How quickly things change.

The thin veneer of civilization… I am sure it has been mentioned enough to be a cliché. But just like truisms, clichés are true – that’s why they are clichés. Civilization can change, turn bad, or disappear quickly. I reflect on this these days.

And change is what we are seeing now. My store is closed for the duration and I am at home. Fortunately, I can teach from here, interactively via the web.

So let’s see the silver linings. This is a good time to learn. (My ebooks, incidentally, are temporarily on sale for just $49 for the collection: go here and use checkout code “COVID” at the end to get a $30 discount.)

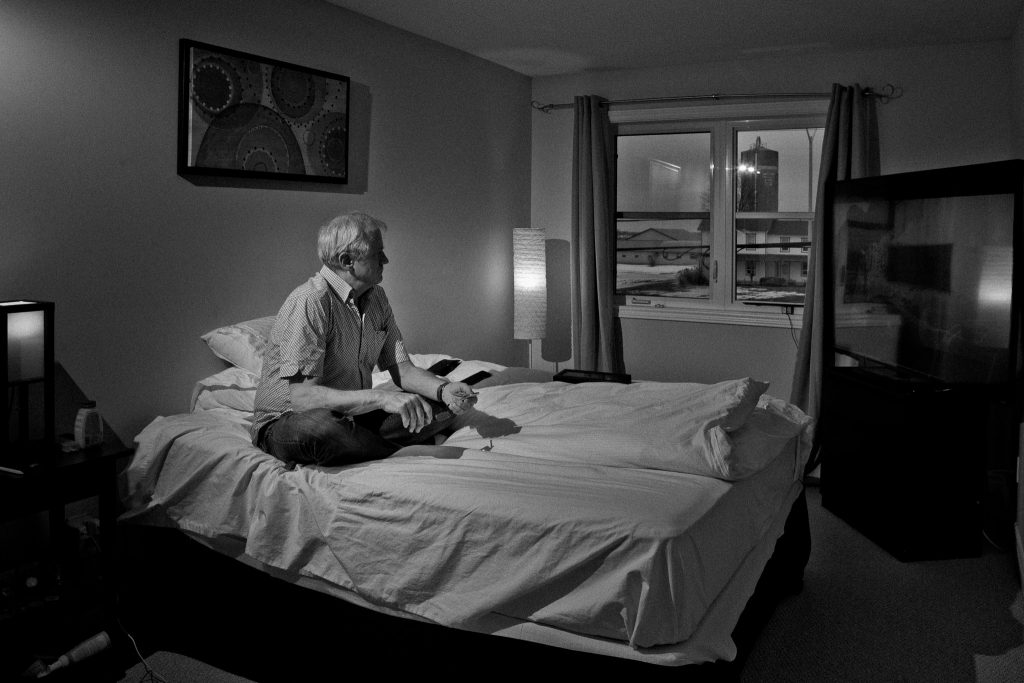
Another thing to do? Get creative. Take out your camera and a flash (or two), and make some documents of this time. We are documenting, and even making, history here.

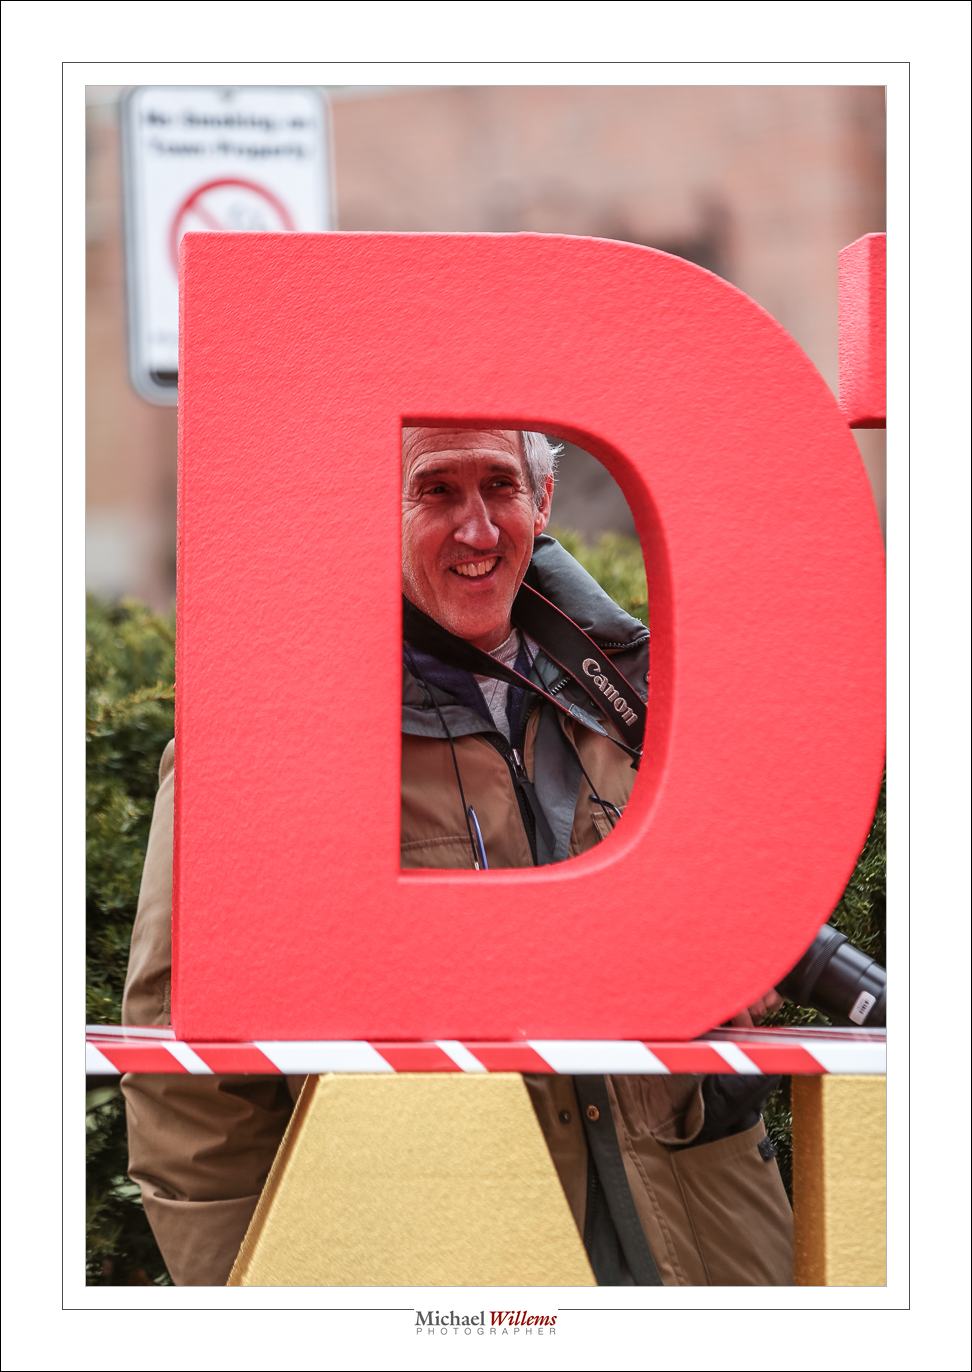
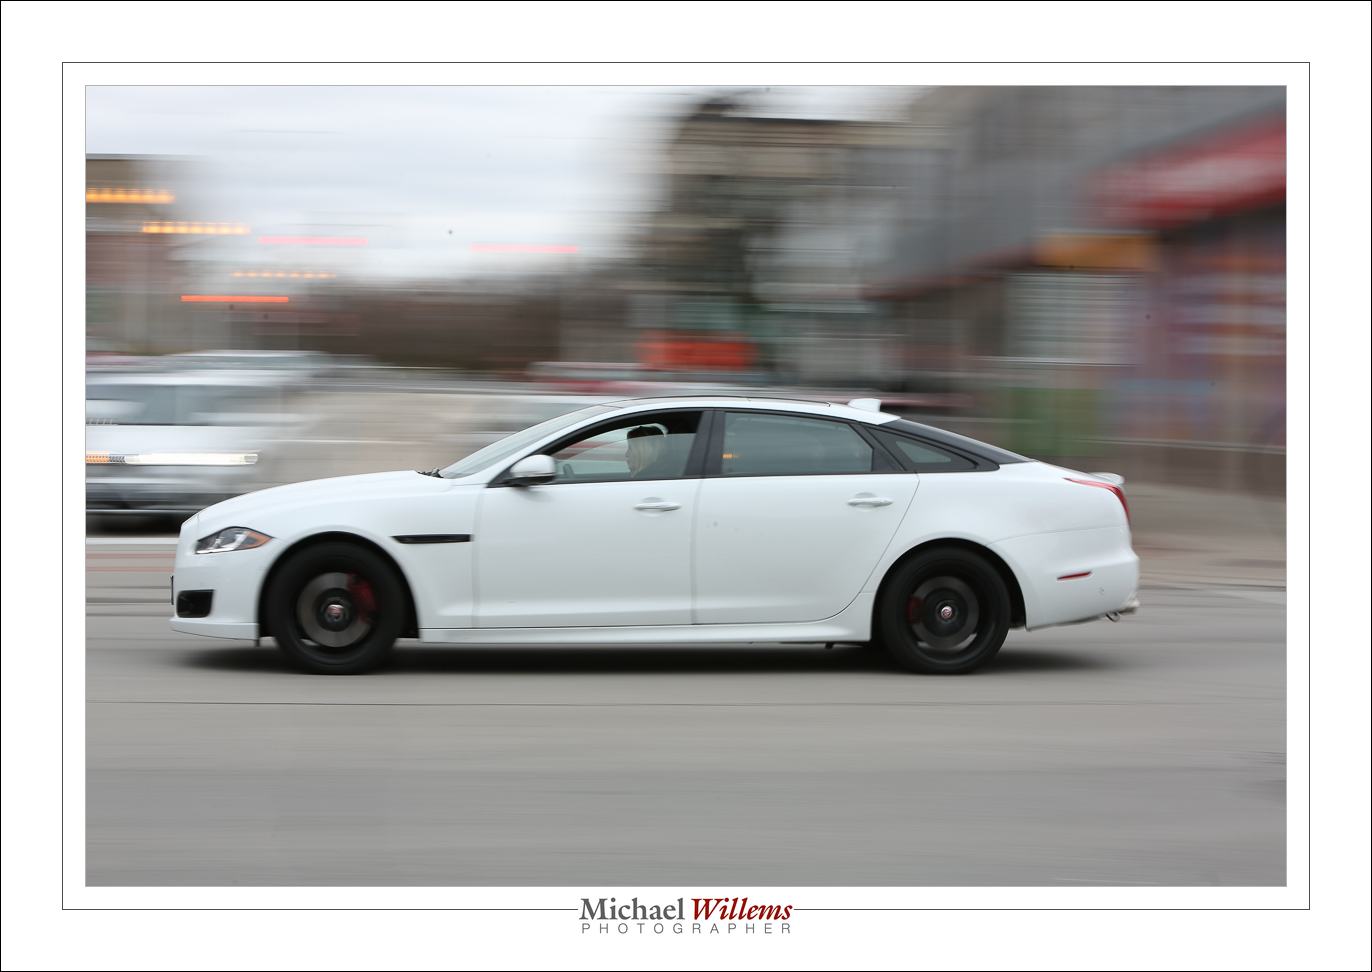
As for me, I am going to do a portrait every day. Here are the first four:

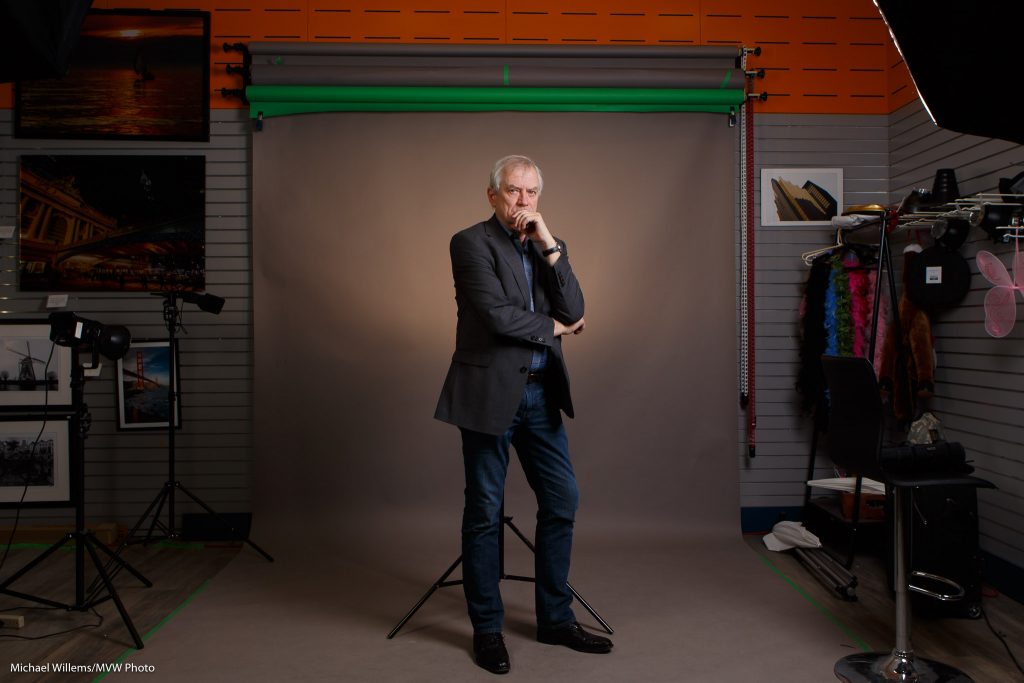
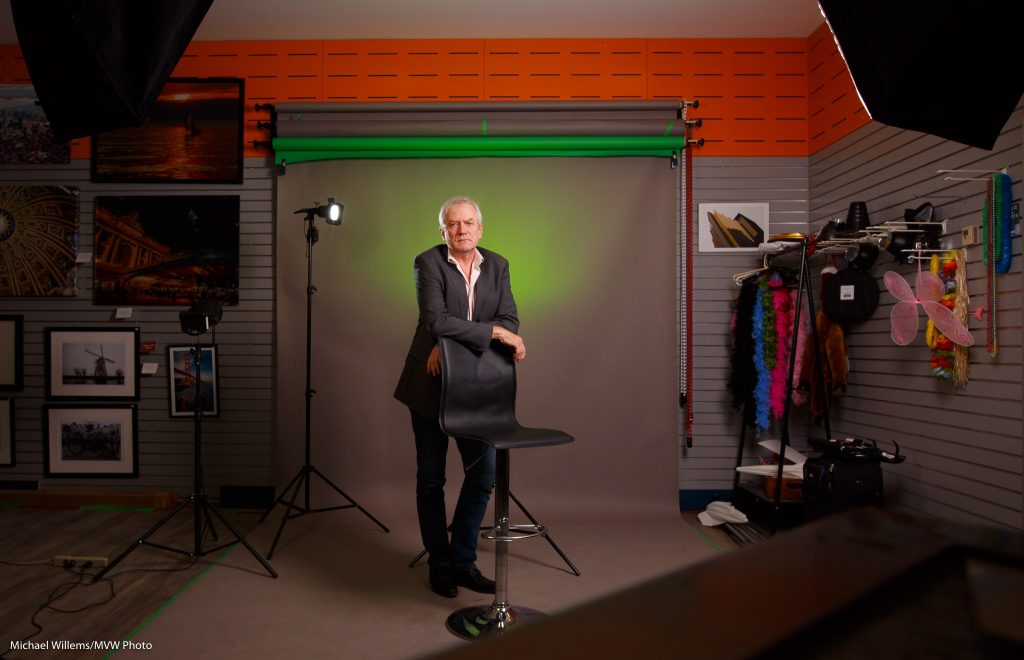
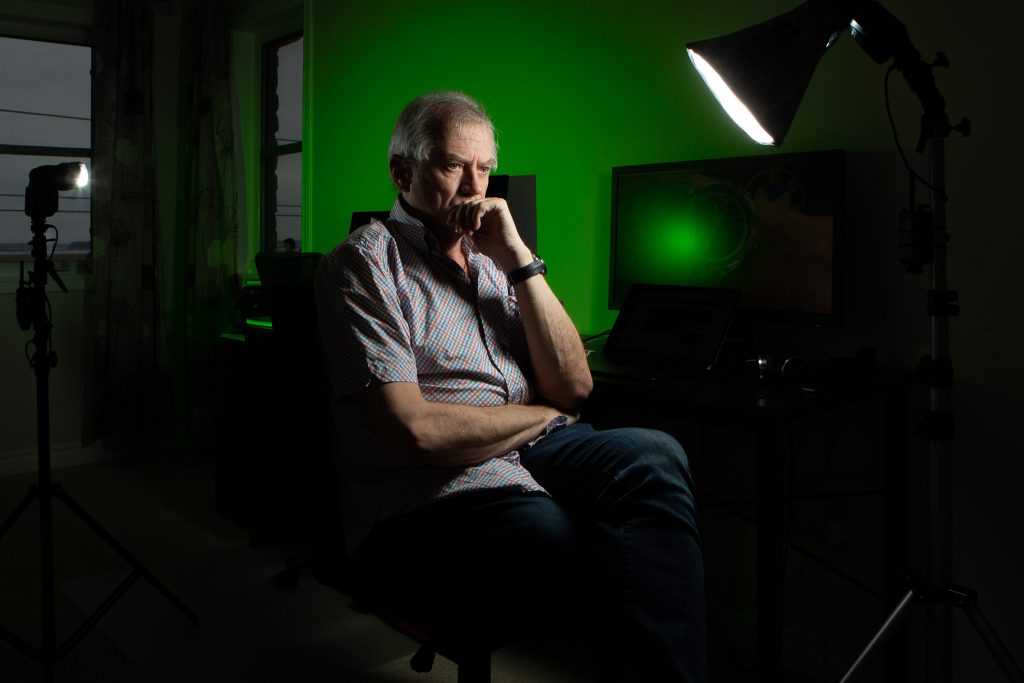
Because I am a photographer, you can see the equipment. In the last photo, for example, that is two manual speedlights fired with Pocketwizards. The left one is fitted with a Honl Photo Aurora Borealis Green gel; the one on the right is equipped with a Traveller-12 softbox. (See them here). In the second image you can also see a Honl Photo 1/4″ grid in use as the hairlight. Yeah, let’s get creative in these terrible days. Learn flash!

Michael

PS: I’ll teach a flash course online live next week; contact me for details or for future dates.

“I need pro equipment”… ?

I hear this a lot: students almost apologizing for “only” owning, say, a Digital Rebel camera, or a similar “starter” model. Because, they say, “of course you need a pro camera for pro results”.

Pro lenses, maybe. But pro camera? Not always, not at all. And even the lenses: this, for example, is student Veronic this morning, using a Yongnuo 50mm lens for Canon (a clone of the cheap Canon 50mm f/1.8, but cheaper):

Veronic. (50mm f/1.8 Yongnuo lens, Yongnuo manual flash, two pocketwizards, Honlphoto grid.)

If you were to see this at full size, you would see it competes very well with photos taken with my pro equipment.

Those of you who take my lessons learn all about this; for the rest of you: be a little skeptical with regards to what you read. Yes, equipment is important. But no, it is not always needed for a quality picture.

Get Cool

Today, I was reminded of how I should not let you all down – the many people who read this blog. Like one reader, Dr Jason Polak, who kindly dropped by in the studio today to have a chat.

(Hint: anyone near Ottawa, feel free to come say hi. The store is open 9:30AM–9pm weekdays, and slightly shorter hours at weekends). So anyway… I promise I’ll write more. Starting today.

One thing to write about is portraits. And how I love doing them. And how I like doing not just the “stand there and smile” pictures, but also slightly more creative pictures. You do not need to look at the camera smiling, not in every picture!

So here’s one I took this weekend—one of a series:

A simple shot; I used two speedlights with Honlphoto grids, driven by Pocketwizards; and one strobe in a softbox, also driven by a Pocketwizard. Took two minutes to set up.

If you need to learn how to do this, it is remarkably simple. You might buy my books or attend my courses, for example. It’s worth the effort!

Here, another one, again showing action:

And that same day, a photo of a dog who was nearing the end of its life: it was sick, and was about to see its suffering ended. A sad event, but good to create a lasting memory:

The message is simple: shoot some portraits that are not just “stare at the camera and ‘smile'”. Worth the effort and you will be happy with your results.

One more, then:

And finally: a new course for those of you near Ottawa: “Take Better Photos Of your Kids”. Sign up soon, because as usual, classes are limited to four people.

Watch!

So. You want to shoot a wristwatch:

Watch at full size: it’s gorgeous.

But not all shots—especially iPhone shots like this one—start out that way. This one is no exception. It started differently:

As you see, I did a few things, and all watch (and most product) photos are like that.

  • I changed the geometry. To avoid reflections I had to shoot at an angle. I had to use the “Transform” pane with manual adjustments to fix that.
  • I changed exposure settings (blacks especially).
  • I removed noise.
  • I used the brush adjustment tool to increase contrast on the face.

And lastly, I removed any imperfections:

And that’s how it is done. So when you see a perfect watch photo and wonder why you can’t do it this way, rest assured that the pros don’t, either.


Yesterday’s workshop

It is minus 28 degrees Celsius. Yesterday, I taught a Creative Flash Photography workshop in Timmins, Ontario. Here’s a sample!

High key:

Some creative gel use:

A snapshot showing the setup for the next shot:

And here’s the shot!

…which also works in B/W:

A simple one flash grid portrait:

And two together:

Fun was had. Flying me out to anywhere for a workshop like this is worth your time: hands-on learning so beats only reading a book or watching a video!


Christmas. Balls.

I love teaching. And I feel generous—read this post until the end and see why, and see how you can benefit!

First, though, here’s a few snaps from Sunday’s Get Out And Shoot. Starting with a Christmas ball…:

This walk was in downtown Oakville:

So why am I happy?

One of my Sheridan College students just sent me an unsolicited student testimonial:

“Thank you for your wonderful teaching style. I have learned a lot from you as a photographer and have taught me many things and you have always responded to every question I had with knowledge. You make the class like Christmas day.”

I am honoured by this; it is exactly why I teach.

Incidentally, I also teach privately or in small groups. And for all my students, there’s now a 30% discount for any orders (for training or anything else) paid by Dec 31, 2018. To benefit from this, all you need to do is to use discount code Student2018 on http://learning.photography. Happy festive season!

And another event

Sunday I shot an event: a baby shower. In a back yard and inside, and in a tent. Portraits, with two strobes (one with umbrella, one with small softbox), as well as event pics.

The portraits, with or without props, looked like this—and you will see it is all about the light. Hence the strobes, and the subjects in the shade as much as possible. I used a 24-70 for this, as well as the 85mm f/1.2 lens.

Some spontaneous, like this – don’t forget to look for those spontaneity moments…:

Indoors shots were like this, shot with thew 24-70 f/2.8 lens and using a bounced flash—here too, look for people interacting or “doing things”:

And outdoors with a flash aimed directly at the subject, which gets us the subject as the “bright pixels” and saturated colours. And when there’s something happening, look for the right moment. either to get the right pose:

And if you pay attention you can often get “the decisive moment“, in this case the piñata falling to the ground in pieces.

Photos were, as far as I can tell, universally liked, and I bet those who did not have their picture taken regretted it in the end.

Oh and the human species will probably survive, judging by the number of pregnant women present. Like half of them, it almost seemed.


iPhoning

Even when using an iPhone, you need to know stuff in order to take the best photos.

Like this one here (click to see it large):

Here’s Five Tips for this type of iPhone photo.

  1. Focus, if needed, by tapping the screen on the object you want to focus on.
  2. Adjust exposure as needed by dragging up or down on the screen at that point.
  3. For a macro shot like this, actually back off a little and crop the photo later. This is a key point.
  4. And most importantly, add plenty of light. This needs to be non-direct light. I prefer outside, but out of direct sunlight.
  5. Finally, adjust your crop and white balance, and anything else needed, afterward, by clicking on EDIT.

Enjoy!


Want to shoot like a pro? Scroll to the previous post to read about the one-week-only Spring Madness Discounts!

Focus Tip: AF-C/AI-Servo and back button focus

I am often asked “can I not leave my camera on AI-Servo (AF-C if you are a Nikon etc)?

The answer is: not a great idea normally. Because you cannot recompose. The moment you try that, taking your focus spot(s) away from your subject, the camera focuses on whatever is behind the subject!

But there is a trick, and I used it today to photograph these amazing insects:

Namely this:

  1. Set your autofocus mode to AI Servo/AF-C.
  2. Select “back button focus” in your camera’s menu (i.e. focus when you press a button on the back of the camera, not whenever you half-press the shutter button).

Now you focus as follows:

  1. Follow the insect, or hockey player, or whatever you are shooting.
  2. While doing this, keep the back button focus pressed, so your camera adjusts to follow the subject’s distance.
  3. But when the butterfly sits and you want to recompose, let go of the back buttoin focus. You can now move the camera to recompose, yet when you shoot, the camera will not adjust its focus.

Done and done!

A quick note about that amazing insect. Nature knows what many beginning photographers do not: you need a catch light in the eye to make it look real and alive. The butterfly’s owl eye has that catch light (the white circle part ion the “pupil”)! Amazing, eh? So learn from nature and always include a catchlight in your portraits.