Mullets Unite

Why do you NOT normally shoot at your subjects with a flash aimed straight at them, unmodified? Especially when your subjects are in front of a wall? Especially if they are male?

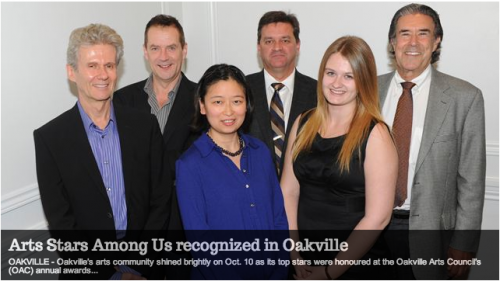
A picture in the local newspaper shows us exactly why not:

Um, yeah, that’s me there, second from left (this was at the recent art awards ceremony).

And like the three other gentlemen there, I have a “virtual mullet”, caused by the shadow thrown by our ears. Awful, and one reason people hate flash.

And yet the photographer could have easily bounced: conditions for it were prefect. But he did not know the right techniques. Ouch! So you get shiny skin, flat unnatural light, hard shadows, and mullets.

Instead, bounce the flash. Aim it up, 45 degrees behind you – depending of course on where you are, where the ceiling is, and so on. Go to 400 ISO or higher at f/4. It’s what I teach in mu courses… it’s a simple technique and I can teach everyone this. Start with what I just said, and see how that works for you. Better than the mullet shot, I am willing to bet!

___

Oakville “Flash” Courses 9/10 November: I think Saturday Nov 9 is full, but Sunday Nov 10 is still open. I am limiting the number of students in each class to no more than 4-5, so do get there first.  See the syllabus here, and book via the link at the bottom of that page – indicate your desired date!


Flash x2!

OK, here’s what we do. I am now offering TWO Oakville “Advanced Flash” Courses: on Saturday, November 9; and again on Sunday, November 10. Both in Oakville, Ontario. This course is for everyone from amateur to pro: I expect you to know basic camera operation including the use of aperture and shutter, but you need know nothing at all about flash.

Why flash? So that you can make pictures like this, straight out of your camera:

As mentioned yesterday, I am limiting the number of students in each class to no more than 4-5, so do get there first.  See the syllabus here, and book via the link at the bottom of that page – indicate your desired date!

Your flash tip for the day: when using your flash outside, keep your shutter speed at 1/200th second or below. Else, your flash would have to go into high-speed/FP mode, which drastically reduces the range. Use manual or shutter-speed priority mode to be sure!


Go Slow, Young Man (Or Woman)

When you use a flash, the shutter speed is not that important. Since the flash fires all its power in 1/1000th sec or less, it is not important whether your shutter speed is 1/200th second, or 1/100th, or 1/4 second. Only the ambient light will be affected; not the flash part.

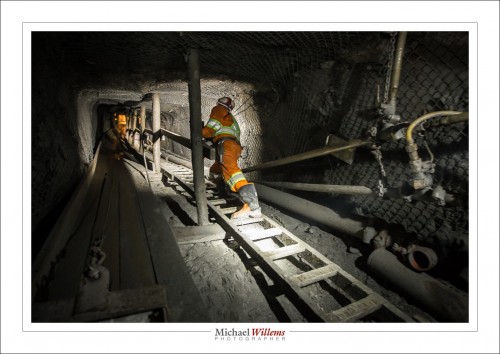
Take this, from a Goldcorp goldmine I shot earlier this year in Timmins, Ontario:

3200 ISO, f/4, and 1/4 second. Handheld.

Why so long? Because I wanted the light at the end of the tunnel to look like, well, the light at the end of the tunnel. And I needed f/4 for depth of field, hence 3200 ISO and 1/4 second.

But Michael, things will be blurry!

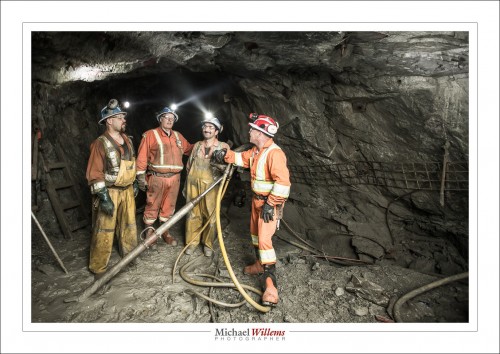
Not if they are lit by the flash. 1/1000th sec is 1/1000th sec! And if they are also lit by a little ambient light, then a little ghosting will appear, mainly in the moving parts:

But that is still better than not having any background light. So I shot the goldmine at slow shutter speed, and you should feel free to try the same. Here I did it to capture the hard hat lights:

Use a wider lens, and go slow, even very slow, any time you are using flash and it’s mainly flash lighting the important bits!


The Thinning Lens

As a photographer, I photograph a lot of people who are reluctant.

Usually, they are reluctant because they do not like their looks. They want to be Jennifer Aniston, and in their mind they are Jennifer Aniston, but in fact they are middle aged, ordinary people. They are usually, but not always, women, who are generally more aware of their looks than men. A very common question is: “oh, you can only shoot me if you put on your thinning lens”.
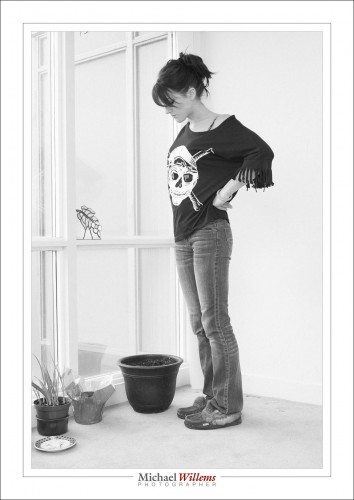
No Thinning Lens Needed Here

These people will be disappointed when they see their photos. And as a photographer, I do not like it when my clients are disappointed. So what do I do?

What I do not do is “put on a thinning lens”; i.e. edit the picture to the extent that the person is materially different. My rule of thumb is that if I cannot do it in Lightroom, I do not do it – that is the reason I have not been in Photoshop all year. I am happy to remove blemishes, especially temporary ones, like pimples and bruises; perhaps even lighten the odd wrinkle a little; but that’s it. No distorting, no making breasts bigger (or thighs smaller) or making people thinner than they are.

But there are other things I can do to get the most out of what a person has. That means things including the following:

Lighting brightly: bright light makes wrinkles vanish into the top part of the brightness, where they do not look obvious. The more high key an image, the better skin will look.

Finding the right angles: everyone has good and bad angles. I would give examples here, but one cardinal rule is that I never show the bad angle pictures to anyone – client or anyone else. Hence, by the way, the fact that I do not like clients asking to “see the pictures” on the back of the camera, unless they are very young and pretty and confident (those three do not always go together).

Modeling: when I can, and when someone is a little overweight, I try to light from the side rather than from the front.  Look at this example of a model’s legs: one lit primarily from the front, and the second lit mainly from the side, using an umbrella and speedlight. This model needs to lose no weight, of course, but you can see the principle: by selectively lighting you can give objects and people shape, and make broad objects appear narrower.
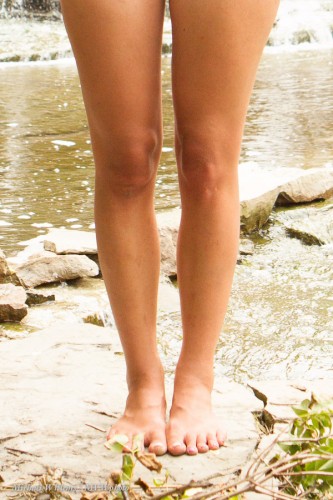
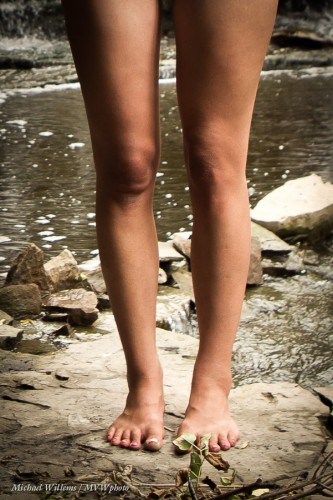
Selectively lighting – in general, I try to light good bits, while keeping less perfect bits in relative darkness.

Use a minor electronic adjustment – I am happy to use Lightroom’s Clarity adjustment to slightly smooth skin tones. A clarity adjustment of perhaps minus 15 is hardly consciously visible – except it does make skin clearer, wrinkles less obvious and hence makes the person look better.

Finally, use the right lens! A wide angle lens can make large objects look “puffy” and will make close shapes look larger. Close shapes can, for instance, be the nose, or the thighs if the person is sitting, or their arms if they are closer to you than the face. Using a long lens, on the other hand, will give a much more neutral, undistorted look. My 70-200 lens is my favourite – provided I have enough space. Fashion photographers tend to also use this lens as a favourite. So I suppose in a sense there is a thinning lens!
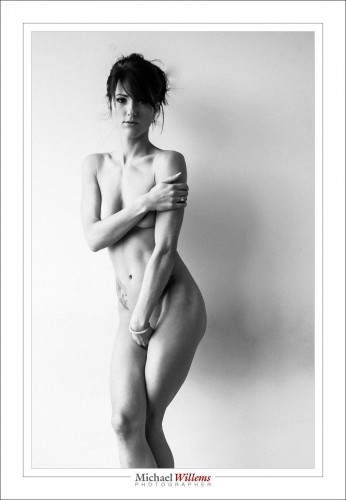
No thinning lens needed here, either

In the end, of course, if someone is not happy with their looks, well, then there is little I can do – I cannot make them into something they are not (like Jennifer Aniston). That is one reason I am happy to photograph a lot of young women: it’s not that I prefer to (the challenge of shooting someone older is great!), but they tend to be more accepting of their bodies, for obvious reasons, and more accepting of reality of there is something not perfect.

And guess what: no-one is perfect. I am guessing that if you saw Jennifer Aniston get out of bed in the morning and groggily walk to the bathroom, you would not be impressed. We are all human. One reason I thoroughly enjoyed doing portraits of naturists at Bare Oaks naturist park the past two summers is that they understand this, and are happy with their bodies, whatever they look like, short, tall, big, small, young, old, whatever – seeing people naked, one realises that no-one is perfect like the fantasies we see in magazines where the photographers do materially alter things. Ahh.. so refreshing for a photographer!

___

NEW: You can now sign up for a June 20-30, 2014 photo tour of North Wales with me: go here and read all about it, and if you are interested, call the travel experts and sign up. Let them know you may be interested as soon as possible: this will be a great trip with photography, travel, sightseeing; doing and learning all mixed in together!


Softening Recipe

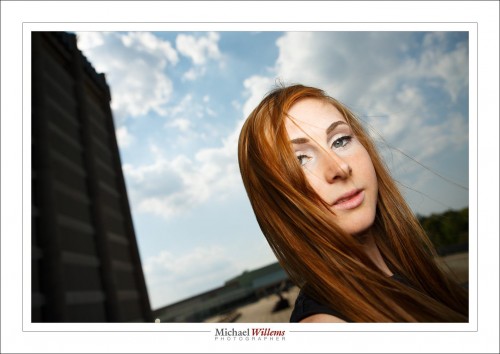
Here’s a simple recipe for a dramatic flash shot outside. Like this:

Look s”photoshopped”, yeah? Well, it isn’t. It was shot like that. And for that, you need:

  1. An external flash on top of the camera
  2. A sunny day
  3. You in very close proximity to the subject
  4. The possibility to set flash (Canon system) or camera (Nikon system) to High-Speed Flash (Canon) or “Auto FP Flash” (Nikon)

On a sunny day, you now shoot as follows:

  1. Camera on manual mode
  2. Flash on TTL mode
  3. Camera set to 100 ISO, f/4, and 1/2000th second
  4. Honl or similar softbox on the flash
  5. You very close to the subject’s face (otherwise, there’s not enough power).

“High speed flash/FP flash” allows you to go to a shutter speed of 1/2000th, which normally you cannot do (normally, you are limited to around 1/200th second).

As a result, you now get dramatic light with nevertheless a blurred background.

Why do you have to be very close? Because high speed/FP flash diminishes the power of your flash very dramatically, more the faster you go.  And the softbox diminishes it even more. Hence – be as close as around 10 inches from your subject, or the flash will not show.  But when you get it right, it is a very cool look.

___

There. Another secret free to you from The Speedlighter. Want more? Come see me do my Flash workshop at Vistek in Toronto tomorrow, Saturday Oct 5. And get the flash e-book!


Print thoughts

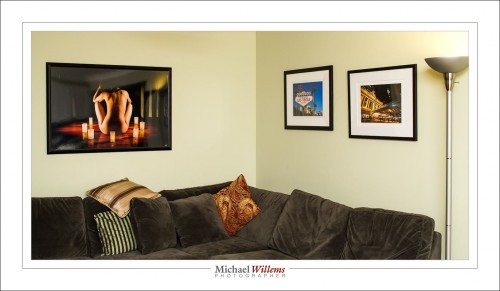
As I have said, printing your images is a great idea. Here’s a few on my living room wall:

It is also complicated – that’s one reason prints cost real money – and time-consuming. But – worth it. Here’s a few decision points for you, when you consider printing.

What tool? I print straight from Lightroom. No intermedia file with colour spaces to worry about, no loss of tines, and great functionality. More about that in future (and past) posts.

When you print, the first question is: “how large”. The two prints on the right in the image above were made on 13×19″ paper, and framed. If you use that kind of size, you will want to hang multiple prints. The image on the left is approximately 40 by 24″. That is suitable for a wall all by itself. Prints up to 13×19″ can be made on a printer like the Canon 9500 MkII.

The second question concerns the printer. Dye or pigment? Most inkjet printers are dye printers. A few, like my 9500 MkII, are pigment printers. The difference? Basically, dyes combine with the paper they are printed on; pigments form a suspension on top of it. The reason to go for pigments is that they last longer and will not fade or shift colour. Dyes, although they are getting much better, will usually fade within 25 years. When I sell, or hang, a work of art, I want it to last for centuries – which pigments will do. If you want your prints to last as long as photo lab photos, pigment is the way to go.

Then, the type of paper. Matte or glossy? That is often a judgment call. Glossy is “like a photo”, matte is “like a painting”. Some photos work best on glossy, some on matte. This is where taste and experience and preference all come together. I recommend that like me you settle on maybe four types of paper; learn what they do; and stick to those.

If you want resistance to fading, use natural fibre paper (such as the Hahnemülle papers). These are not coated, so they are not as white as brightened papers – but brightened papers will lose their brightness.

You can also, of course, go for metallic (like the print on the left in the image above). This is wonderful, sharp, glossy, with a great silvery shine. In addition, metallic prints do not need glass, so they can use a very simple frame. You can even wipe them.

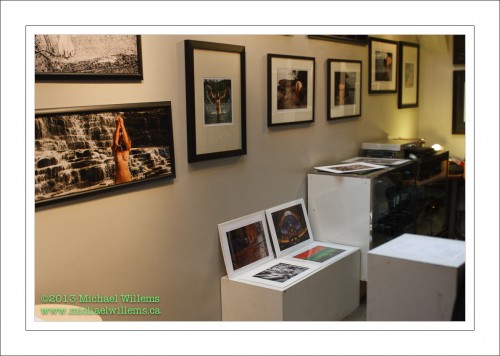
Then, the aspect ratio. No, no, no: your prints do not have to be 3:2 like they come out of the camera, or 8×10 because that’s the only frames you can find.  make your prints any aspect ratio that please you. Even square, or long and thin like the print on the left here, from a gallery exhibit I did last year in The Distillery District on Toronto:

Finally, then the frame. A photo, like a painting, generally looks much better framed. Be warned that framing is not cheap – but it’s worth it. A custom frame, with a custom-cut mat, means your print can be any size. You frame according to the print’s needs. As a result, you will have a unique work that reflects your taste, environment and needs.

Do have a look at some of the pictures I am currently selling in limited editions, all handprinted and individually autographed: www.michaelsmuse.com. Interested? I ship worldwide.


Anatomy of a portrait

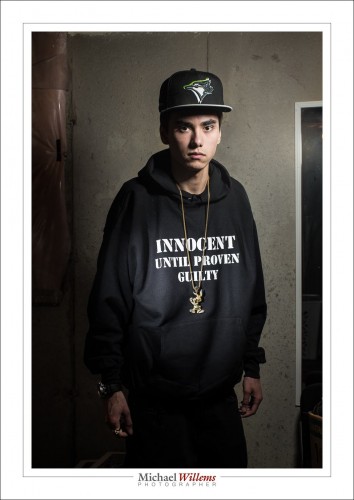
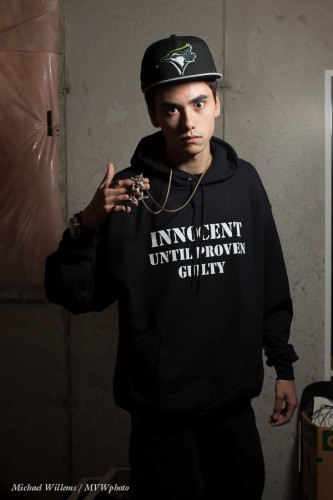
My younger son, who is a rapper, told me tonight, on his birthday, that he needed  a new portrait for publicity for his new album. So I obliged, before cooking dinner and while simultaneously doing laundry. Here he is:

That image took maybe twenty minutes, half an hour tops – but a lot of experience and thinking and equipment goes into a portrait like that.

First, what is required? We discussed, and he clearly wanted a serious, dramatic, look. In a grungy setting. The T-shirt text and the bling should be clearly legible and visible, respectively.  So OK – the briefing being clear, I used the basement studio, and freed just enough space to do a half body portrait.

Then the light. Speed was of the essence: I was about to make dinner. So I used speedlights. First, I set up a light stand with a 430EX flash set to manual, 1/4 power, and driven by a pocketwizard. I equipped it with a Honl photo 8″ softbox. I feathered the softbox to get the right amount of drama in the light, and to get Loop Lighting, almost Rembrandt Lighting, on his face.

The camera was a 1Dx with a 50mm f/1.2 lens, set to 1/125th sec, f/11, 100 ISO. I knew the 50 was perfect for a half body portrait in a small space.

I tried, and the photos were OK:

Not too bad, but we wanted a little more emphasis on the writing. And more texture of the shirt. And clearly visible bling. So I added a second speedlight, this time with a 1/8″ grid, for a tight line of light, and aimed that at the shirt. Also equipped with a pocketwizard, and set to lower power (1/16th). Not having had time to prepare, I took my time finding things like cables and a bracket that fit the flash – all part of the fun.

I set the lights to the camera’s desired settings of, if you recall, 1/125th sec, 100 ISO, f/11. I used a light meter to verify that.

And there you have it. A few pictures – I took a total of 30, and we chose his preferred one, the one at the top. I could have done the light thing, the vignetting, in post, but call me crazy: I call that cheating if I could have done it in camera.

As a result, almost nothing needed to be done in post, but that still takes time: selecting, removing the odd bit of dust, any perspective correction, and so on.

Total time taken, as said, less than half an hour including getting things ready, setting up lights, moving stuff, and the entire discussion and post work. But that’s only because I have done this before. Experience is important. The good news: you can gain experience too and it costs very little.


___

If you want to learn, and you live near Oakville, Ontario: evening Flash course on 3 Oct, and 5-evening course with a weekly evening lesson starting  2 Oct. – both these small courses have open places still.


A few snaps

Today, just a few old images. Why? Because I am printing, for an art council awards ceremony on October 10, where I will be selling some of them.

But since this is an educational blog, let me add at least a couple of words of explanation to the shots.

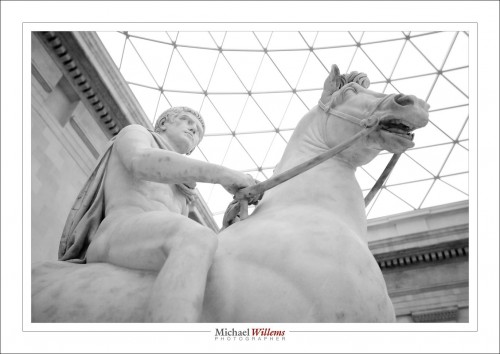
Julius Caesar (not “Ceasar”!) at the British Museum in London:

I got close and aimed up in order to get rid of distractions.

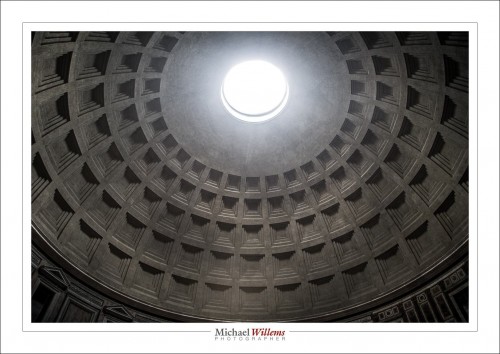
That takes us to Rome and the Pantheon:

I laid down on the floor to get the shot. I do not care what I look like.

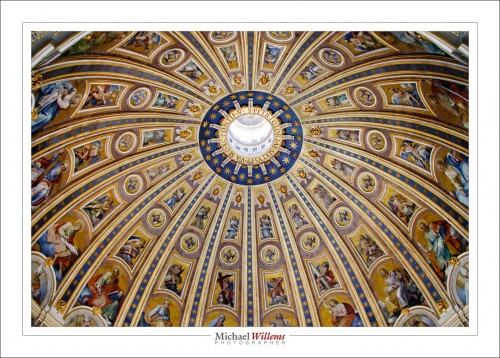
And since we are under Rome’s domes… to the next one:

St Peter’s Basilica’s dome. High ISO, since no flash is allowed, of course. And best shot from the gallery half way up the dome. A lineup, but worth it.

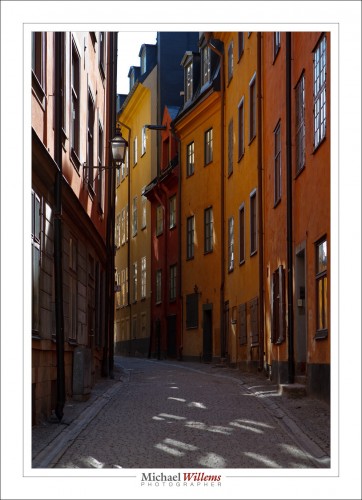
Off to Sweden: Stockholm; old Stockholm to be precise (“Gamla Stan”):

The thing here is to balance light in the dark street with the sky and reflected skylight. perhaps bracket. And to wait for the street to be empty.

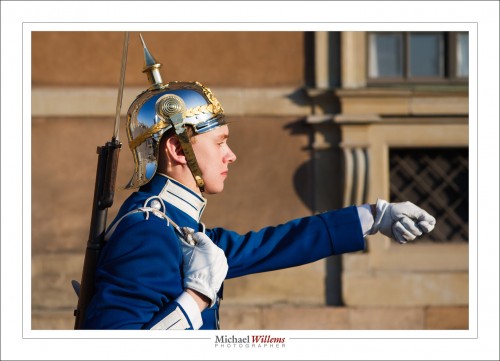
Not empty: the royal palace and its guards.

Here, the trick was to get close enough to crop out other tourists, cars, etc, and yet not to be bayonetted. And – to get the right light (onto his face, with the sky in his helmet).

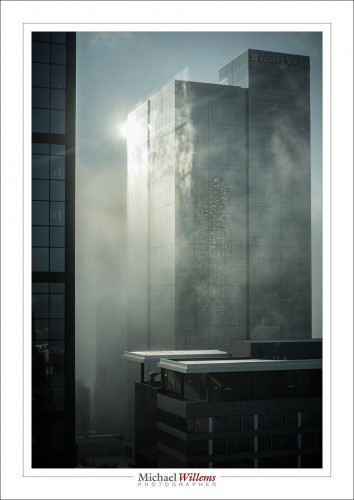
ZAP! We are in Melbourne, Australia, and the backlit morning fog is dancing around the city’s tall buildings. All I had to do is avoid flare (remove any filters, beware of window reflections) and expose accurately.

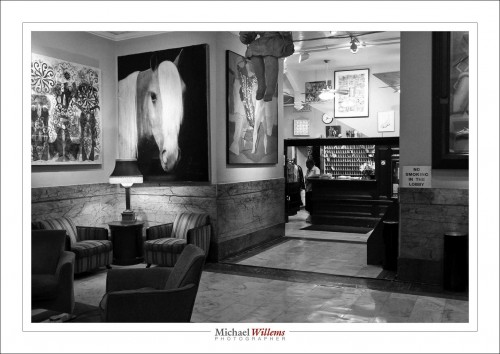
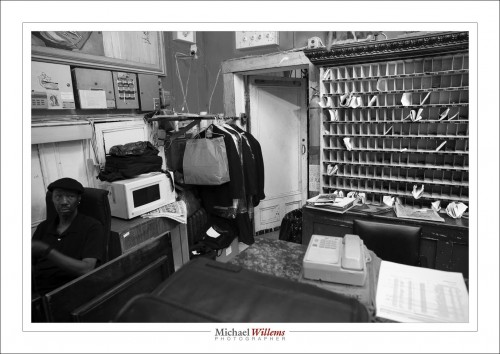
Not -zap – we are in New York, at the Chelsea Hotel:

That calls out for B/W, as does the reception desk:

Nothing to do except high ISO, snap, and leave before being challenged. Either that or just ask for permission.

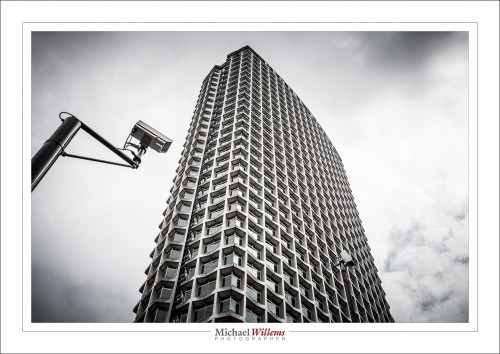
And one final ZAP – back to London, where Big Brother watches:

And to leave just as the cameras swing towards you (yes, they do – eerie).

That was a quick world tour, wasn’t it? And that is what photography does: take you to different worlds. Take you back there long after you were there. Time travel. If I can perhaps paraphrase Mad Men’s Don Draper:

Your camera isn’t a camera, it’s a time machine. It goes backwards, forwards. It takes us to a place where we ache to go again.

Word.


B&W is alive and well

When you look in art galleries, what do you see? Black and white prints. Although this is sometimes silly – in the 1970s, colour started to be seen as art too, so let’s get with the times – sometimes it’s a good thing.

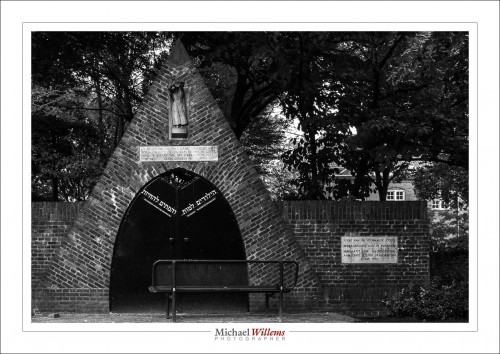
Here’s the rebuilt gate to the Jewish cemetery in Gouda, the Netherlands. The city I went to high school in.

This gate was rebuilt in 1980, long after the Jewish cemetery itself was moved – since no Jews lived in Gouda anymore after the war. One terrible example:  Friday, April 9, 1943, the Jewish retirement home in Gouda was raided by the SS, assisted by Dutch police from The Hague and Gouda. All residents were deported; none ever returned. The Dutch have always “respected authority” – order is order.  Awful, and there’s a lot to make up for. Fortunately, many Dutch families sheltered and hid Jews at severe risk to their own lives.

Incidentally, I believe I am wanted in The Netherlands, for not paying a speeding ticket from last year (they time you on the freeways and then do the math and send you the fine, no trial, no argument. Over my dead body would I ever live there again!). Problem is, they send the ticket to you even in Canada without a payment method, unless you are Dutch and in Holland. No credit cards, no cheques. So of course I did not pay. So I shall be arrested next time I enter that country. All because I drove like 5km/h (3 mph) over the limit on a freeway. Blind and inflexible adherence to “law”. Have they learned nothing since the 1940s? The Nuremberg laws were “law”, too.

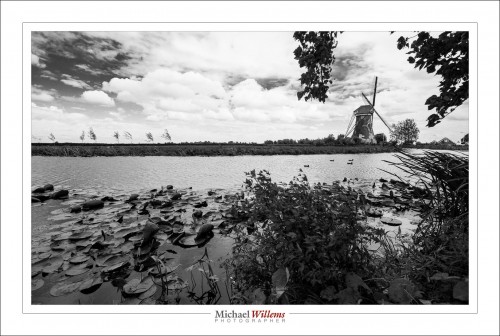
Just outside Gouda, this is what things looked like then, and it is what things still look like today:

You see those trees? That’s what I remember, riding my bicycle westward to school every day, fighting that damn wind.

Black and white pictures are a great way to convey such moods.

Here’s how you do this:

  1. Shoot RAW – this is essential
  2. Set your Picture Style to B/W. (“Monochrome”)
  3. Your previews are now B/W – but the pictures are still in colour.
  4. Now use the B&W tab in the HSL section of the DEVELOP module to convert. That way you can tweak the relative strengths of all the colours. Like adding colour filters in the old film days.

    An added benefit: you can change your mind and so colour if you choose. This only works, of course, if you shoot RAW.

    Try to shoot some B/W. It’s cool.

    ___

    Admin news:

    • Courses still open: Flash (Oct 3, all evening) and the 5-evening fundamentals course (weekly, starting Oct 2). These are in Oakville, and small – max. 6 students, and I will run them with as few as two. So, book soon.
    • I have the 24mm T/S f/3.5 tilt-shift lens for a few days, from GTA Lens rentals. But better still: I have arranged a 10% discount for my readers, from the already low prices. Click on the logo on the right. Renting a lens is a great way to try out a lens you’ve always wanted.


    Another Selfies

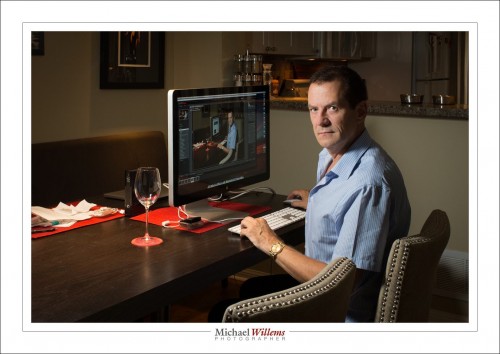
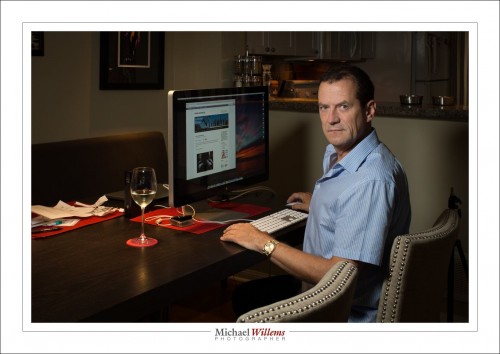
    Nope – that is not a grammatical error. It is simply taking liberties with grammar. It’s a selfies in the sense that, if you look carefully, it combines two into one:

    Me looking at me!

    And I thought that today I would explain the thinking behind this portrait and its execution.

    First, my choice of model. I used “me”, because I am extremely patient with me; I do not get drunk; I do not stand me up; I do not fall asleep; I do not say “are you done yet”; I do not mind retrying a shot many times if need be. Not that all models are difficult: a true pro model would never make any of these mistakes – but not everyone is a true pro.

    So, seeing as it’s me, I wanted an environmental (a.k.a. “situational”) portrait. And what better than my work environment? So that is settled.

    Next, then, the choice of lens. I chose a 50mm lens (full-frame: if you had a crop camera you would use a 35mm lens). A little longer than usual: for an environmental portrait I would normally use a 35mm lens, but I wanted to go a little tight to get rid of other “stuff”, like the flash on our left and the printer on our right: both now out of the picture.

    Then the light. I wanted to light me with a flash, with a small softbox; but in this case, the ambient light is very important. I wanted the screen to be visible, and I wanted the tungsten and LED lightbulbs to be visible.

    But I needed a small aperture. Why? Focus had to be set manually, and I would probably not be entirely accurate in positioning myself. That meant I needed f/11 for depth of field. So given that f/11 and the need to see ambient light, this meant I needed 400 ISO and 1/20th second.

    And at the distance I needed, with the Honl Traveller 8 softbox, that “f/11 at 400 ISO” setting needed full power from a 430EX flash, in order for that flash to be the right power. The flash is just upside the picture on our left, on a light stand.

    So the first shot:

    And finally, the final flash direction. I tried it fairly straight on for the test shot, but for the final shot, wanted more short lighting (making my face thinner). See top.

    Then all I needed to do is load that into Lightroom, and take the second shot; and apply the same lens corrections/cropping to both shots. Done!

    ____

    Want to learn? I have just scheduled a special all-evening Flash course on 3 Oct; as well as a five-evening basic photography course, starting Oct 2, aimed at novice to intermediate users who want to learn to use their DSLR properly once and for all.

    These courses are very special in that they are like private coaching: I will only take up to 5 students for each course. The Flash course includes the Pro Flash Manual, and the five-evening course includes course materials and homework. Both are now available for signing up on www.cameratraining.ca/ – see the flash course details on this page.

    Do you have the flash manual e-book yet? Click on “Pro Flash Manual” above and learn how to do this!