Blurry Backgrounds

Another beginner’s tip for you today. Blurry backgrounds.

How do you get blurry backgrounds? Any of the following:

  1. Larger aperture (“lower f-number”).
  2. Zoom in.
  3. Get closer.

Do not forget numbers 2 and 3. Take this picture, taken at f/4:

That’s a nice blurry background. But if we want it blurrier, we can, as one of the options, simply get closer. The very same settings (same lens, same everything; f/4, again, but closer), give us this:

See how much blurrier the background is? So if you cannot afford an f/1.4 lens, then just get closer.

Another thing you notice, perhaps, in picture two: it’s simpler. Simplify! As Antoine de Saint-Exupery said: “we achieve perfection not when there is nothing left to add, but when there is nothing left to take away”.


Nom nom!

Food.. food… food. Few pleasures in life as good, and blogger Rhonda of professional Toronto-area food blog http://oliveandruby.com/ knows this well, and makes it her mission to share her food insights, knowledge and recipes with the world. If you like food, this is a recommended blog.

But Rhonda is not only a food expert: she is a wonderful person, and she is very intelligent to boot. It all shows in her blog.

And in her photos. This year, Rhonda has been spending some time with me to hone her skills in food photography. How else to convey the quality of food but by great photos?

It’s not just necessary – it is also fun. Food photography is fun because it includes all of the following:

  • Composition insight.
  • Technical camera skills.
  • Technical flash skills.
  • Knowledge of flash modifiers.
  • Light skills.
  • Storytelling.
  • Post-production skills.
  • Planning.
  • Improvising.
  • Studio photography.

So while it seems simple (“prime lens… aim… click”), it is far from that. It’s pretty much “if you can shoot food, you are a pro”… and not even all pros can shoot food.

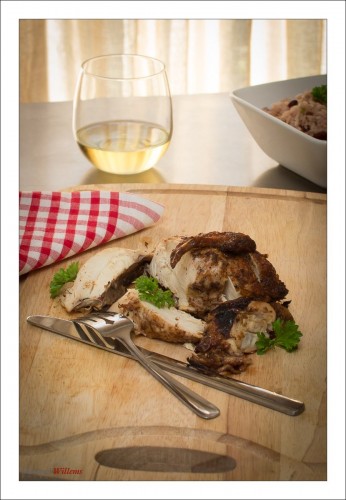
But Rhonda can. Look at the excellent work she produced today, under my guidance and with my feedback. First, a pro photo of her Jerk chicken:
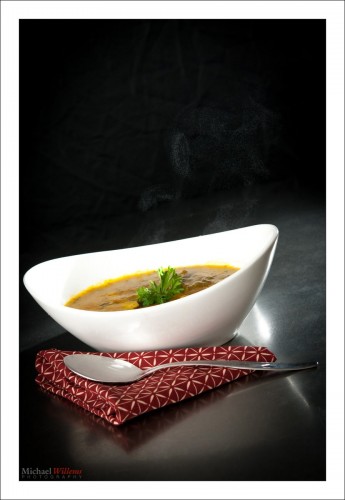
…and then, a pro photo of her excellent soup. Look carefully, you will see that even some of the steam is included:
These compositions did not come out of nowhere. First, of course, Rhonda spent forever (that’s my careful estimate) cooking the food.

And then the compositions. They started with, first, a full discussion of the work she had done to date. Photo critique (not criticism: critique!) is a fantastic way to learn, which is why I like to take an hour or so as part of these types of lessons to do just that. People know their own answers if they ask their own questions. Questions like: “how could I have made this even better?”, and “is every element of this image supporting the story?”.

Critiquing and shooting in one session together is also a great way to learn because you discuss, and often debate, every decision made. Why is that flash there, not here? Why is that flash at quarter power, not half? Why aim forward, not backward? What do we do to see the steam? Why f/4 one time, and f/16 the next time? How does a light meter work?

These decisions involve some complex thinking, and there are many decisions to be made – in food photography, nothing is accidental. It is good to discuss these points at length, and private coaching is a great way to do this.

My top ten tips for food photography are:

  1. Keep it simple. Ask “is every element in the picture needed?”.
  2. Think colour!
  3. Think light!
  4. Get close and fill the frame
  5. Decide what should be in sharp focus, and what need not be.
  6. Crop carefully: put a lot of thought into this.
  7. Keep it simple.
  8. Keep it simple.
  9. Keep it simple.
  10. Keep it simple!

The equipment? That was simple too, today. A Nikon D90 with a 60mm micro lens (a macro lens, to non-Nikonians) and two simple flashes; one bounced off a white ceiling, and one as a “slave cell” follower. And a tripod. A Honlphoto 12″ snoot. And Adobe Lightroom.
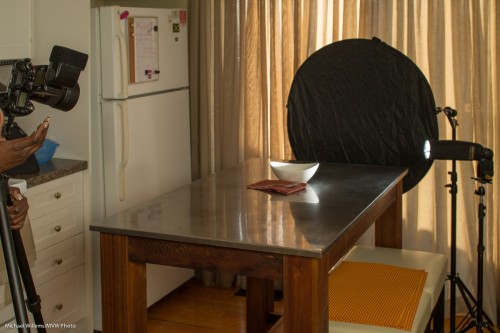
One of our setups

But it’s not just what you use – it’s how you use it. If you learn how to improvise, you can handle those pesky issues that will always, inevitably, crop up!

Like that steam. After the soup did not produce enough, we used two little cups of boiling water placed right behind the soup bowl. That, and a flash with a snoot behind the food aimed forward toward us, and a black background (as you see, a simple black reflector on a stand), and a setting that nixed all ambient light, and manual for all settings, camera as well as flash. Easy once you know.

Finally… from my perspective, the best part of food photography?

I get to eat the food.


No Meter? No Problem

In studio shoots, you use a flash meter.

But if you do not have one, can you do it? Sure you can. Here’s a trick:

  1. Set up your lights. Guess the light’s power setting.
  2. Get a grey card, and hold it in the exact spot where your subject will be, aimed half way between the light and the camera, as your model may be.
  3. Set focus to manual (we are worried here about exposure, not focus!)
  4. Fill the viewfinder entirely with the gray card (be sure not to block the light)
  5. Click.

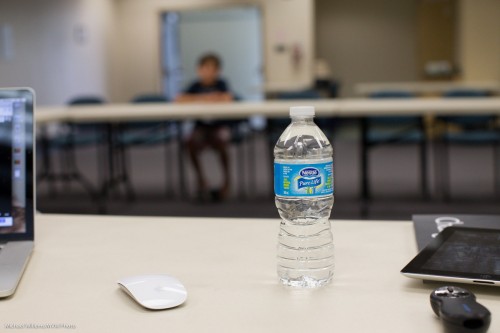
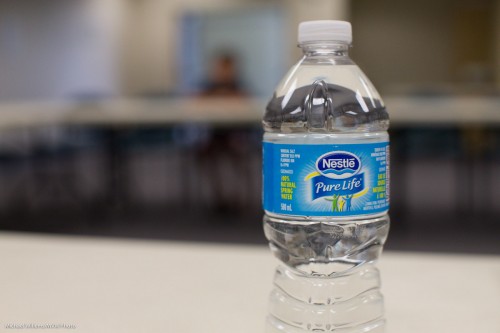
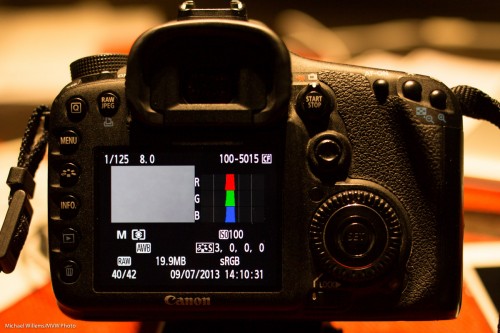
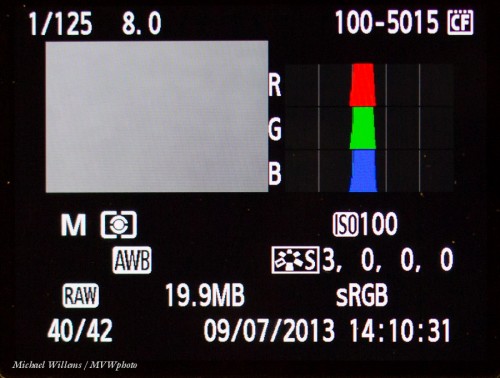
Now review the pictures. Press INFO or DISP, or hit UP/Down, until you see the view that includes the histogram.

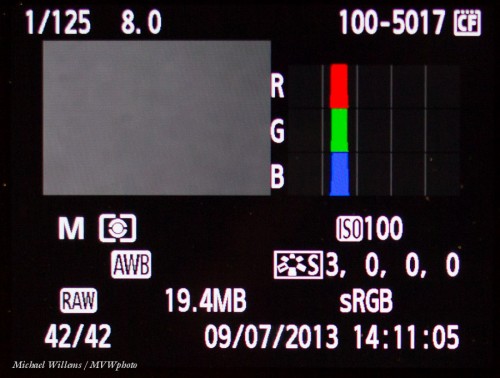
Now here’s the trick. A good picture has the histogram peak (or peaks) in the centre. So if you see this, you are ok:

What if you see this, a histogram on the left side:

That means you are underexposing. You need to turn up the flash power and try again:

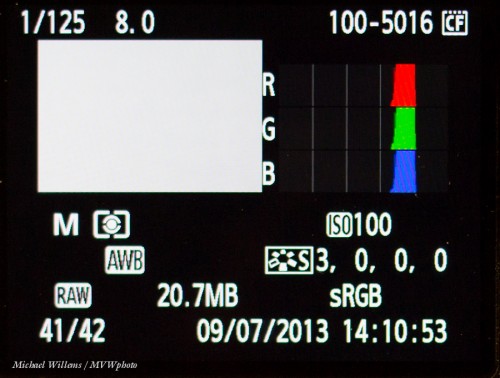
And if you see this, the histogram on the right side:

The histogram is on the right; you are overexposing: turn down the flash power, wait a few seconds so it can dump its excess charge, and try again.

As soon as you are in the centre, take a real shot and check – you should be OK. And you metered it – and all without a light meter!


Framed?

A reader wrote, after yesterday’s post:

“Great post. Thanks for the info. I’ve been concentrating on producing prints of my photos. I’m tired of just seeing them on screen. I think I have the cropping issue solved, but choosing a frame is still a mystery. Should the frame match the photo, or the wall, or the home decor…etc.? Do I need to buy an expensive frame, or will a cheapo frame do? Must there be a fancy matting around every photo? When and why add matting?”

Great questions. And there are no easy answers, as in every art question, but perhaps I can get you going in your thinking. After this post, learn all about framing – google it – and find a good framer who can help you.

First: yes, I cannot emphasize enough the importance of prints. For a number of reasons:

  • Prints are beautiful as decoration all through your home. They are seen by visitors as well as by yourself, and they add to your living enjoyment daily.
  • Albums are beautiful to hold and to go over at the coffee table.
  • Both of these experiences are very different, and in many ways transcend, sitting at a desk looking at a computer screen.
  • Prints can be bigger, much bigger, than a computer screen – size matters.
  • Prints do not get lost when a hard drive crashes. And quality “giclee” prints last for hundreds of years.
  • Not least, prints can have their appearance enhanced by careful choice of paper and frame! I like to use metallic paper for my large prints, for instance; and museum paper.

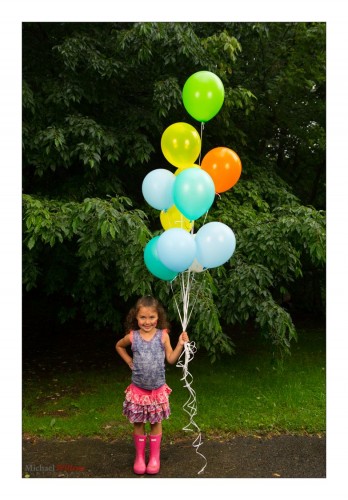
Framing is an art. We frame pictures because a frame emphasizes an image and calls attention to it. Hence, I do it even with electronic files, as you see in these two examples of a shot I made yesterday, first without frame:

Now with “frame”:

Most people prefer frames around an image, especially when printed. So then the question becomes “which one”, and I would say this is mainly a matter of taste. An elaborate frame can be good for a small image, but a very simple frame can also be good.
Every time you need a frame, there is the question: can you use a cheap “off the shelf frame” or do you need a custom frame?

For a great image, a cheap “Wal-Mart” frame is not a great idea, in my opinion, for three reasons. First, and most importantly, a frame becomes a piece of the art. When buying a standard frame, you will have little choice, so rather than you deciding, it will be the Walmart buyers who have decided for you. Second, you are stuck with standard sizes. So if you have cropped to an odd size, or if you use an unusual paper size, you are out of luck. And I always recommend you should use what paper and crop you like, not what the frame-makers dictate. Third – a cheap frame looks like a cheap frame. Your picture will cost you anything from $80 to $800, so why spoil that with a cheap-looking frame? The cost may seem high but it is worth it for a custom piece of art no-one else has.

If you have decided on a custom frame, find a good framer and decide on the printing technique. One reason I love metallic print on foam core is that I can then have a simple black frame made without the need for glass: metallic paper needs no glass in front, meaning you save on weight and cost and get fewer reflections.

My personal thoughts about frames:

  1. The frame needs to match the room you are hanging the picture in;
  2. It needs to complement the picture;
  3. It needs to be simple – unless you want complex.

Matching and complementing means style as well as colour.

  • Starting with colour, I look at the picture and pick a prominent colour and use that as the frame.
  • Then I ensure that this also matches the room’s wall and the room’s look and furniture (if it did not, would that print be a good choice for that room?). An old-fashioned frame in a modern room can really look out of place, for instance.
  • I tend to use a thicker frame for a larger picture; a thinner frame for a smaller picture.
  • I bias toward simple – but when I have a reason to go to an elaborate frame, fine. A classical picture, for example, can look great with an elaborate painting-type frame.

Matting is needed if your print has glass on top, in order to separate the glass from the paper. It is also good to give your picture a little depth; make it look three-dimensional. So yes, often matting is a good thing, in spite of the cost of cutting a custom mat. But there are exceptions – e.g. the metallic prints I mention, that have a simple wooden frame around the picture, but no glass, and no matting.

As for that cost… again, custom framing is not cheap, but it is worth it – and it can even be fun. If you find a good framer (and I use several) that framer can also help advise you on style, colour, and more. Framing is an art, and I would spend the money to do it right.  (As a side note, I stay away from the mall art stores that always seem to have a “this week 50% off” sale – it’s 50% off the double price.) Bring the framer a photo of the room you will hand the artwork in, if at all possible.

I do anything from simple frames (on a metallic print, a simple black frame, no glass) to elaborate custom frames, depending on the print. Yes, it costs money, as does everything of quality  that will last you a lifetime; but it pays back every single day you look at a picture.


Recipe, another

Yesterday’s recipe was the “Willems 400-40-4 rule” for indoors flash shots.

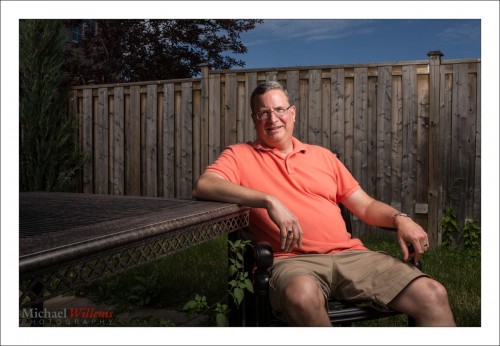
Today, another one. Say that you want to go outside for a saturated colour flash shot like this, on a fully sunny day at noon.

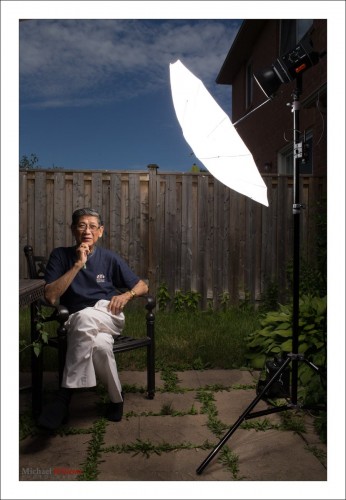
So for that you need a flash with a modifier. I used a strobe, but you can use speedlights if you are willing to fire them at high power and have them close to your subject.

Here’s my strobe:

Now follow my logic.

Step One: ISO and Shutter. The sun is bright and I am competing with it. So to cut the sun, I will be at low ISO (meaning at 100 ISO, the minimum) and high shutter speed (1/200th sec, the fastest sync speed for many cameras). This is a given, an “always” starting point: by default. sunny day means 100 ISO and 1/200th sec).

Step Two: Aperture. At that speed, a “normal” exposure would be f/11 (this is the Sunny Sixteen Rule in practice – look this up on this blog – yes, there is a reason I teach you all this stuff. At 200 ISO it would be f/16 “sunny sixteen”, so at 100 ISO, we’d need f/11.). So we arrive at 1/200th sec, 100 ISO, and f/11… this looks like this:

But wait – I want that background darker, to get saturated colour as in the first shot, not light as in the second shot. So we go to at least f/16, one stop darker than “sunny sixteen”. Now, indeed the background is darker.

Step three: Flash power. Now we adjust the flash to give us enough power to get to f/16. If we are using a small flash, that means no modifier (loses too much light); if using a strobe, we adjust it until the brightness matches f/16. Use a meter, or use trial and error.

So the method was:

  1. Set low ISO and fast shutter;
  2. Decide on aperture you want;
  3. Set flash to match that aperture.

And to this, we add:

  1. Use a modified flash if you can – like shooting through an umbrella, as I am doing here. But modifying loses power, so you may need a direct flash, or have the flash very close to the subject.
  2. Use off-centre composition (avoid the centre – use the Rule of Thirds).
  3. See if you can get diagonals included to lead into the image and give it depth.
  4. Avoid direct sunlight on the subject’s face: it shows wrinkles and it causes squinting. Sun from behind gives you “shampooey goodness” instead: much better.
  5. See if you can angle the flash w.r.t. the subject, off to the side, and turn the subject into that flash. Also raise the flash 45 degrees (looks natural and you see no glasses reflections).
  6. See if you can get lucky and include all three primaries, red (-ish); green and blue, in the image. If so, you have a good image!

Let’s see that image again. Click on it and click through to see the original image at full size:

That looks like a photoshopped image, and yet it is not – it is the way I shot it in the camera. yes… and I can teach you the same – it really is simple, once you get the idea.

___

The Pro Flash Manual e-book is designed to teach all this and much, much more, and it dovetails into this site and into my classes. Learn about both these e-books here on my web site. Want to learn? Check out www.cameratraining.ca as well.


Simple Setting Tip

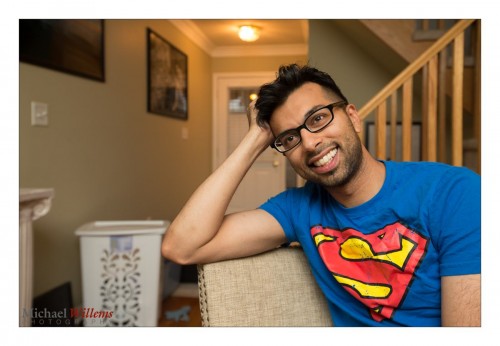
You have all heard this before, but one more time: here is a simple setting for “indoors flash in a typical living room”. For photos like this, in other words, of my friend and colleague photographer Taha Ghaznavi:

Not bad, eh? Would you like to learn to make photos like this, with those nice warm background colours, and natural looking shadows? Well – you can, if you have an SLR and a flash. Here’s how:

  1. Camera on MANUAL (“M”)
    1. ISO: 400
    2. Shutter: 1/40th second
    3. Aperture: f/4
  2. Set the White Balance to FLASH
  3. Ensure that the Flash is set to TTL (that is its normal auto mode: it says something like “TTL” or “ETTL” on the display on the back).
  4. Aim the flash 45 degrees up – BEHIND you (ensure there is a ceiling or wall).

Magic! Your background is dark, but not too dark. There’s no reflection off the glasses. The face looks not flat, but three-dimensional.

Simple starting settings like the Willems 400-40-4 rule above are important. Recipes. Of course they are just that – simple start settings. If your subject is too dark, for instance, it may be that the ceiling is too high for good bounce. In that case increase your ISO to 800 or even to 1600. Or if your subject is wearing white, you may need “+” flash exposure compensation. And so on.

So you may need to vary, but by starting with good rules of thumb like the Willems 400-40-4 rule you will not be too far off for a start!

___

These recipes are the basis for my Photography Cookbook – a recipe book that will get you started with many good situations. But a thorough knowledge of the fundamentals is also needed if you want to be a good photographer. The Pro Flash Manual is designed to teach that. Learn about both these e-books here on my web site.


Softly, softly

“What is a softbox used for?”, I often hear. “To soften light”, I respond. But it occurs to me that showing you is probably worth a lot more than telling you.

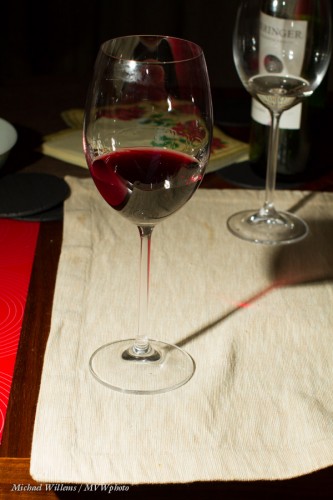
Here’s a picture of a wine glass, taken last night to demonstrate exactly this point:

As you see, I used off-camera flash, so it’s not too bad – but look at the shadows from the glasses’ stems. They are well delineated and sharp and clear. We call that “hard” shadow, caused by “hard” light.

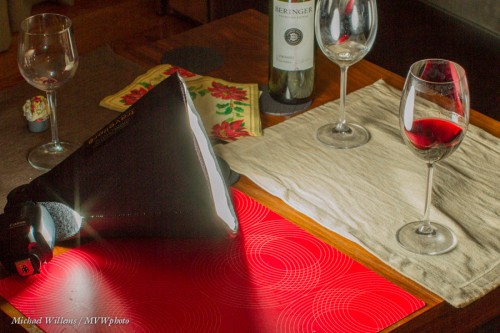
Now let me put a little softbox on the flash:

I used a Honl photo Traveller 8 softbox – one that folds up to basically a flash nothing, and is light and sturdy. A very useful tool, and I always carry one or two.

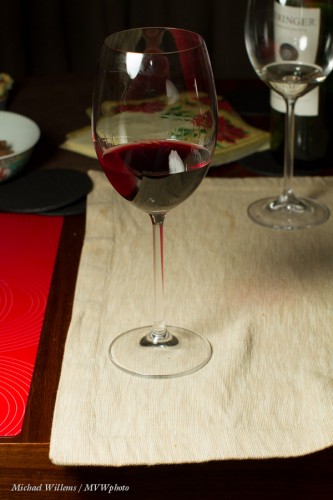
What does it do? It modifies the light (a “modifier” is anything that changes the direction, size, or colour of the light) by making it bigger. A large light with respect to the subject avoids sharp shadows: the larger the light, the fuzzier (“softer”) the shadows become. Now look at the shadows coming from the glass:

What shadows? They are almost gone now! And that is what a softbox does. Even a small softbox, if close to the subject.

Why “close to the subject”? because what matters is how large the light source is with respoect to the subject, or, if you prefer, “as seen by the subject”. Small gives hard light; large gives soft light. Take the sun: it may be large, but as seen by us, because of its distance from us, it looks small, so it gives hard light. This 8″ softbox, on the other hand, may be only 8 inches across, but because it was close to the subject it looks large. Hence, soft light.

The softbox is better than an umbrella in the sense that it does not throw light all across the room. That is why the softbox is my favourite light softener, and that is why I usually carry a number of them, large and small, when I shoot.

___

My new e-book “Pro Flash Manual” discusses this and all sorts of other modifiers in detail, of course, as well as teaching you the rest of flash, all in once go. It’s a PDF; just $19.95, contains 123 unprotected (i.e. easy to read and copy) pages, and you can get it here now.


Travel Trick

A travel trick I have mentioned here before, several times.

Say you have this.

One solution is to electronically increase contrast:

But you can also put a sharp object in front of the hazy background. Like this:

This gives you the effect of 3D “depth” (the “Close-Far” technique), as well as what I would call “excusable haze”. meaning, the haze has an excuse; no-one will blame you for it. In fact it can help make your foreground object look even sharper.

Those images were from April 2008, by the way.


Forest

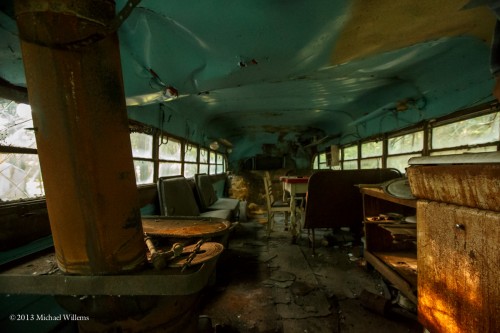
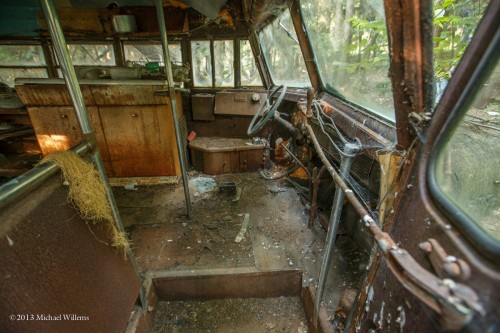
Yesterday, I was in a the woods near Susquehanna, Pennsylvania, shooting this:

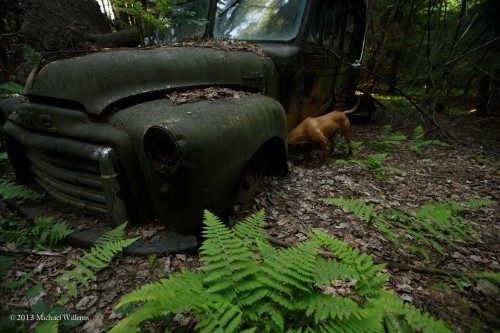
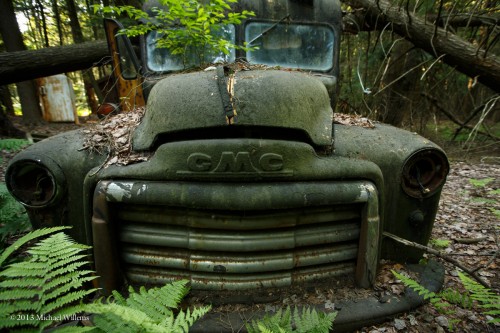
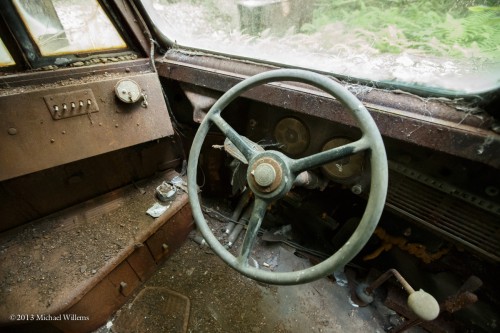
An abandoned schoolbus, once used as a hunting lodge for locals now long forgotten.

No light except available. You can see what lens I used, yes? Wide angle – 16mm (On a full frame camera).

As for settings, how did I arrive at the right settings?

  1. I set the camera to Manual mode.
  2. I wanted f/4, so I set that first.
  3. Then I wanted a sufficiently fast shutter, say 1/40th sec or faster – at least 1/15th second when using a 16mm angle, to avoid camera shake. So I set that.
  4. So that led to the ISO setting – I set the ISO so my meter indicated “-1 stop” when I aimed the camera, zoomed out, at an “average” scene (why -1? Because it is dark. Why not -2? BEcause I am ever so slightly “exposing to the right”, and I do not want to lose the highlights.

So that gives you:

And sometimes, a little adjustment in post: pulling back the highlights in the RAW image, and perhaps increasing the shadows’ brightness, to avoid the inside being all back or the outside all blown out:

Shooting contrasty scenes like this is not easy. So a trick you can use: go to Program Mode, with auto ISO, and see what settings this mode uses, then disable Auto ISO and go back to Manual, and emulate those previous settings; then fine-tune and adjust to taste.


What goes into a shoot?

Today I photographed a birthday party, in a Toronto park, outdoors under cover. “Simple”, you might think; “everyone can do this, with a point-and-shoot”  – but not so. Simple results need real skills. That’s why you hire a pro. Let me explain.

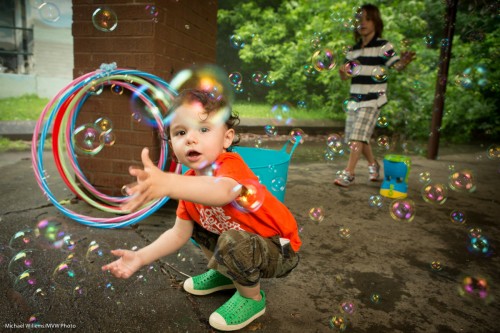
Take a picture like this, for instance:

That simple-looking snap needs considerable technical skills:

  • Choosing the right lens! 24mm on a full frame gives you this “wrap-around” 3D-type feeling. You need to know what lenses give you what results. I used a 24-70 zoom lens on a full frame camera (the Canon 1Dx) for best results, but I thought carefully about what lens focal length to use for any shot.
  • Then, to take care of the background exposure. The camera was on manual (M), and I chose f/4, at 1/40th second, using 640 ISO. That gave me a good, slightly dark background. f/4 gave me enough depth of field with that lens width. 1/40th froze enough motion with that angle.  (TIP: a good starting point for indoors is the Willems 400-40-4 rule: 400 ISO, 1/40th sec, f/4. Then adjust as needed).
  • Of course I was changing parameters all the time, since the sun went from totally gone (thunderstorms) to full bright – many stops difference between shots. Be ready for this!
  • I bounced the flash and knew exactly where to bounce it – an essential part of bouncing. I have eyes in the back of my head while bouncing, and you should develop the same. Where is the virtual umbrella?
  • I also knew how to set aperture and ISO to get enough available flash power!

It needs creative skills also:

  • I needed to see the bubbles and positioned myself accordingly. I also waited for the right arrangement of bubbles. I ensured my bounce angle lit enough of the bubbles.
  • I needed to get the right angle: I got down to child level.
  • The Rule of Thirds gave me a pleasing composition.
  • I did the necessary to get the child to look at me – not at all a given (and please parents, do not say “SMILE”).

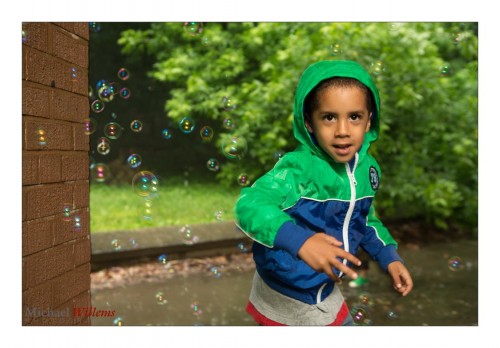
Or take a shot like this:

All personality, with the same compositional and technical rules as before. In a shot like this, it is all about the moment, and the technical details should be a given. You snooze, you lose.

Then consider this:

Here, it’s the same tech skills and compositional skills, but we add storytelling as the necessary skill. Great photographers are great storytellers.

How about this?


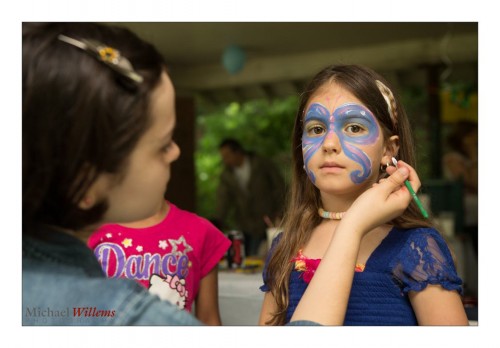
Well, all the above is needed, but here there’s personality and communication mixed in. What’s the little girl thinking? Why the serious expression? Raising questions is an important part of artistic expression. And let’s face it, photography is an artistic endeavour.

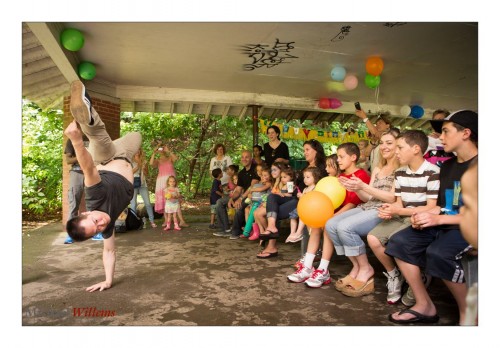
The above shot is about the performance, a simple shot of record – but everything has to be perfect for it to work. You cannot miss!

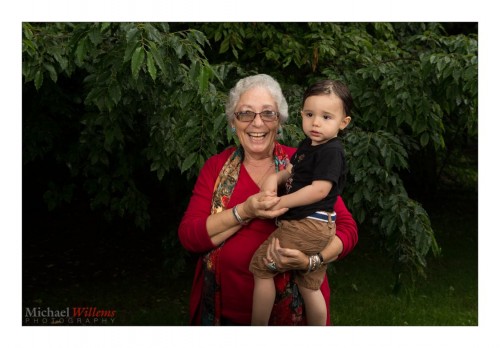
Here it’s about using studio lights powered by a lead-acid battery pack to “nuke the sun” – you have read here about this technique many times (and if not, get the flash book and learn flash!). It’s also about that great proud smile. Really, isn’t that photo just “life in a nutshell”?

Another example of the same: how you can make direct sunlight go away and by using flash, override whatever bad light happens to be available, so that horrible direct sunshine can instead end up looking like this:

I hope these sames from a simple two-hour shoot show you that there is mileage in learning pro skills, or hiring a pro. It’s not at all “tech stuff for the sake of tech stuff”, or “pretentious art talk”. There really is an enormous benefit to these skills. Having great images of your event is time travel, is life committed to eternity. Cliché? I don’t think so – I prefer to think “truth”. I have only one image of myself as a child, and I wish I had many, and that they were all professional images.

OK… one more.

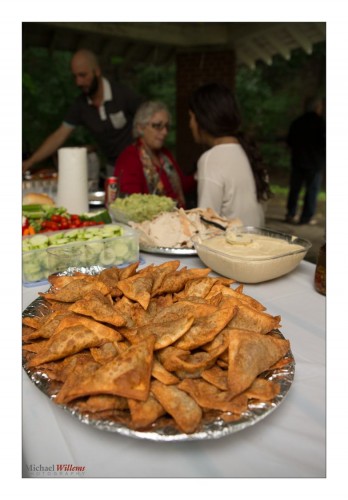
The family was incredibly hospitable and kind – as I find most people are! – and grandma made the fried snacks and the hummus, both pictured.  Please photograph the food, especially when it is made by the people you are working for – love and soul went into it, and the photos will make it last forever.

iPhone snaps just won’t do it. Please make a record of your life events. Hire a pro, or if you are one of my student readers, learn the pro skills. It costs money – yes, but not doing it wastes life!