Hidden worlds

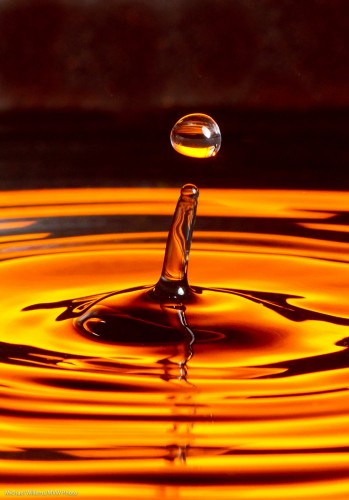
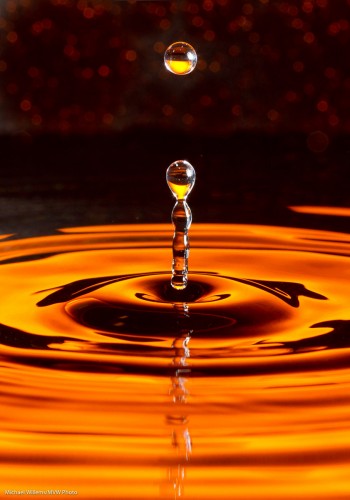
There is a hidden world in water’s surface tension. A world like this:

Water Drop (Photo: Michael Willems)

Is that difficult to photograph? Depends on how much patience you have.

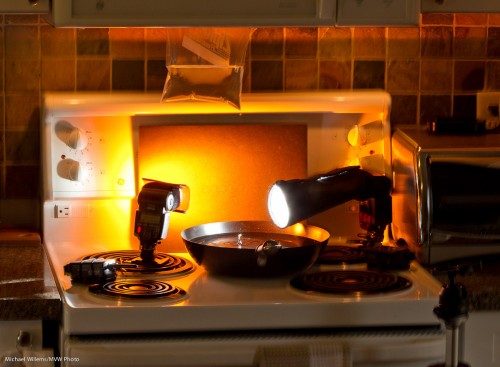
Here’s how I just took this picture:

  • Camera on a tripod, equipped with a suitable lens – I used a 100mm macro lens but a 50mm or a telephoto lens may also do.
  • I set the camera to 320 ISO, f/11, 1/250th second.
  • A black background, lit up with a gelled flash – or just a coloured background.
  • A tray with water – also preferably black. I used a wok since I had nothing else, plus a wok is round, so you get circular waves.
  • A plastic bag with water. I hung it from my microwave. Poke a very small hole in it with a pin.
  • A for the background – I used a 430EX with a Pocketwizard driving it. The flash set to manual 1/4 power and equipped with a Rust gel from Honlphoto.
  • Another flash aimed at the drops from the side. Also driven by a Pocketwizard, this flash was equipped with a Honl snoot. Also set to manual 1/4 power.

This looked like this:

Water Drop (Photo: Michael Willems)

See the ziplock stuck in my microwave door? And see the tripod on the right?

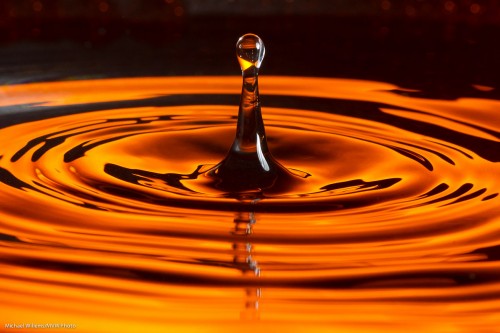
And given enough patience you will get pictures like the one above. Yes, patience is required – I just shot 500 pictures to get 10 great ones.

Gotchas to watch out for:

  • Too big a hole will give you streams of water – not flattering. You want slow-moving, large drops. Small pin hole achieves this (else, wait until the pressure lessens).
  • Like in any macro photo, you may need to clean up your picture to remove the dust you lit up with the flash.
  • You will also want to crop the image.
  • Watch for reflections of the waves in the bottom of the pan – shoot as horizontal as you can.
  • Watch for reflections elsewhere too – I got a reflection in the side of the pan; some of this I had to remove in post-production.
  • Focus manually; prefocus where the drops fall.
  • You want fast flashes – and since a flash’s power is set by its duration, this means not full power, so make sure the flashes are close.

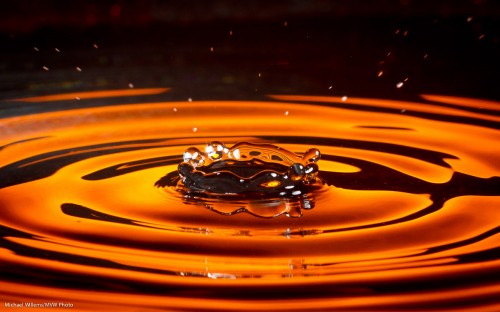
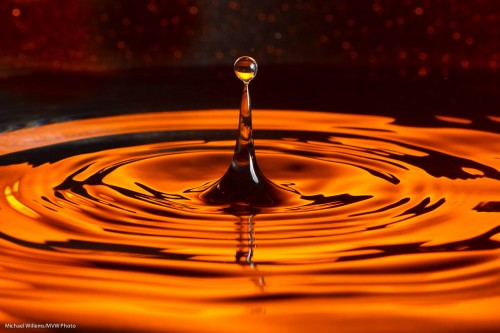
A few more samples:

Water Drop (Photo: Michael Willems)

Water Drop (Photo: Michael Willems)

Water drops (Photo: Michael Willems)

Water drops (Photo: Michael Willems)


Flash restraints

When working out a photographic scenario, it is often useful to think in terms of restraints – i.e. “what to watch out for”. That can help you handle tough situations.

When using flash, especially in mixed light (e.g.outdoors) the following are the major restraints to watch for:

  1. Flash synch speed. When using flash, your camera cannot exceed the speed beyond which the shutter no longer fully opens. This is around 1/250th second on most SLRs. (Tip: open the aperture on your camera all the way at 1600 ISO and point at the sky. Check shutter speed. Now turn on the flash, and see what the shutter speed is now reduced to – that is your flash sync speed).
  2. Flash range. Your flash range gets smaller the more you close the camera’s aperture. The guide number divided by the aperture tells you the full power range. (Tip: the flash may display it on the back – most modern flashes do, when the head is pointed straight forward.)
  3. Usable Aperture Range. On the one hand, you want a small aperture number (a large aperture, say f/2.8) for blurred backgrounds – but that may be difficult due to constraint (1) above.  On the other hand, you may need a large aperture number (a small aperture, say f/11) to make backgrounds darker, but that may be difficult due to constraint (2)

Geez, life is full of impossibilities, isn’t it!

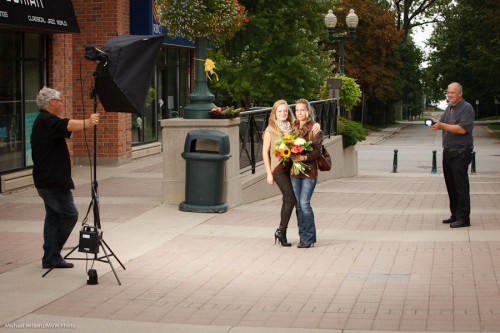
But if you keep those constraints in mind at all times, you will know when you are about to run into trouble – conversely, staying clear of those constraints guarantees trouble-free shooting. Like in this recent shoot:


Exposure lock

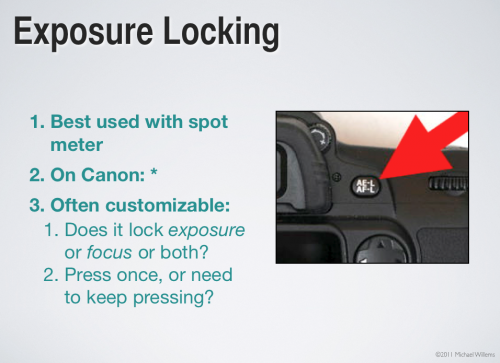
Beginners may wonder what the AE-L/AF-L or the “*” button on their camera is for.

Here’s what. It’s called “exposure lock”.

It allows you to do the following:

  1. Aim at something you want to expose well (a mid0greay object, ideally);
  2. Press the lock button;
  3. While still holding it down, now recompose (i.e. aim the camera at another area);
  4. The focus and click.

That way you get a picture that is focused on what you set as the final composition, but its exposure is based on where you were aiming earlier, when you pressed the lock button.

You might use this if shooting a person against a very white or dark wll. Aim at the person, lock, now aim back at the rest of the scene, now takethe image The exposure will be based on the person, not on the wall.

Two things you need to be sure to do for this to work:

  1. Set your meter to spot metering.
  2. While locking, be sure to aim at an object that is not very dark nor very light – an “18% grey” object, like a Grey Card or like Uncle Fred’s grey suit.

Do this and all your images will be exposed great.

So why do we not use this all the time? Simply because it takes time.


Dark arts

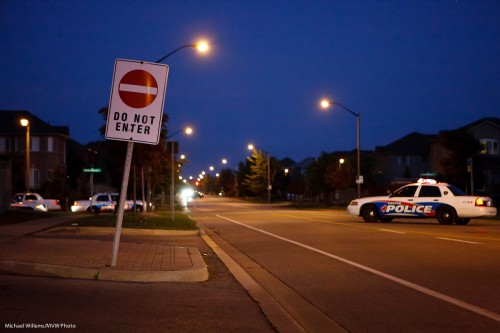
Darkness techniques, I mean. In other words: what do do when you have to shoot in the dark. Like in an image such as this, from the other night (as a photojournalist I take quite a few of these):

The simple answer: there’s no simple answer. In other words, there isn’t one single technique.

What I do is a combination of the following techniques:

  • Try to shoot when there is some light- not usually an option, since the criminal element does not wait until
  • Use a tripod or monopod, if possible.
  • Use a fast lens (one with a low “F-number”).
  • Use a wide lens, if possible – wider lenses are of course more tolerant of motion; while longer lenses show every little tremble.
  • Use a higher ISO – 3200 in this image, which is as high as my a-little-long-in-the-tooth 1Ds Mark 3 can go.
  • Crouch and make myself into a tripod.
  • Take the image many times – in the hope that one will be “accidentally sharp”.
  • Underexpose, and then later “push” the image (at the expense of more grain).
  • Use what you get – in this case, cars turning around right beside me lit of the police cars on the left, so I waited for more cars to do that (otherwise, those police cars would be dark).

By using some or all of the above techniques, you can get sharp pictures even when it is difficult, and when others fail.


Back to basics

You know that as an event shooter, I use TTL (through-the-lens flash metering, using a preflash) very widely. Much as it is sometimes hard to predict, it is the only thing you can use when things are moving quickly. Like at an event.

But sometimes, things go wrong. I had flash maslfunctions for part of Saturday’s shoots. You see, TTL is not really unpredictable -once you know how it works (metering bias to the focus point, for instance, and an assumption of 18% grey where it meters) it is predictable. So a malfunction is when it becomes actually unpredictable.

As it did Saturday with my dying 580EX II flash. Here’s three consecutive shots – I do everything the same, and yet I got, in rapid succession in the same setup, one dark shot, one light shot, and one OK shot:

Too dark. And the next one, way overexposed:

And the third one, almost OK:

I cannot live with this craziness. So then what do I do? I go back to basics. Actual basics. The basics we used in 1980. Namely, I set my flash to manual power setting (my camera, of course, is already on manual exposure settings).

One quarter flash power ought to do it, I thought, looking at where I was bouncing and what my settings were – and that worked great:

So then for the next dozen or two shots I stayed in the same place, shot people at the same distance, and kept the flash and camera set to the same. Bingo, predictable shots.

So when life hands you unpredictability, force predictability on it If you use the same settings and it’s all manual and your distance to the subject stays constant, the pictures will all be the same.

Sometimes, 1980-style basics work just great. Actually, they quite often do. My camera is very often on the “manual” exposure setting, for instance.


Flash assist

Sometimes when shooting an event, I cannot easily bounce my flash. In that case, I will first try to use mainly available light –  meaning, turn up the ISO. That gets me shots that are borderline acceptable, like this from Saturday’s event shoot:

So here’s the message: even when I am not using the flash as the main, overpowering, major light, I still use it in these cases.

Turning the flash on and bouncing it behind me, while I lose most of that light in this room, still gives me a better picture:

This gives me what I would call a “flash assist” image:

  • Better light, brighter whites
  • More control over direction of the light
  • Fewer shadows where I do not want them, and softer shadows overall
  • Better control over colour balance
  • “Bright pixels are sharp pixels”.

So why did I take the first picture above?

Simply because my 580EX II flash failed. It fired intermittently Saturday, This is why pros always carry spares: I grabbed my other, second, 580 EX II and put that on my camera instead. The first 580 will have to be retired – a blow, because it’ll cost me more than I earned in the shoot to replace it – but them’s the breaks.


Tip of the day

Thinking a little more about yesterday’s post: here’s a suggestion for you.

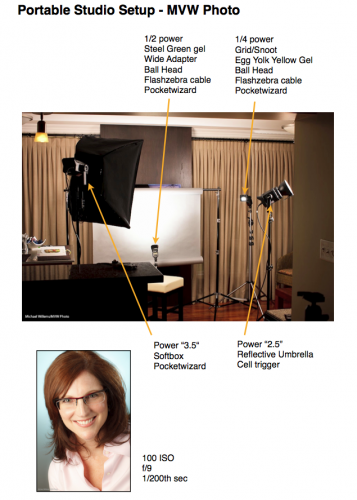
When you find a setup thart works, or when you pack your bag just the way you like – anything like that, make a one-page cheat sheet for yourself.

Like mine for the portable studio I showed you yesterday:

Click through to see it as a PDF:

HomeStudio-Small

And of course I have that cheat sheet PDF on my iPad also.

These “recipe” sheets help me or my assistant quickly set up a starting situation, in case I am in a hurry. (OK, I am always in a hurry.) This way, I ensure I do not forget something. I have one for my lighting bag (what goes where), for common lighting situations, and for common shoots.


Fashion flashin’

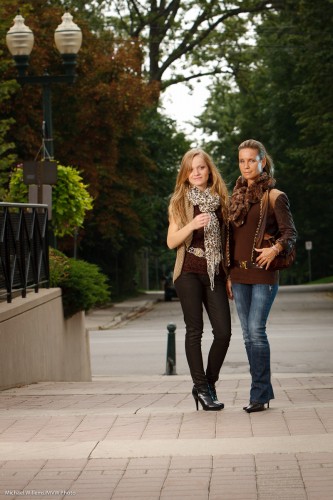
Sunday morning, around mid-day, in downtown Oakville I shot a fashion shot for a magazine front cover.

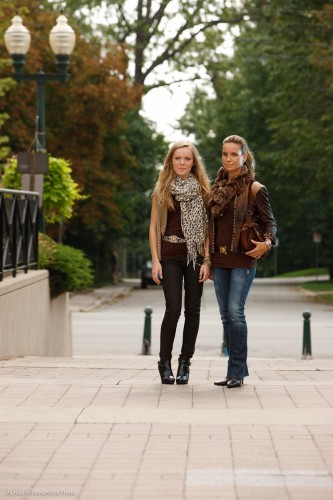
Outdoors fashion is, as always, a matter of many things coming together at once. One of those is light. Without light, even on a wonderful overcast day (wonderful in photo terms), the image lacks something. The mother and daughter models lack a certain je-ne-sais-quoi.

Actually I do know – they lack light:

Models in Oakville (Photo: Michael Willems)

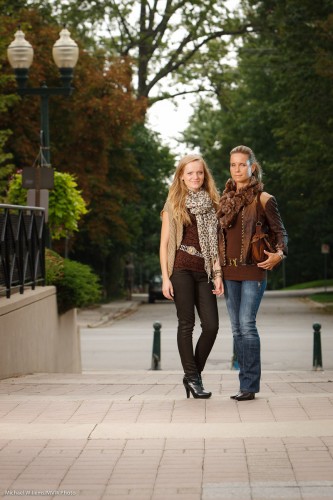
So we add a flash. I used a Bowens 400 Ws strobe, although I could have used speedlights. The sequence is as follows:

  1. I set my camera to manual.
  2. I select 1/200th second and 100 ISO.
  3. That gave me, on this particular day, an aperture of f/5.6 for a nice saturated background. (To arrive at this, I can use my in-camera meter or my light meter set to ambient.)
  4. I now add the strobe, set it to 80% power about 6ft away, and test this with the meter (now set to flash mode). Well have you ever:  the meter immediately indicates f/5.6! (This is just experience. If you are less experienced, no worries – just turn the light up and down until you do read f/5.6).

That gives me:

Models in Oakville (Photo: Michael Willems)

If I want the background a little darker I change the speed to 1/250th (still in my flash sync range):

Models in Oakville (Photo: Michael Willems)

Okay, we are set. If the sun comes out a little more,  I go to 1/250th, and if it gets a tad darker I go to 1/160th.

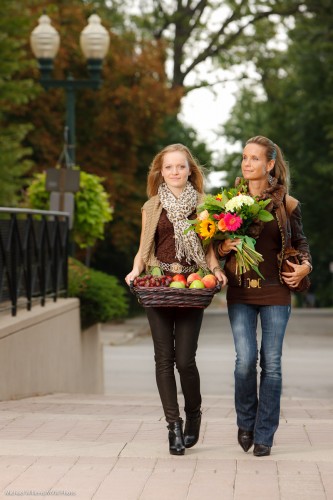
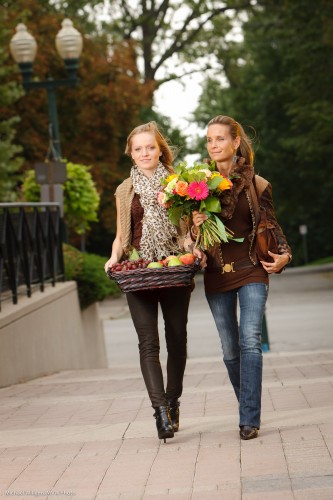
The idea of this shot is autumn – so we now bring out the props. Autumn flowers and fruits and vegetables now gives us this:

Models in Oakville (Photo: Michael Willems)

Notice the speedlight with a blue-green gel as accent/hair light on our right? The speedlight was held by Kurt, who assisted on this shoot, and was set to 1/4 power (again – experience tells me that setting will probably work – and it did).

The final step is to make that an egg-yolk yellow gel instead of a blue-green gel – yellow accentuates the late day setting sun feeling that is synonymous with autumn. (I use Honl Photo gels).

Models in Oakville (Photo: Michael Willems)

And there we have the image. (In fact this is not quite the image – that one went to the client, and I do not like to publish images in this open forum before the customer has used them!). Also – note that these are shot a little wide since this is for a magazine front page, so there needs to be space for text.

Notes:

  • Umbrellas and softboxes outdoors will be blown away, so hold on tight.
  • If the models move, use AF-C/AI Servo focus mode.
  • With two models, be very aware of the danger of blinking – one of them will blink in very many images, so check, and take many images.

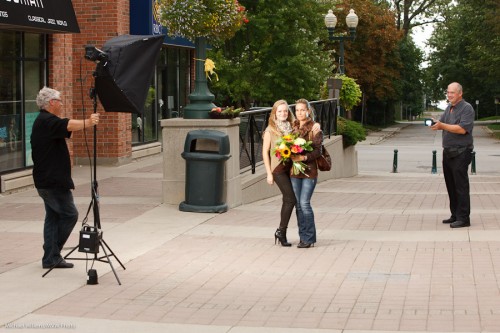
The setup was as follows:

Fun shoot.

(And perhaps also, a shoot that explains why photography costs money: A car full of equipment, props that get used just once, two sets of clothing, and five people taking several hours. All this costs money!)


Manual exposure

Why do we use manual exposure mode?

We use manual exposure mode (“M” on the dial on top) when it is more convenient to do so than to use an automatic or semi-automatic mode – i.e. when the drawbacks are outweighed by the advantages.

Grand Case, Sain Martin (Photo: Michael Willems)

Aug 2011: Grand Case, Sain Martin - 1600 ISO, 1/30th sec, f/2.0

Automatic modes (camera sets both aperture and shutter) and semi-automatic modes (camera sets one after you set the other) are convenient and quick, but are also error-prone. In particular, they do not handle the following well:

  • Backlight
  • Dark or light subjects
  • Varying subjects
  • Varying light across a scene

In those situations it is often better to use manual, assuming you have a moment to work out the best setting – and then to stick to these settings. So “indoors” is often like that, as is “night scenes”. As you get more experienced, you will use manual more often.

(One more note for beginners” manual exposure mode is not the same as manual focus, or manual focus spot selection, or manual white balance setting – etc. Unrelated!)


The Importance of being colourful

Colour is an interesting thing. It can help or hinder your pictures. It helps if you are using it where it is wanted; it hinders if you use it when it is not, or if you fail to use it when it is.

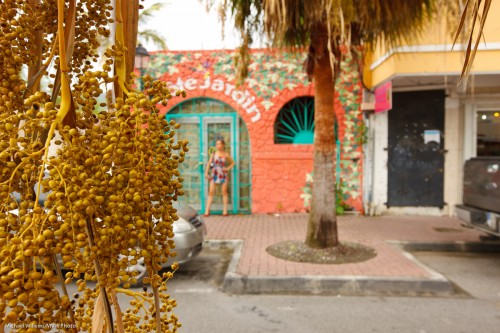
The Caribbean is all about colour. People are happy, the sun is hot, and everyone uses wonderful bright colours. So a scene like Philipsburg, Sint Maarten, needs colour:

Philipsburg (Photo: Michael Willems)

Technique needed:

  • Flash: I needed to use my Canon 580EX flash for this sign.
  • Exposure: I made the colours vibrant by exposing the rest of the image down a little: 1/200th at f/13 at 100 ISO.

In the following image, I needed no flash – or rather, it would not have done anything:

Sint Maarten (Photo: Michael Willems)

In the next example, I needed the flash just to light the plants that make up the roof, or they would have been black:

Sint Maarten (Photo: Michael Willems)

And one more, where I used the flash:

Sint Maarten (Photo: Michael Willems)

One more – a street grab:

Philipsburg vendor (Photo: Michael Willems)

And one more, again showing wonderful Caribbean colour:

Philipsburg (Photo: Michael Willems)

I suppose this all boils down to a few simple rules:

  1. Decide if color is needed; is it an important part of the image?
  2. If so, expose well – underexposing ever so slightly will make colours more. saturated; overexposing leads to washing out. (Note: you are allowed to “expose to the right and fix in post – you get better quality).
  3. Use a flash if needed to light up areas that need lighting up.
  4. Use the right white balance.
  5. Consider a polarizer on sunny days.
  6. Add a little saturation in post if you have to.


All very logical once you think about it.