Make it all work for you!

One piece of advice I give all photographers is: make it all work for you; in particular, spend a little time making things efficient. And spend up to a day doing it every month.

That means things like:

  1. Packing your bags the best way (hint: I have no camera bag. Camera on one shoulder; bag with lenses etc on the other. Camera in bag = unready camera.
  2. Carry a little checklist or drawing that tells you what goes where in the bag(s). Enormous time-saver!
  3. Have at least one camera that is charged and set up, ready to go. Perhaps read settings from a memory card, if your camera allows that, or have a user preset ready to go. That way you can start shooting immediately.
  4. Finding a good camera strap: all my cameras have Domke straps, because they have a rotating joint at each end that avoid tangled straps.
  5. No lens caps on the camera you are using. Filters are your option, but I do not use them unless it’s snowing or I am at a beach or in a sandstorm.
  6. Always carry a flash and some modifiers (I really like the Honl photo range and always carry a reflector and a softbox and some gels.)
  7. Use Lightroom to asset-manage and edit your images. Only go into Photoshop when you need to (and do that from within Lightroom).
  8. Get a Mac – yes, I’ll say it. The productivity gain is so great, I am no longer OS-agnostic: I recommend the Mac with OS X. Yes, I know Windows and I love Linux, but the Mac just gets on with it, its interface is consistent, and especially when it gets to things like networking, it’s just so much more reliable than Windows. (*)
  9. Mark your equipment. Personalize all your gear. label things.


And find the right apps for your devices. To get you started, I have some recommendations.

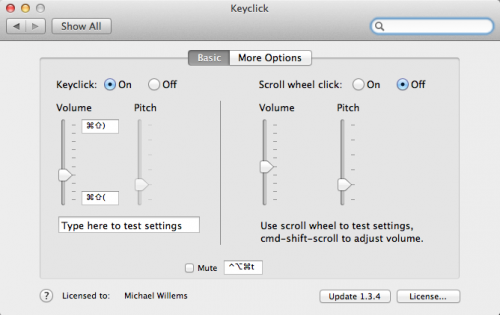
This month’s app winner: One little gem I recently discovered is an app for Mac OS X (i.e. for the Macbook or iMac) called Keyclick from Sustworks (click here for the app’s page). It features selectable sounds and many more options:

This app makes my Mac’s keyboard sound like an electric typewriter, and I totally love that adjustable sound: it even has a carriage return sound with a bell. At $9.99, it has made typing an activity that I once again enjoy. At the risk of annoying young people like my young engineer son: 1-0 for skeuomorphism. I find that the discrete and heavy click auditory feedback makes me a much faster and better typist. I have been using it for over a month now and it’s proven reliable and useful. And it’s fun to watch people turn their heads looking for the typewriter. Get the 30-day tryout version now, or just get it: it’s not exactly expensive.

The iPad is a great business tool too. Honourable iPad app mentions go to:

  • OmniFocus for to-dos and project planning,
  • HP15C for a calculator with RPN notation,
  • Exifwizard to tell me the EXIF data embedded in photos I have on my iPad,
  • for credit card payments,
  • Portable Numbers for spreadsheets,
  • Easy Release for releases.

On the iPad, set up your screens in a way that works for you!

My rule of thumb: I find that if I spend roughly a day per month setting things up to be optimal for me, I gain at least several days per month forever.

A Little More”Post”.

Today, a few more words about “post-production”.

I tend to pride myself on the fact that “I shoot in the camera”.But even then, there are things you can do “in post”, and that I feel fine in doing when I feel like it, because you cannot do them in the camera; or because in the past, you would choose a particular kind of film. And while you probably should not manipulate all your images, “pixels were born to be punished”, as Frederick Van Johnson says.

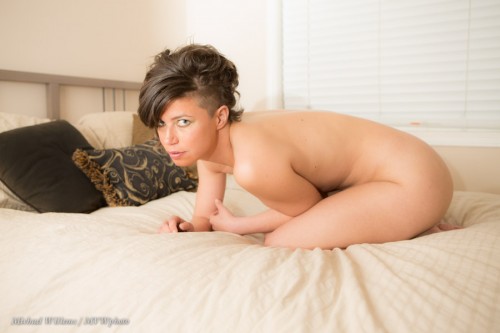
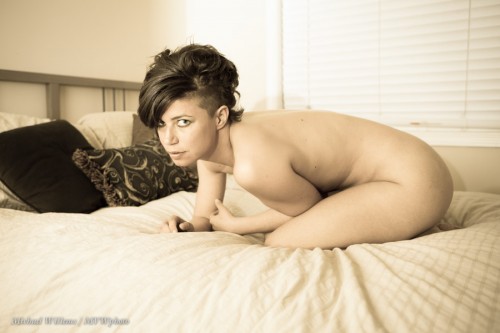
Take this recent nude:

That was lit simply and neutrally, with one or two flashes (one on the camera and one in an umbrella, if I recall correctly), so I can do all sorts of things with it. “Lighting it simply” is pretty much a requirement if I want the most options  open to me, so that is the way I shot it.

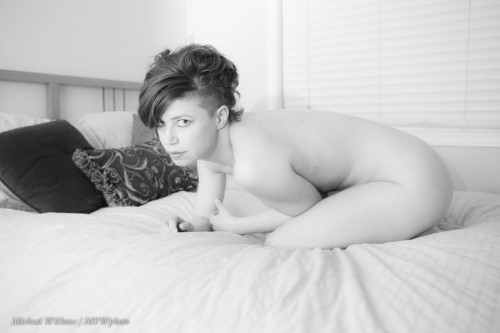
Now let’s see. Here it is in Black and White, with skin brightened (using the Lightroom HSL slider) to give a high-key image:

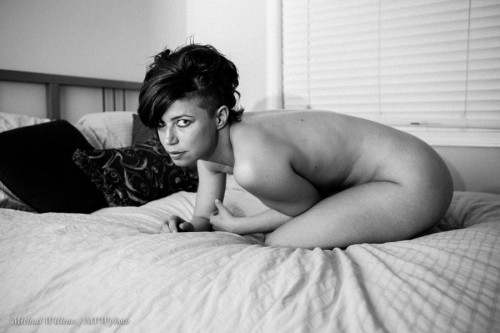
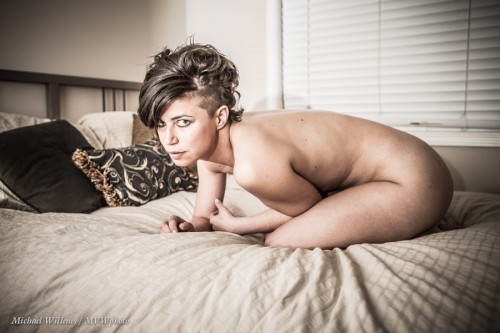
Or consider this, a gritty B/W look, with lots of film grain added as well – view it full size to see the effect:

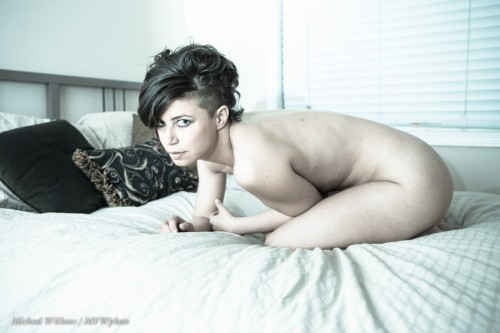
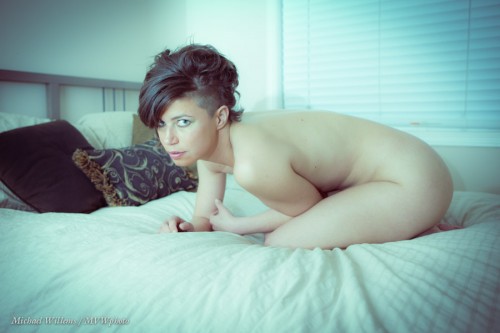
Or this, a cold look:

Or this, an “oldfashioned” look:

Or this, a split toned look, straight out of the 1960s:

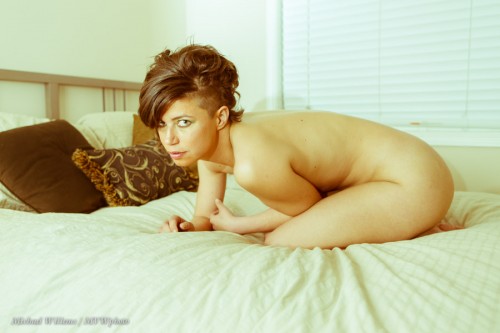
Those last four were built into Lightroom: a click is all you need. But you can do more yourself, and it is very simple. Like this desaturated look:

Or this rather Polaroid-like look:

I think I like the third image best – it suits the model’s look best in my opinion – but that is my opinion. I love the one before last, too. The point here is that all these are very different, and all good.

So before we take my “shoot in the camera” as mantra: what I really mean is: shoot in the camera as much as you can; i.e. do not use post production as a substitute for proper exposure and lighting. But beyond that: as long as you are not shooting news, alter what you like to get the art look you desire!

___

Need to learn Lightroom? Consider a few private coaching sessions, during which I will get you started very quickly. We will set up your file storage strategy, get Lightroom all set up properly, and I’ll teach you what you need to know to get started immediately.


Portrait work

Centuries ago, portrait painters used to take months to create a commissioned portrait. Meticulously perfecting each detail with fine brushes.

“The past”, you may think. But photographers do essentially the same up to this day. When you ask me to make a portrait, you can expect some considerable time spent on it. Shooting, and also finishing. That’s why portraits cost some money: see my prices for prints, for example.

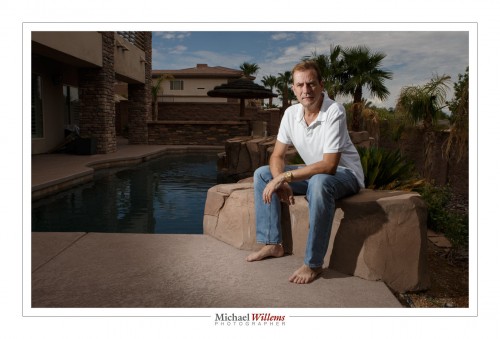
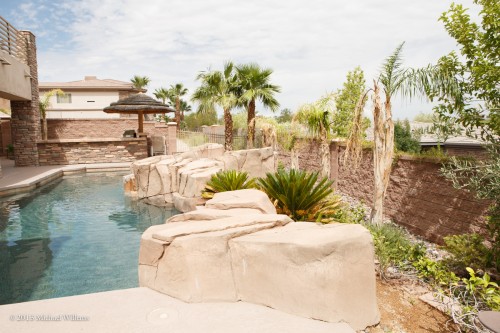
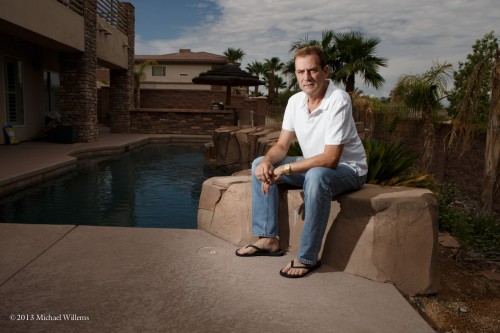
Some of the edits are very small. Take this self-portrait of a few days ago, in Nevada:

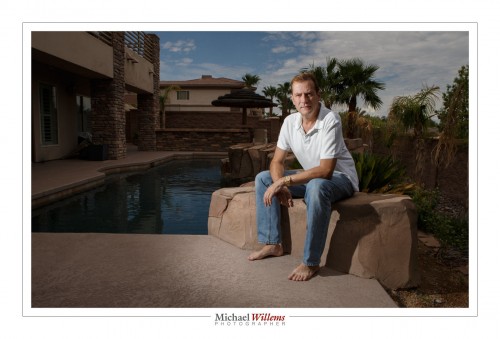
And look at this later version:

That second version is almost done. Look, the line in the concrete: gone. Some of the details in the background house: gone. If you were to look closely you would see many more very small changes; some shadows on my face; the odd piece of dirt on the ground; basically, things that do not belong in the image and could detract from attention on the subject.

These are the kind of changes that really do matter, if you make a large print and you want something good. Remember: Everything in a photo needs to be relevant, or it should not be in it. What applied in the 1600s applies equally today.

I am not saying every photo needs to be photoshopped for hours. What I am saying, though, is that in commercial or art photos and portraits, changes are OK, and often make the image better. Many things can be done while shooting; some cannot, and those can be edited afterward.

And of course I did all my changes in Adobe Lightroom, not Photoshop.


Because I can

Yesterday found me at Las Vegas’s Foundation Room, on the top floor. But it did not find my camera there. I had to check my camera and camera bag before entering the elevator. Not allowed.

This annoys me no end. We see more and more of it and it is not good. Usually the control freaks use “terrorism” as the reason, but surprise surprise: in Vegas it’s “money”. Apparently, some pro made some money from pictures taken from this bar – so now, all cameras are banned.

Except cell phone cameras.

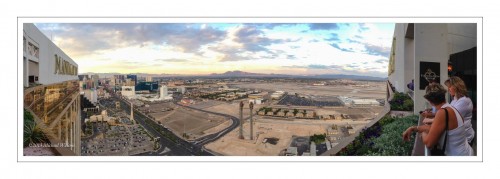
And today, these can do pretty decent pictures. So I made it my point to get a nice pic or two. And here’s what my iPhone 5 did in panorama mode:

You really have to see that in full size screen mode: click until you see the size I uploaded it at (1600 pixels wide, not counting the margin). And you will see it is good enough for a nice print. Take that, Foundation Room!

Moral of the story: learn to use your cell phone; it may be the only camera you carry and it can do decent work.


Stop That Noise!

I am often asked about megapixels.

Yawn.

They are not interesting, not anymore. Any camera over, say, 12 megapixels (Mp) will have enough resolving power to make nice big prints. Sure, if you shoot fashion you may want a 50 Megapixel camera, but for most of us, megapixels are no longer important.

They can even work against us – images get larger and take more disk space to store; transferring is slower; and so on. And there is another reason I say that megapixels no longer rule. A very important reason: electronic noise.

The more pixels you cram onto a sensor, and the smaller you make that sensor, the denser, and hence the smaller the pixels are. And small sensors create more such noise, leading to a lower signal to noise ratio.  Basically, this means less quality at high ISO values. A small sensor camera with a lot of pixels crammed onto the sensor is not very good at high ISOs: it produces grainy images.

A modern top camera therefore often has fewer pixels. My Canon 1Dx has fewer Mp (18.1) than my previous camera, the older 1D MkIII which had 23 Mp. Hence, the new camera has truly great low noise performance at high ISO values.

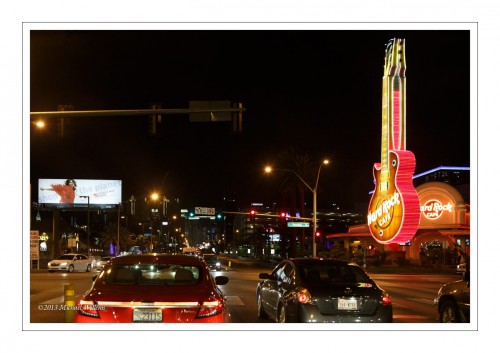
Here’s a snap at 3200 ISO:

And I can go much higher.

So when you buy your next camera, do not ask about Megapixels: ask “how large is the sensor” (larger is better) and “how good is it at high ISO” (fewer Mp means better). Because when you can take pictures at night without having to worry about grainy images, you will be a happy camper.


Rent!

I am often asked “what lens to buy”. One answer: rent. Renting a lens for a few days allows you to try it out risk-free and pressure-free.

Typical long lens photo (70-200mm f/2.8 lens)


And renting is possible almost everywhere, especially in North America. In Ontario, for instance, you have Henrys/Headshots and Vistek as two good options.

But a new third option also sounds interesting: GTA Lens rentals. Interesting especially because prices are lower, and they stock exactly the Canon (and Nikon) lenses (and a few third party lenses) that you are most likely to want to try out – all the pro lenses I own in fact, and then some. Worth a try, and I am going to rent the 85mm f/1.2 every now and then  -my favourite Canon lens, and the one I do not own yet!


Dramatic portraits

Why is my portrait style dramatic? Because it’s my style and I like it. And because I want to emphasize my subject. And because I like saturated colour. And because I like to be the boss of the light. Those four reasons.

Here’s the back yard I am at, this morning.

And now I come. I do my thing.

  • ISO to 100
  • Shutter to 1/250th
  • Aperture to what I need to get a dark background (f/11 in this case)
  • Flash power to match those (full power, direct flash about 5ft away from me)

And that gives me what I have in mind.

Much more my style. And by the way, as always, to judge an image, view at full size -in my case, by clicking on the image and then selecting full size and if needed, clicking on the magnifying glass.

___

You can learn this too. Benefit from the many learning opportunities: NSI next month, private courses by me in Oakville all the time, 24/7, courses in Hamilton and Oakville as per cameratraining.ca, and courses at Vistek, just for a start. But better: get enough people together and I’ll fly to you anywhere in the world and teach you all about flash for a day.


Blurry Backgrounds

Another beginner’s tip for you today. Blurry backgrounds.

How do you get blurry backgrounds? Any of the following:

  1. Larger aperture (“lower f-number”).
  2. Zoom in.
  3. Get closer.

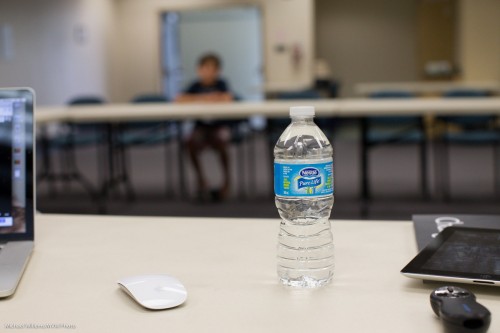
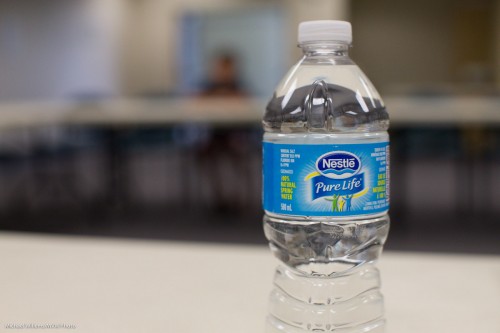
Do not forget numbers 2 and 3. Take this picture, taken at f/4:

That’s a nice blurry background. But if we want it blurrier, we can, as one of the options, simply get closer. The very same settings (same lens, same everything; f/4, again, but closer), give us this:

See how much blurrier the background is? So if you cannot afford an f/1.4 lens, then just get closer.

Another thing you notice, perhaps, in picture two: it’s simpler. Simplify! As Antoine de Saint-Exupery said: “we achieve perfection not when there is nothing left to add, but when there is nothing left to take away”.


Lens and perspective

A basic tip, to support my class today – I taught a teen workshop at the local library. Some amazingly talented young people, who, as a bonus, learn quickly, too!

The question: when do I zoom in, and when do I walk towards my subject instead? Similarly, when do I zoom out, or when do I walk away?

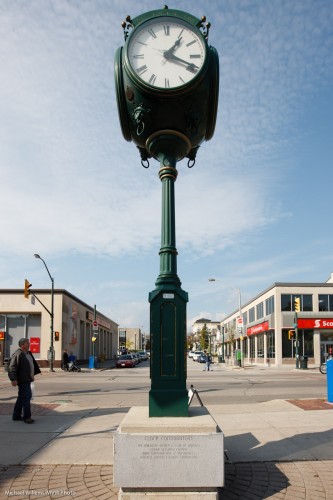
Take this clock:

With a 16mm lens. Wide angle lenses make the remote objects small, and hence enhances the feeling of perspective.

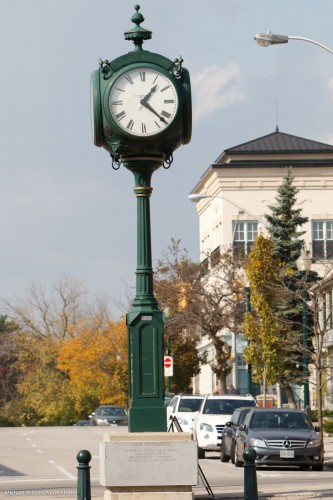
Now we walk back, all the while zooming in so that clock remains the same size. We end up at around 200mm, but from a “far away” distance:

Now look at the background objects. See?

A long lens makes background objects large, and hence compresses the feeling of perspective.

So the choice of what focal length lens to use is often not dictated by the need to get closer or the need to get more in, but instead, by creative needs.

A GOOD EXERCISE: Try to shoot some images today both “zoomed in and from afar” and “zoomed out, but close”. See what the difference is, See what works: try “close-far” in both cases: which is easier?

___

I am off to Las Vegas tomorrow morning for a few days, so posts may be slow for a few days. Stay tuned for some new Las Vegas photos soon, though.