Framed?

A reader wrote, after yesterday’s post:

“Great post. Thanks for the info. I’ve been concentrating on producing prints of my photos. I’m tired of just seeing them on screen. I think I have the cropping issue solved, but choosing a frame is still a mystery. Should the frame match the photo, or the wall, or the home decor…etc.? Do I need to buy an expensive frame, or will a cheapo frame do? Must there be a fancy matting around every photo? When and why add matting?”

Great questions. And there are no easy answers, as in every art question, but perhaps I can get you going in your thinking. After this post, learn all about framing – google it – and find a good framer who can help you.

First: yes, I cannot emphasize enough the importance of prints. For a number of reasons:

  • Prints are beautiful as decoration all through your home. They are seen by visitors as well as by yourself, and they add to your living enjoyment daily.
  • Albums are beautiful to hold and to go over at the coffee table.
  • Both of these experiences are very different, and in many ways transcend, sitting at a desk looking at a computer screen.
  • Prints can be bigger, much bigger, than a computer screen – size matters.
  • Prints do not get lost when a hard drive crashes. And quality “giclee” prints last for hundreds of years.
  • Not least, prints can have their appearance enhanced by careful choice of paper and frame! I like to use metallic paper for my large prints, for instance; and museum paper.

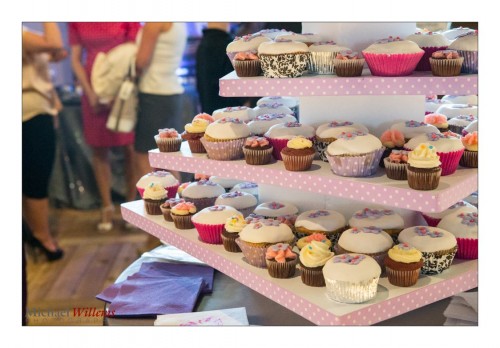
Framing is an art. We frame pictures because a frame emphasizes an image and calls attention to it. Hence, I do it even with electronic files, as you see in these two examples of a shot I made yesterday, first without frame:

Now with “frame”:

Most people prefer frames around an image, especially when printed. So then the question becomes “which one”, and I would say this is mainly a matter of taste. An elaborate frame can be good for a small image, but a very simple frame can also be good.

Every time you need a frame, there is the question: can you use a cheap “off the shelf frame” or do you need a custom frame?

For a great image, a cheap “Wal-Mart” frame is not a great idea, in my opinion, for three reasons. First, and most importantly, a frame becomes a piece of the art. When buying a standard frame, you will have little choice, so rather than you deciding, it will be the Walmart buyers who have decided for you. Second, you are stuck with standard sizes. So if you have cropped to an odd size, or if you use an unusual paper size, you are out of luck. And I always recommend you should use what paper and crop you like, not what the frame-makers dictate. Third – a cheap frame looks like a cheap frame. Your picture will cost you anything from $80 to $800, so why spoil that with a cheap-looking frame? The cost may seem high but it is worth it for a custom piece of art no-one else has.

If you have decided on a custom frame, find a good framer and decide on the printing technique. One reason I love metallic print on foam core is that I can then have a simple black frame made without the need for glass: metallic paper needs no glass in front, meaning you save on weight and cost and get fewer reflections.

My personal thoughts about frames:

  1. The frame needs to match the room you are hanging the picture in;
  2. It needs to complement the picture;
  3. It needs to be simple – unless you want complex.

Matching and complementing means style as well as colour.

  • Starting with colour, I look at the picture and pick a prominent colour and use that as the frame.
  • Then I ensure that this also matches the room’s wall and the room’s look and furniture (if it did not, would that print be a good choice for that room?). An old-fashioned frame in a modern room can really look out of place, for instance.
  • I tend to use a thicker frame for a larger picture; a thinner frame for a smaller picture.
  • I bias toward simple – but when I have a reason to go to an elaborate frame, fine. A classical picture, for example, can look great with an elaborate painting-type frame.

Matting is needed if your print has glass on top, in order to separate the glass from the paper. It is also good to give your picture a little depth; make it look three-dimensional. So yes, often matting is a good thing, in spite of the cost of cutting a custom mat. But there are exceptions – e.g. the metallic prints I mention, that have a simple wooden frame around the picture, but no glass, and no matting.

As for that cost… again, custom framing is not cheap, but it is worth it – and it can even be fun. If you find a good framer (and I use several) that framer can also help advise you on style, colour, and more. Framing is an art, and I would spend the money to do it right.  (As a side note, I stay away from the mall art stores that always seem to have a “this week 50% off” sale – it’s 50% off the double price.) Bring the framer a photo of the room you will hand the artwork in, if at all possible.

I do anything from simple frames (on a metallic print, a simple black frame, no glass) to elaborate custom frames, depending on the print. Yes, it costs money, as does everything of quality  that will last you a lifetime; but it pays back every single day you look at a picture.


Square peg, round hole

…I hear a lot of confusion about the following subject: Cropping. And a lot of wishful thinking.

For example. People shoot a 4×6 shaped image (that is what your camera probably produces with its 3:2 sensor, after all!), and now want to print it as an 8×10 but without either “cropping off feet” or “having white edges on the side”.

Not! Possible!

It is one or the other. To understand why, just imagine for a moment that your camera produces, say, square images. You are saying “I want to put that square image on a rectangular piece of photo paper, but without either trimming or white edges”. Well, you can presumably see that this is by definition impossible. You either lose part of your image, or you get white sides.

Here’s an original image, shot closely cropped:

Original Image

And here the same image cropped to 8.5×11:

Image cropped to 8.5 x 11

Unless I had shot it wider, I cannot crop that to 8.5 x 11 – let alone to square – without losing important parts. Cropping means cutting!

TIP: Every time it gets confusing, imagine you want a square print. How would you do that?

So what do you do if you do want 8×10 prints, say, and your camera produces 3:2 (i.e. 4×6) images?

You have three separate options:

  1. Shoot the way you want. Now print on the 8×10 paper – but you will get white edges around two of the sides. Cut those off. Of course you no longer have an 8×10 print, but you can at least use 8×10 paper!
  2. Or shoot wider, then before printing, crop to 8×10. This will involve cutting off part of the photo, hence “shoot wider”.
  3. Make the image wider in Photoshop, i.e. “add stuff on the outside so have more to crop”. This is laborious and not easy, and not always possible.

There are no other options. Square peg, round hole!


What…

….camera should I buy? In particular, if I already have lenses, should I upgrade?

In general, I recommend you upgrade your camera body every 3-5 years because of higher ISO. So when a friend just asked me what to replace his old Canon 40D with, I thought it might be helpful for me to share my thought process in today’s post on the DAILY blog.

First off, I said yes, replace it. It’s time. Higher ISO is a good reason.

1/80th sec, f/6.3, 16,000 ISO (yes, 16,000, not 1600)

For my friend, his options if he wanted to stay in the mid range camera bodies would include the Canon 7D and the newer 6D.

  • The 7D is a crop camera with a not-all-that-great sensor at high ISO values. It has pro features, like fast rapid shutter release,  great focus system, and more. Great studio camera, not as good when you need the high ISO values.
  • The 6D is a more modern camera with great high ISO, and it has a full frame sensor. Great quality camera, but leaves out some of those cool “pro” features you would get on the 5D (of course).

Unless I needed the pro features, like the focus system, I would go with the 6D if I were him.

But then what about lenses? When you update to a full frame camera, you can no longer use your crop lenses (on some Nikon cameras you can, but then you get limited use out of them).

My friend had two EF lenses (can be used on any body) and one EF-S lens (can only be used on crop bodies), the 10-22 f/3.5-5.6 lens.

When you buy lenses today, keep in mind tomorrow you way upgrade to a full frame body. I only buy EF lenses for that reason. Which my friend did, except for the wide lens, which there is no other option for – he had to buy the EF-S to go that wide. So he only has one lens to replace. Only one EF-S lens makes it easy: I would sell the 10-22 and buy a 17-40 f/4L, in his case.

___

OPPORTUNITY KNOCKS. Questions like these, and many others, can also be answered in a one-to-one online coaching session.

I do those over the Internet (using Skype and similar tools) and I work 24/7. Give it some thought: a one- or two-hour private session can really help you get pro use out of your camera. It can:

  • Answer your equipment questions.
  • Identify, and then solve, gaps in your knowledge.
  • Go over your work in the form of a portfolio review.
  • Teach you specifics you need to know.
  • Enthuse you and inspire you.
  • Give you homework.
  • Keep you focused!

And I have great news. The usual fee is $125 per hour plus any applicable taxes, but to encourage you to try it out, for July 2013 only, I am discounting that by 35%.

You need to book soon and the training needs to take place in July. Email me (michael@michaelwillems.ca) or call (+1 416-875-8770: Eastern US time) to set up your time and date.


Open, or not quite open?

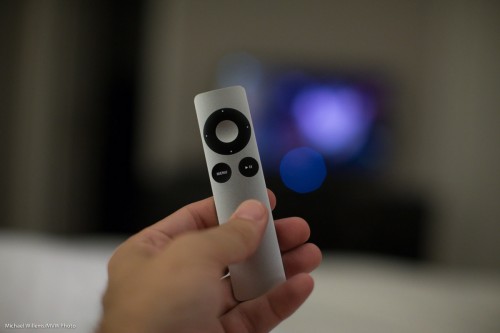
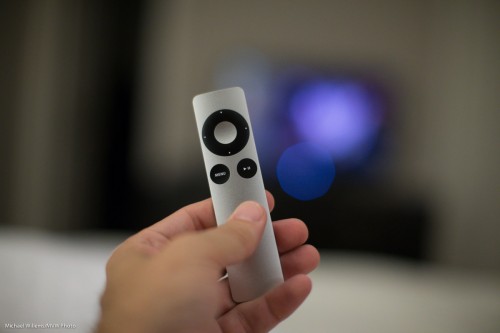
Look at these images of an Apple remote:

1/125th sec, 3200 ISO, f/1.8

1/125th sec, 3200 ISO, f/1.4

1/125th sec, 3200 ISO, f/1.2

They get a tiny bit brighter as you go down. Correct. And that is because I opened the aperture a little more each time: f/1.8, f/1.4, and f/1.2, respectively, on my 50mm f/1.2 lens.

Ah. But now look at the circle next to the remote. The actual light source in the distance was the “ON” light on my TV, a tiny blue light. But the more open my aperture, the larger the circle caused by that out-of-focus light.

And now observe the most important thing. Only wide open do we in fact see a circle. In other images, the “circle” is not a circle, but the shape of the lens diaphragm that creates the aperture (“opening”). In my case, an octagon. Not quite a circle.

So if you want out-of-focus hexagons or octagons in the distance, stop down your lens. If you want out-of-focus circles, open the lens as far as it can go.


Camera Care

I am just back from having had my Canon 1Dx repaired: there was an important recall, so I bit the bullet and had it done. At the same time, I had my 70-200 2.8L lens looked at, and Canon Canada kindly did it all in 48 hours for me, and they replaced some bits and tightened all internal lens elements – and that brings me to a small blog post on maintenance.

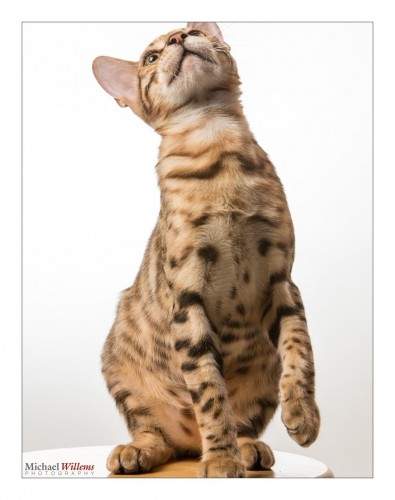
In particular, preventive maintenance. Which can be very useful so you can keep making, say, cat pictures:

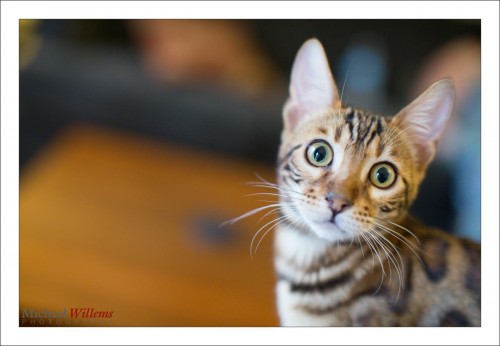
(I know – I just had to get a cat picture in there).

Just like for your car, preventive maintenance is not a bad idea for your camera gear either. Changing gaskets every now and then; tightening screws (they come loose, see this previous post); cleaning; replacing internal filters; adjusting and calibrating: all these can be worth the effort.

When to service? I would do this when:

  1. An expensive “pro” lens is ten years old, say.
  2. Especially when there has been any hint of a malfunction or a deterioration in its performance.
  3. You see dust on a camera sensor, or you see a lot of dust in a lens (a little dust is normal in non “pro” lenses; dust sealing is one of the benefits of pro lenses).
  4. You see visible signs of wear in rubber or plastic bits.
  5. There’s play; i.e. anything is loose. (This is a very good indicator for quick service, since loose bits will fall off, and play will affect focus)
  6. You have dropped the equipment hard.
  7. You hear unusual sounds when shaking the equipment.
  8. Equipment has not been used for a long time (years).
  9. You depend on the lens/camera for a living.
  10. You live in a tough climate and it’s been a few years.

You can do the simplest parts yourself, but for anything that involves opening up the equipment, I would go to the pros. That can be Canon, Nikon, i.e. the maker, especially for newer equipment. It can be worth joining the pro program; free for Nikon and in many cases free or cheap for Canon (alas, not in Canada). You can also use third party repair shops, but in that case it is wise to only use specialized shops.

In any case: preventive maintenance is often the difference between failure and success, so don’t ignore it. TIP: put dates in your calendar now, even if it is for years hence, that way you will have one less worry.

___

Yes, I talk about equipment also, during all my courses. That, and photos… Have a look at the “featuring Michael” video for August’s Niagara School of Imaging Course. And do check out the expanded schedule, online now – book soon to assure your place!

Screens on cameras

Today, a word about screens on cameras. Cameras can have several of them, with several uses for your convenience.

First, there is the screen on the camera’s back:

  • It can be used for “live view”. This is is not recommended except when shooting certain things like macro, and of course it is necessary when shooting video.  Other than that, it just uses up your battery.
  • This back screen can be an “articulated” screen. The sure sign of an amateur is a photographer who, before each schot, moves the articulated screen all the way out, only to move it back and reverse it to “close down” the back after the shot.  This is not necessary; it just wears out the screen hinges. Moving the entire screen out will just break the hinges eventually.
  • The back screen can also be used for review – that is valid use!
  • It can be used for menu operation – also good use.
  • It can optionally be used to set common settings. If you have alternate options (like a dedicated button, or a small LCD screen on the top of the camera), then those are better. The large back screen tends to be slower and it uses up a lot of battery power.

Then, you may have a dedicated screen on the top (and sometimes, on pro bodies another one on the back) that is much smaller and not normally luminescent. That screen is a great option for adjusting settings: it uses much less power than the back screen.

Finally, the viewfinder contains a small dedicated screen (on some cameras a large screen). I prefer optical viewfinders, but these LCD viewfinders can have valid uses.

My advice:

  • Use the optical viewfinder whenever possible: avoid “live view”.
  • Avoid using the back screen unless necessary to change settings. If possible, use dedicated switches and the small top LCD.
  • Avoid using the articulated screen unless necessary. All this unnecessary moving, twisting and turning your screen will just break things.
  • Do review your images as often as you like (I do!), but do not obsess over it.

And today I have a final piece of advice for my American friends in particular: Click here.


Tool Tip

I recently received a few screen protectors for review from Expert Shield (www.expertshield.com and  www.expertshielduk.com ).

Now, you need to know: I have never used screen protectors for any of my equipment: they are unnecessary, they are messy and they get in the way of clear visibility.

But wait. Not these! These are special, and so far, I am very impressed.

When you receive the screen protector, it comes in a neat box with a special cloth to clean your device’s display. The screen protector is pre-cut to your exat device including any openings for switches, cameras, loudspeakers, microphones, etc. These are available for a wide range of devices.

The screen protector comes as three layers: one protective mask below, the actual protector, and one protective mask above. You clean your display; then you peel off the bottom mask, then put the protector over the display, and finally, when any dust and air bubbles have been removed, you peel off the top mask. The actual screen protector is a silicone gel that sits on the display without any glue or any other substance: it appears just surface tension that holds it on.

No glues, so these are not messy. They are 100% transparent and I cannot see that the protective layer is on my screen. I have used the screen on my iPhone, Canon 1Dx, Fuji x100, and am about to put one on my iPad also.

The biggest benefit for me? My devices tend to start getting dirty and they then attract dirt and grease (the iphone and ipad in particularly turn from “oleophobic” to “oleophilic”). Wit these screen protectors, it will at worst be the screen protector that starts deteriorating – and it is easily replaceable.

I am doing a long term test of these, but so far I am very much impressed, and it is not often that I change my mind on an entire field, but that has happened here: I am now converted and am happy to use screen protectors. I will continue to use these and will update you after a while – so far, an unreserved recommendation.

Michael

___

I will not accept payment for reviews: when I review products, as in this case, I am not getting paid, and I will always give my honest opinion, good or bad. If you want me to review your product, send me a copy or a loaner (depending on how expensive and large the product is) and I shall review forthwith.


Portray your era

We make photographs because we want to remember. We want to be able to time travel back at any time, back to where we were. And photography gives you that ability.

Here are a few portraits just of the last few days – taken privately, or during courses; just for fun.

My son Daniel at his high school graduation, taken with a 200mm lens on the Canon 1Dx and then cropped a little more. See how he stands out as the main subject, and how we wonder what he is thinking – this is all about communication?

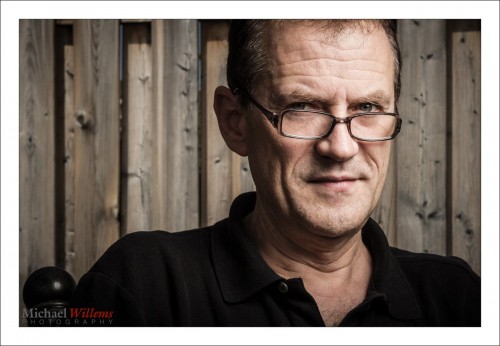
Then there’s my friend and student Brian – I used a strobe with a softbox here, and exposed for a dark background (see previous post). This is all about light and colour:

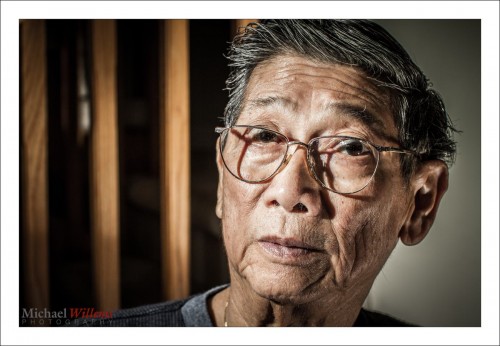
Another student in that course, but now with increased clarity and decreased saturation, to emphasize experience and character. Lit with one direct off-camera flash on our left:

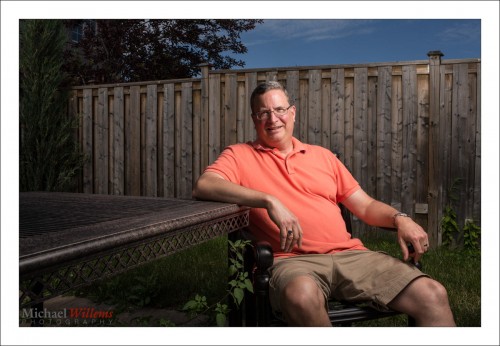
Now me, taken by Brian in the same garden setting as before – this one is all about composition:

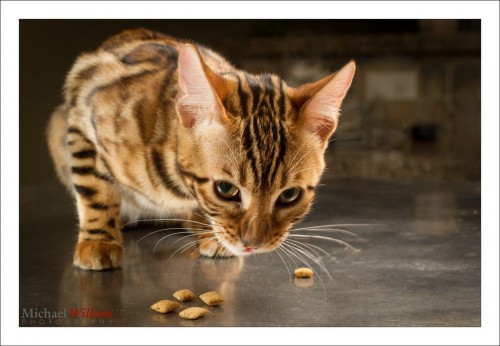
And finally, cat Mau while eating treats. Lit with a softbox on our left, behind; and a direct flash on our right, in front: I would say this is all about trust.

I think you will see that portraits tell something about the person you are portraying; can be visually interesting; and are not difficult to make. And that they are expressive of something. If you know what that “something” is, you can do miracles.

So if you want some homework, here’s an assignment: take at least two portraits today, using various light (say, one flash, one available light; or one indoors flash, one outdoors flash; and decide what the picture is about. And let me know how you do.


Recipe, another

Yesterday’s recipe was the “Willems 400-40-4 rule” for indoors flash shots.

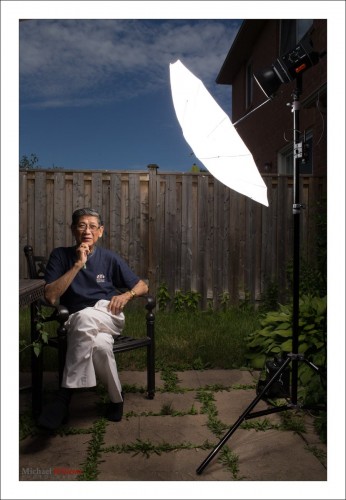
Today, another one. Say that you want to go outside for a saturated colour flash shot like this, on a fully sunny day at noon.

So for that you need a flash with a modifier. I used a strobe, but you can use speedlights if you are willing to fire them at high power and have them close to your subject.

Here’s my strobe:

Now follow my logic.

Step One: ISO and Shutter. The sun is bright and I am competing with it. So to cut the sun, I will be at low ISO (meaning at 100 ISO, the minimum) and high shutter speed (1/200th sec, the fastest sync speed for many cameras). This is a given, an “always” starting point: by default. sunny day means 100 ISO and 1/200th sec).

Step Two: Aperture. At that speed, a “normal” exposure would be f/11 (this is the Sunny Sixteen Rule in practice – look this up on this blog – yes, there is a reason I teach you all this stuff. At 200 ISO it would be f/16 “sunny sixteen”, so at 100 ISO, we’d need f/11.). So we arrive at 1/200th sec, 100 ISO, and f/11… this looks like this:

But wait – I want that background darker, to get saturated colour as in the first shot, not light as in the second shot. So we go to at least f/16, one stop darker than “sunny sixteen”. Now, indeed the background is darker.

Step three: Flash power. Now we adjust the flash to give us enough power to get to f/16. If we are using a small flash, that means no modifier (loses too much light); if using a strobe, we adjust it until the brightness matches f/16. Use a meter, or use trial and error.

So the method was:

  1. Set low ISO and fast shutter;
  2. Decide on aperture you want;
  3. Set flash to match that aperture.

And to this, we add:

  1. Use a modified flash if you can – like shooting through an umbrella, as I am doing here. But modifying loses power, so you may need a direct flash, or have the flash very close to the subject.
  2. Use off-centre composition (avoid the centre – use the Rule of Thirds).
  3. See if you can get diagonals included to lead into the image and give it depth.
  4. Avoid direct sunlight on the subject’s face: it shows wrinkles and it causes squinting. Sun from behind gives you “shampooey goodness” instead: much better.
  5. See if you can angle the flash w.r.t. the subject, off to the side, and turn the subject into that flash. Also raise the flash 45 degrees (looks natural and you see no glasses reflections).
  6. See if you can get lucky and include all three primaries, red (-ish); green and blue, in the image. If so, you have a good image!

Let’s see that image again. Click on it and click through to see the original image at full size:

That looks like a photoshopped image, and yet it is not – it is the way I shot it in the camera. yes… and I can teach you the same – it really is simple, once you get the idea.

___

The Pro Flash Manual e-book is designed to teach all this and much, much more, and it dovetails into this site and into my classes. Learn about both these e-books here on my web site. Want to learn? Check out www.cameratraining.ca as well.


Simple Setting Tip

You have all heard this before, but one more time: here is a simple setting for “indoors flash in a typical living room”. For photos like this, in other words, of my friend and colleague photographer Taha Ghaznavi:

Not bad, eh? Would you like to learn to make photos like this, with those nice warm background colours, and natural looking shadows? Well – you can, if you have an SLR and a flash. Here’s how:

  1. Camera on MANUAL (“M”)
    1. ISO: 400
    2. Shutter: 1/40th second
    3. Aperture: f/4
  2. Set the White Balance to FLASH
  3. Ensure that the Flash is set to TTL (that is its normal auto mode: it says something like “TTL” or “ETTL” on the display on the back).
  4. Aim the flash 45 degrees up – BEHIND you (ensure there is a ceiling or wall).

Magic! Your background is dark, but not too dark. There’s no reflection off the glasses. The face looks not flat, but three-dimensional.

Simple starting settings like the Willems 400-40-4 rule above are important. Recipes. Of course they are just that – simple start settings. If your subject is too dark, for instance, it may be that the ceiling is too high for good bounce. In that case increase your ISO to 800 or even to 1600. Or if your subject is wearing white, you may need “+” flash exposure compensation. And so on.

So you may need to vary, but by starting with good rules of thumb like the Willems 400-40-4 rule you will not be too far off for a start!

___

These recipes are the basis for my Photography Cookbook – a recipe book that will get you started with many good situations. But a thorough knowledge of the fundamentals is also needed if you want to be a good photographer. The Pro Flash Manual is designed to teach that. Learn about both these e-books here on my web site.