Tomorrow…. TODAY!

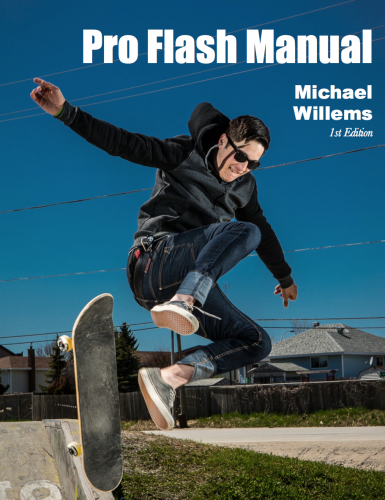
Announcing the release of what in many ways is my Magnum Opus: my long awaited Flash Photography book!

SATURDAY, 8 JUNE: IT HAS JUST TURNED TOMORROW!

This is a downloadable e-Book (that is: you pay, and I send you the link by return, usually in minutes), in convenient PDF format:

This 123-page PDF lays out, in a very logical fashion, everything I know about flash. This book has been a long time coming because the main thing I wanted to solve was the question of how to teach flash properly. Flash I already knew; how best to convey what I know took longer. But it’s done!

“I find this one is almost like you are there explaining it in person. It makes me want to go out and try what I have just read”. – Lisa J, Timmins, ON

Many years practice in both doing and teaching flash photography, and my prior business experience and engineering education, resulted in what I think this is the perfect way to convey my knowledge.

You judge – $19.95 for the 123-page manual, packed with information, and richly illustrated with examples. Buy here.

Chapter titles:

Introduction 8
A Few Words About Learning 10
Photography Basics 12
Flash Basics 25
The Flash/Ambient Mix 36
Modifying Flash 44
Problem Solving 62
Using One Flash 74
Off Camera Flash 97
What You Need 113
And from here? 120

This book will change the way you look at flash. Instead of thinking of flash as a way to add light, you will think of flash as your creative tool par excellence; and as a tool that makes things easier.

This book will demystify flash. The things you never thought were easy, actually are. The secrets will be unlocked. You will frequently say “Is that how it works?”.

This will make you creative. Creativity is often hampered not by lack of thoughts, but by lack of knowledge. Knowledge and ideas are what you need: Problem Solved!

This book will take away your misconceptions. There are many common misconceptions and half truths. This manual teaches you the real truth behind them.

This book will allow you to get results from your current camera. Even if you only have simple equipment, I will teach you how to use it well. You do not need studios to get studio results!

This book will give you checklists. There are many good rules of thumb, starting points, and checklists included. This is often the secret to good results.

The eBook format has some unique advantages for you:

  • CONVENIENCE: this is an Electronic Book formatted for reading on iPad and on your computer.  I do not addle you with “Digital rights management” restrictions like most book authors. You will never see “not authorized on this device”. You can copy and read it on all your devices, forever.  I trust my customers.
  • COST: Because I self publish my books, there’s no Middle Man like Amazon, Google or Apple to take a large portion of the money. That means I can keep the cost down for you. Comparable books on similar subjects cost three or four times more.
  • FUTURE PROOF: It’s digital. There will be a second edition soon, no doubt, with any misconceptions explained and errors fixed and new material added – and when that happens, you are entitled to the new edition at no extra cost!

Many years of Flash photography knowledge for just a few dollars: head on over to http://www.michaelwillems.ca/Buy_Book.html and get your copy. And take pro shots by the end of this weekend!

 

Update time?

A reminder – firmware updates for cameras happen, and they usually improve things. So I just updated my Canon 1Dx to the latest firmware: link here. I also checked that my 7D (same link) and Fuji x100 were up  to date (link here).

So if you have not updated your cameras firmware recently: check that you have a full battery and a newly formatted (in-camera) memory card, and go google the availability of new firmware.


Thanks to…

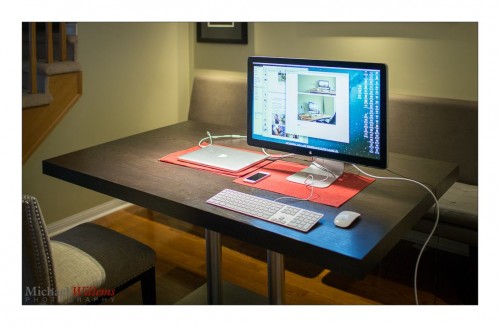
…Peter McKinnon for pointing out yesterday how beneficial a clean workspace is. As it happens, I was cleaning mine as he sent that:

This by the way is my laptop plugged into a new 27″ Apple Thunderbolt display. The display powers the laptop as well as connecting various devices (it has USB2 and Thunderbolt outputs and more). It also has built-in speakers but those took me a while to figure out – you have to enable them in AUDIO settings in your system preferences.

Anyway: if your workspace is not this clean, go fix that now. You will be inspired to work harder, I promise.


Live to teach!

I live to teach – have you noticed? And I am hoping you live in part to learn to be a professional photographer.

I live to teach my skills, secrets, and need-to-knows, and there are many opportunities coming up for you to benefit. Of course there’s this daily blog, but get some one-on-one!

  1. See www.cameratraining.ca for details of my upcoming Oakville and Hamilton courses. Booking pages aren’t up yet, but bookings are open already, just email me.
  2. I do personal coaching and portfolio reviews, too… contact me!
  3. July: teen workshop in two parts at Oakville Library.
  4. Sheridan College’s fall course in Oakville is open!
  5. A really exciting one: August 18-22, the Niagara School of Imaging course is open! http://niagaraschool.com/michael-willems-the-speedlighter/
  6. Vistek Toronto is planning new courses. Stay tuned!
  7. My eBook is out – do you have it yet (click here) ? A 52 “photographic recipes” manual that should go with you everywhere.

Moreover, my next eBook, on Flash Photography, is due out soon! Lots of ways to learn, and this is a great time to get started with that learning.

Michael


It’s 2AM, or “a day in the life”…

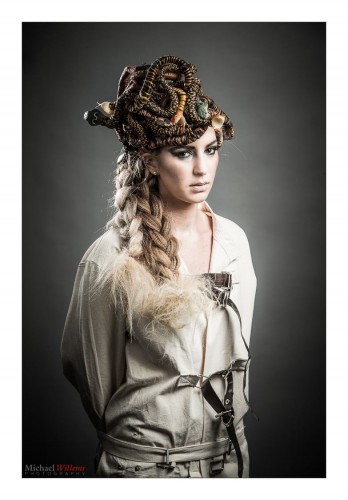
…and I am back from an impromptu shoot. A friend and student needed some help with a commercial shoot for a high-end hair salon. 11AM-7PM they did the hair; 8-11pm my friend was shooting. Except it didn’t go too well. So I drove up to lend a hand.

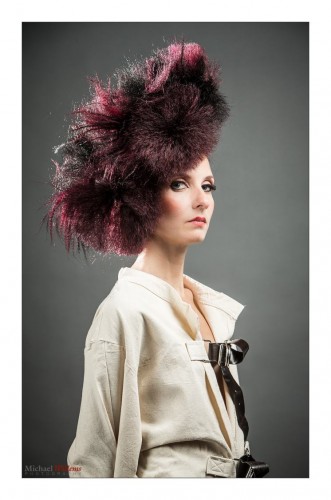
The salon owners are extremely creative. And Italian. That made this a very pleasant shoot. Here you go; Medusa in a straightjacket:

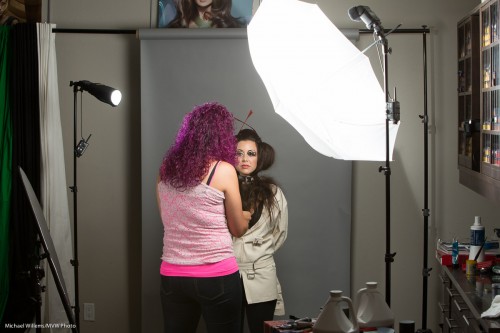
I had to first pack my portable studio into the car. Then drive 60km. Then quickly unpack, and quickly ask my colleague to set up a backdrop: I had brought the grey paper backdrop, because grey can be made anything from white to colours to black. Time was short by now.

Then the lights. I brought the strobes, but decided to use the speedlights. Lighter, smaller, quicker. A hair shoot means a main (or “key”) light shot through an umbrella, and a reflector for fill.  And, very important, a hair light through a snoot or grid for “shampooey goodness”.

For consistency, I used Pocketwizards and manual settings on the flashes. If this had been an event, I would have used TTL.

Here you see the setup:

Then, metering – flash set to half power gave f/7.1. At 200 ISO and 1/125th second. Done. Now I can concentrate on shooting the fabulous creations!

Part of the skill that goes into a shoot is in areas like problem solving and technical knowledge. But a larger part goes into deciding on the positioning. The people skills, in other words. My colleague is very good at those, so I am looking forward to seeing her work.

In any case: including the drive, five pictures took me about seven hours altogether to make; and that is not counting the post work – the pictures above have had minimal editing done. So now you know why pro photography costs money.

I would add more here, but it’s 2:15Am and I need some sleep!


Group Shot Basics

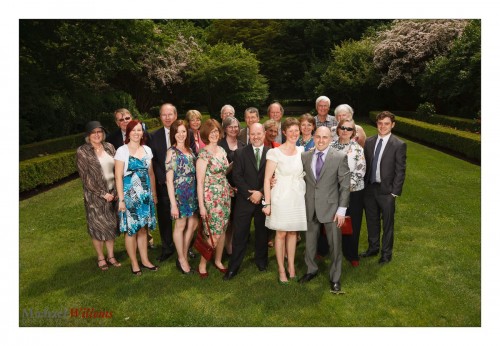
Another post on group shots. Here’s another take on a good group shot I made at a wedding:

I shot that as follows:

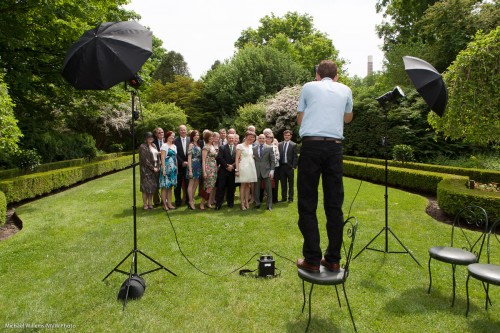
  • At 1/250th second, 100 ISO, f/8.
  • Using a 35mm lens.
  • Using two strobes (battery-powered) fired into umbrellas.
  • Using Pocketwizards to fire them.
  • Me standing on a chair.
  • Shooting into the sun’s direction (i.e. the group is turned away from the sun).
  • White balance set to “flash”.

That looked like this:

Shooting properly gave me a much better shot, wouldn’t you agree? I have saturated colours. The audience are the “bright pixels”. My perspective show everyone, not just tops of heads, and the backdrop is vegetation. Turning the crowd away from the sun prevented squinting.

And that’s how its done!


The Seven Benefits To Wide

A lot of my teaching involves lenses, and lens choices. Tough choices, especially when you cannot just “bring them all”, for example when you travelling.

For travel, my favourite lens, as you know, is the extreme wide angle. “Wide angle” for me in this context means 16-35 on a full frame camera (10-20mm on a crop sensor camera); used usually on the wide side (16mm, for me; 10mm on a crop sensor camera).

Yes, the first reason is obvious: a wide angle lens allows me to “get more in”.  But this “pedestrian” reason is not at all the main reason I like it. First there are three additional “creative” advantages:

  1. I get nice diagonals.
  2. I can easily introduce depth (“close-far”).
  3. The wrap-around feeling that is so good for environmental shots – which is what travel shots often are.

There are three practical benefits, too:

  1. A wide angle lens is usually smaller  and lighter than a longer lens.
  2. I can shoot with slow shutter speeds without blurring the image.
  3. It is easy to get very extended depth of field, even at low “f-numbers”.

Now you see why I like wide angle lenses. “It’s like you’re there”:

___

Did you know I can teach you the ins and outs of your specific camera? Come to me for a short 1-2 hour session and we will fully set up your camera; I will teach you its menus and its custom settings; you will learn its quirks; and I will answer all your questions. Any camera type/brand; $125 per hour.


Born to be punished

Pixels, as Frederick Van Johnson says, were born to be punished. While I do not always agree with this, it sometimes makes sense to alter images a little.

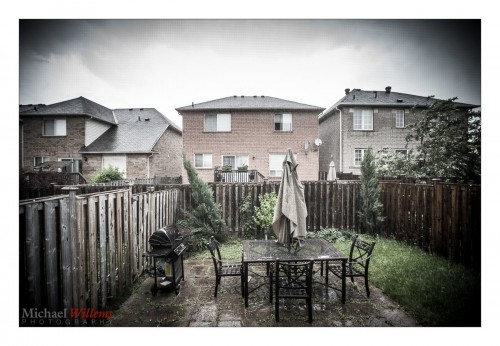
Take the rain outside, this past afternoon:

Nothing wrong: that’s what it was like outside my kitchen a few minutes ago.

But I could make it desaturated with extra presence (basically, a one click preset adjustment in my Lightroom), to accurately reflect the mood I felt, “what I felt I saw”. Then it would look like this:

More stark and threatening – and severe thunderstorms do feel like that, don’t they?

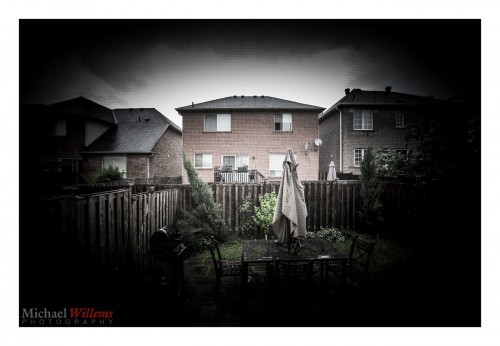
Or I could go to town and darken the outside completely. Now it doesn’t reflect what I saw – instead, it becomes something entirely new:

All three have merit in their own way, so let me reiterate my tips:

  • Do it in camera if you can! “Post-work” should not generally be a substitute for good technique.
  • That said, cropping is always OK. So is white balance adjustment, and so are small exposure changes.
  • Modify nothing (other than white balance, exposure adjustments, and cropping) if you are shooting news.
  • Do feel free to modify to get back to “what you saw”.
  • Do feel free to modify to be artistic.
  • That said, try to avoid trendy changes that you know will not be cool anymore in a few years time.
  • Realize that the more modifying you do, the less you are a photographer and the more a graphic artist.

And finally: do not forget to learn basic photography skills. No changes should be a substitute for knowing those skills. But once you know those skills – you can go crazy and edit, or do the minimum.

Now go have some fun. Learn Lightroom!

___

Did you know I can teach you Lightroom? Come to me for a 2-4 hour session and we will fully set up your Lightroom and file storage and backup strategy; and I will answer all your questions. $125 per hour.


Crop, how much?

“How much can I crop”, I am often asked.

Depends on what you need – look at the remaining pixels after you crop.

Here’s how many pixels you need:

  • A longest dimension of 3,000 pixels is enough for a good 8×10 print or a little larger.
  • 1,200 pixels for a web site
  • That, or perhaps 1,024 pixels, for an email attachment.

So as long as you crop to at least those kinds of sizes, you can crop all you like. This is one big reason for always shooting RAW, or large jPG,  of course: more pixels to play with.

And it is pixels you should worry about, not DPI. (Or DPI x Inches, but why express it in two numbers when one suffices?)