Fix your pics

A “product”: picture, like this iPhone shot of my watch, needs some TLC.

Let’s look at the “before” and “after”:

Look at that full sized, and you will see the healing brush spots!

And these small improvements make a big difference. An iPhone is fine given the right circumstances, but the TLC is not an option!


Back in Ontario…

…from the Caribbean.

And the first thing I did is set all my cameras to the correct time. Which was easy, because they were already set to the correct time, since I came from the Caribbean. But for those of you who did not:  set all your cameras to the correct time now!

And here’s a few pics from last week. More, and some advice, to follow in the next days. Stay tuned!


Sunny? Sixteen!

You have heard me talk about the “Sunny Sixteen” rule before. This is a very useful rule of thumb that allows you to shoot without using your camera’s light meter. The rule is:

If your shutter speed is set to 1/ISO (e.g. 125 ISO at 1/125th sec, 200 ISO at 1/200 sec, or 400 ISO at 1/400 sec, etc), then on a fully sunny day at noon, f/16 will give you the right exposure.

Like this, at f/16:

And if it is not sunny?

f/16 Sunny Distinct
f/11 Slight Overcast Soft around edges
f/8 Overcast Barely visible
f/5.6 Heavy Overcast No shadows
f/4 Open Shade/Sunset No shadows

(Source: Wikipedia)

This rule is a rule of thumb, so feel free to vary – I often expose two thirds of a stop higher – but since the sun is always the same brightness, it holds well. And it is nice to be able to expose without light meters, if only in order to be able to check your camera.

Bonus question: how do you expose the moon?

Answer: f/16. The moon at noon (there, so any time here, including night) is as bright as the earth at noon- they are the same distance from the sun!


Watch!

So. You want to shoot a wristwatch:

Watch at full size: it’s gorgeous.

But not all shots—especially iPhone shots like this one—start out that way. This one is no exception. It started differently:

As you see, I did a few things, and all watch (and most product) photos are like that.

  • I changed the geometry. To avoid reflections I had to shoot at an angle. I had to use the “Transform” pane with manual adjustments to fix that.
  • I changed exposure settings (blacks especially).
  • I removed noise.
  • I used the brush adjustment tool to increase contrast on the face.

And lastly, I removed any imperfections:

And that’s how it is done. So when you see a perfect watch photo and wonder why you can’t do it this way, rest assured that the pros don’t, either.


Who says?

…that you can’t get blurry backgrounds with an iPhone? And I don’t mean fake backgrounds, like with a newer iphone with two lenses, either. Here:

Just…

  • Get close!
  • Have plenty of light
  • Get close!

That’s all. Simple, really. Get close and your background is comparatively far, so it gets blurred.


Post work needed?

For most photography, I recommend keeping post work to a minimum. Quick crop, perhaps a small exposure adjustment: done. For some types of photography, like press photography, adjustments of any other type are forbidden.

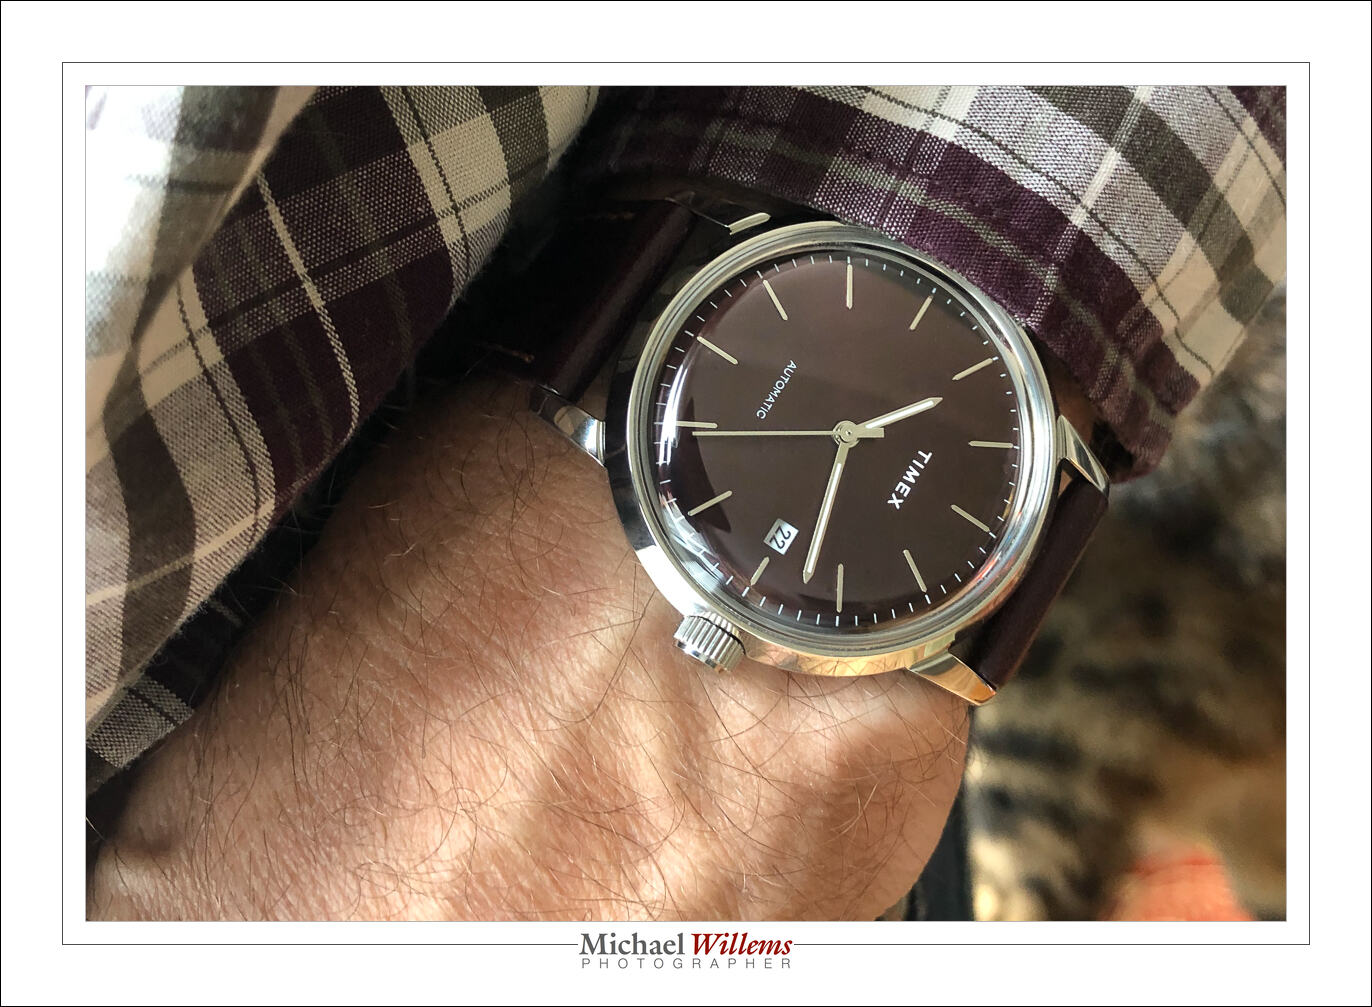
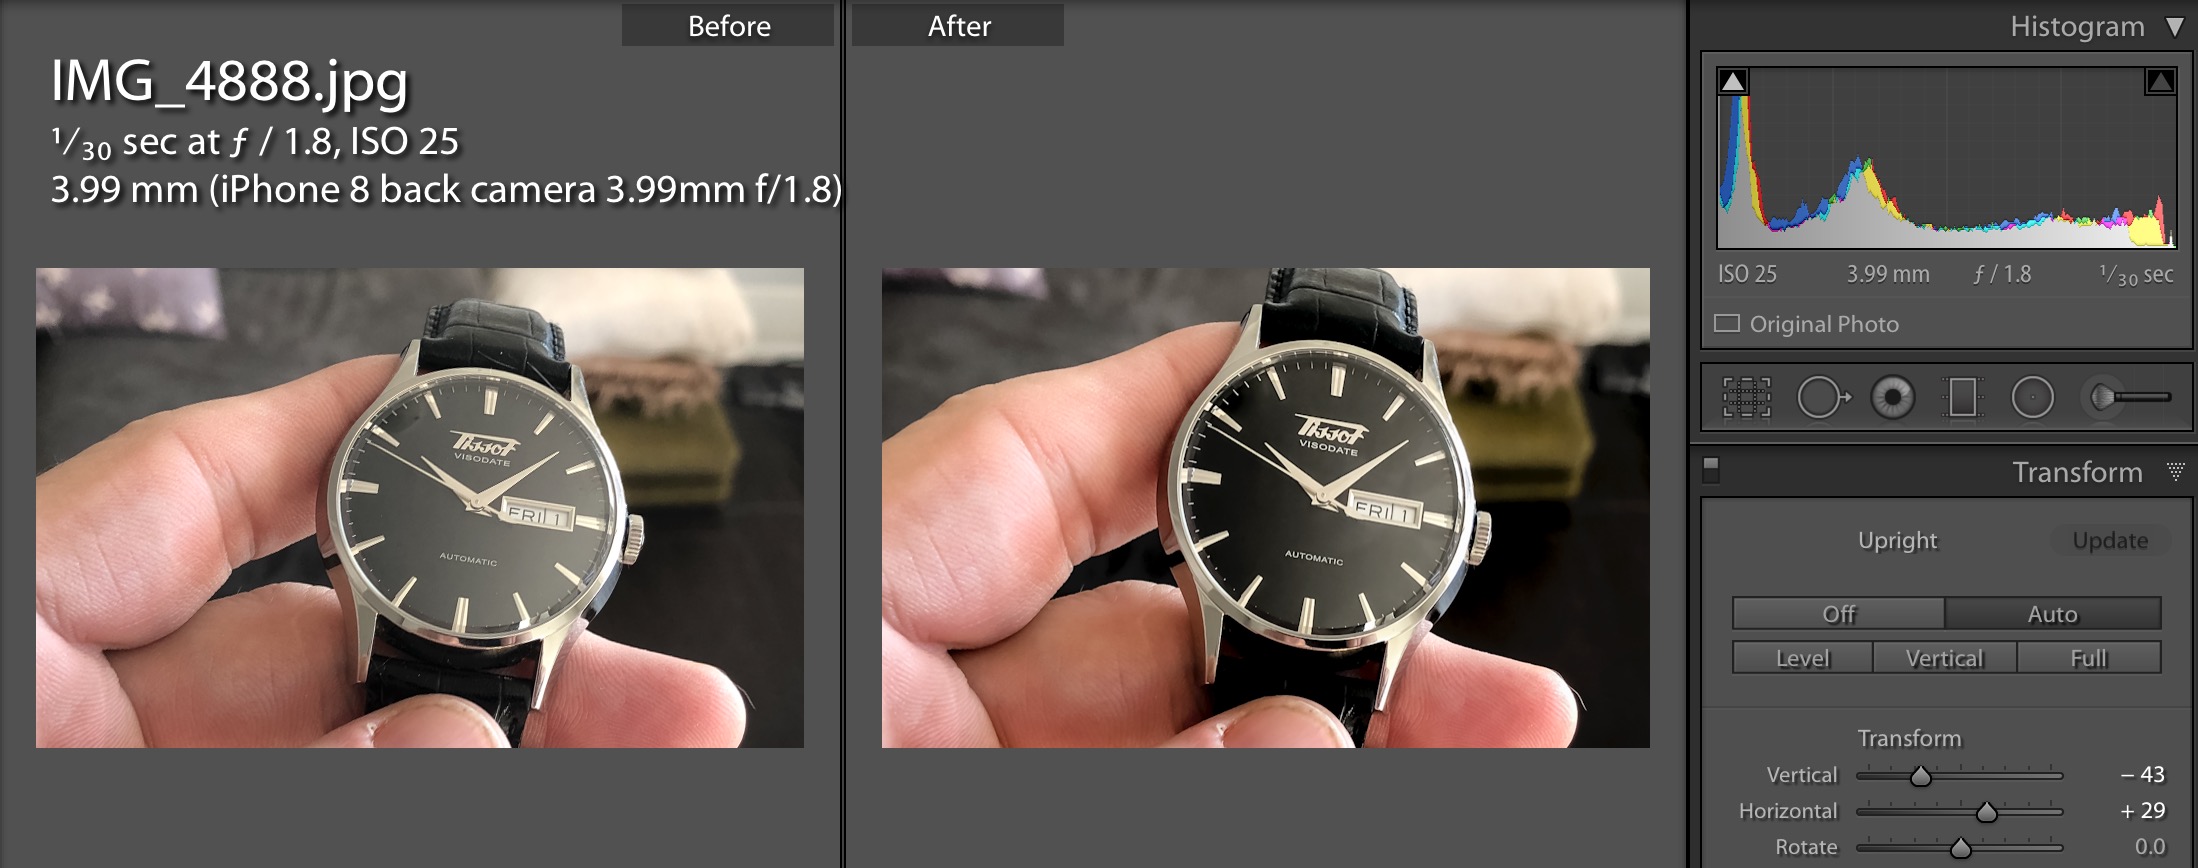
But for some, they’re necessary. Even an iPhone product shot like this, of my Glycine watch, needed some TLC:

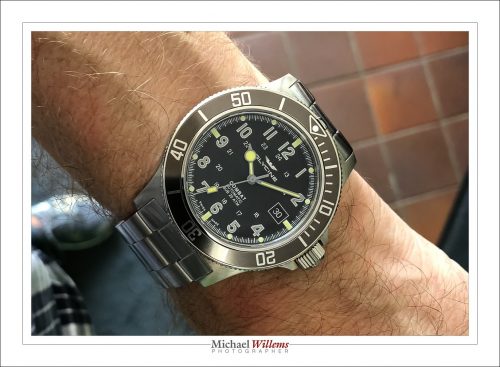
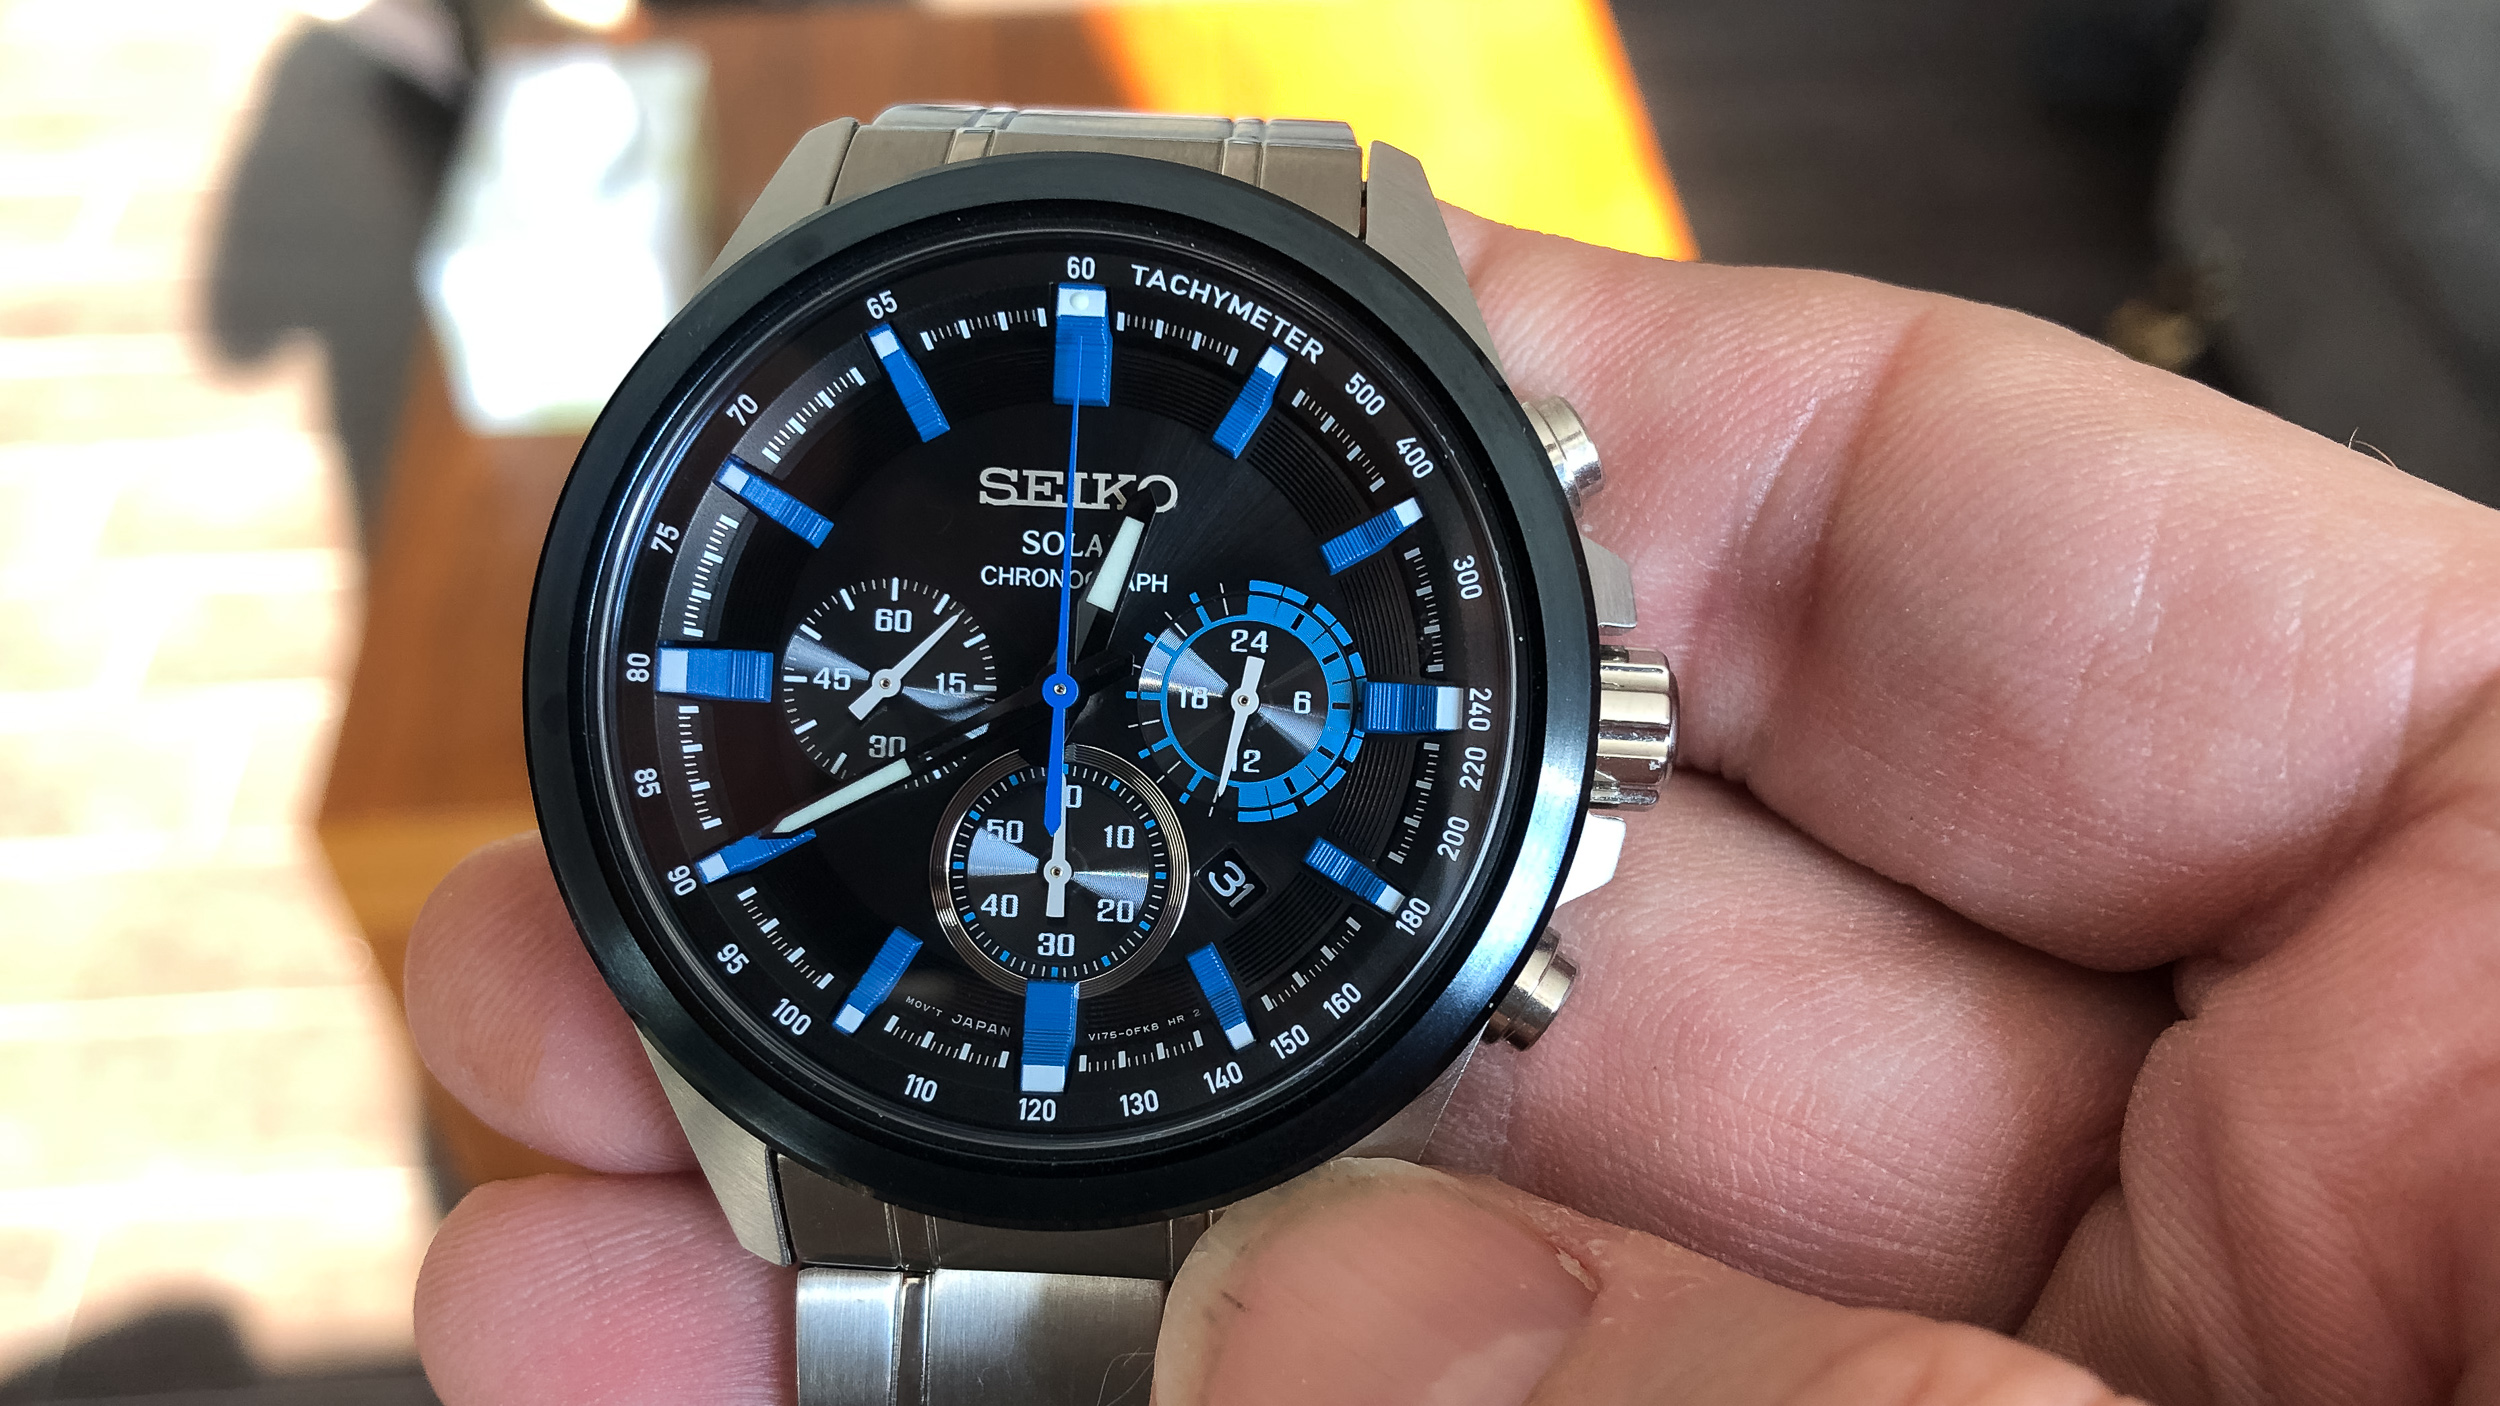
That’s one of my watches. Click on it to see the full version. And notice how perfect it looks. No dust at all, no smears or scratches, great contrast, and so on. All watches always look hyper-perfect in all ads.

And that’s because they’re hyper-edited. Things like focus stacking, and expensive editing.

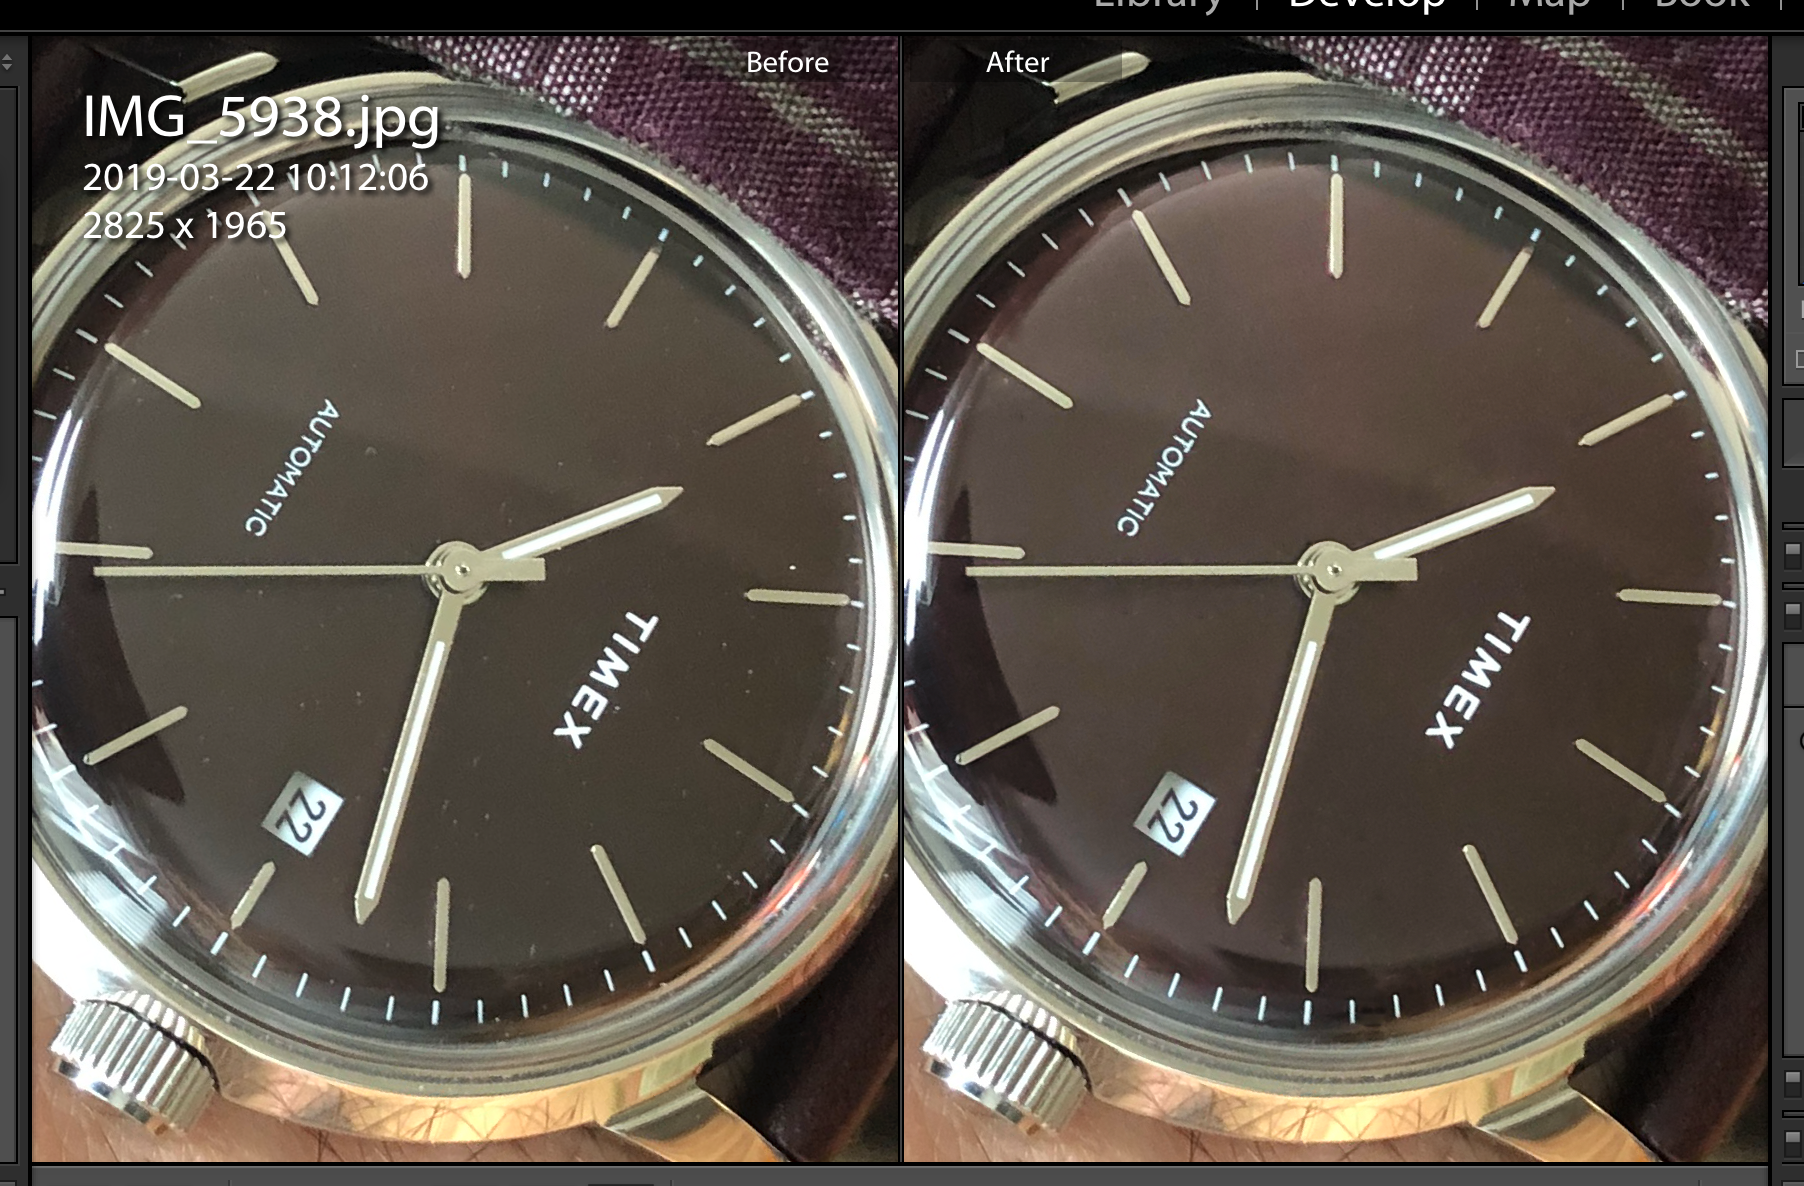
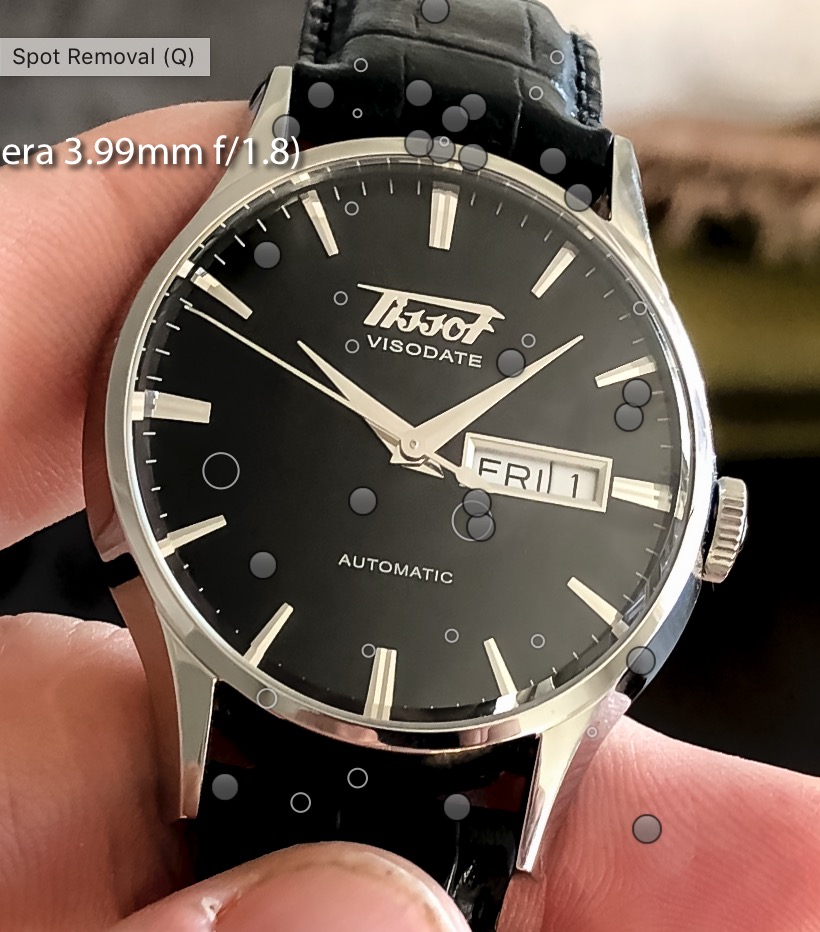
In mine, above, I removed every speck of dust using the healing tool in Lightroom. Then I increased local clarity and decreased exposure on the watch face. I added a tad of sharpening and then noise reduction. And although small, the effects of these edits are important.

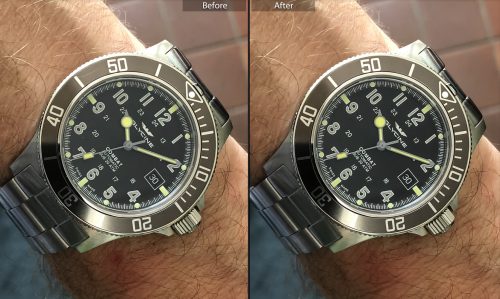
The good news: most of these edits are easily doable in Lightroom. For a commercial advert, you need Photoshop, but for everything else, Lightroom is fine.


Yesterday’s workshop

It is minus 28 degrees Celsius. Yesterday, I taught a Creative Flash Photography workshop in Timmins, Ontario. Here’s a sample!

High key:

Some creative gel use:

A snapshot showing the setup for the next shot:

And here’s the shot!

…which also works in B/W:

A simple one flash grid portrait:

And two together:

Fun was had. Flying me out to anywhere for a workshop like this is worth your time: hands-on learning so beats only reading a book or watching a video!


Why manual?

Especially when shooting with flash, your camera (though not necessarily your flash) needs to be in manual mode. I’ll show you why.

This is Aurele Monfils in Timmins today, in auto mode:

And here is Aurele in manual mode:

In manual mode, I made a few adjustments. Namely:

  • Shorter shutter speed
  • Higher ISO
  • Flash TTL minus one stop (FEC, Flash Exposure Compensation).

After these, as you can see the dashboard is no longer unnatural looking, and you can actually see what little late afternoon sky blue there was.


Portraits… plus ça change.

A repeat post from 2015, showing that things do not change much…


I very often hear people who are a little ahead of themselves. They do paid portrait shoots before learning how to focus, that sort of thing. They do not want to learn formally, for instance from a course, or books, or seminars; and yet they expect the knowledge to come to them for free, somehow.

Wishful thinking, and you know it. So let me grab a few of these things by the horns. Starting with portraits. You are doing a studio portrait; you have a backdrop; but the rest is mystery. So your images end up:

  • Badly lit.
  • Under- or overexposed.
  • With a background that is sharp instead of blurred.
  • With the subject not separated from that background.
  • Out of focus.
  • With the background white, not coloured even though you use gels.

That is because you never learned the basics. But there is good news: studio portraits are simple. All you need to learn is:

  • Lighting. A main light, 45 degrees away from subject. A fill light, same on other side. Hair light, opposite main light. See diagram, from my new book:

  • Exposure. Set your camera to manual mode, 1/125 sec, f/8, 100 ISO.
  • Turn the flashes to half way (obviously  the flashes are on MANUAL too).
  • Now meter the main flash. Adjust main light until it reads f/8.
  • Same for hair light.
  • Fill light: meter this to f/4 (i.e. adjust this light until meter reads f/4 when it flashes).
  • Background light: same as main light, again.
  • White balance to “Flash”.
  • Focus using one focus spot. Focus on the eye using that one spot.
  • Use a lens longer than 50mm. I prefer my 70-200 or my 85mm prime.
  • Move subject from background as much as you can. Then you can gel the background light. If, whoever, much of the normal light falls on the background, you cannot gel. Test this by turning OFF the background light: the background should be dark.
  • Turn subject toward main light, then head slightly to you.

Like this:

That really is all. Click., You have a competent portrait.

What you must not do is pretend that no learning is necessary. Go find a course, go buy my e-books; read this free resource www.speedlighter.ca; take private training; sign up at Sheridan College; : whatever you can do, do it now.

It really is simple. But not as simple as “I just bought a camera and next week I am shooting a wedding”—and believe me, I have heard that very statement more than once.