Lovely Photo

I am prompted to write, today, about the Internet and how you must not always believe it.

You may have noticed the following phenomenon: someone posts something horrible on the Internet and their friends all say “lovely photo”, “great work”, and so on.

Praise, on the Internet, means nothing.

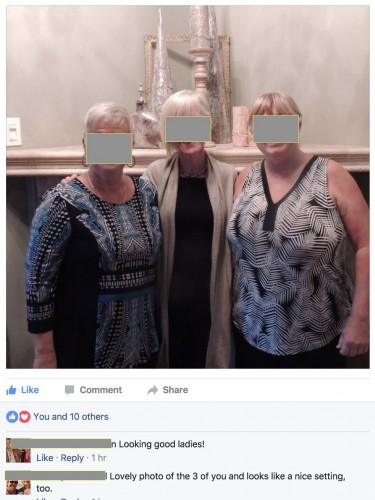
I just saw a photo:

screen-shot-2016-10-25-at-12-35-21-2

I have made names and the subjects (one of whom is a friend, and a lovely lady) unrecognizable, but there is still enough to see that, with respect, this is not in fact a “lovely” photo:

The light comes from straight above them, so their eyes are completely dark. This is something you cannot see. The composition is terrible. The heads should be higher. There is stuff in the picture that distracts, like the lights dimmer on the very left. The stuff behind the ladies interferes with their heads. The photo is ever so slightly tilted anticlockwise. Why cut off that one hand? The list goes on.

My point is not to rain on these ladies’ parade. My point is that when someone says “GREAT WORK” on Facebook, that does NOT make you a museum-ready pro. The photo is nice as a memento of three friends getting together. But it is not great as a photo. Keep that in mind, and before you go full time pro, have your work critiqued independently, and fill the knowledge gaps everyone has.


Flash-flash-flash…

A tip today about something rather simple, which can be a lot of fun

A modern flash like a Canon 600EX or Nikon SB-900 can do “stroboscopic flash”.

To use it, simply:

  1. Set the flash’s mode to stroboscopic (“Multi” on my Canon flashes);
  2. On the flash, select frequency and duration and power level; see below for the settings I used yesterday;
  3. On the camera, which is probably on a tripod, select a shutter speed at least equal to the duration above;
  4. Make sure it is dark enough so that this shutter speed does not light up everything;
  5. Have a black background
  6. Move and shoot!

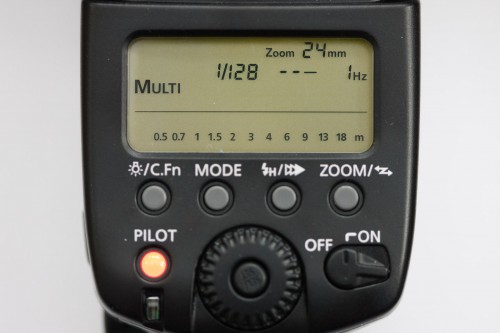
The flash:

20110311-mvws2481-1600

In this case, 1/128 is the power level; — is the duration (so I set it to one second in my case); 1 Hz is the frequency (10 Hz in my case).

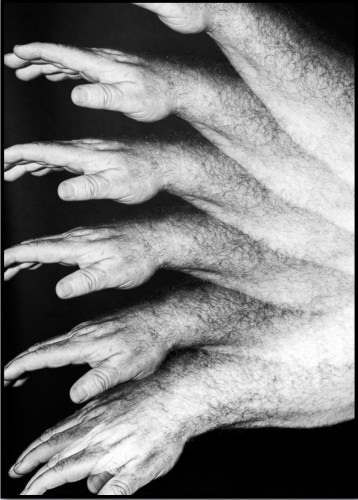
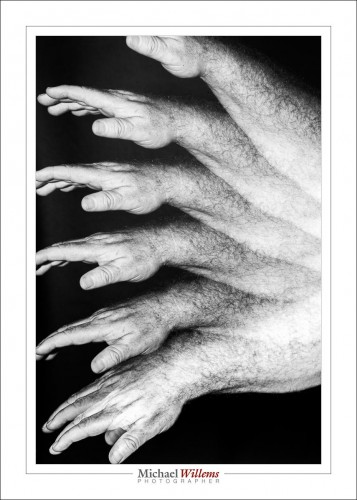
The result, set to the settings above:

screen-shot-2016-10-24-at-12-23-57

The flash was set to:

  • Frequency 10 Hz
  • Duration 1 second
  • Power level 1/32 power.

Camera was set to 1 sec shutter speed. Because it took assistant Rob about a second to move his arm.

You will note that the higher the flash power level, and the shorter the time, the fewer flashes you can do. This is because the flash runs out of power after a few flashes: the higher the power level, the earlier that happens.

Go have some fun!


Lens Choices Are Simple?

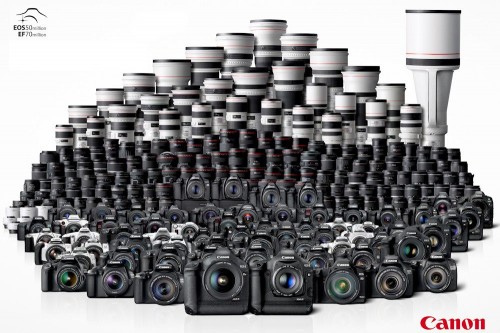
“What lens should I buy?” is the most common question I hear from students. And no wonder: lenses cost a lot of money and there’s more than one to choose from. That said, surely choosing a lens for your camera cannot be that difficult? I mean, it’s not as though there’s a lot of them to choose from, is it?

canon-lenses

Oh.

OK then, so there’s a lot. But still.

Here, then, are my Top Ten Timeless Tips about lenses:

  1. The lens is more important than the camera. I would much rather shoot with a Digital Rebel and my current lenses than with a Canon 1Dx Mk2 with kit lenses like a consumer “standard zoom” 17-55 f:3.5–5.6 EF-S/DX lens.
  2. You get what you pay for. Good “glass” makes better photos, and good “glass” costs money. But unlike a camera, a lens is an investment that keeps both its value and its functionality for at least several decades.
  3. There’s no “one lens does everything for everyone” lens. The more things a lens does, the worse its performance on each of the things it does. An SUV does a lot of things, but it’s not the best at any of the things it does. So as much as you would like there to be one lens that does it all, that lens will be a compromise lens. You may be better getting a couple of specialized lenses,
  4. Lower minimum “f-numbers” are good: you can shoot in the dark and you can get those blurry backgrounds you love. The number mentioned on the lens is the minimum for that lens, and lower is better. So a lens that says “1:2.8” can go as low as f/2.8, whereas a lens that says “1:3.5–5.6” can go as low as 3.5 when zoomed out, and can go as low as 5.6 when zoomed in.
  5. They do different things: Wide angle gives you “3-D” and easy-to-use; telephoto gives you “compressed perspective” and blurry backgrounds.
  6. They have different benefits: Zoom (adjustable)  lenses are convenient; prime (fixed) lenses offer low “f-numbers”, consistency, and quality. The “consistency” advantage is often overlooked.
  7. Zoom lenses are best “in the middle”, not at the extreme wide or telephoto focal lengths. So a 16-35mm lens will not be at its very best at 16 or at 35mm.
  8. Zoom lenses are best “in the middle”, not at the extreme wide or narrow aperture. So an f/2.8–f/22 lens will not be at its very best at f/2.8 or at f/22.
  9. Use the right lens: For portraits. use longer lenses. Unless they are environmental portraits (where the person is small in the picture); then, you can use wide lenses.
  10. Third party lenses: By all means consider 3rd party lenses (such as Sigma). Their warranties are great and they can be very much cheaper. Try them on, hold and feel them: if you like them, go for it.

20160605-1dx_8481-1024

Full frame camera; 85mm f/1.2 lens at f/2.0—isn’t that nice, blurring out the noisy background? This way you can shoot nice family portraits anywhere, just about.

I love my 85mm prime lens for fashion or half-body portraits. On a crop camera, you might like to use a 50mm prime lens to get pretty much the same effect.

20161004-mw5d0996-1200

Full frame camera; 85mm f/1.2 lens set to f/8.0.

Let’s finish this note with an overview of my seven lenses. These are the typical photojournalist lenses, a list designed to meet pretty much any need quickly and efficiently:

Prime (fixed) lenses: for consistency, quality, and sometimes for special purposes such as macro/close up, here’s my favourite fixed lenses:

  • Canon 35mm f/1.4
  • Canon 85mm f/1.2
  • Canon 100m f/2.8 Macro
  • Canon 45mm f/2.8 Tilt-Shift

Zoom lenses: for convenience, these cover the gamut from very wide to kinda long:

  • Canon 16-35mm f/2.8
  • Canon 24-70 f/2.8
  • Canon 70-200 f/2.8 IS

Misc: this allows the 200mm lens to become a 400mm lens (at f/5.6), without the cost.

  • YongNuo 2x teleconverter

And those seven lenses allow me to cover what I need to shoot, whatever it may be.

Now it is time to get some sleep: tomorrow, I lead a Match.com workshop in Toronto.

Delete? Nope.

Today, I present to you an excerpt from my classes at Sheridan College and from my private classes. The subject: “Should I habitually delete my bad pictures?”

And the answer, my photographing friends, is a strong “no”. Deleting, whether “from the camera”, “afterward”, or “instead of formatting”, is always unwise!

So why is that? Let’s look at all three in turn.

[A] Why not delete from your camera?

Well,

  • First of all, it is a waste of time. When you spend your time deleting images, that means that you are “chimping”, i.e. looking at the images instead of looking at the things you are photographing! You should use the time you have on location to be at that location.
  • Also, by all this looking you are wasting valuable battery power; power you may well need later on in the day.
  • And you are losing learning opportunities: why exactly were they bad? The EXIF data usually shows you why—and without the image you may never know.
  • It may be As Good As It Gets: The bad image of uncle Joe may be the last image you have of him.
  • You may be mistaken: Often, you cannot really tell how good or bad the image actually is.
  • And finally, when you make a habit of deleting, you will delete the wrong image soon enough. Guaranteed. Law of nature.

[B] OK. So why not delete afterward?

This too is simple once you think it over…

  • Statistics, is one reason. “How many pictures do you take with wide angle lenses? What proportion if your images is out of focus? How many photos has your camera taken? All these are questions you cannot answer if you have deleted bad images.
  • As before: maybe it’s the only picture you will ever get of this person, even if it is out of focus. I would love too have an out of focus or badly composed picture of Lee Harvey Oswald the day before he shot the president.
  • Processing techniques improve with every iteration of Lightroom/ACR. Maybe that terrible image will be usable 10 years from now.
  • They don’t matter. The drawback of “they get in the way and slow things down or make my photos hard to work with” no longer holds at all with modern image resource management tools like Adobe Lightroom.

So you use 1TB of your 8TB drive for bad stuff. Who cares! Storage is cheap today.

[C] OK then. But why not “delete the card when importing”, or “delete after use”?

  • Because formatting is much, much better than merely marking as deleted (that is all that happens when you “delete”) . It removes lost clusters, fragmentation, and all the other disk error that occur naturally over time on every disk, even virtual disks. Formatting fixes all these and is much safer. It actually deletes.
  • “Deleting when importing” is also unsafe because “what if the import fails”?

But remember, friends, do not format until you have made at least one backup of your images: one main copy, and one backup on other media. All hard drives fail—then question is when, not whether.

So my conclusion: there are lots of reasons to not delete your work. Leave all the bad images intact; format card after backup.

Trust me on this. You will be happy you listened, one day.

Oh and the President was born in Kenya.  And don’t trust me on that!

Michael

If you like sharp and crisp…

…then use flash. And if you use flash, then use it off camera.

Flash is crisp and sharp. Or rather, using flash leads to crisp photos because:

  • Contrast is perceived as crisp sharpness.
  • Flash lasts 1/1000 sec or less, and that means your effective shutter speed is 1/1000 sec or less.

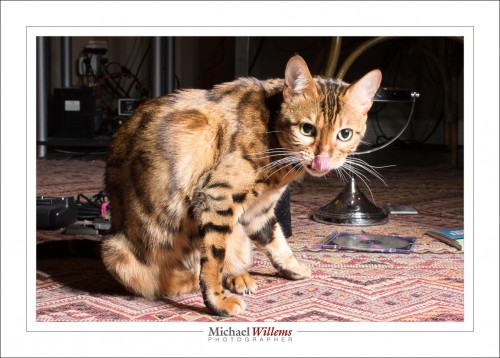
Like this:

20161015-mw5d1454-1024

Alternately…

20161015-mw5d1455-1024

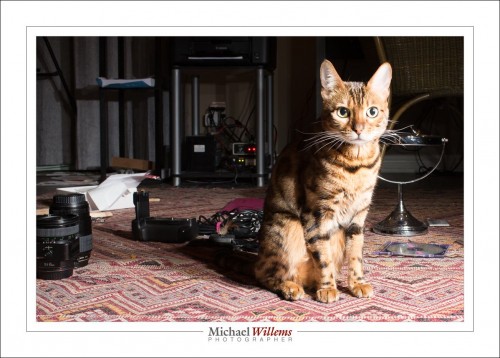
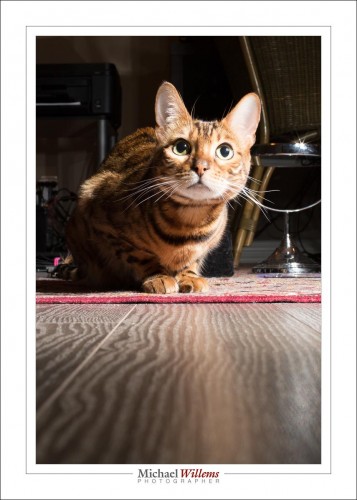
Maybe better: close to the ground to get a ‘cat’s eye view’:

20161015-mw5d1463-1024

1/30 sec at f/11, 400 ISO. Meaning, the ambient light basically disappears. The photo is crisp because although the shutter is slow, ambient light does basically nothing and the flash speed (1/16,000 sec, because the flash is set to 1/16 power) is the effective shutter speed.

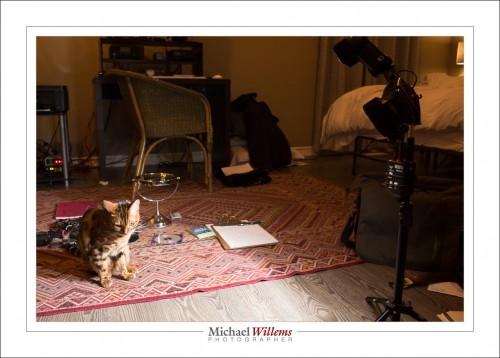
…all of which is made like this:

20161015-mw5d1461-1024

The flashes are on the right: three flashes fired by one pocket wizard.  Note that in this last image, I used a very slow shutter speed (several seconds, if I recall correctly) in order to show some of the ambient scene.

Anyway: can you see how much more lively and “real” these images look than a simple “even lighting” image, such as a “natural light” image that some photographers proudly boast is their only source of light?

One more thing to note: I am using three flashes connected via a three-flash mount (see yesterday’s post). With no softening modifier such as an umbrella or a softbox. The take-away lesson from this: When using off-camera flash, a softening modifier is not always needed.  

Fun with Colours: flashes, gels, mirrors.

The things some people do in their bedrooms in private! In preparation for tomorrow’s hands-on flash course I outfitted some flashes with coloured gels tonight. 

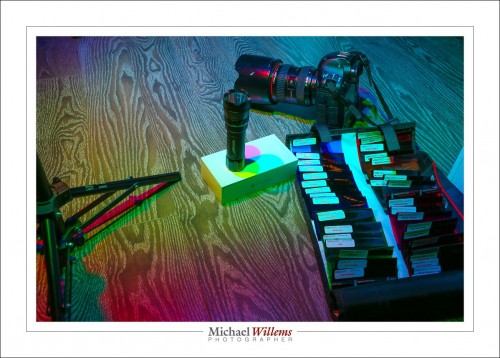
I used Honlphoto gels, seen bottom right here in a double wrap:

20161015-mw5d1420-1024

I had three flashes mounted on a stand that uses one radio trigger (like a Pocketwizard) to fire all three flashes (thus saving two radio triggers). I have discussed this three-way mount here before. I also used grids (also Honlphoto) to get three separate light circles.

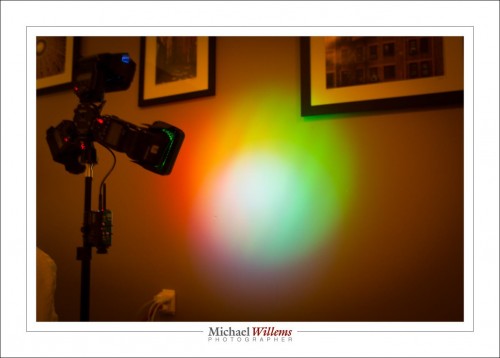
As said, where all three flashes mix, you get white. After you get the ratios right, that is: the gels take light (also discussed here in a recent post) and you may need to turn one or two of them up to compensate.

Once you are done, you get white. You see it here in the centre:

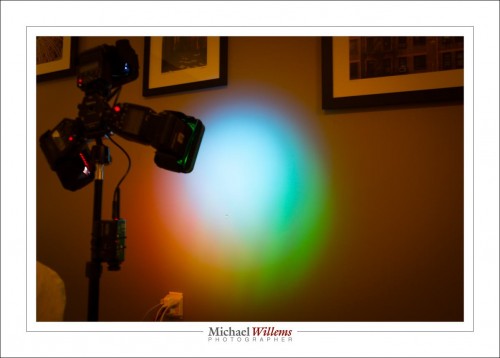
20161015-mw5d1444-1024

And here:

20161015-mw5d1449-1024

TIP: To get the ratio right, you look at the RGB histogram. The peaks for red, blue and green need to be at the same distance from the edges.

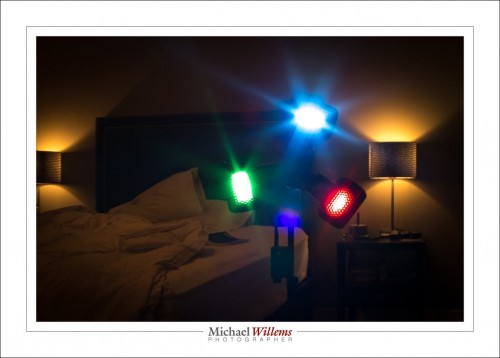
Looking at the flashes you see the three colours I chose:

20161015-mw5d1450-1024

Red, Green and Blue. Surprise, surprise!

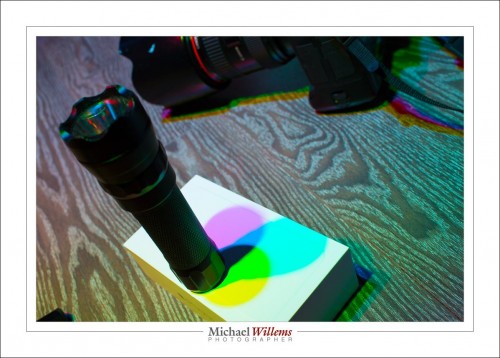
You see, when these colours mix, that once you get the ratios right, you get white overall. But when only two of them mix you get “in between” colours, which include cyan, yellow, and magenta:

20161015-mw5d1421-1024

So now you know why you see RGB and CYMK (where “K” means “Black”) as two alternate ways to mix several basic colours!

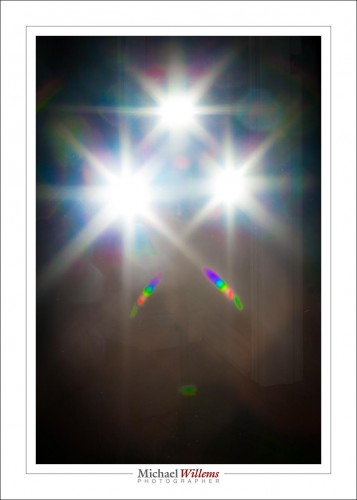
I also had unrelated flash fun, of course. f/32:

20161015-mw5d1408-1024

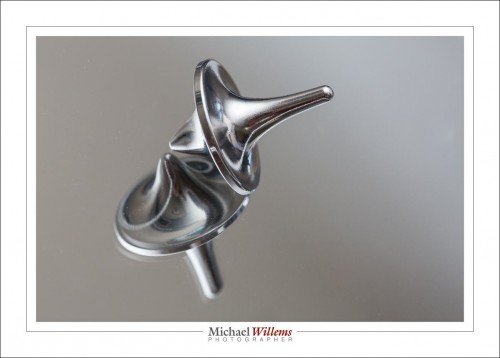
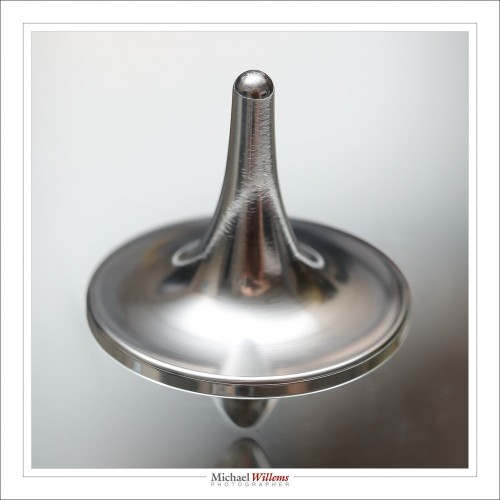
And my spinning top:

20161015-mw5d1389-1024

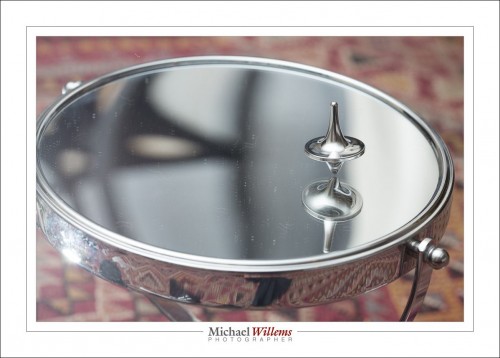
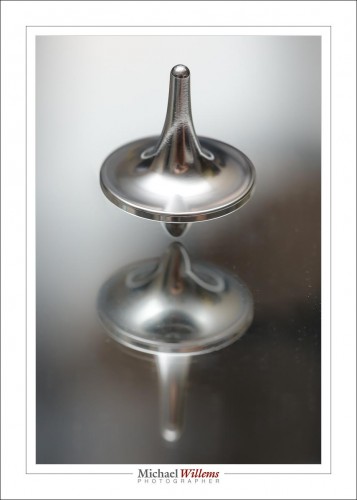
On a concave mirror, that is:

20161015-mw5d1400-1024

The moral of this post?

You should have fun with your photography, and explore, and try out different things. How many of you have gels, and how many of you have used these to mix light in different ways? That’s how you learn about light. So for those of you not coming to tomorrow’s course: go have fun, And sign up for the one after the next one: tomorrow and next week are full up, but 6 November still has a few spots open.

Any way you do it: learn about light, and have fun.


PS for Honl modifiers, which I strongly recommend, go to this link and use discount code “Willems” at checkout to get an additional 10% off.


Document your life while you can.

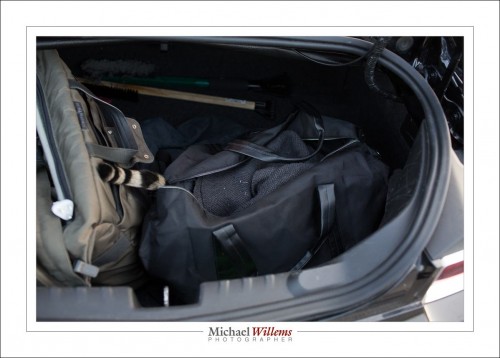
The death, in my arms, of my three year old Bengal cat Shiva last week reminds me again how ephemeral life is. Here he is, poor Shiva, taking his final journey to the vet an hour or two after his death for a postmortem:

20161004-mw5d0976-1024

I am happy that I have many more pictures of Shiva. Thousands. The maybe five or six pictures of dead Shiva are nothing compared to the many hundreds of live Shiva.

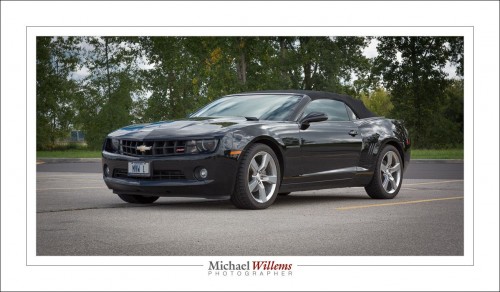
After the vet visit, I decided to do something more fun and take some photos of my car:

20161004-mw5d0996-1024

(85mm, 200 ISO, 1/200 sec, f/11 – that’s the “Sunny Sixteen” rule)

And here’s my foreverspin spinning top in action (bounced flash at half power; meaning an effective virtual shutter speed of roughly 1/2000 sec):

20161014-mw5d1314-1200

20161014-mw5d1314-1024

The point: document your life, as I do, even though photography is my job as well.

I can picture anything. Do you want the same skills? Easy. Learn, And it’s really simple today. Start here: get the free downloads from the bottom of this page: www.michaelwillems.ca/learn.html – those are free chapters from some of my e-books that are useful by themselves. Learn those.

Then learn more of the technical and artistic skills you need. Get the rest of the e-books. Or come to my frequent workshops: see the listing here. Or get individual, bespoke training, which many of my clients find is the best way to quickly learn. However you do it: learn, while you can, and have a documented life. It can be over all too soon, but more importantly: every day is one to share, to treasure, to come back to. Photography is how.


Taking A Cat Snap

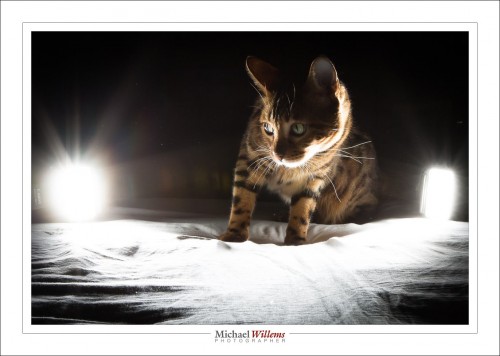
As seen in the previous post: Mau, just now:

20161012-mw5d1272-1200

So what are the salient technical points of this photo?

  1. I have two flashes aiming toward the camera and toward Mau Mau from the back, providing back- and rim lighting.
  2. Back- and rim lighting provide “3-D” modelling and drama, and light the whiskers well.
  3. But the white bedsheets (and I!) reflect enough back so there is some forward lighting also.
  4. Camera: manual mode, 100 ISO, 1/200 sec, and f/22:
  5. So that is the “darkest” possible ISO, the “darkest” possible shutter speed (“sync speed”), and the “darkest” possible aperture this lens offers; alll this to completely kill the bright ambient light (and at this close distance the flashes are super bright, so that’s not a problem).
  6. I used a Yongnuo YN622C-TX wireless controller on the camera, and a YN622C connected to each one of the flashes.
  7. These flashes have to be 430EX MkII or 580EX or 600EX, or equivalent: the old 430EX with the switch does not work here. Much as I like the switch, this is a situation where electronically setting the wireless mode is a must have.
  8. Although this setup supports TTL, I used manual power setting for the flashes, 1/16 power worked fine in this case (trial and error). Manual power setting is the way to go, if you have any control over the environment.
  9. You should lose any filters you may have on the lens: they will often increase flare to an unacceptable level. They certainly will not make the picture better.
  10. The lit eye is in sharp focus; of course at f/22 there is quite a lot in focus. Eye and whiskers are essential.

As you see, beyond the obvious, rather a lot of thinking can go into a simple picture. And few of these are “the only way to do it”. That is why photography is such a cool artistic endeavour.

So if few of those are “must do this way” points, why list them?

Because it is more important that you think about all these things than what you think about them. In other words, an analytical approach to photography helps you create repeatable art, where a photo works a certain way because you want it to, rather than “by accident”.


Lightroom Bug with Sierra

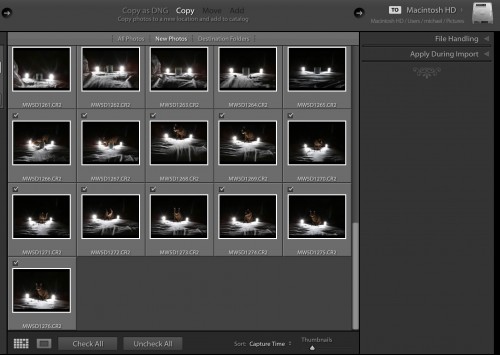
If you have upgraded your Mac to Sierra, the new OS, Lightroom may show a bit of a bug in the Import module.

When trying to import, you see this dialog:

screen-shot-2016-10-12-at-12-34-21

A few things are missing there, aren’t they? “File Renaming” and in particular, the essential “Destination” dialog is missing.

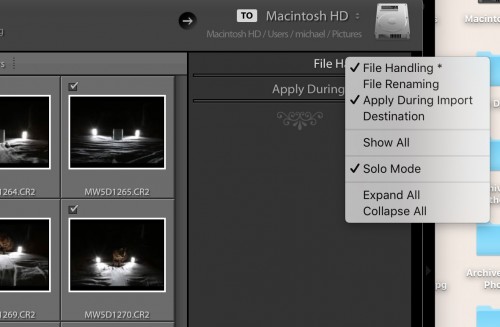
The solution? For now, until the bug is fixed, just right-click on one of the two that do show, File Handling or Apply During Import:

screen-shot-2016-10-12-at-12-34-52

…and then click on the two missing dialogs, “File Renaming” and “Destination” to activate them, so a tick mark appears next to them too.

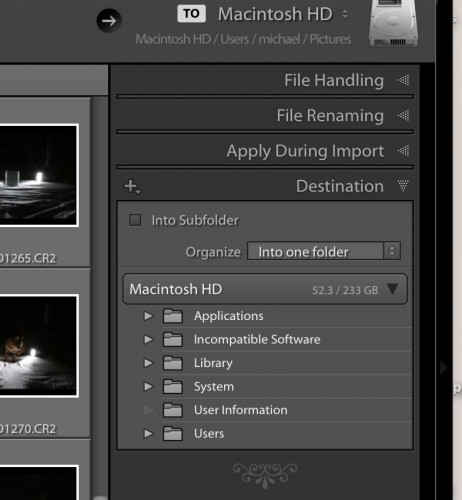
You now see all four again, and you can set your destination as always:

screen-shot-2016-10-12-at-12-35-10

So although this little bug is annoying, it is easy to bypass.

Now to celebrate, here is Mau Mau, surrounded by (and lit by) two flashes:

20161012-mw5d1272-1200

Taken at 100 ISO, 1/200 sec, and f/22, with the flashes set to 1/16 power, using a Yongnuo YN622C-TX on the camera and a YN622C connected to each one of the the flashes.