Shutter speed isn’t all there is to shutter speed.

“Shutter speed” isn’t all there is to shutter speed.

Uh oh. Michael is The Oracle. What on earth does he mean by that confusing statement?

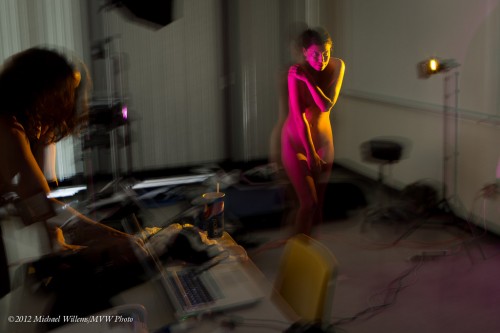
Well, let’s have a look. Let’s set up a couple of gelled and gridded speedlights (using Honlphoto grids and gels) and get a talented life model. Which is exactly what I did in August 2012 at Brock University, during the 5-day flash course I was teaching for the Niagara School of Imaging.

But wait. Because I want to show you the setup, let’s allow in some ambient light. To achieve this we use a really slow shutter speed, of 0.6 sec. More than half a second, in other words. That lets in some ambient. Not a lot, but enough to see the classroom, some of the equipment, and so on.

The picture, showing the setup with the two flashes, below. Look at the two little gelled speedlights, can you spot them? Purple gel on the left and yellow gel on the right:

tumblr_m94klicvuq1qfts2ko1_1280

OK. Great. Blurry as heck, of course: 0.6 seconds is ridiculously slow. Impossible to hold still. Right?

But wait. Lots of blur, yes, all over the picture, but look carefully. Click on the image to see it full size, and now look carefully at the model. What do you see?

She is sharp. No blur on her: she is tack sharp. There’s blur all over, but not much on the actual subject. A little “ghosting”, but she is substantially sharp.

But that’s impossible: the shutter speed was 0.6 seconds. So she must be blurry! Right?

So that’s where I say “‘Shutter speed’ isn’t all there is to shutter speed”. The shutter speed may be 0.6 seconds, but the model is lit primarily (almost exclusively) by the flashes. And the flashes flash at 1/1000 second or faster. At 1/4 power, they flash for just 1/4000 second. So while the shutter speed may be 0.6 seconds, as long as the subject is lit only by the flashes, our effective shutter speed is 1/4000 second!

And that is why you see a sharp model: there is very little ambient light on her, so the effective shutter speed is determined almost exclusively by the flash speed. Which is very rapid.

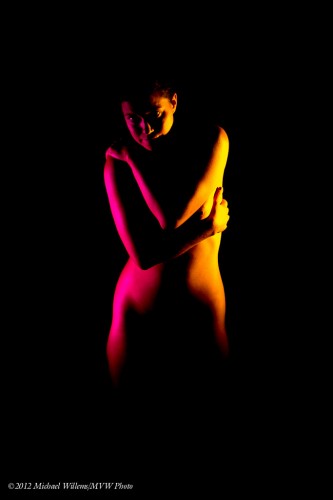
So now let’s do a normal shutter speed, of 1/125 sec, so the ambient light is cut out. And here is the finished product:

tumblr_m94knozSgL1qfts2ko1_1280

So anyway. This is a studio shot. So I want no ambient light: the second picture, in other words.  But when I shoot an event, like a wedding reception, I want to let in some ambient light to avoid those cold, black backgrounds. Instead, I want a nice warm background. To achieve that, I am happy to shoot with shutter speed as slow as 1/15 or 1/30 second. And now you know why I can get away with that.


Yaay! Natural!

You have all heard about the grassroots campaign against dihydrogen monoxide?

This chemical, which if ingested in large quantities can be deadly, is present in most manufactured foods. It is even in our water supply.

Which is not strange, considering the fact that “dihydrogen monoxide” is just another way of saying “H2O”, i.e. water.

The reason this joke works is that people have been conditioned to like “natural”, eat “natural”, and to resist anything artificial. As though Ebola, disease-carrying mosquitos and bone cancer aren’t “natural”!

And we see the same in photography. Oh so often do I hear people proudly proclaim that they use “natural light”.

That is fine, nothing against that. I use available light quite often. But to be proud of it? To me, that’s like proudly saying “I am walking to Rome!”. Personally, I’d rather be carried there on a luxury yacht, or in a Saudi royal’s personal 747 with golden faucets. And similarly in photography I use the tools that suit my needs. Whether they are “natural” or not. I am as happy using flashes as I am using sunlight. Except flashes give me more options in more conditions.

So I’d say, use what works for you. Whether it is “natural” or not. And learn all types so you have the option when needed.


Flow, or moment?

As every photographer knows, you use shutter speed to either blur, or freeze, motion. That is what the shutter is for, creatively speaking.

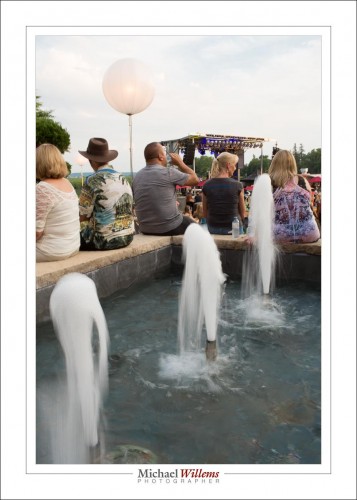
A slow shutter speed, like 1/10 second, gives you blurred motion, as in this photo I took at a country music event the other day:

20160820-MW5D9704-1024

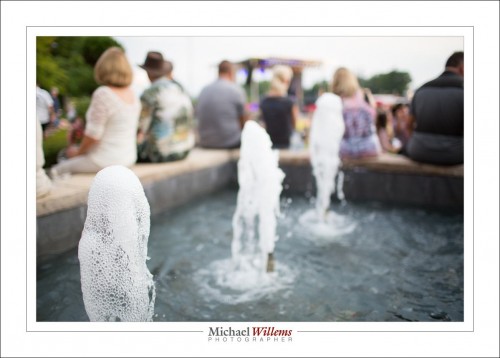
While a fast shutter speed, like 1/800 second, freezes motion:

20160820-MW5D9702-1024

See the difference?

Incidentally:

Q: If picture 2 was taken at 1/800 sec, why is it not darker than the first picture, which was taken at 1/10 sec? Over six stops darker?

A: Because at the same time as selecting a faster shutter speed, I selected a larger aperture: f/1.4 for the second picture, as opposed to the f/22 I used for picture 1.

Anyway. Here’s the core question I get quite often from students:

What drives the decision “do we blur or freeze?”

First, a flow looks better blurred, while something that happens as a moment in time looks better frozen. So generally speaking, for a fountain like this I would use a slow shutter speed.

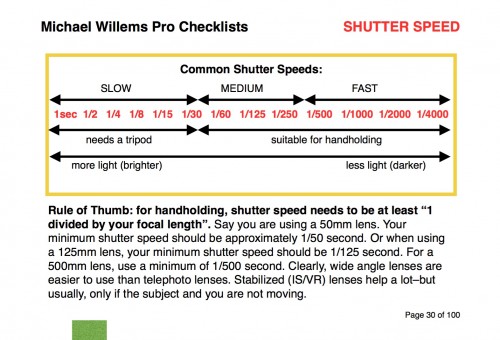
What constitutes “slow”? See this excerpt from my Book 7, Pro Photography Checklists: 100 checklists, summaries, and Best Practices.

Screen Shot 2016-08-13 at 17.04.29

What is slow, and what is fast? 

So, OK, slow or fast determines motion: blur or freeze. But there are other considerations. Like “do I want a blurred background” (which would mean a low f-number, which in turn would mean a fast shutter)? And like aesthetic considerations: the frozen fountain looks kind of cool, in this particular case.

And so it is with many photography decisions: you have a rule of thumb, a starting point; but then you interpret that creatively. That goes from everything from motion to colour to the rule of thirds. You are the creative driver, not the book or the camera or social pressure.

So if you have a reason to not use some established rule or starting point, then by all means do what you want. (In the absence of such a reason, though, go with the recommended Best Practice or Rule of Thumb.)


The beauty of a prime lens

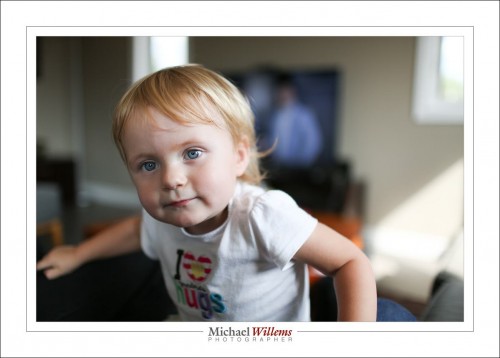
Why do we like prime (non-zoom) lenses? Like the 35mm f/1.4 Canon lens I used for today’s snaps of the granddaughter, who is almost two? Because they rock, that’s why. 

20160828-MW5D9762-1024

With a prime lens you get:

  • Sharpness. Typically, prime lenses are very sharp.
  • Consistency: unlike with a zoom lens, every shot in a shoot is the same in its tolerance for motion, in its depth of field, in its look-and-feel, and in its showing of perspective.
  • Large aperture (low “f-number”).
  • …meaning blurry backgrounds when you want them, like in the snaps above.
  • …and meaning fast shutter speeds (over 1/1000th sec in these shots, at 200 ISO).
  • The ability to shoot indoors without a flash.
  • Low weight.
  • Less to worry about.

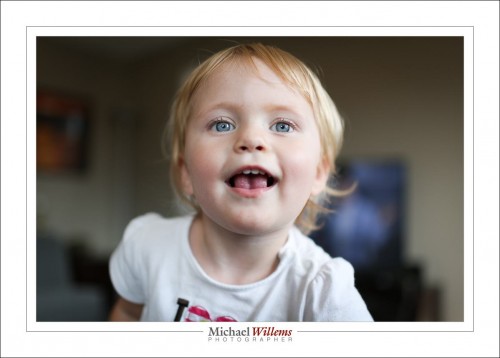
Today’s shots? Simple snaps. Taken in Aperture Priority mode because I had less than a second to shoot. Although I generally shoot in manual exposure mode, there’s always the exception, and this was it.

20160828-MW5D9763-1024

I was in “One Shot” AF mode (“AF-S”, in Nikon terms), which works fine if you are quick, even with a moving baby. Yes. I could have used “AI Servo” (“AF-C” for Nikon users), but again, there was no time. Seize the moment!

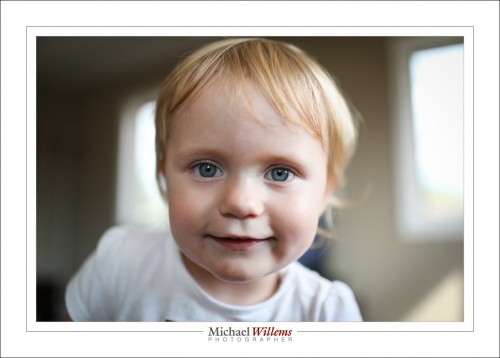
What is important is that I focused (with the focus button on the back of the camera, rather than the shutter button) really quickly. Using one focus point, aimed at, you guessed it, the child’s eyes.

The sequence: Aim at eye—Focus on eye—Recompose—Shoot. And all this within a tenth of a second, because almost-two-year-olds do not sit or stand still. Sounds difficult? It is, but with a little practice you can do it.

So at f/1.4 I got two big advantages. First, the large aperture results in a nice fast shutter speed, so there is no motion blur, and there is no need to raise ISO, so I get great quality. Second, the large aperture gives me a super blurry background, which is great, because since this was in a living room rather than a studio, the background was messy. Blur it out and it doesn’t matter; and the subject stands out from the background too. A win-win-win.

20160828-MW5D9765-1024

Just remember: focus quickly, and make sure the eyes are sharp. The rest is optional, pretty much.

And then you can concentrate on what is important. The baby. Not the f-numbers, the focus points, the lens’s bokeh quality, or other technical properties of your equipment. Those are just tools. The child and the moment are what it’s all about.


Depict your life. You have just one, and it’s great if you can make a record of the things you do and see.  Years from now, my granddaughter will be happy to have good pictures of herself as a young child.


Assignment

Here, from years ago, is an assignment for you:

Put your 50mm f/1.8 lens on your camera and, using just available light, go shoot twelve things in your living room that show its character. Or shoot lots, but pick the best twelve.

Then put these together in a 3×4 arrangement, like this (yes that was my living room at the time):

Living Room Miniatures

This assignment forces you to look properly. What is it that shows the character? What makes for a simple shot? It also forces you to use the right techniques for simplifying and filling the frame. And you get to practice low-light shooting, selective focus, and so on.

But most of all, you get to think about subjects. Initially you’ll struggle to find ten – then suddenly 100 pictures will suggest themselves.

Show me your results!

Filters!

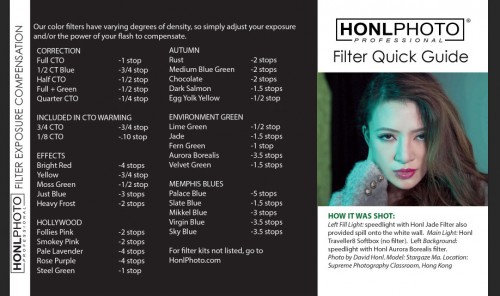
David Honl, whose modifiers as you know I use, and love, just posted a helpful post on his blog. I will show you Part of it right here, namely the corrections you need to make to your flash when using a gel:

image

Those are useful Numbers, these will save you a lot of effort when you’re using the gels yourself. Which as you know I’m a big advocate of. This  will save you a lot of effort when you’re using the gels yourself. Which as you know I’m a big advocate of.

There is one thing I want to point out in addition to this though. Namely:

To turn a background into colorful, it first has to be dark.

It does not matter if the background is in reality gray, light gray, white, or even black; what is important is that to the camera ot has to look almost black. Then, and only then, can you add your gelled flashes. Then, and only then, can you add your gelled flashes.

If you do not do this, and if the background is, say, white, then adding color will add nothing except perhaps a slight tint   LIgor is not like paint: you cannot cover a color by putting another color on top.

For many people this is the biggest revelation when they start using color gels… So now you know. I just saved you a bunch of time. As did Dave with his table.

To  buy,  click on the advertising link on the right, and when checking out use code word “Willems” for an additional 10% discount. You’re welcome. 


Five years ago; still current

And still this is current! A question I answered years ago here and on another forum bears a repeat here. The photographer asked:

I just had a client order an 8×10 of a picture but when I crop it in Photoshop, it goes beyond the picture. (like it only fits for a 4×6 or something) What do I do?!?

A common question. For some reason known only to the good Lord, cameras use a 3:2 aspect ratio, while prints, frames, camera stores, and so on usually use 8×10 (i.e. 4×5) or 5×7, which are entirely different aspect ratios.

This means when you print, you have to do one of only three possible options:

  1. Crop off part of the image;
  2. Leave white bands on the sides;
  3. As in 2, but fill those two white bands with fake picture (what Photoshop calls “content aware fill”).

For methods 1 and 2, you probably want to use Lightroom, not Photoshop: in Photoshop you get burdened with having to know the picture size (pixels, DPI/PPI) when all you want to do at this point is set the aspect ratio. In Lightroom, you can simply set the aspect ratio (like “8×10”) without yet having to worry about the size you will eventually want to print at.

For method 3, however, you do need to use Photoshop. You expand the canvas to the size you want, then fill the white areas using that “content aware fill”, and adjust as needed.

But why is this all necessary? I have many people asking me this with a certian degree of perplexity.

Simply because you cannot fit a square peg snugly into a round hole.

To help understand, imagine if the print the client wanted was square. Does your camera take square pictures? Probably not. So to print square you either need to crop, or have white edges (or fill the edges with fictitious material).

Last tips:

  • This has nothing to do with picture size, or with things like DPI/PPI. It is simply about the shape of the picture (square, rectangular, etc).
  • I typically crop to the aspect ratio I like – not to the one dictated by the frame makers of this world.
  • That said, it is often wise to shoot a little wide, then crop later – just in case of this kind of aspect ratio nonsense getting in the way.

Have fun shooting!


Some composition techniques

This morning, I ran an outdoors workshop in Toronto, for US-based Digital Photo Academy. And I took some snaps, although I was not there to shoot.  (I think I was there to melt: it was 30ºC and 95% Relative Humidity).

So anyway: let’s look at a few of the compositional principles I used.

Reflections

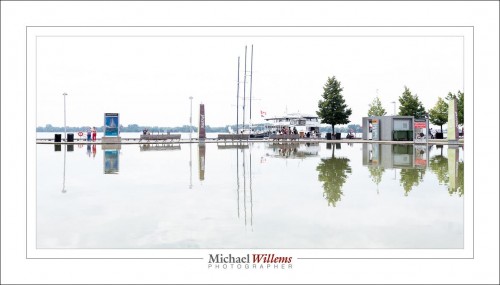
Reflections…

What was it that struck me in the image above?? The perfect symmetry. Flat water, clear reflections. And white sky (and hence water). Learn to spot reflections–just in case. This is a case where you do put things in the middle, rather than using the Rule of Thirds.

Sightsseing in motion

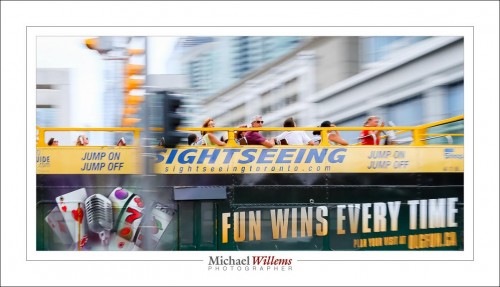
Sightseeing in motion.

Above: Motion. I “panned” with the bus, i.e. I moved my lens with the bus, at 1/30 second. That way, the passengers are sharp, while the background is streaked in the direction I moved my lens (left-right).

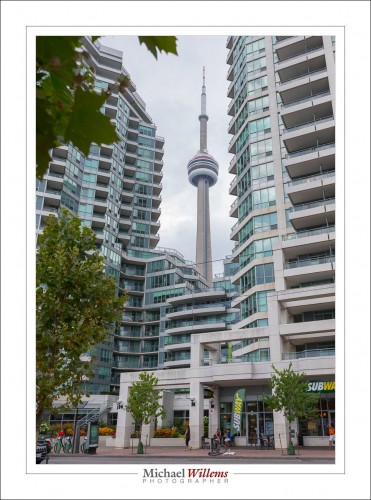
Next, this photo of a certain well-known tower:

Coilour coordination

Colour coordination

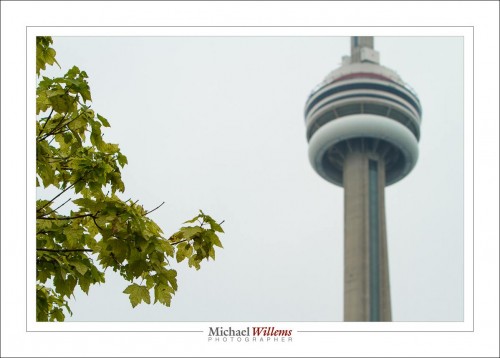
…which is a good example of framing. I am using the buildings and the tree to frame the CN tower. So it’ll go to prison for a murder it didn’t commi…. oh never mind.

Next, some words.

Culture, and progressive values

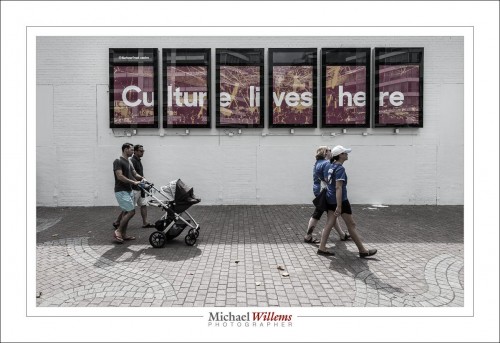
Culture, and progressive values.

People in front of signs are interesting when the words mean something. Culture. And is that two men pushing the baby–stroller? Questions are good. rather than spoon-feeding your audience, make them work out what’s happening, You can spoon-feed babies, instead.

Now to bigger matters:

"Exit Stage Left"

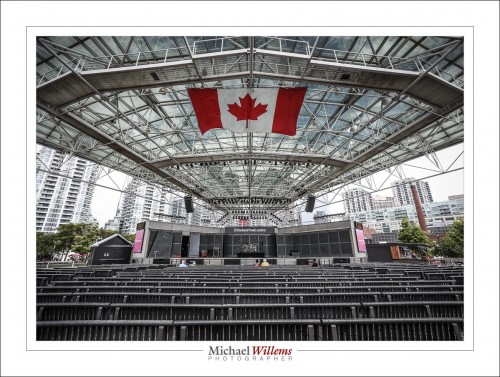
“Exit Stage Left”. Waterfront

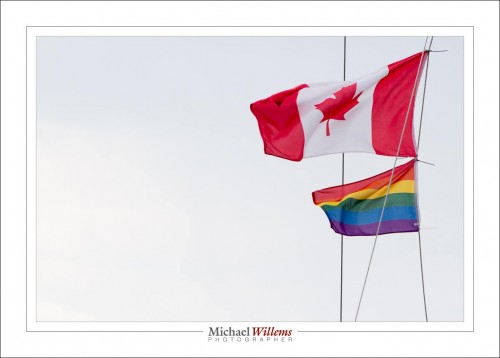
Great stage, especially when seen through a 16m lens (on a full frame camera). Sharpness, symmetry, and the Maple Leaf flag.

CN Tower

CN Tower.

In that picture, we see a blurred CN tower—but only blurred a little. The framing tree is sharp. And above all else, we see… simplicity. A golden rule of good photography:simplify, simplify, simplify, simplify, and simplify.

The same applies to this:

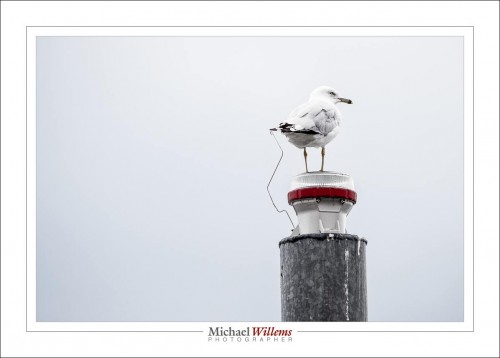
Master of its domain

Master of its domain!

And I presume you see the Rule of Thirds being applied there too. As well as in this picture:

Fun and joy

Fun and joy.

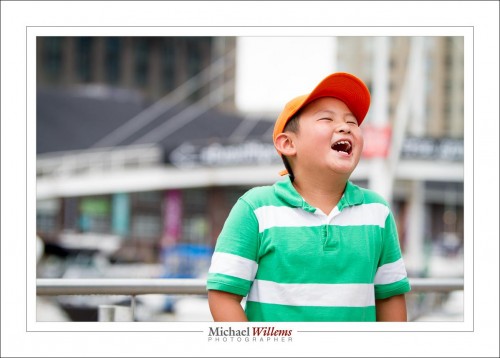
And that picture is, of course, all about the Right Moment. And about another rule: “If It Smiles, Shoot It”. 


People and their devices..

People and their devices.

A snap of a person wrapped up in her iPhone.

Short Final

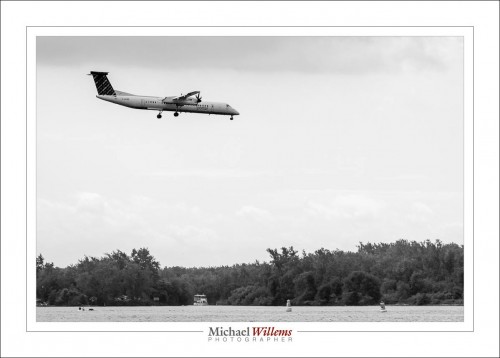
Porter on (Very) Short Final.

An airplane photo. Because why not.

And then, back to progressiveness:

A progressive city

A progressive city, eh.

Toronto really is a very progressive city. (Though now, with a career politician at the helm, I wonder).

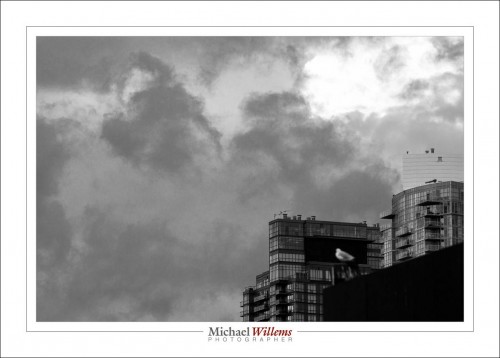
What I need not wonder about was today’s weather.  30ºC, and 95% Relative Humidity, interspersed with frequent heavy downpours, and air that looked like it was trying to start to rotate. Those clouds looked dangerous:

Dark skies

Dark Skies. Incipient Rotation.

What was I using there? Clear subject, simplicity, Rule of Thirds.

Do some of your own now. And think, consciously, about the principles and techniques you can use. Your pictures will be better for it. Take one of my courses if you need to learn. The good news, “it’s all just technique” and “it’s all simple to learn”.

Have fun!


Take a look at my e-books:

Why go pro?

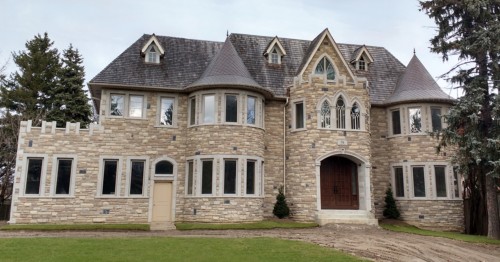
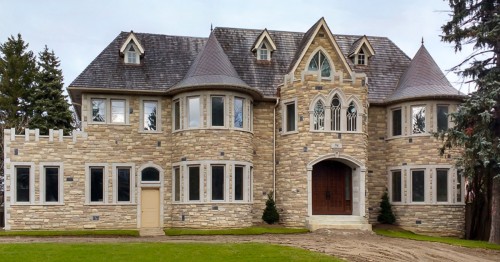
This is why. Just one example, a builder selling a wonderful, large, home in a prestigious Toronto neighborhood. So we’re talking millions. And in selling that, visual imaging is everything.

So this is what a non pro produces:

old

And this is what I made of that on a few seconds:

new

Colour, geometry, sharpness, all much better.

Details matter, and quality matters, and when you are a pro you take great care to get all the details right, both when shooting and afterward.

And I would have used a tilt-shift lens to get it straight without having to edit.

Just saying.