You’ll get credit.

“We have no budget for photography, but you’ll get credit!”. I have heard this many times, as I am sure all other photographers have, when a client is trying to get free photography.

It seems to me that there are a few problems with this: several reasons, in other words, to never engage in this type of free shoot.Let me explain.

One issue is the lack of perception of value. If, at a reception, say, it is taken for granted that the caterer, the waiters, the printer, the supplier of the flowers, the maker of the curtains, the electricity company, the people who supply the coffee and the barman all get paid but the photographer is expected to work for free, that means that the photographer is not perceived to be doing anything valuable. Would a waiter work “for credit”? No, and most of us would consider it insulting to even ask. If you are asked to do something that confirms the effort you are engaged in as having basically no value, I would argue that it is best not to do that.

Photography is not a thing

One reason for this absence of value perception is that photography is not a thing, and that furthermore there is a perception that the photographer does nothing but push a button. The Kodak perception: “anyone can do it”. Look online and see the advertisements offering to “teach you photography in ten minutes”. A staggering claim, and a sad one. Any photographer knows that ten thousand hours is more like it. But if the perception is that there is no value in pushing a button, and that that is all a photographer does, can you fight it?

No—but what you can do is look for value elsewhere. And that is in tangible objects. People like tangible things. My books on DVD are much easier to sell than my books as a download, for instance. So look for prints, albums, memory keys, possibly web sites, but as much as possible, things beyond just bits. Working ten hours for free is something you may be expected to do, but a large print costs money, and everyone understands this. It’s a thing, and things cost money.

I said several?

I said there were several reasons to not do unpaid work for credit. The second reason is that it simply does not work.

Quick: tell me the photo credit of the last 100 photos you saw.

So how many did you get? I would be surprised if you remembered any. “Photo credit” does not work. You will get nothing out of it.

I have heard many people promise me the world for doing free work. Unfortunately, I have never yet seen an iota of benefit out of all this crediting. So your name appears in a brochure, or under a picture on the newspaper. No-one notices. And if they do, it is because they are already your customer. But in no case will they buy more because of it.

Because building a brand takes time and effort. Name recognition, while a necessary component of a marketing approach, is not enough by itself. And even for that, name recognition, you need repeated mentions of your name, on and on, consistently, throughout multiple campaigns over time (yes, plural). One mention here and there is not going to do anything for you.  Sure—there are exceptions to this. But generally speaking, your name being mentioned underneath a photo will do exactly nothing for your bottom line.

Never?

When I said “never”, I did not actually mean never. Of course if it is charity or if it is for a friend, you can do whatever free work you like. But in those cases you are not expecting a few mentions of your name to generate business.

So?

So, do not be afraid to ask for a reasonable fee for your work. I had a washing machine fixed yesterday. For a ten minute visit and a five dollar switch I paid $140 plus tax: $158. So do I need to feel embarrassed to ask for $125 an hour? Not in the least. Bankruptcy is not good for me, but it would not be good for my clients either. A business needs to be sustainable.And free work does not result in that sustainability, unfortunately., So next time you are asked to do work “for credit”, I suggest you respectfully decline.


A black day

Blacks, the photo retailer, is closing its remaining 59 stores across Canada by August. The end of a long downhill story. “What do I think”, I am asked.

First, that this is bad for competition. Even though Blacks only sold a few pieces of hardware, and concentrated mainly on prints, any retailer disappearing is bad news for everyone. Less competition is never good. Wait for choice and quality to go down and prices to go up.

Second, that this is a disaster for me. The end of my film days for sure. Now that Blacks still exists, I can shoot a roll of film and drop it off a few kms away, and the next day, I get back prints and a CD/DVD. This is over. Now, the only way to get a roll of film developed is to find an envelope and print a label, line up at a post office (talk about 19th century anachronisms, and yes, there is always a lineup at every post office), pay too much to send the roll somewhere far away, and wait weeks and then pay a fortune. No way. The end.

Third, that this is not surprising. I have wondered for 20 years how Blacks survived. All they sold was rubbish frames and prints no-one bought, as well as a few cameras no-one was interested in. If ever I have seen a company without vision, it is Blacks. Run by grey Telco people in grey suits. If I were Blacks I would hire a bunch of young 20-odd year old Apple guys or McGill graduates and make a business out of something related to photography. And there must be something. I would create the market. Make a deal with Apple, if at all possible, or with other Telcos, or create a Telus app that automatically prints photos you take on a Telus phone: anything like that. There is a place where online and paper meet, and I would build a business around that. But no. They sold lousy 5×7 Chinese picture frames no-one wanted.

Fourth, that the market is changing and this is not Black’s fault. People should make prints, but they don’t: they keep all their snapshots on their phones and lose them all when their phone dies. Disasters in the making. Blacks was right that people should print their photos. But they don’t. That’s lack of vision on the part of the population as a whole. And everyone will pay for this, when all their family photos disappear. But you cannot enforce vision on the part of the public. You can try to educate, but that is it.

So, a sad day, and this is bad for everyone, including the 450 employees who will lose their jobs. But you can’t stop progress, right?


Back to the future

The best computer UI (User Interface) that I have ever experienced is that of the Compaq Concerto I used to own. This computer, which was decades ahead of its time, was powered by Windows for Pen computing and by, as I just found out, Wacom pen and screen hardware. Hardware that today looks like this:

Not surprising. The intuitiveness was amazing. I regret that this disappeared: we lost 20 valuable years.

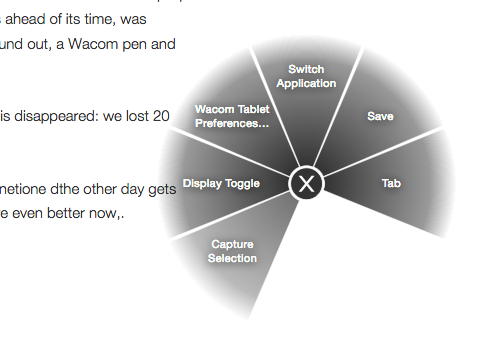
But we are back: back to the future. The Wacom tablet I mentioned the other day gets me back there. The pen feels the same, and the functions are even better now than in the Compaq days. Like the radial menu:

I assigned this to a pen button, so now by clicking that button I get this menu (where I can set functions for each of the pie segments)—and what’s more, it pops up where my pen is at that time. Ridiculously simple, and such a time saver. I grabbed that picture by selecting the “Capture Selection” segments. That’s one way to have me remember those combined buttons (try to remember Command-Shift-$). You can even assign hierarchal sub-menus.

And what’s even more: the pen and button functions can be set differently for each application. The tablet senses which app you are in, and you get the applicable settings for that particular app.

I think it is a good bet you will be hearing more about this particular piece of hardware here.


Respect the click

I am old enough to remember the film days. And while the digital era is better in almost every way, there were a few things that did work better in the film era. And those things were to do with what I would call “respect for the click”.

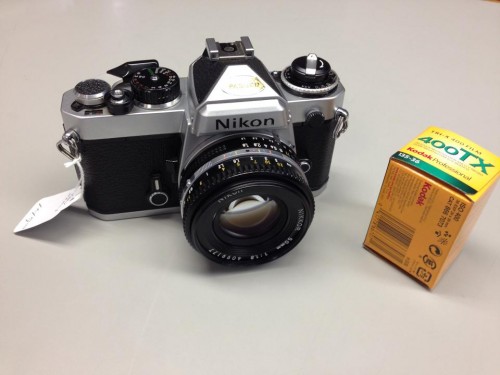
My film camera—a Nikon FE

Today, it is no longer necessary to respect the click. So instead of making a portrait, for instance, we take 100 photos and scan through them hoping to find a good one. And instead of setting white balance, we just leave it on “whatever” and sort it out later, on the computer. Instead of getting exposure right, we shoot, adjust after looking at the screen, then shoot again, and repeat until exposure is OK. In the film days, we could not do these things: each click cost a dollar, and after each click we had to wait several days to see the results.

In the broadest sense, this means that today we do not think about the photo. And that is a shame. This prevents us from becoming a better photographer, and it gives us more work to do at the other end, after shooting. It also devalues the photo.

Fortunately, there are several ways to get the old discipline back.

One way is to turn off the automatic display at the back. That way you have to click on playback specifically to see an image. If you do not, you do not see a preview. And try not to look after every photo. Finally, try to have the self-discipline to not “just” try things. By all means correct if you have to, but give it a couple of seconds of thought to get as close as you can, before you actually shoot.

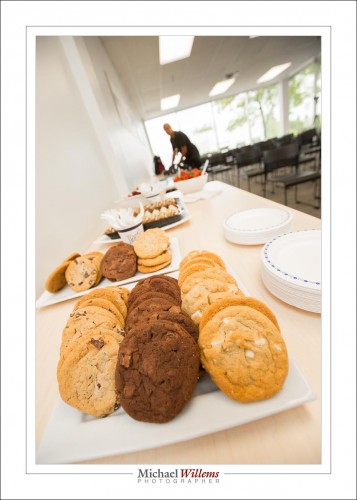
Cookies – 16mm, full frame

One great way to do that: shoot the odd roll of film. If you want to be a really good photographer, you should buy an old film camera—a good one like the one above should cost you between $100—$150. And then shoot a roll of film every month. You will be surprised how much more respect you will have for every photo.

And that is a good thing, because lack of respect for the click results in snapshots.


Workflow, again

Another note on workflow.

You need to rate your images, to separate the good from the less good. But this only works if the process is:

  1. Quick.
  2. Unequivocal, objective.

Lightroom helps in both cases. The “quick” is addressed by the following process. First, you rate all images to a standard, say 3 stars, namely the standard that most of your pictures will be; and now you only mark the exceptions. That takes half the work away. And to actually mark those exceptions, you simply use the number keys on your keyboard (“1” for one star, “2” for two stars, and so on) combined with right arrow (“next”) and left arrow (“previous”) in the negative strip.

This only works, as said, if your system is clear. A system that needs you to indicate “how much you like an image” will not work: it has to be more objective.

My system is as follows:

  • One star: this image is technically bad; too bad to fix in post-production editing. It is out of focus, or too under= or overexposed, say.
  • Two stars: this is technically OK, but it is not an inspiring image. A snapshot. Something you’d rather not use of you do not have to.
  • Three stars: this is an image that meets my standard; i.e. one that I would be willing to share with a customer. (That does not mean I will share it).
  • Four stars: this is one of the best shots in this shoot.
  • Five stars: this is a portfolio shot.

Note that the ratings indicate the end status; i.e. after editing, not the way it looks now.

Your system may be different, but be sure that like me, you design a system that is simple and objective in the sense that it is not open to interpretation.

As a result of the system described here, I can rate a shoot in a few minutes, even when I have hundreds of images.


Work. Flow.

Your workflow needs to be exactly that: a flow. A logical sequence of actions.

In my case, that means:

  1. Import the images.
  2. “Asset Manage” them: add keywords; rate them 1-5; backup.
  3. Then from the ones marked 3 and over, pick the ones to actually use.
  4. Edit only these.
  5. Mark the edited ones as finished.
  6. Select the finished ones and output them for use.

So it is basically “input – handle – select – edit – use”. And whether you are a pro or an amateur, it is going to be the same flow for you.

And that flow is where you need to save time: you do not want to spend an hour making photos, followed by two hours in Photoshop.

That is where Lightroom comes in. Lightroom is a one-stop workflow tool. It handles all the steps above: ingestion—asset management—editing—using. And it does it in an amazingly efficient way.

Evidently, if you can save time in Lightroom, it saves time overall. And that is where Wacom comes in. I now also use a Wacom Intuos tablet, which I find very useful; much more useful than I would have imagined. Part of the reason is better quality than the last time I looked, years ago. And part is new functionality. Like customizable buttons per app.

This tablet is especially useful when editing, and especially because of its pressure sensitivity. When using the brush, the harder I press, the more brush effect I get.  Very cool. Skin fixes and other local edits are now much quicker—and that saves me a lot of time. This functionality is simply not available on a mouse.

In the next weeks I will keep you up to date as to how I am using the Wacom tablet. I will start with customizing the buttons: how do I do it? What functions are most useful? As I sort it out, I will give you my recommendations. Stay tuned.


Open up opportunities

I am often asked “do you always use flash?”.

The answer is “no, but I always consider using flash”. In other words, flash gives me so many more options that I feel it would be a mistake to ignore those options.

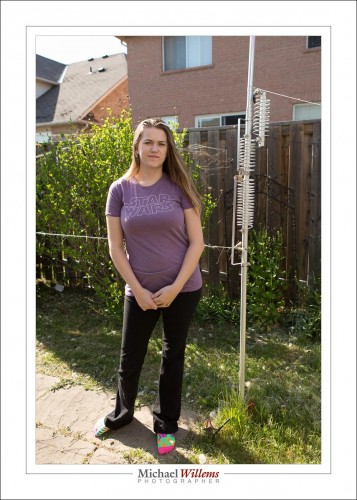
One of yesterday’s students in the sun, the way you would have to do it without flash:

But with flash, we have options. Like this:

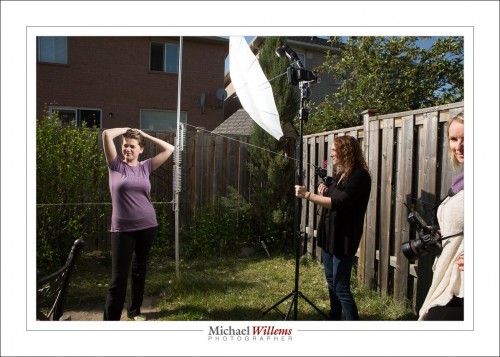
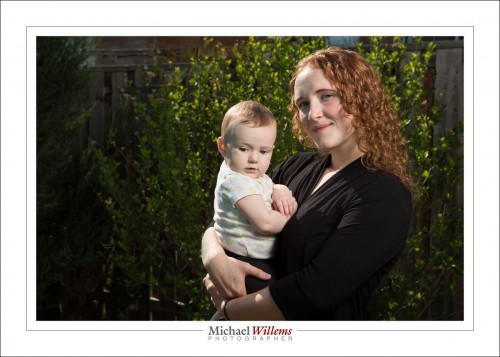
Isn’t that 100 times better? Emphasis on subject, saturated colour, modeling with light. And the setup is not complicated:

You may notice that I have two flashes shooting into the umbrella. That way, I can get both of them set to half power, which is a lot better than one flash at full power: full power tends to overheat flashes, and the recycle time is slower.

Camera settings for the “proper” shot were: manual mode, 100 ISO, 1/250 sec, f/8.

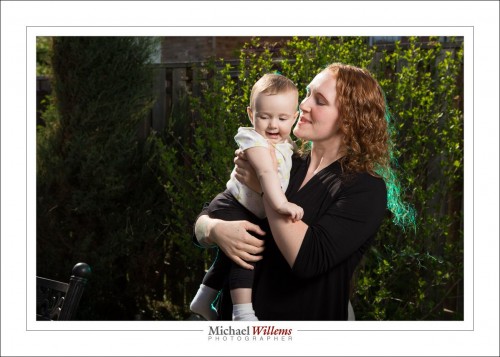
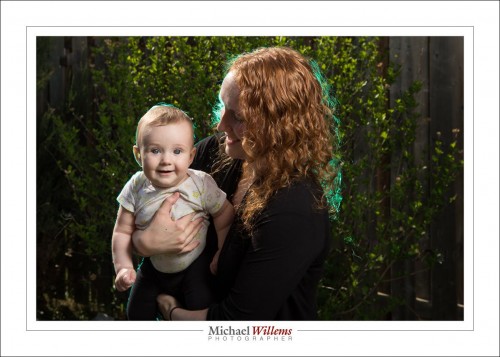
A couple more examples:

The green gelled flash was there to show it could be done. In a “real” photo I probably would have aimed that green gelled flash at the darker area in the background.

And even with one off camera flash you can have fun:

So now that the summer is here, bring your flash, take a lesson and learn to use it—and have fun creating images that you can be proud of; images where you are in charge of the light.


Light and dark

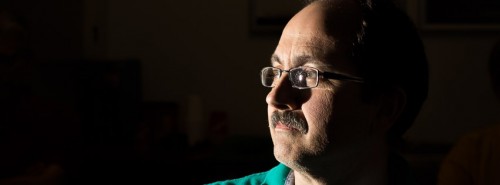
Ciaoscuro is all about the play between dark and light.

Take this student at Vistek, the other day. Lit from where the camera is, you get this:

Fine, I suppose… competently lit, just barely.. but is that creative? Not really.

Now, lit from the side, with a simple flash with a grid on it, no other modifier, we get this, instead:

I think you will agree that’s a lot better, and for several reasons. One is that there is less stuff. Only what’s important is lit: the rest is simply not lit at all. Second is that the face is now shaped (modeled) by the light. Third is that what is important is lit; what isn’t is simply not lit. Light direction as well as distribution and quantity are now totally under your control.

(Note that the grid is essential: without it, the flash light would spill onto the walls and ceiling and floor and from there to the rest of the room: no black room)

What I used? A 5Diii with a 600EX flash on the camera set to be master (but not to fire itself); and a 430EXii slave flash on our left. that’s all. “Studio setting” (1/125, 200 ISO, f/8) ensures that the ambient light is black.


Wishful thinking

A quick note on learning.

The other day, I met a photographer, a nice person, who shoots things for pay all the time. He knew nothing about his camera. I mean nothing. Auto mode, auto focus, auto everything all the time. He did not know how to set aperture or shutter, or what these were. Or how to focus. Or what ISO was. And so on.

That is fine, but it will seriously limit your options. Seriously.

And I just saw an ad flash in front of me on Facebook that contained this risible claim:

No. No. No, and no. This is wishful thinking. The reason photography costs money is that it is a serious skill that takes some time to learn. Yes, you can learn it. But not in 10 minutes. Please—learn properly, and while properly does not have to mean a three year degree course, 10 minutes is obviously not enough. I mean… really.

My courses and books may help (http://learning.photography), as may be my Sheridan College courses and my Vistek Toronto workshops. As will this blog, as will the entire Internet. All this combined with lots of exercises. Trying different things. Testing. Running into problems and then solving those. All this will get you there.

But not in ten minutes.