Back button focus: Why and how.

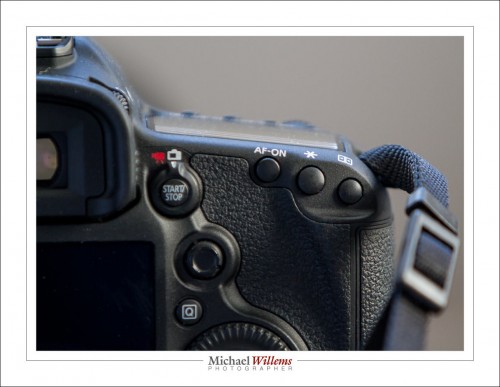
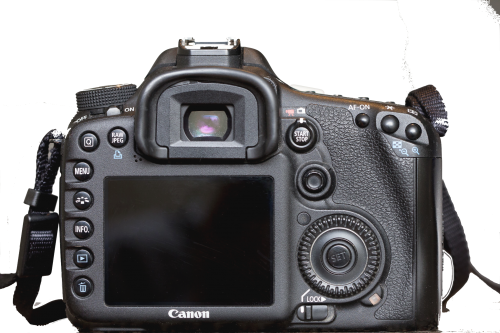
Some photographers (like me, usually) prefer to use “back button focus”. That means that instead of focusing by pressing the shutter button half way down, they focus by pressing a button on the back of the camera. Usually the “AF-ON” or “*” (asterisk) button top right on a Canon camera like the one below. The shutter button now only operates the light meter (in manual mode) or sets the exposure (in automatic and semi-automatic modes.)

On most Nikon cameras, you can use the AE-L/AF-L button on the back to operate focus.

Why would you want to do this?

You might not, or you might. If you prefer this, it is probably for some of the following reasons:

One is that it is easier to separate the process of determining and setting exposure from the process of determining and setting the correct focus distance. These are separate processes that have nothing to do with one another: why combine them into one button? You may well want to focus on the bride’s eyes, while taking an exposure reading off Uncle Fred’s grey suit. This way I set exposure and ignore focus. When I am done and exposure is good, then I go focus where the image should be sharp, and forget exposure (or vice versa). And the two areas do not need to be the same. And usually they are not the same. Unless, of course, your bride has 18% grey eyes.

Also, it is easier to “set and forget” one or both. If, for instance, your distance to the subject does not change, why should you have to re-focus for every shot? There are plenty of situations where this is the case. Like portrait headshots. Focus once, then concentrate on expression and pose, not on focus. By using a separate button you make it possible to do this: focus once, and then forget it until you or the subject changes position.

The third advantage of focusing like this is that it is now easier to make manual adjustments. I focus using autofocus, but sometimes I want to adjust manually. No problem. I can do that, If my camera is set up for back button focus. Beep focus, then overrule that with manual focus.

How?

How do you set it? That depends on the camera. A few examples/notes:

  • On most Canon cameras it’s a Custom Functions (C.Fn) entry or two. For instance, on the Rebel T3i you use C.Fn 9 (option 1 or 3).
  • On the 60D, use C.Fn IV-1 (option 1, 2, 3, or 4)
  • On my 5D Mark 3 it is done in the Custom Controls section of the Quick (“Q”) Menu: set Shutter Button Half-Press to “Metering Start”, and set AF ON to “Metering and AF Start”. I usually also set the AEL button (the asterisk) to “Metering and AF Start”. That way I can use either the asterisk or the AF-ON button. Less chance I miss it!
  • Exactly the same applies to the Canon 7D.
  • On Nikon cameras, set the AF-L/AE-L button to “AF ON”. To do this, go to the pencil menu, find section “controls”, and use “Assign AE-L/AF-L button.”  Within this menu, choose “AF-On.”

Q: Michael, didn’t you say “back focus” was to be avoided?

A: Yes. But this is “back button focus”. A very different thing altogether. “Back focus” means the focus is inaccurate. “Back button focus” means that we are using a button on the back of the camera to start the focus process.

Q: So should I start using back button focus?

A: No, unless you understand all this, know your camera, and are happy to benefit from the advantages I outlines—and only if those are important to you. It’s no big deal either way; I go back and forth between using it and not using it. But now at least you know what it is all about.

 

Full frame or crop?

You will have heard talk of “crop cameras” and “full frame cameras”. But perhaps the fine points are not exactly clear to you. Let me try to illuminate the subject a little.

First, the definitions. A “full-frame camera” is a camera whose sensor is the same size as a 35mm negative used to be. A “crop camera” is a camera whose sensor is smaller (usually 1.5x, 1.6x or 2x smaller).

Full frame cameras are generally more expensive: they include such cameras as the Nikon D800, Nikon D4, Canon 6D, and Canon 5D Mark III. Generally speaking, “bigger is better”: full frame cameras have some major advantages over “crop” cameras—but the reverse can also be true.

Available Sensor Sizes

  • Lower-end (and many higher-end!) point-and-shoot cameras usually have very small sensors. These do not make it easy to get blurry backgrounds, and they generate a lot of noise at relatively low ISOs.
  • Next, there is the “Micro four thirds” format—these sensors are almost as big as a crop camera’s sensor. Micro four third cameras are twice as small as a negative.
  • The next step up is the “APS-C” crop sensor – 1.6 times smaller than a negative for Canon; 1.5 times for a Nikon. Most DSLRs have this size sensor. Some quality small cameras also do (like my Fuji X100).
  • Next, there is a Canon-only size that is 1.3 smaller than a negative—this is the format used by the 1D (not 1Ds or 1Dx).
  • And finally, there is the full-frame sensor—it is exactly the size of a 35mm negative.

Should you save up for a full-frame camera? Maybe. Maybe not. As so often, it depends.

Pros and Cons of “Full frame” and “Crop”.

Full-frame sensors have several advantages over smaller sensors:

  • Full frame sensors generate lower noise (i.e. produce better quality photos) than crop sensors of the same generation and with the same number of megapixels (Mp). This means that, again given equally old cameras with the same number of megapixels, they are better at high ISO values, where noise can become a problem, than crop sensors.
  • The viewfinder on a full frame camera is larger and brighter than that on a crop camera.
  • In the same conditions, you can achieve blurrier backgrounds than with a crop camera.
  • Wide-angle lenses actually work as wide-angle lenses on a full-frame camera (as opposed to on a crop camera, where each lens works as though it were longer, compared to using the same lens on a full frame camera).
  • The entire lens is used. Crop cameras use only a smaller portion of the lens, so imperfections in the glass can, at least in theory, become more significant.

That’s a nice list, and it explains why most pros use full frame cameras, but there are also advantages to using slightly smaller sensors:

  • They cost less.
  • They are smaller, so cameras with a crop sensor can be slightly smaller.
  • They can use special lenses (DX lenses for Nikon, EF-S lenses for Canon, etc) that were made especially for smaller crop sensors; these lenses are therefore smaller too, so they cost less and weigh less.
  • And last but not least, a big one: lenses “appear to be longer” by the crop factor compared to the same lenses used on full frame cameras. This is an enormous advantage if you need a long lens, such as when shooting lions in Africa: your 200mm lens will now work like a 300mm (Nikon) or 320mm (Canon) lens. And if you have looked at the price of long, fast lenses recently, you will know how big this advantage can be.

Drawback of special “crop only” lenses (DX on Nikon / EF-S on Canon) : if you upgrade to full-frame, you need to replace these lenses. My strategy is to only buy “normal” lenses, those that can be used on any camera (i.e. “EF” lenses, in the Canon world).

Misconceptions

I have heard and read many misconceptions. Misconceptions such as “full frame cameras have better colour”, or “full frame images can be edited more”. Those ideas are wrong. True, many crop cameras produce more noise at a given ISO than a full frame camera, but that does not mean that “full frame colours are better”. Also, age matters (any new camera is better than any old camera), and pixels matter (an 18 Megapixel crop camera probably produces less noise at a given ISO than an equally old 33Mp full frame camera). So a blanket statement like “full frame images can be edited more” is a half truth at best.

Effect on Apparent Lens Length

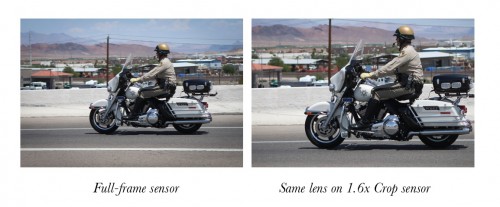
As said, crop cameras “appear to lengthen a lens”. That is, a 35mm lens works like a 50mm lens when used on a crop camera; a 50mm lens works like an 80mm lens when used on a crop camera; a 200mm lens works like a 300mm lens when used on a crop camera, and so on. (All numbers approximate). The same lens, for instance, mounted on two cameras with the same number of megapixels, one with a full-frame sensor and one with a crop sensor, might give these two images:

In this example, on the 1.6x crop sensor (the sensor that is 1.6x smaller than full frame), the same objects in the resulting image would be 1.6x larger. An advantage when you want telephoto behaviour; a drawback when you want wide angles.

“What type of camera should you buy?” The choice is up to you. Both full- frame and crop cameras have advantages and drawbacks. If you were to summarise it in just a few words, you might say “full frame usually gives better quality; crop usually gives better value”. I usually prefer full frame cameras because of the better high-ISO performance at the same pixel count and because of the blurrier backgrounds; but I own a crop camera as well, because i like the fact that without buying more lenses, I now have more focal lengths available. After all, depending on the camera it is on, each lens now has two focal lengths, effectively.

Only you can decide whether quality is most important to you, for instance, or money. “What camera should I buy” is like asking “What car should I drive”. A tough question for anyone but yourself to answer.

Either way, any modern DSLR will provide quality beyond that of good professional cameras even just a few years ago. This is a great time to be a photographer.


A few admin words

A few admin words for my readers:

First, if you have not yet joined the Speedlighters Forum on Facebook, then by all means do. Here it is: www.facebook.com/groups/SpeedlightersForum/ – ask to be added and I will add you as soon as I see the request. It’s free, it’s secret, so you can ask basic questions without the whole world knowing about it, and it’s full of friendly people.

Second: I make some buying recommendations. These will always be in an Article, so pull down the “Articles” link above to find them. You can save money, or get best products, by using the recommended vendors. And they are there because I use these vendors myself.

Third: you get a 10% discount on one of them, Honlphoto, by using the link in the article (or by clicking on the Honl advert on the right), and then using Discount Code “willems” upon checkout. Take a look at the kits, especially.

Fourth: There’s about to be a special Flash kit, consisting of all sorts of things in a combination created by me, at Vistek. Stay tuned to hear about this as soon as it is ready to be released.

Fifth: I notice that many people are not quite sure how Lightroom work,s or how to set it up at the start. I therefore have a 2-hour consulting product: Setting Up Lightroom. Follow the link to learn more.

Sixth: The same is true for using your DSLR for Video. There, too, there’s things to know. And I can teach you those things… click right here to hear more.

Seventh: I teach almost all my courses (including the Flash signature course) remotely, using Google Hangouts. All you need is a good Internet connection and a computer with a (built-in or separate) camera. Whether you live next door, or in Australia. Keep that in mind, and do benefit from that to cut your learning time in half. Because that is what my courses do.

And now, back to the salt mines: picture editing. I love it, actually.

Michael


Ghostbuster

Or rather, misconception-buster. Let me just remove a nasty misconception that crops up again, and again, and again. In people who ought to know better. Namely, focus.

Let’s start at the beginning. When we say “Focus” we mean:

  • (noun): the focus distance, or
  • (verb:) the action of setting the focus distance.

“The focus distance” means “the distance at which the picture is sharpest”. Not “what is my subject”, or “what else is sharp”, or “are we free of motion blur”, or anything else. It just means “at what distance from the sensor is the image sharpest”. If I set my focus distance to one meter, that means the picture is only really, really sharp at a distance of one meter. Objects that are 90cm, or 1.10 meters, away from the camera will be less sharp. Objects at 80cm, or 1.20m, less sharp still. Even when you have a great depth of field (i.e. the unsharpness away from the focus distance only sets in gradually), there is still one distance at which objects are sharpest.

CAM--//-----VVF-----VF-----F-----LF----SH----LF-----F-----VF-----VVF
 0          0.6    0.7    0.8   0.9   1.0m   1.1   1.2   1.3 metres
                                  |==========| DOF
(SH=sharp, LF= A little fuzzy, F=fuzzy, VF=Very Fuzzy, etc)

Between the two “LF” markers, the image is acceptably sharp; we call that the “depth of field”.

Select a higher “F-number” and you get greater depth of field. True, but the principle remains the same: there’s only one distance at which the image is totally sharp. If the schematic above is for a certain lens at f/4, then the same lens at f/8 might look like this:

CAM--//--------VF---------LF-----------SH-----------LF---------VF--
 0          0.6    0.7    0.8   0.9   1.0m   1.1   1.2   1.3 metres
                           |=========================| DOF

We have more depth of field (sharp range). But the focus distance is unchanged.

OK, so now we know exactly what focus is. Now to the misconception.

There are two separate, unrelated focus system settings. One has to do with HOW to autofocus (ONE STOP vs AI-SERVO, or AF-s vs AF-C). That is not what this post is about.

The other setting, the one we are talking about now, is about WHERE to autofocus.

You can use the “where to autofocus” system in two ways:

  1. You choose where the camera autofocuses, or
  2. The camera chooses where it autofocuses.

If you set up your camera to use one focus point, for instance the one in the centre, or one of the others, then you are choosing what the camera focuses to choose on. So it’s still autofocus, but you choose where. (That’s the mode I usually use).

If on the other hand you set up the camera to use all focus points, so that when you press down the shutter, any combination of points might light up, that means that the camera is going to choose what it autofocuses on. It looks at all the focus points, and chooses the one(s) that have the closest object behind them; it lights those points up, and it focuses on those (close-by, equidistant) objects.

Let’s have that again. If you set up the camera to use all focus points, it looks at all the focus points, and chooses the one that has the closest object behind it; it lights up that point, and it focuses on the (close-by) object behind that point. If two or three focus points have a close by object at the same distance, it will simply light up all three of those points.

So, to the misconception…

NO: using all focus points does not give you “more focus”. It does not give you greater depth of field, or anything else. It just allows the camera to choose where to focus (namely, on the closest object it sees), instead of you choosing. If you see multiple focus points, that simply means there were multiple objects at the same close-by distance.

So, misconception solved. I hope. Finally.

Next time: Should you always format your memory cards? (Hint: the answer is “yes”).


CEO

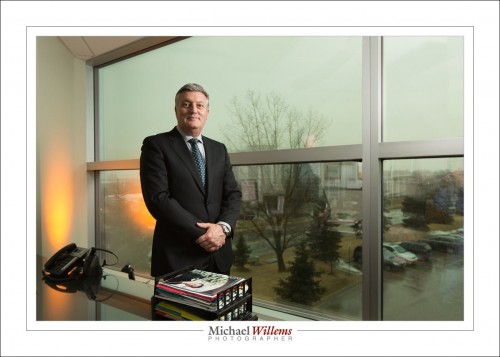
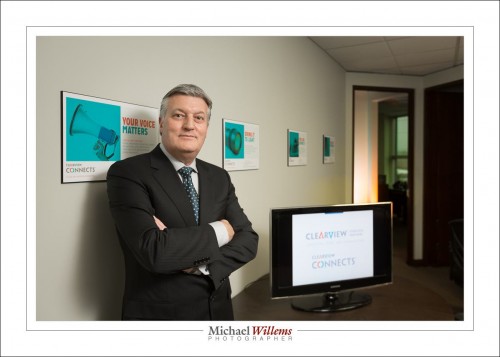
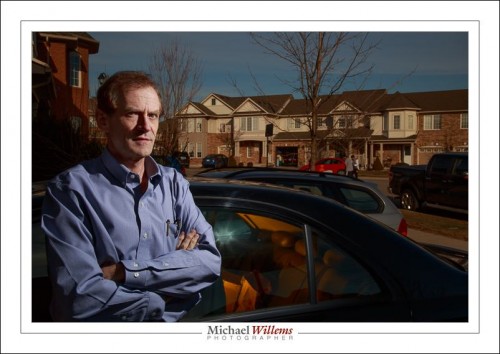
So today I did yet another CEO shoot. I do love environmental portraits.

So what do I look for in such a portrait? How do I make one? I thought it might be interesting for you to follow along, so to speak, with my process.

It starts with the lens. I start with a wide angle lens, because I will probably want the person “surrounded” by the rest of the shot. By their environment, in other words. Probably, not necessarily: so I also bring lots of other lenses. If I do use the wide lens, I am careful not to get too close to my subject: distortion is always a possibility.

Then the light. I will usually start with one off camera flash in an umbrella. So, since it is a flash picture, I start with the ambient light. 400/40/4 is a common start point. Whatever it is, I continue until I am happy with the ambient light, that I typically want at –2 stops, and only then go on to flash. For the flash, I ensure it is aimed at the subject’s face from the right direction, at the right angle (e.g. 45 degrees off-centre, 45 degrees up).

Then the location. I look for something that is typical for the person I am shooting. An office, for instance. But I also look for good composition. The rule of third, for instance. Leading lines, diagonals converging where the subject is, leading the eye there, are good.

I watch carefully for reflections in glass, and position lights and subject accordingly. I check that the subject’s clothing and hair are all OK.

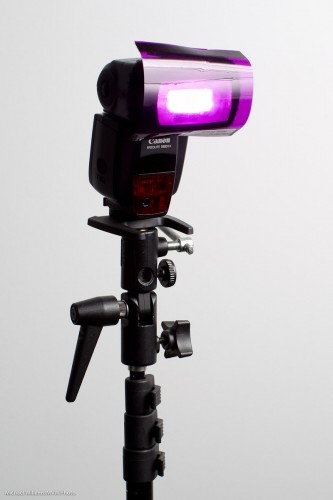
An extra flash or two, with gels, are always ready to be used. A dash of colour here and there is great.

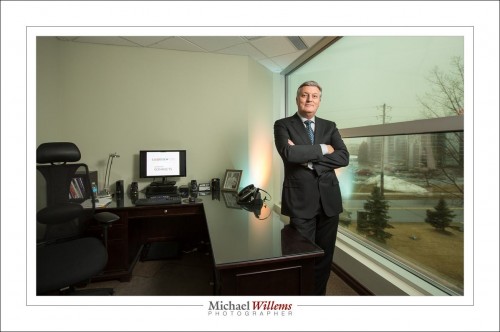
And now: in practice. Can you see how I applied all these techniques to today’s CEO portrait shoot?

Of course I also use all other standard composition and portrait and technical rules. But it’s not about those; it’s about showing something of the subject’s world, and of his or her personality.


Tell stories

Even in the smallest ways, you can tell stories, and even in snapshots there is thought, Like tonight, as I walked to class. I shot a little four-image story.

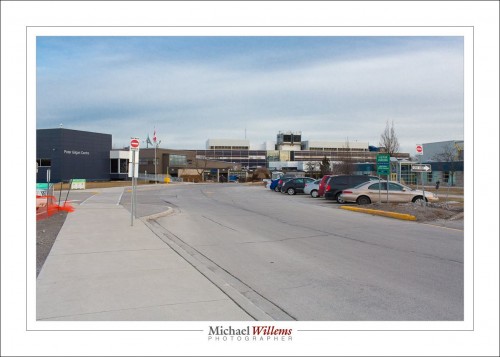
First, the all-important overview “establishing shot”:

Shows where we are going. Namely Sheridan College, where I teach several photography courses. I used the “Sunny Sixteen Rule” to set the camera without using the light meter. Partely overcast at 7pm, that is about 3 stops down from sunny at noon. So, 400 ISO, 1/400 sec, f/5.6 (5.6 being three stops down from “sunny” 16).

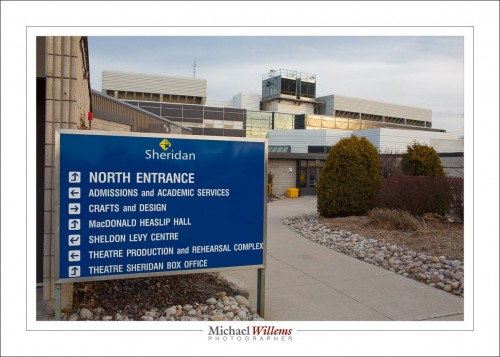
Then, let’s add some depth, some 3D, and at the same time let’s tell the viewer where we are:

Showing depth? That’s done by using “close-far”. A close-by object very close to you, with the background showing far away. That shows us there is depth in the photo; that it is not flat, in other words.

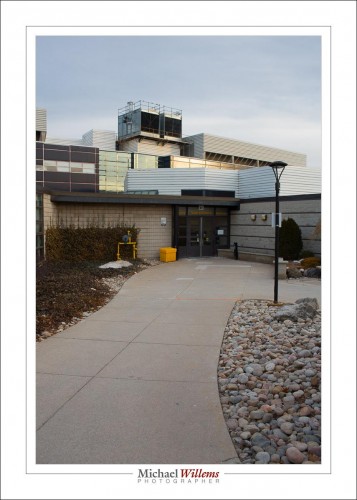
That being done, now let’s use a nice curve, a converging one at that, to imply that we are going in, by showing “the path”:

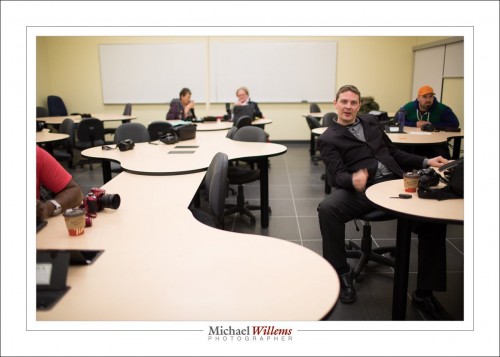
And now that we are there, let’s see the class, during a break:

Again, nice S-curves lead the viewer’s eye into the photo. Focused on the person closest to us. Using the Rule of Thirds.

The point? The point is that you can, and should, apply “high rules” to “low snaps”; and that this makes them better. Enjoy!


DOF preview

Your camera probably has a DOF preview button. Depth-of-field preview. A little button next to the lens, at the bottom somewhere. Cameras have had that button since mid way through the 20th century.

Normally, while you are preparing foe a photo, your aperture is wide open. This button allows you to momentarily close it to the set value while preparing for a photo. That way, you can see the depth of field you will get with your chosen aperture. The drawback is that the brightness also goes down during this preview, so it does not help you much.

And therefore, some of you can re-assign that button. To use it for something else. On my Canon 5D Mark 3(*) I can re-assign that button to do one of 12 different things like focus, stop focus, AE lock, various autofocus things, flash lock, and so on. Is that cool? Yes.

So on your camera, look for that button. Do you have it? If so, can you use it—or can you reassign it? If so, is there a useful function you can assign it to? If so, you have an even better camera than you thought.

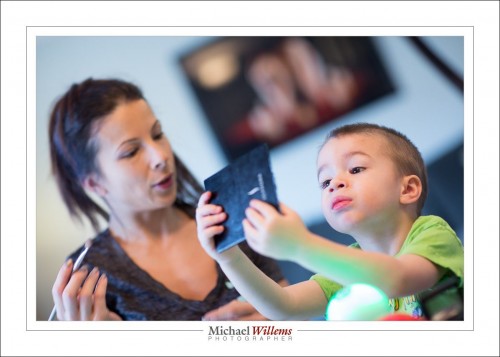
That’s it for today, just a tiny tip. After shooting this all day, I am very tired:

Isn’t that a nice mom/son team? It’s so great to make beautiful photos of a mom who doesn’t have any, for herself or her son, to put on the wall. Now she does.

And I will never stop saying it: please, everyone, buy wall art rather than just having electronic files on a PC or Mac somewhere.  You will see your photos more; you will be showing them to your friends and relatives; and you won’t lose them after a crash. A win-win-win.


(*) NOTE: I shoot with a Canon 7D and a Canon 1Dx, but the latter developed a malfunction: after playing video it switches off—dead—and cannot be restarted. Canon wil take 2-3 weeks to fix it and charge me $300. So until that time? Because I shoot for a living, I had to buy a Canon 5D Mark 3 to tide me over. That’s the life of a pro: I have to have the latest and greatest, and renting one for a month is the came cost as buying and then reselling it.

Colour. Just because.

That is often my answer when someone asks “why did you use those gels in that picture?. “Because I could”., “Why not”.  And you start adding colour here, there and everywhere. Consider this:

(100 ISO, 1/20 sec, f/16, 24-105 f/4 lens).

Private student Tim made the picture yesterday. And I put the yellow gelled flash inside the car why, exactly? Because otherwise it would be dark. A little colour adds a lot: think matching, or opposite, colours. Deep blue skies go well with yellow: blue and yellow, like red and green, or green and purple, constitute one of nature’s favourite combos.

And it’s so simple, with a Honlphoto gel:

Just strap it onto the speed strap and bingo. (If you do the Honl photo modifiers thing, go http://www.honlphoto.com/?Click=2032 and don’t forget code word “Willems” at the end to get another 10% off. Look at the kits: they rock, especially the last one).

I use gelled speedlights to:

  • Add opposites to relieve boredom
  • Warm up cold subjects (half CTO gel does wonders)
  • Get creative
  • Add a little red to skin in low key portraits
  • Correct colour when shooting in tungsten ambient light
  • Turn backgrounds blue

…and so on. Once you get into the habit, you’ll see how good your photography gets. Speedlights, and easy-to-use, sturdy gels, make all this not just possible. They make it convenient and affordable, too.

This site is called the speedlighter for a reason: speedlights unlock the potential. Just get another flash or two, get some gels and other modifiers, and get creative.


Gridlock

It always gives me enormous pleasure to see that this blog is being read. I mean really read, by real people, who put just about as much time into reading it as I put into writing it.

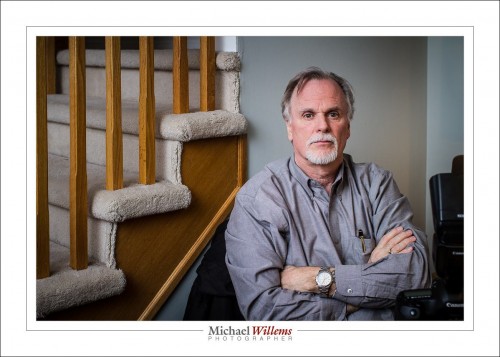
And so it was tonight, with a long-time reader, and new friend, Tim. So I used the opportunity to snap him:

That was “400-40-4” (see ARTICLES above)  and an on-camera flash bounced on the ceiling on the left, slightly behind me.

But then I thought: let’s pull out the stops and shoot Tim with an off camera flash and the “studio settings” of 1/125 sec, 100/200 ISO, f/8, to make ambient light disappear:

A little post was done to darken the background more, because flash spilled onto it, but it’s essentially SOOC—”Straight Out Of Camera”.

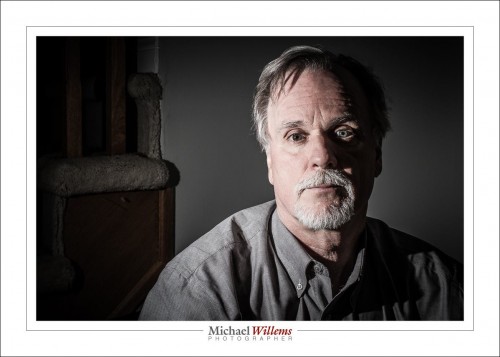
But then I showed Tim what happens when you use a grid on the flash. No light spill everywhere, like in the previous shot. So now the black background is really black:

That’s why the grid is my favourite flash utility. I used a 1/4″ Honl photo  grid; I love the Honl accessories (and as you will recall, readers — and that means you — get an extra 10% off by using this link and discount code “Willems”).  And want to shoot like me? Then get the Speedlighter–approved Master Lighting Kit. It contains all the accessories I use daily in one convenient—and discounted—package.

And let’s finish with…

Shiva!

And now I am so tired I must sleep. Good night!


See spot run!

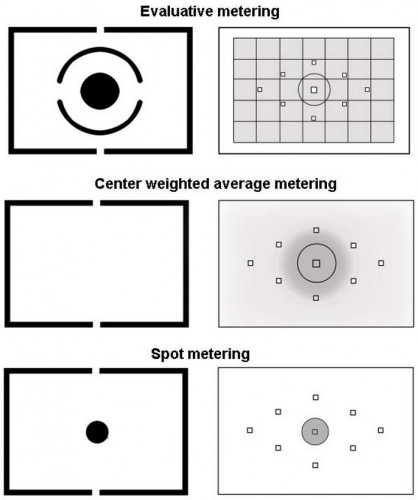
Your camera behaves in one of several possible ways when spot metering; and it behaves in one of several ways when using evaluative metering.

When spot metering (at the bottom in the graphic):

  • The camera only meters what is happening at the centre spot
  • OR the camera only meters what is happening at the focus spot you have selected.

It is easy to determine what it is on your camera. Shoot a scene with dark and light areas. Taking care not to move the camera at all between shots, shoot with the spot aimed at a light part of the shot; then shoot with the spot aimed at a dark part of the shot. If the exposure varies, your camera meters at the focus spot; if not, it meters at the centre spot.

When doing evaluative/matrix metering (a the top):

  • The camera evaluates the entire picture, and chooses the best exposure to suit the entire photo.
  • OR the camera evaluates the entire picture, and chooses the best exposure to suit the entire photo, biased to the selected focus point.

Again, it is easy enough to determine which one it is, using the same test.

My Canon 7D, for example, does the first option (centre point only) when spot metering, and the second option (bias to chosen AF point) when set to evaluative metering; while my 1Dx can be set to do either (using a custom function named “Spot meter. linked to AF pt”). The 7D, therefore, might seem to only do spot metering when it is not set to spot metering. Can you see how this can be confusing?

Did you know which it is, on your camera, before testing? If not, this will explain a lot of the “incorrect exposures” you have been seeing over the years. Yes, you need to know this stuff!

I remember a hardcover book. Pastel coloured pictures. “See Dick. See Jane. See Spot Run. Run Spot Run”. My memory is visual.