Photos Graphein

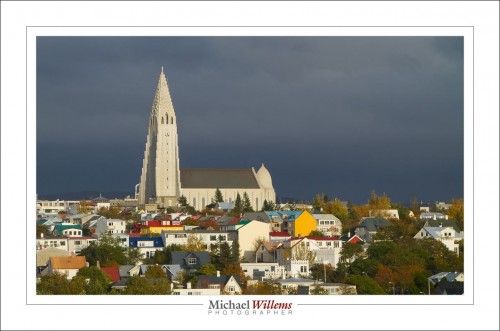
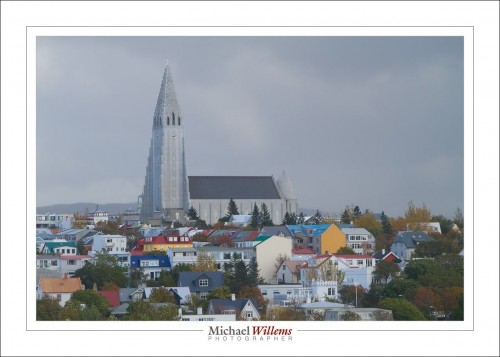
Writing/drawing with light. That’s what photography means. And sometimes that means just waiting. Look at Reykjavik, the Hallgrímskirkja, two photos I took today. One in the morning, one just now, late afternoon:

Need I say more?

I don’t think so, for once. Except perhaps “look for that golden hour light, especially on dark, dramatic cloudy days”.

Yeah and Reykjavik is the capital city of Iceland.


ill

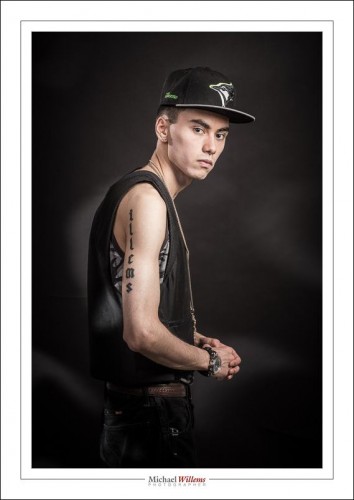
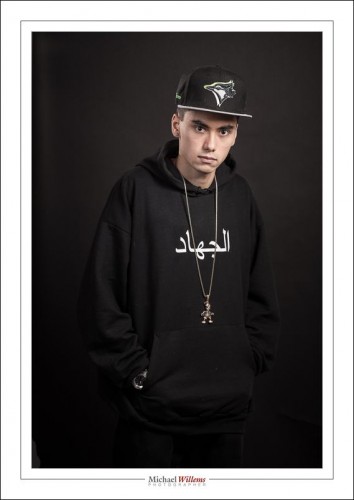
My son, Toronto-area rapper illems, who turned 20 today, and his rap-partner Merkury released their second mixtape, “Tumbling Towers II“. (Please read the disclaimer, and it is mature content). And here he is in my studio at 11pm last night:

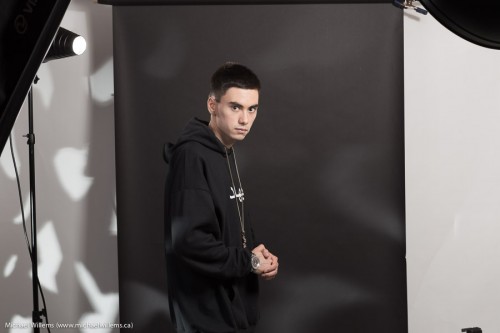
Slight desat and vignette in post, otherwise as shot. One beauty dish right; softbox -2 stops left; snooted hairlight behind left. Mottled light template from front left. Like so:

Why black background? Because he is wearing black and we want a black mood.

Now I used strobes, but speedlights would have worked just as well. Better, perhaps, because they are smaller and more easy to manipulate.

This calls for manual settings of course. Make sure black is black. Black background and enough distance between model and background. Lights close to model.


Boko Not Haram

The Nigerian terrorists known as “Boko Haram” are well known. Loosely translated, this means “Books are bad”.

I would say “Boko Halal”. Books are good. And not just for Muslims.  Books are good for everyone. You all know about my e-books I hope: head on over to http://www.michaelwillems.ca/e-Books.html to read all about them and to order them. They are not DRM-addled (i.e. you can put them on all your iPads, tablets, phones, computers, anything that can read PDFs) and there is a README that gives you permission to print a copy for personal use—this README is not a formality, because without it, you cannot have Staples or any other office supply store make a printout for you.

So, books are good I am very proud of my books; they reflect years of teaching experience, combined with my photographic skills.

But while books are good, I think you need more than just books. Books are invaluable combined with practice and interaction. Practice: we learn by doing. The books are useful because they tell you what to do (“before the practice”) and they explain the background (“after the practice”). They thus put it all into context and shorten your learning time. Third advantage of books is that they are your permanent memory.

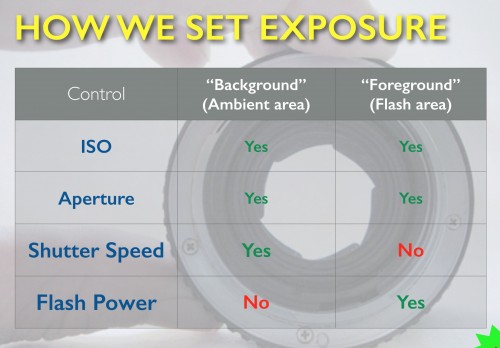
To give you a taste, let me share a couple of images from my books: here’s how a flash exposure works:

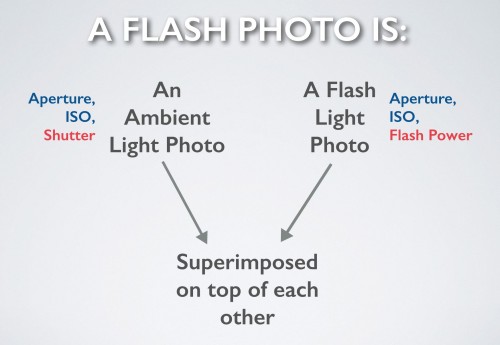
In other words, a flash exposure has ambient light as well as flash light. And these are affected differently by the camera settings. Which is a good thing, because it enables you to balance the two.

Here’s a clearer look at how:

…and this is what I teach you in my books, my courses, and my various forms of online training. That is why books are good: when you do one of my courses, you do not need to spend the bulk of the time making notes.


Tip: Stitch.

When you travel, so some panorama shots.

You can do them in your iPhone or similar. But you can also do them—and probably at higher quality—with your DSLR. Like this:

  1. Camera on tripod. Manual mode. On a day with consistent light.
  2. Take a photo on the left of your scene.
  3. Rotate the camera around its axis (hence the tripod, too). Overlap 20-30% with previous shot. Click.
  4. Repeat step 3 until you reach the right.
  5. Take all these shots an put them together in Canon Photostitch, or Photoshop, or whatever other software you have (you can download lots of apps).

Now you get this: click the image repeatedly to see it at  full size:

That’s the Las Vegas strip. In all its glory.


Myth-busters!

(To the tune of “Ghostbusters”).

Often, my posts point out common myths and misconceptions. Of which there are many… many. On the Internet, no-one knows that you’re a dog, and no-one knows that you are wrong.

So, two oft-heard “truths”:

  1. You cannot shoot with TTL if you are a pro.
  2. You cannot use just one light for a serious portrait.

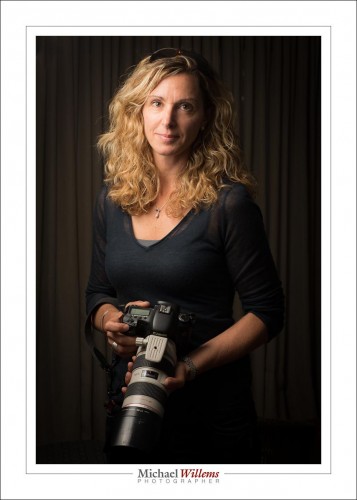
So. TTL was used in this portrait of students and friend Diana; remote TTL in fact (light flashes from on camera flash drives off camera flash); and the light was one flash through an umbrella. The on camera flash was disabled, except for those light flashes.

1/125 sec, f/8, ISO100.

The curtain was chosen as a classy background, but the umbrella was close to the subject so the curtain would get little light. TTL handles this fine; if the subject had been too light or too dark, a touch of flash compensation would have sorted that out.

The one light-with-umbrella gives us enough light for a portrait with Rembrandt lighting. Fairly dramatic chiaroscuro-type lighting, but not so dramatic that it becomes unflattering. On the contrary, this is nice light.

The blonde hair stands out nicely against the dark background; dark hair would have needed more light.

So there, a real portrait with “studio settings”, i.e. just one light, and using TTL. I could do that all night.


Turn turn turn

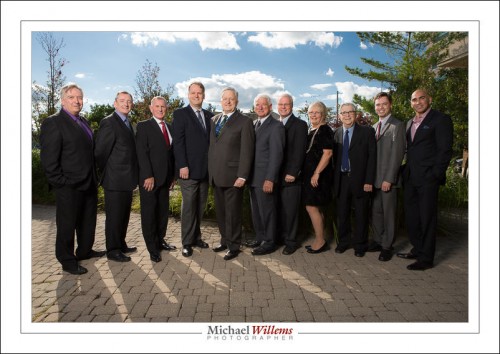
Another reminder to those of you who do outside portraits: turn your subjects away from the sun. Like this, I photo I made yesterday of Oakville’ mayor Rob Burton and friends:

The advantages:

  1. The nice shadows coming towards you.
  2. The sun becomes the hair/edge light.
  3. The subjects do not squint.
  4. The light on my subjects’ faces is not harsh like sunlight.

Of course this needs a… flash. To light up their faces. I used a Bowens 400 Ws studio flash, powered by a Bowens “Travel Kit” battery.

Camera settings: 100 ISO, 1/250th, f/7.1. Flash set to 4 (out of 5), bounced into an umbrella.

And that is that. Simple.


Blur

I asked a photographer about studio the other day. She said we needed 1/200th sec, to freeze motion. After all, you cannot shoot moving things at, say, 1/40 second. Right?

Wrong. And right.

That is: if you use only flash (i.e. your settings make ambient light go away) then you effective shutter speed is the speed of the flash—which is 1/1000 sec or faster.

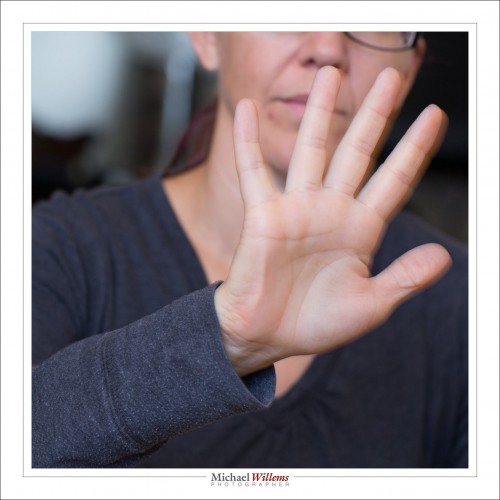
So this shot was taken at 1/40 sec while the subject waved her hand quickly:

What you see is:

  1. The hand is substantially sharp: that is the flash part of the exposure.
  2. There is some “ghosting”: that is the ambient part.

If we had gone to a smaller aperture, say f/11, that part (2), the ghosting, would have disappeared. Even if I had shot at 1/10 second.

This is ONE reason that flash gfives you sharp images: it “freezes” everything.


What’s with the long lens?

So when I shoot portraits, my favourite lens, if I can use it, is the 70-200.

Why “if I can use it”?

Because it is long. That means I need a large studio to stand back a lot. And not every studio is large. In all probability, your kitchen isn’t large, and I bet you do portraits there sometimes.

OK… but why would I want that long lens in the first place?

Because then I get very little distortion. Here’s a student, a few years ago on an Oakville Photo Walk, from far away, with the 70-200mm lens:
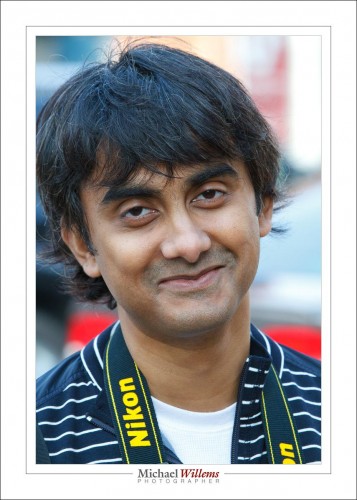
That’s what he looked like.

But now let’s get closer. And closer. So we zoom out. Closer still. Wide angle. Closer still. Now we have a very wide angle lens (16-35), and we are very close:
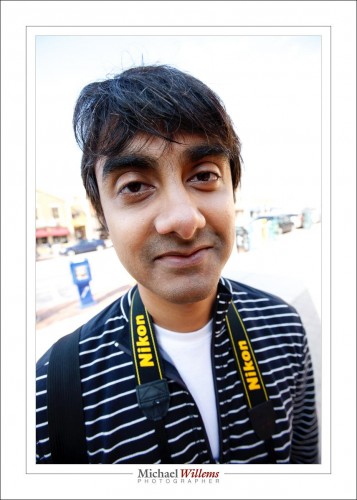
Can you see that’s a very different (and distorted) person?

Sometimes, in an environmental portrait, you may want to get close to the second picture—though never that close, distortion is out. But generally speaking, if it’s a headshot, you want accuracy, and the farther back you stand, the more accurate the representation of the person is.

There is a second advantage to being far away: you are not “in their face”. That means you are not perceived as threatening and something to fear. Which in turn means your subject will relax more. Basic psychology.

Practice: 50mm (on a full frame) is the minimum for half body shots; 85mm (ditto) is the minimum for headshots; longer is better for neutral, accurate portraits.

Lesson learned: If you go wide, stand back. Because of course it’s not the lens that does this magic: it’s how far away you stand. The lens just facilitates that.

 

The method

More and more, I am honing my flash teaching into a well-defined method. It comprises theory and practice, including:

  1. Basic theory
  2. Tech: Tools
  3. Tech: Modifiers
  4. The Epiphany…Turn Your Thinking Around: Balance
  5. The Four Flash Lighting Types
  6. The Three Starting Points: outdoors, indoors/party and studio
  7. Learning Bouncing
  8. Flash or strobes?
  9. Off-camera flash
  10. Learning The Limitations
  11. Getting Creative, Post-work, and minimizing the latter
  12. Troubleshooting

The emphasis is on obtaining a Quick Start.

Today, a quick tip.

Namely: Conceptually and in practice, split your photo into background/ambient and flash: two different shots, and treat them as such!

Here’s background: a very talented photographer I had the honour of teaching a few days ago. or rather.. the background behind her.

Aim for minus 2 stops (—2 on the meter).

Now add flash,. so we get background plus Flash:

There you go. And that is direct flash, hand-held, but off camera.

This is how it works. Not complicated, and in my courses and books (see http://learning.photography) you get the practical start points (f-this, ISO-that, etc) that allow you to get this right off the bat 90% of the time. Learn this stuff: it is such a nice experience to be able to light things predictably, and well!

Back to writing the “Portraits” book.