Blog mod

My son Jason modified this blog’s software: the layout is much better now, with less wasted space at the top, and the search field in a place where people can actually find it. Check it out above — and check out Jason’s Internet offerings, including web site surveys starting at just $5 on http://fiverr.com/jwillems – he provides great value. Have a site? Have him check it out. A McGill engineer for $5? A deal, I’d say.


Auto Is Better?

Isn’t “Fully Automatic” Better than all this manual stuff?

No.

Oh, that was simple. Just “No”?

Yes.

OK, ok… let me explain. It is natural to think that a camera knows better than you: after all, it has all those chips and computers and clever algorithms built in, and besides, you don’t know anything about photography (yet—that will change with the reading of this blog). It is natural to think that, but it is wrong. Every time the camera does something automatically, there’s a good chance it may get it wrong.

The camera tries to set many things automatically. Like your picture’s focus point (where it is sharpest). The picture’s exposure (how bright or how dark it is). The picture’s colour balance (does an evening picture or a sunset look reddish warm, for instance, or is the colour more neutral). The sensor’s sensitivity (high sensitivity is good when it’s dark, for instance, or when you are shooting fast-moving things like sports, but it does give you a more “grainy” picture).

The problem is: the camera does not actually know whether it is night-time or daytime. Or whether you are shooting something dark or light. Or even whether you want it to look darker or lighter. Nor does it know where in a photo you want it to be sharpest: the person closest to you, the one farther away, or the one in the distance? Nor does it know whether you want neutral colour or, in the case of a sunset, extra warm colour. Or whether you are shooting sports, or handheld nighttime scenes.

It’s not that the computers aren’t good enough. It’s just that the computers aren’t you. So they cannot possibly know what you have in mind. And that is why, after you learn simple “snapshot camera” use, you should unlearn that, and you will learn to take control—first by slightly fine-tuning what the camera does; then by increasingly doing it all yourself.

___

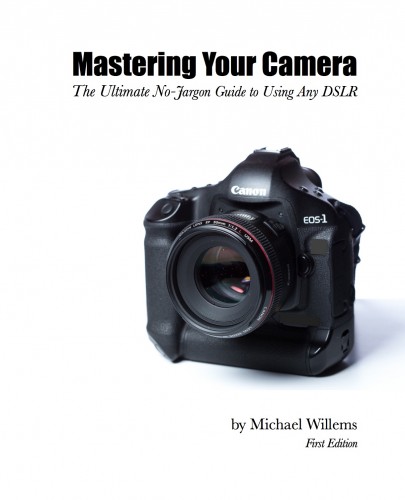
These words are from my next e-book, “Mastering Your Camera-The Ultimate No-Jargon Guide to Using Any DSLR”, which will be released in the next couple of weeks.

Reader Question

Today, another reader question–one that will interest many of you, so I will answer it here. Reader R.D. asks:

I am seriously considering “investing” in a full frame camera from my crop (CanonT3i).  I am considering the Canon 6D and 5D MkIII.  It will be a quantum shift for me. I have read your posts on the topic and I believe you feel both cameras are great.
My two questions are, 1) if you were going to choose between the two, which one would you go for; and 2) given I would also need to invest in new lenses (mine are EF-S), what would be your first and second choice in lens selection (I am asking having read your bakery’s dozen lens tips).

Great questions both, and very relevant. Let me try and answer them, with the proviso that I can only tell you in and outs; only you can make the decision. A bit like asking “what car should I buy”. That said, with the right ins and outs, you will know what is right for you, I am sure.
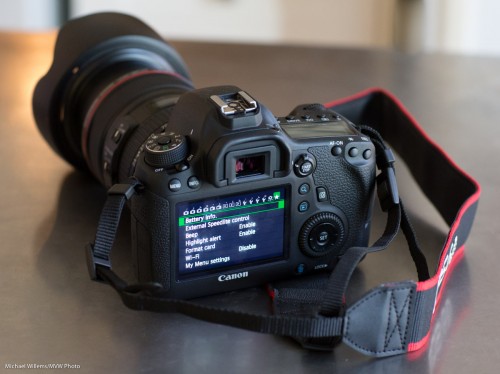
First, the camera choice. Yes, correct: I love both of them. I was amazed to see how good the 6D is: I thought Canon would have left significant functions out, but no. The main thing you lose compared to the 5D3 is the ability to write each picture to two memory cards: this is essential if you shoot weddings, but less important otherwise. There are other differences (the 6D has more plastic and is less weather resistant, and has simpler focus point geometry: 11 points vs 61 points. Also, it has slower continuous shooting, and a very slightly smaller viewfinder. The 6D has a stereo microphone. The 6D uses SD cards; the 5D3 CF and SD cards.

If these differences are important to you, spring for a 5D Mark III. I would say if you shoot weddings, the “dual cards” feature will be necessary. If you like a lot of focus points, too, the 5D might be your choice. Otherwise, I love the 6D. I advise you go into a store and hold both of them, use them, take them through their paces. Both are excellent choices. And a full frame, modern camera will amaze you: yes, this is a great time to upgrade.

Then the second question: lenses. This depends on what you want to shoot. My newly released Travel Photography book has a long section on lenses. I would say this:

  • If you travel, think of a wide angle lens like the 17-40 f/4L or the 16-35 f/2.8L.
  • If you shoot wildlife, consider a long telephoto lens.
  • If you shoot sports, try to obtain a 70-200 f/2.8 lens.
  • If you shoot “general purpose” photos, if you can afford it, the 24-70 f/2.8 is a superb lens and I know it is on sale at several retailers now.
  • If you want to save money, then go for some general purpose lens, but see if you can afford at least one “L”-lens. The cameras are both superb, and both warrant a superb lens.
  • You can also consider third-party lenses. Here, my advice is: hold them, try them, feel them: if you love the feel, you can save money this way. Today, some third party lenses are very good.

And finally: do, please, please, get a prime lens also: I would recommend the 50mm f/1.4, or even the extremely affordable 50mm f/1.8. Those lenses will allow you to get those beautiful crazy blurry backgrounds and to shoot in dark rooms without having the ISO cracked up very high; and they are both very sharp.

Tell me more about your type of shooting and I will help more, but this may help you along already, I think.

Finally: also learn the ins and outs of Lightroom!

Michael — standing by for more questions.


Simple, innit?

Today, I present you with one page from my next upcoming book, “Mastering Your Camera”, a no-jargon guide to using any DSLR.


Simplifying.

When people ask me “what is the difference between my snapshots and a professional picture?”, I most commonly say “the pro simplified her picture”. Simplifying your images is probably the most important thing to not forget.

“Simplifying” does not necessarily mean “removing everything but your subject from the photo”, although that is one way. More accurately, it means “ensuring that everything that is in your photo is in your photo because it should be in your photo”. If it shouldn’t be there, it shouldn’t be there!


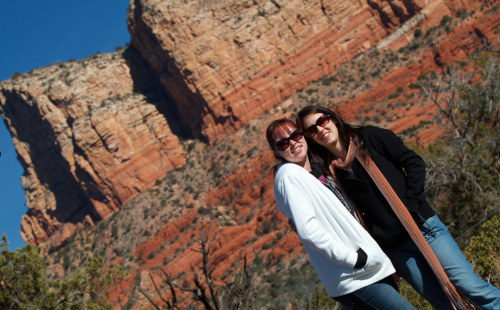
Sedona, AZ: Tilting Away The “Stuff”

Take the picture above. I tiled this image because next to the girls, there was a garbage can. That garbage can did not belong in the picture – it was not a picture of “two garbage cans in Sedona, AZ” – so I wanted it gone.

How can you simplify a picture? There are many ways, and you can come up with them yourself. They include:

  • Move: you do not have to take the image from right where you are. Often, moving to a different location makes all the difference.
  • Wait: Often, distractions disappear. The photo of the guard at The Alamo earlier in the book had three tourists right behind his neck: I waited until they were thus invisible, and then pressed the shutter.
  • Viewpoint: shoot from a different angle: a circle has 360 degrees, not just one…
  • Zoom: filling the frame is also a good way to get rid of distractions.
  • Blur: blurring the background by using a low “f-number” is also a great way.
  • Tilt: see the example above!
  • Selective light: only light the objects you want to see; keep the rest in the dark.
  • Move the subject or the offending objects. If you are not a photojournalist (for whom this is taboo!) then you can ask the subject to move, or move the distracting objects.

That is a partial list: you can come up with more ways yourself. The key is just to remember to do it.


Macro Tip

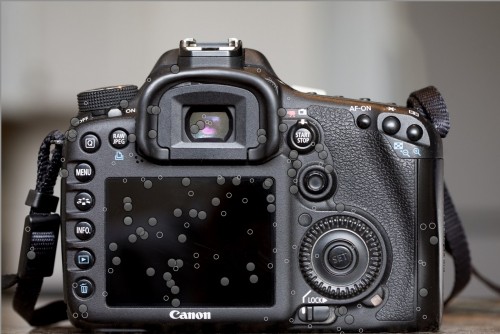
Whenever you take a close-up photo – and it does not have to be one taken with a special macro lens – try to ensure that your object is clean. That saves so much work!

Take this image (taken for my upcoming fourth e-book):

That may look fine, but if you click and look closely, you will see there is lots of dust, as well as some scratches, hair, etc.

To make it usable, here’s the dust I had to “remove” in Lightroom: one marker per bit of dust, etc, that I removed:

..which leads to this resulting final image:

And when you zoom in, you see that this one is much better.

I hope you take two things away from this. First, the obvious “clean things, especially black things, before you shoot them”. But second: what you see is not always what there was. A professional image often has a lot of work done on it before it is a professional image. There’s no such thing as “click and shoot”.

And with that thought I wish you a very happy Christmas eve day, if you celebrate Christmas; or a general purpose happy holiday if you manage to have the day or evening off and can spend it with family and friends.


Festive Day Tips

As I type this, I am sitting at my car dealership waiting while some preventive maintenance is taking place on one of my cars. And an ex student just said hello, and told me he was going to take some pictures over Christmas. Good!

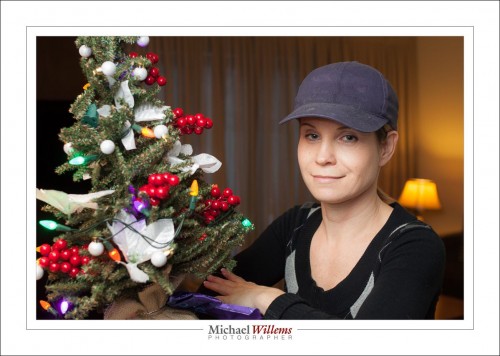
Picture, no doubt, like this one I took of a friend the other day:

And it occurs to me that he and I are not the only ones doing some photography. Hence, a few tips for you for the parties of the next few days.

  1. Make sure your camera and flash batteries are fully charged.
  2. Ensure you have a formatted memory card in the camera.
  3. For “party shots”, you may want a lens in the, roughly, 35mm focal length range, or 24mm on a crop camera.
  4. Put the flash on the camera and aim it upward behind you, if you can find a white or white-ish wall or ceiling.
  5. Use the “Willems 400-40-4 rule” as your starting point setting. That gives you a warmer, slightly dark background, as in the photo above. Adjust as needed.
  6. If your flash part of your photo is blown out and harsh, use “Flash Exposure Compensation” to decrease the flash power. Or inscrease it if it is dark (you may also need to increase your camera’s ISO).

Do these simple things and you will get good pictures, better than ever. And I am telling you this now so you have two days to practice. Enjoy!!


Icepocalypse

Well, perhaps not quite, but today was a good wake-up call in terms of power and how we rely on it. Like most in the Toronto area, I lost power for a few hours today – for most of the day, in fact. And it failed several times, just when computers were connected and writing to hard drives. Note to self and to you: always use UPS uninterruptible power supplies when working on a non-laptop computer. Your data is too valuable.

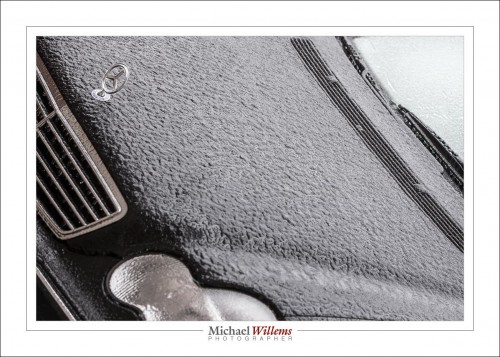
My car today, covered in a layer of hard ice:

Note two: Now that my Travel Photography book is out and available for purchase here, I have started my next book: a book for beginners and advanced users alike on using DSLR cameras – any DSLR camera:

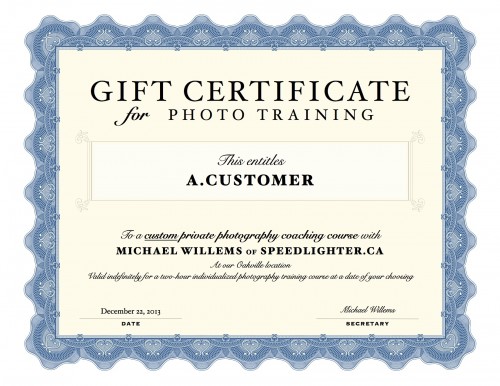
And note three: you can still get a certificate for custom training for your loved one:

An idea for Christmas? Contact me-I can have a personalised PDF file for you in an hour!

Now, back to charging the cameras. Enjoy these festive weeks!


Weather the weather

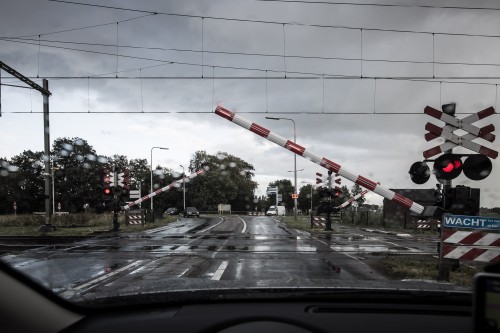
Weather is important to us. But it is a misconception to think, as we did in the “Kodak Instamatic days”, that we can only make nice photos on sunny day. See the photo of a dreary day in the Netherlands. above.

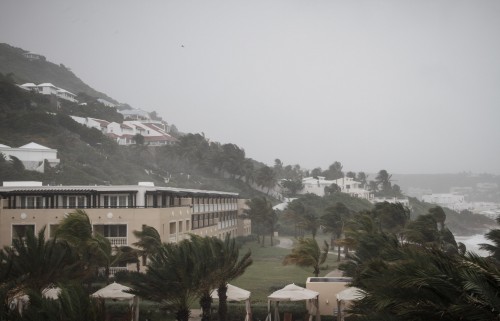
First, the weather is part of the story-like the hurricane winds in St Maarten in the photo here:

Second, you can always make photos work somehow: there is no “impossible weather”. You may need high ISO, or a tripod, or rain gear, or even a flash, but every weather type is usable.

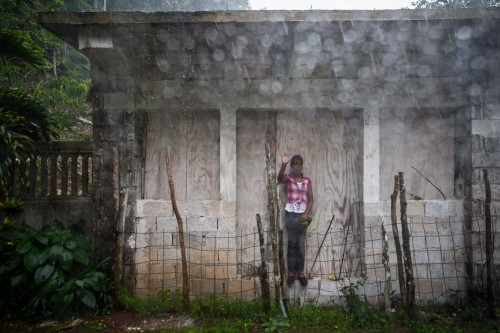
And third, sometimes “bad weather” is good for your photos. A grey sky, for instance, allows flower colours to pop much more than a sunny harsh sky. Rain can convey mood and give you soft lighting! Grey skies, too, and the resulting low contrast can be very good. Not every picture needs to be super contrasty, as a cloudy and wet Jamaica shows here.


This tip is a small part of my all-new Impactful Travel Photography e-book, published yesterday. $19.95, or a special price of $49.95 for all three books. Head on over: www.michaelwillems.ca/e-Books.html – just in time for Christmas, Just saying!


Happy Festive Days!

Happy Festive Days, everyone. Regardless of what creed, belief, religion, or nationality you may be: I wish you happiness. Life is short; enjoy it and make it better!

Michael


Don’t forget: check out the all-new Impactful Travel Photography e-book: perhaps some reading and playing for the holidays? Or get all three books for a reduced price. Interested in upping your skill level quickly, using my proven structured learning methods? Head on over to www.michaelwillems.ca/e-Books.html to buy now!