Go Slow, Young Man (Or Woman)

When you use a flash, the shutter speed is not that important. Since the flash fires all its power in 1/1000th sec or less, it is not important whether your shutter speed is 1/200th second, or 1/100th, or 1/4 second. Only the ambient light will be affected; not the flash part.

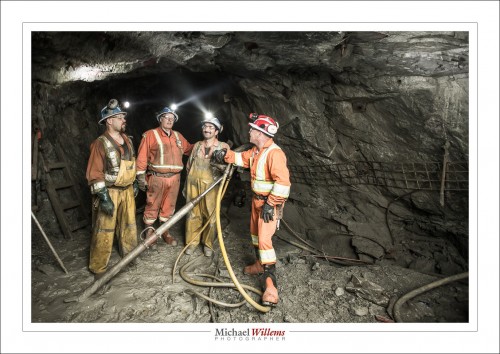
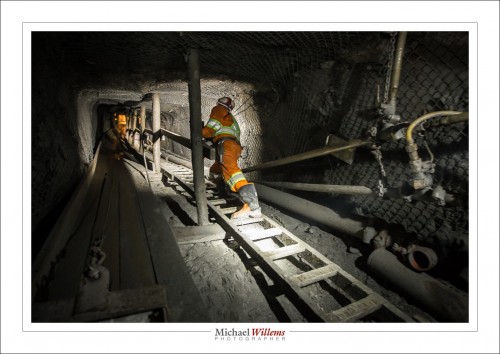
Take this, from a Goldcorp goldmine I shot earlier this year in Timmins, Ontario:

3200 ISO, f/4, and 1/4 second. Handheld.

Why so long? Because I wanted the light at the end of the tunnel to look like, well, the light at the end of the tunnel. And I needed f/4 for depth of field, hence 3200 ISO and 1/4 second.

But Michael, things will be blurry!

Not if they are lit by the flash. 1/1000th sec is 1/1000th sec! And if they are also lit by a little ambient light, then a little ghosting will appear, mainly in the moving parts:

But that is still better than not having any background light. So I shot the goldmine at slow shutter speed, and you should feel free to try the same. Here I did it to capture the hard hat lights:

Use a wider lens, and go slow, even very slow, any time you are using flash and it’s mainly flash lighting the important bits!


The Thinning Lens

As a photographer, I photograph a lot of people who are reluctant.

Usually, they are reluctant because they do not like their looks. They want to be Jennifer Aniston, and in their mind they are Jennifer Aniston, but in fact they are middle aged, ordinary people. They are usually, but not always, women, who are generally more aware of their looks than men. A very common question is: “oh, you can only shoot me if you put on your thinning lens”.

No Thinning Lens Needed Here

These people will be disappointed when they see their photos. And as a photographer, I do not like it when my clients are disappointed. So what do I do?

What I do not do is “put on a thinning lens”; i.e. edit the picture to the extent that the person is materially different. My rule of thumb is that if I cannot do it in Lightroom, I do not do it – that is the reason I have not been in Photoshop all year. I am happy to remove blemishes, especially temporary ones, like pimples and bruises; perhaps even lighten the odd wrinkle a little; but that’s it. No distorting, no making breasts bigger (or thighs smaller) or making people thinner than they are.

But there are other things I can do to get the most out of what a person has. That means things including the following:

Lighting brightly: bright light makes wrinkles vanish into the top part of the brightness, where they do not look obvious. The more high key an image, the better skin will look.

Finding the right angles: everyone has good and bad angles. I would give examples here, but one cardinal rule is that I never show the bad angle pictures to anyone – client or anyone else. Hence, by the way, the fact that I do not like clients asking to “see the pictures” on the back of the camera, unless they are very young and pretty and confident (those three do not always go together).

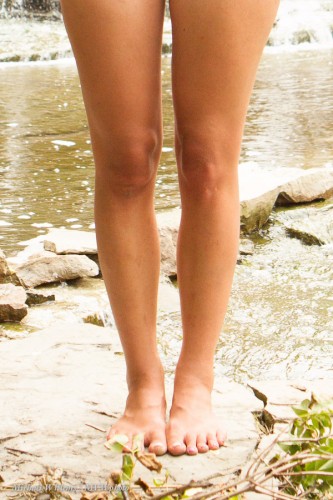
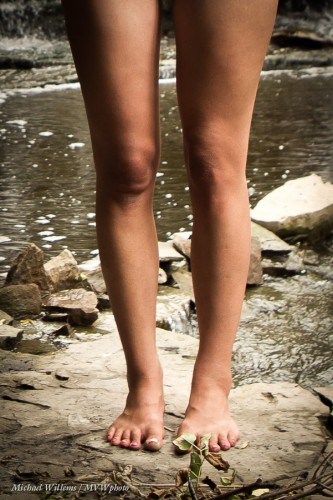
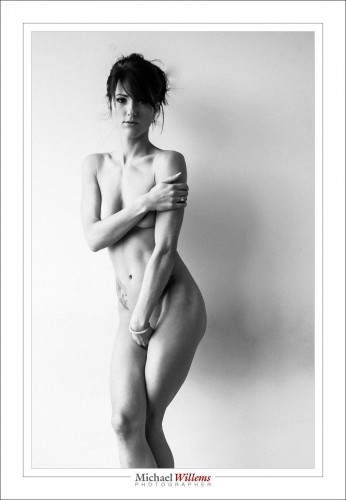
Modeling: when I can, and when someone is a little overweight, I try to light from the side rather than from the front.  Look at this example of a model’s legs: one lit primarily from the front, and the second lit mainly from the side, using an umbrella and speedlight. This model needs to lose no weight, of course, but you can see the principle: by selectively lighting you can give objects and people shape, and make broad objects appear narrower.

Selectively lighting – in general, I try to light good bits, while keeping less perfect bits in relative darkness.

Use a minor electronic adjustment – I am happy to use Lightroom’s Clarity adjustment to slightly smooth skin tones. A clarity adjustment of perhaps minus 15 is hardly consciously visible – except it does make skin clearer, wrinkles less obvious and hence makes the person look better.

Finally, use the right lens! A wide angle lens can make large objects look “puffy” and will make close shapes look larger. Close shapes can, for instance, be the nose, or the thighs if the person is sitting, or their arms if they are closer to you than the face. Using a long lens, on the other hand, will give a much more neutral, undistorted look. My 70-200 lens is my favourite – provided I have enough space. Fashion photographers tend to also use this lens as a favourite. So I suppose in a sense there is a thinning lens!

No thinning lens needed here, either

In the end, of course, if someone is not happy with their looks, well, then there is little I can do – I cannot make them into something they are not (like Jennifer Aniston). That is one reason I am happy to photograph a lot of young women: it’s not that I prefer to (the challenge of shooting someone older is great!), but they tend to be more accepting of their bodies, for obvious reasons, and more accepting of reality of there is something not perfect.

And guess what: no-one is perfect. I am guessing that if you saw Jennifer Aniston get out of bed in the morning and groggily walk to the bathroom, you would not be impressed. We are all human. One reason I thoroughly enjoyed doing portraits of naturists at Bare Oaks naturist park the past two summers is that they understand this, and are happy with their bodies, whatever they look like, short, tall, big, small, young, old, whatever – seeing people naked, one realises that no-one is perfect like the fantasies we see in magazines where the photographers do materially alter things. Ahh.. so refreshing for a photographer!

___

NEW: You can now sign up for a June 20-30, 2014 photo tour of North Wales with me: go here and read all about it, and if you are interested, call the travel experts and sign up. Let them know you may be interested as soon as possible: this will be a great trip with photography, travel, sightseeing; doing and learning all mixed in together!


Baker’s Dozen Lens Tips

Oh, I get that question so often: “what lens should I get”?

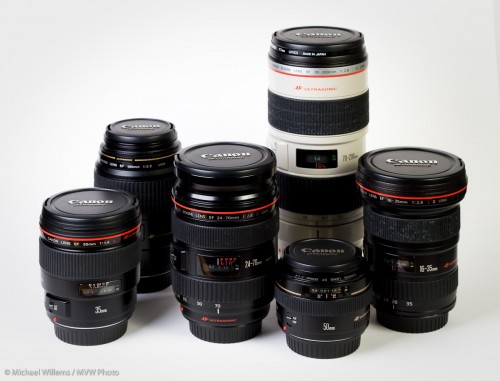
Michael Willems's Lenses

A Few Of Michael's Lenses

And of course that is a difficult question to answer, because there is no “should”. It depends. But in general, these remarks may help:

Michael’s Baker’s Dozen Lens Tips:

  1. The lens makes the picture more than the camera does
  2. Faster is better. The lower the lowest “f-number”, the better.
  3. Zoom lenses are more convenient, but prime (fixed) lenses are faster, better, and lead to more consistent photography.
  4. Consumer zooms cannot go to the same lowest f-number when zoomed in and out. Pro lenses, on the other hand, can go to the same lowest number whether they are zoomed in or out.
  5. IS/VR, stabilization, is a great feature: get it if you can, especially on long lenses. It will allow you to shoot 1-3 stops slower without camera shake.
  6. The very wide angle lens is underused (10-20mm range on a crop camera, 16-35mm on a full-frame). This lens is especially great in travel and journalism
  7. A good lens keeps its value for many years. (The corollary: no great deals on used lenses).
  8. Always use a lens hood (good lenses come with one).
  9. Manufacturer lenses are typically better than third-party lenses, but not always. Third party lenses do offer better warranties.
  10. The greater the range of a zoom lens, the more it is a compromise.
  11. Specialty lenses (fish-eyes, tilt-shift) are great fun but you will probably not use them all that much (ymmv). A macro lens, however, is also a great portrait lens, and you will probably use it regularly.
  12. Do try the lenses you have in mind. You can order into the store, or you can rent before you buy!
  13. Full-frame lenses (eg Canon EF) can be used on any camera of the brand they are made for. Crop lenses (eg EF-S, DX) are cheaper, but can usually only be used on crop cameras.

There’s more, but not much, so this should get you started!


Evening worthwhile

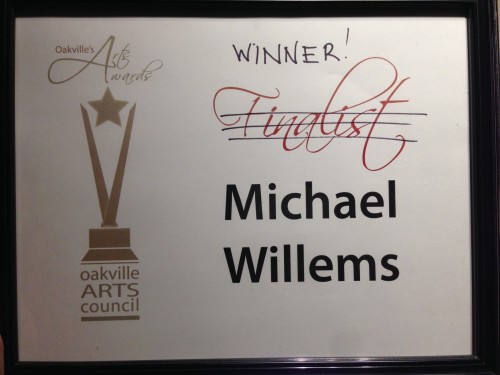
So… the art award evening, held in the Grand Ballroom of the local conference centre just now, just now went well:

Yes, I won the 2013 Cogeco “Stars Among Us” Digital Art Award.

I am hugely honoured for several reasons. First, I am humbled by the company I am in: other finalists in the various categories included renowned authors, university professors, poets, and great creative artists. And the other two finalists in my category (“digital arts”, meaning photography and video) were very, very good: I was surprised to be chosen over them.

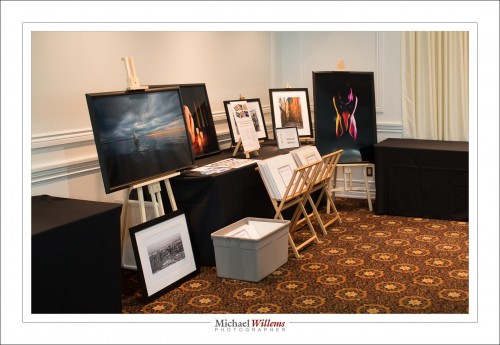
The work I submitted consisted of nudes, and a few sailing and other recent images: wall art, ready to hang. I had a bunch, as you see:

As a creative artist, I know my work is good, or I would give up. And yet, knowing that others also value it is great validation. And the cash prize helps. And the publicity will help. And business will result from this. But above all, knowing that my work pleases others is reward in itself. That’s why you do it – right?

See some of my prints on www.michaelsmuse.com


All set

Okay… I am all set for tonight’s Art Council event. A grand ballroom full of people, and a number of artists (namely, a few members and the finalists, me included) set up to display some work. Here’s mine:

On a different note: a reader asked me a few questions about macro lenses, and I thought I might repeat them here:

Macro lenses come in a variety of lengths from the 45mm range to the 200mm range. Ken Rockwell (The more time I spend in your class, the lower my opinion of Ken Rockwell… although he has some reasonable resources on Nikon equipment) is of the opinion that anything below about the 100mm range is more or less useless.  His argument being that you don’t really want to get close to your subject.
… Forgive me, but isn’t a macro lens designed for the express purpose of getting close?  May as well just use a normal lens if you don’t want to get close, yes?

Good question. Well – first, a macro lens isn’t really about “how close you get”, but it is more about “how large the object will appear on your sensor”. If I could get an object to look huge from a ten meter distance, that would suit me fine, too. Well, that is exaggerated, but you get my point.

A true macro lens has a ratio of 1:1 (or conceivably more). Meaning that at its “closest” extreme, the object appears the same size on your sensor as it is in life. A 2cm long bee would throw an image of 2cm onto your sensor. (A “macro featured zoom”” typically has a 1:4 ratio: it is not a true zoom. The 2cm bee would be a 0.5cm image on your sensor.

The reader continues:

Forget Mr. Rockwell for a moment. Let me approach my question another way.
Amongst my other hobbies,  I am an ‘N’ scale model railroader.  If this means nothing, I can clarify a little bit by saying that in ‘N’ scale  1/16th of an inch is roughly equivalent to 1 foot in real life.  A locomotive that’s 80ft long in real life, is 5″ long in ‘N’ scale.
Lets say I want to take a picture of my layout, as if it were “real life”.  I want to get lots of depth in the picture… lets say a near head-on shot looking down the side of the train as it rolls around a curve… Would I not then want a wide angle macro lens? So that I could focus as if I were only a 1/2″ (6ft) tall man with a camera that’s only 1/32″ (6in) square standing 5″ (80ft) from the train?

Yes. The length of the lens you like is determined by all sorts of factors. Do you want to be close? You probably do. But someone shooting bees doesn’t, for fear of disturbing said bee (or of getting stung). Also, keep in mind that a 60mm macro, used on a crop camera, would be like a 100mm macro. And keep in mind that a wide lens will have greater depth of field (depending on its position). I think saying “short macro lenses are useless” is not a very nuanced statement.

And in your case, I think you are probably right about your needing a wide macro lens. But I would have to see your setup. You might also want to (or even need to) consider a tilt-shift lens, at least for the larger “overview”-type shots. Tilt-shift lenses (see previous post) can shift the focal plane, giving you great depth of field at large apertures.

As said, I would have to see. One good thing you can do is rent a lens – or perhaps a few lenses – and see what you get. I fear you will end up with several lenses, since an “I am there” shot is very different from an overview shot.

One more thing. Shoot at small apertures, meaning slow shots, so you use a tripod. If you want the train to be zooming through the picture, slow it down so it looks like it’s zooming in a 6 second exposure, while in fact it was crawling.


When the light is right…

…that’s when you have a camera.

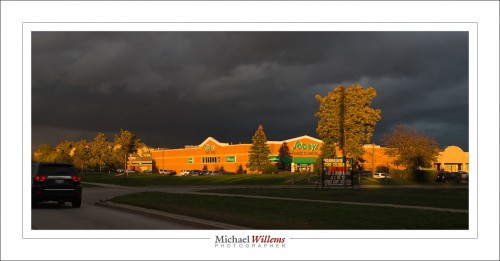
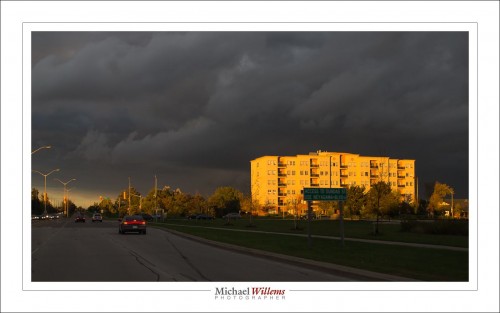
Yesterday, just before sunset, I was driving to my class at Sheridan college and I saw a dark sky, with a wonderful golden sunlit lower area. The kind of light and colour we get a lot here when there’s storms brewing in the autumn. So I shot a few shots while driving (of course I would not do this if I were personally driving, as this would be illegal, right?) – and anyway: this is why you always carry your camera.

Even the local supermarket can be a thing of beauty, when the light is right:

Technique: 800 ISO, f/8, 1/250th second.

I set f/8 because I had a tilt-shift lens on the camera, and I had no time to focus.  That was my first need. Then, f/8 and focus on “infinity minus a little” it was. At 800 ISO (experience speaking) this gave me 1/250th second: perfect for handholding an SLR while not looking through its viewfinder.

Another shot from the same drive, a moment later: a local retirement home, where old people spend their golden years:

If my grandparents were in that place I’d want that photo.

The moral:

  1. look for great light – light distinguishes the pros from snapshooters.
  2. Always carry a camera.
  3. Know the exposure basics.

Do those and you’re golden, as they say.

___

Footnote: the local Currys’ store manager came around today and very kindly gave me a $25 gift certificate. Much more importantly, she explained how she had used my post yesterday as a learning opportunity for her staff – customer service being everything. Nice, and apology accepted.


Metallic Prints: when?

A friend just asked (and I paraphrase): “I have a picture: should I have it printed on metallic?” He went on to say that it has shiny stuff in it. His picture is here.

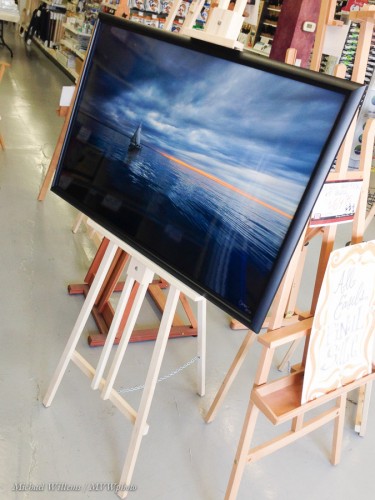
And I do like to have my work printed on metallic, for the large prints. Like in this one, which will be for sale at the Oakville awards ceremony this Thursday:

Good question. When do you use the following?

  • Normal paper;
  • Matte paper;
  • Glossy paper;
  • Natural fibre paper;
  • Metallic paper.

Well, here’s my rules of thumb. Very basically:

  • Normal paper: run of the mill paper, never. Make your images look great, and make them last.
  • Matte paper: when you expect reflections. When blacks need to be deep black.
  • Glossy paper: when you want your pictures to look like photos. When reflections will not be an issue.
  • Natural fibre paper: when you are using a pigment printed, and are less interested in the background being pure white, but more interested in long-lasting prints (think centuries). Pigment lasts centuries; natural fibre paper types such as the popular Hahnemülle papers will not fade, since they have no “emulsion” side to fade: “it is what it is”.
  • Metallic paper: when your prints need to “wow!” and they have shiny bits in them. Colours become vivid; black and white greys get this wonderful silvery sheen: strongly recommended. Also, when you want a light print. Silver paper mounted on softcore needs no glass; just a simple frame around the edges.

Based on the above, my friend’s print most certainly qualifies for a metallic print. I’d go and do it. If you (like him) live near Toronto, go to Fotobox in Etobicoke, and tell them I sent you.

One more thing. Settle on a few paper types. All papers have a clear range of things they do best; colours they can express; way with colour and with deep blacks; and so on. Pick a few, learn what they do (use the Soft Proofing function in Lightroom that I discussed here previously!) and then print accordingly.

Talking about prints: I also intend to sell smaller prints from www.michaelsmuse.com at this week’s event:

If you should be interested in prints for your home or office: I will honour the special Oakville Arts Council pricing until Thursday. Just saying.

___

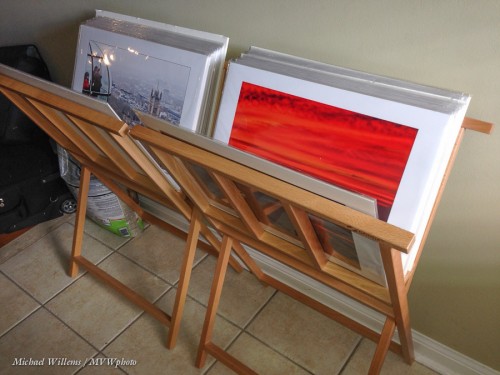
A Note for Oakville residents: I just bought those easels and print stands at Currys in Oakville (off Trafalgar Road). The store manager (I think that is what she was), when asked by the very nice cashier if there was a discount for taking the display items (they had run out of boxed items) grumpily looked at me and said “NO. There’s nothing wrong with them.” The brusque and rude way she said that, and the way that she then then went back to her work with clear disdain, apparent feelings of superiority, not liking me, and all sorts of other not-nice-to-customers feelings makes me not want to go back there. At Michaels art store, on the contrary, they were very nice and took all sorts of time even though I bought nothing. Just saying, everyone: avoid Currys Oakville if you want to be treated with respect. (And it’s not the discount: it’s the way she expressed it).


Military Technology

Once again, military technology is at the basis of what we do with technology. It is incredible what humans will do in order to more efficiently fight other humans.

In the early 20th century an Austrian army captain named Scheimpflug worked out how to handle perspective in aerial photographs (this would come in handy in WWI, no doubt). Hauptmann Scheimpflug is famous for explaining what we know as the Scheimpflug principle. If you like math, look it up on Wikipedia. I warn you, it took me a while to get my head around all those formulas.

What do they do for us? They tell us how to use tilt-shift lenses (or view cameras) to change the plane of focus.

And I will give you a simplified version of its implications here today (yes, it’s simplified: no need to start pointing that out). I am talking about tilting here today, not about shifting. But even simplified, this is an advanced article that assumes you already know at least the basics of what tilt-shift lenses do.

I wrote this because I usually see people with tilt-shift lenses just wildly change every adjustment randomly: and that is not at all a way to guarantee results. Knowing stuff is always better.

WHAT TILT-SHIFT LENSES CAN DO

A tilt-shift lens (its tilting, specifically) allows you to shift the plane of focus so that you can make sharp not “stuff parallel to the sensor” (like the wall in front of you), but “stuff at an angle to the sensor” (like the floor below you).

Consider this, the normal situation. With my 45mm lens set to f/2.8, I focus on the door, so it is in focus (but the stuff close to me is not):
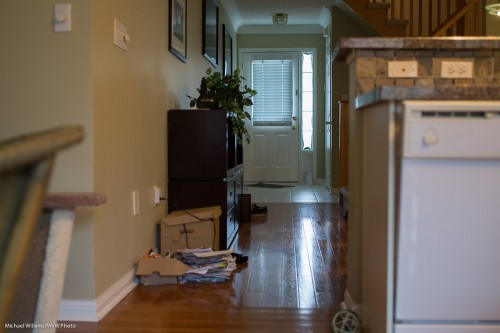
Or I focus on the stuff closest to me, so it is sharp (but the door is not):
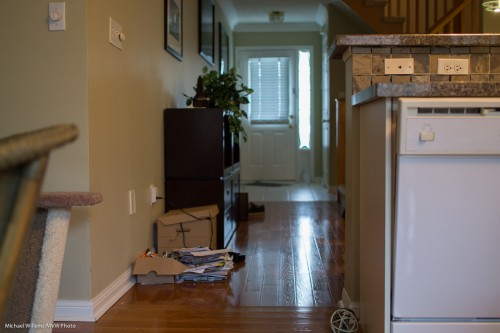
And if I want both in focus, well, I would have to go to a very small aperture (maybe f/16 or even smaller) to get them both sharp. Or to a wider angle lens, or I would have to move way back. None of which may be practical, or even possible.

Enter the tilt-shift lens. If I…

  • tilt the lens down by the the right angle; and
  • hold my camera at the right angle; and
  • am at the right distance from the floor; and
  • focus at the right distance…

(I told you this was complex), then I can do anything I like. Like this:
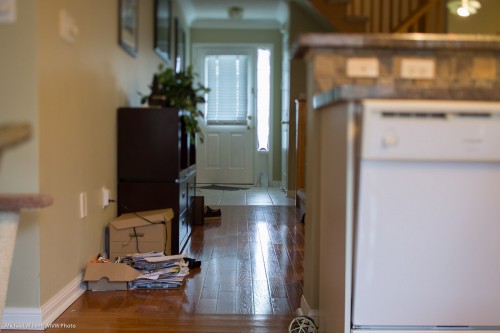
The floor is in focus, from close to far. And yet I am still just at f/2.8!

So far, so good. The question is: once you have a tilt-shift lens, how do you focus it where you want? With the number of variables I just mentioned, there’s just about infinite possibilities, and very few of those actually work for you.

LET’S SIMPLIFY!

I like simplifying. So let’s start with taking variables out. Let’s hold the camera parallel to the floor (i.e. aiming straight ahead, not up or down) and set the focus to infinity. Then the focal plane (“where it’s sharp”) will be perpendicular to the sensor, and since we are holding the camera straight, that means it will be the floor – provided we get the height of the camera above the floor and the angle of tilt down right. Just two things!

And the relationship between them is given by a simple relationship:

J = f/sin θ

Where:

  • J is the distance to the focal plane (“the floor”)
  • f is the focal length of the lens (45mm in my case)
  • θ (theta) is the angle at which you tilt the lens down (down, because the floor is below you).

My 45mm lens can shift down up to 8 degrees.  So the relationship between angle and “how high you have to be above the floor if you want the floor to be in focus” is:

45mm T/S LENS

TILT ANGLE (deg) – DISTANCE (mm)

  • 1°   2,578   (=2.57m)
  • 2°   1,289   (=1.29m)
  • 3°   860   (=86cm)
  • 4°   645   (=65cm)
  • 5°   516   (=52cm)
  • 6°   431   (=43cm)
  • 7°   369   (=37cm)
  • 8°   323  (=32cm)

Remember, this is with the camera pointed straight ahead, and the focus set to infinity. (Why this is so is easily derived from the formulas in the Wikipedia articles and basic knowledge, but I will spare you the math, except to mention that that the tangent of 90 degrees is infinity).

So in my last image, I was about 85cm above the floor, with the lens angled down by 3 degrees. Bingo.

(A tilt-shift pens is hard to adjust very finely: the adjustments are very precise. Patience is needed.)

An alternate way to use this simple rule is to start with what you want. I.e. “if I am x distance away from the floor (and pointing straight ahead with my focus set to infinity), what should my angle be?)

The formula is simply the same as above, so it becomes:

θ = sin-1 (f/J)

So if I want my camera to be, say, 1.7m above the ground, I would have to angle down by sin-1 (a.k.a. arcsin) (45/1700), which my calculator says is 1.52 degrees. Yes, a scientific calculator is handy. Or you could work these out once and carry a little table with you, like this:

45mm T/S lens

DISTANCE (m) – TILT ANGLE (deg)

  • 5m   0.5°
  • 4m   0.7°
  • 3m   0.9°
  • 2m   1.3°
  • 1.5m   1.7°
  • 1m   2.6°
  • 0.5m   5.2°

NOW WE GET A LITTLE MORE COMPLEX

Now let’s let go of the assumptions, namely that you focus on infinity and point straight ahead.

When you alter the focus setting of your lens (i.e. you do not focus on infinity), the focal plane swings up and down. It still starts below your camera at a distance given by the formula at the top, but now it is not parallel to the horizon. As you focus closer, it swings up (or you swing the camera down, whichever you prefer):

Scheimpflug Intersection (Source: Wikimedia)

By how much? I.e. what focus setting will give you what angle?

Aha, glad you asked. Another formula!

From Wikipedia:

ψ = tan-1 ( (u’/f) sin θ)

Where:

  • ψ (psi) = the angle that the focal plane angles up by;
  • u’ = the distance along the line of sight from the centre of the lens to the PoF (i.e. the distance to the focal plane; i.e. the focus setting, since you will be focusing on your plane of focus);
  • f = your lens’s focal length;
  • θ = the angle you have tilted the lens down by.

So that means that while at infinity focus the plane is perpendicular to the sensor, as you focus closer, the plane tilts up.

IN PRACTICE

So now.. knowing all this, in practice, this is what you would do if you want a particular focal plane to be sharp:

  1. Determine how far away from the intended focal plane you will be. E.g. if the intended focal plane is the ground, say in a landscape shot, then you may say “the sensor will be 1 metre above the ground”.
  2. Put the camera on a tripod at that distance from the ground.
  3. Aim it straight ahead (the sensor is vertical).
  4. Set the focus to infinity.
  5. Now, using the tilt-shift mechanism, tilt the lens toward the intended focal plane (e.g. down, in this example) by the angle given by θ = sin-1 (f/J) above, so in our example, with a 45mm lens and 1m distance above the floor, that means angle down by 2.6 degrees.

Alternately:

  1. Aim the camera straight ahead (the sensor is vertical).
  2. Set the focus to infinity.
  3. Now, using the tilt-shift mechanism, tilt the lens toward the intended focal plane until you see it sharp.

Both these ways to get to the same result give you a sharp ground (if that is what you are intending). The first method is less error-prone, of course; calculating angles rather than trial and error is always recommended if you can.

Not perpendicular?

And if the focal plane should not be perpendicular to your sensor, e.g. because the landscape slopes up, or because you wish to aim down at an angle, then start as in the first method above; then (after aiming down if need be*) and simply adjust focus closer than infinity until the plane tilts up to where you want it.

(*) If you aim the camera down, of course the actual distance between it and the intended focal plane increases, so you will have to lessen the tilt angle.

Did I mention this was a little complicated?


Disclaimers: Any errors here are mine. And as said, of course I am simplifying a little here. If we were to be totally accurate, we would take into account the different distances between lens and focal plane on the one hand (hinge rule) and sensor and focal plane on the other hand (Scheimpflug rule); and the fact that a T/S lens on an SLR does not rotate around its axis, but instead, rotates up or down in its entirety; and the fact that a lens is not a simple single-element idealized lens (lens plane versus lens front focal plane). But what I discuss in this article will do entirely well enough in practice.

___

American friends: why am I using metric instead of feet etc, you may ask? Read what The Oatmeal says, and no more words necessary.

 

Softening Recipe

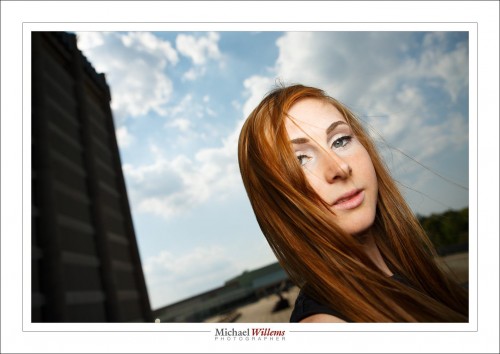
Here’s a simple recipe for a dramatic flash shot outside. Like this:

Look s”photoshopped”, yeah? Well, it isn’t. It was shot like that. And for that, you need:

  1. An external flash on top of the camera
  2. A sunny day
  3. You in very close proximity to the subject
  4. The possibility to set flash (Canon system) or camera (Nikon system) to High-Speed Flash (Canon) or “Auto FP Flash” (Nikon)

On a sunny day, you now shoot as follows:

  1. Camera on manual mode
  2. Flash on TTL mode
  3. Camera set to 100 ISO, f/4, and 1/2000th second
  4. Honl or similar softbox on the flash
  5. You very close to the subject’s face (otherwise, there’s not enough power).

“High speed flash/FP flash” allows you to go to a shutter speed of 1/2000th, which normally you cannot do (normally, you are limited to around 1/200th second).

As a result, you now get dramatic light with nevertheless a blurred background.

Why do you have to be very close? Because high speed/FP flash diminishes the power of your flash very dramatically, more the faster you go.  And the softbox diminishes it even more. Hence – be as close as around 10 inches from your subject, or the flash will not show.  But when you get it right, it is a very cool look.

___

There. Another secret free to you from The Speedlighter. Want more? Come see me do my Flash workshop at Vistek in Toronto tomorrow, Saturday Oct 5. And get the flash e-book!