And may all your…

….festive seasons be white!

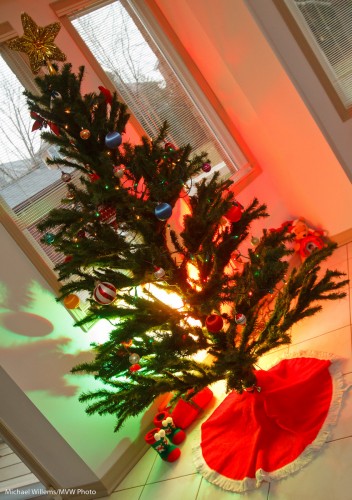
A quick reminder therefore of some basic flash technique.  Look at this shot of my living room the other day:

Snow outside

To shoot that you take the following steps:

  1. Expose for the background (use your camera’s spot meter and point at a tree, or use smart metering with +1 to +2 stops exposure compensation).
  2. Add a flash you your camera. Turn the flash head above and behind you.
  3. In a white room such as this, also use flash compensation, say +1 stops for a start.

And there you go, a well exposed picture. Have fun!

Party recipe

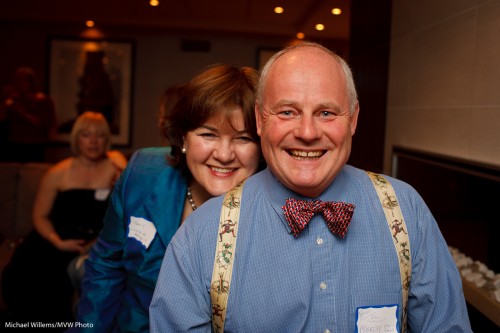
There will be many parties in the next few weeks for many of you, so I would like to give you a few tips and reminders for better event photos.

I shall illustrate with a few pictures of an event I shot the other day.

A Recent Party picture

First, your equipment:

  1. Use an external flash. Never the popup.
  2. Aim it behind you – yes, behind you, high so that you bounce off the ceiling, provided there is a ceiling and it is somewhat like white.
  3. Use a “slightly wide angle” lens. I love the 35mm prime (fixed) lens – on a full frame camera, which means a 24mm lens on a typical crop sensor camera.
  4. A prime lens is good as it forces a consistency to your compositions, which will pay off since it also means consistency in your settings.

Cheers!

Then, the settings:

  1. Mode: Camera in manual exposure mode (“M”)
  2. Flash: in its normal TTL mode
  3. ISO: Set ISO to 400 for most venues (800 if it is dark, possibly even higher if the venue is pitch black)
  4. Exposure: Set aperture and shutter speed to a combination of values that gives you an ambient exposure of -2 stops. That is, when you press half way down on the shutter as you aim at an average part of  the room, your meter in the viewfinder points at a value around -2.  A typical combination at 400 ISO is f/4 at 1/30th of a second.
  5. White balance: Set your white balance to Flash. That gives you warm backgrounds, but your subjects will look natural, since they are lit primarily by the flash.
  6. Flash compensation: if your subjects are small in the picture, with a large background, your camera may overexpose the flash portion. In that case, use flash compensation and set it lower: try a value of -1, say.

If you shoot in a very dark venue, you will need to go to a wider aperture, so I recommend fast lenses. I often end up shooting at f/2, or even lower.

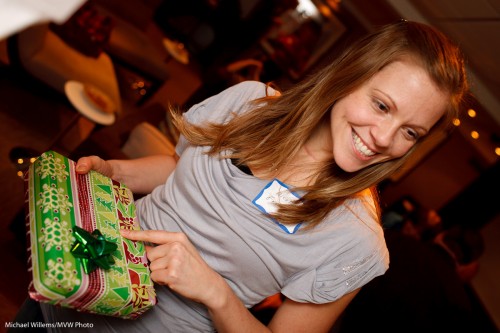
Is this present for me?

And finally, composition:

  1. Shoot “grip and grins” like the first one above: people like those. Heads together!
  2. Also shoot “fly on the wall” pictures. “If it smiles, shoot it”.
  3. Use the rule of thirds – “off-centre composition”)
  4. Tilt whenever you like.
  5. And please also shoot the food, the room, the small details.

The above will give you great images. But remember to finish them in Adobe Lightroom: crop, do minor adjustments, and only show your great pictures!

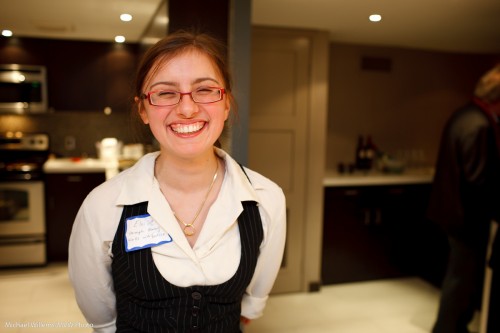
A wonderful smile

Above all: have fun!

Colour your season

The drab dark days of December can get to you – except if you take charge. That is why we put up trees, and icicles – and that is also why you can use gels.

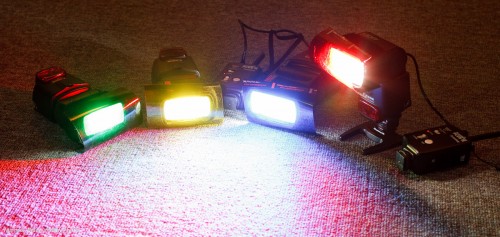
Like these Honl Photo gels, which I use on my speedlights all the time:

Fun with Gels

Red and green are the seasonal colours that can make a boring scene into an appropriately brightly coloured one.

Especially with the remote flash technique I metioned a couple of days ago:

Fun with Gels

So your assignment: today, go take a few pictures with a gelled flash – or preferably with two gelled flashes.

A quick flash tip

One of the things you may wish to do this festive season is use off-camera TTL flash.

I.e. holding the camera in your right hand and the flash elsewhere – for instance in your left hand (or your other fight hand if you have two – well spotted, Mike).

In any case: away from the camera – this is key to good pictures.

All brands of camera allow this, and if you have a Nikon, or a Canon 7D or 60D, you do not even need additional hardware: just your flash and your camera, with its popup.

The popup (or on other camera, the on-camera flash) now sends commands to the other flash. So you can light a subject – like the student in Thursday’s Flash class – from one side, in this case with a flash in an umbrella on our right side, with a reflector on our left:

Off-camera flash using TTL

Much better than straight flash!

You can even use several flashes, divided into groups. In the next shot, we have an additional flash on our left, rather than a reflector. That flash has a red gel (one of the Honl Photo gels) on it, to see clearly which light is doing what work:

Off-camera flashes, using TTL

But what you must remember is this:

Disable the on-camera flash.

That is, the pop-up or 580EX/SB900 on your camera still sends its commands to the other flashes, but when the actual photo is beingtaken, it does not flash.

If you forget to disable it, it will fire. And then you get this unfortunate effect:

On-and Off-camera flashes, using TTL

Deer in the headlights. Harshness. Shadows. Brrr: baaad.

So your tip: use off-camera flash, and disable the main flash from firing actual flashes. The camera menu (or the flash on your camera) has functions for this.

If you want to learn this and many other techniques before the holiday, take the advanced flash course in Mono (see http://www.cameratraining.ca) next week. Else, take a course with me or at Henry’s early in the year. It is worth learning flash!

No tie

As reader Robert G pointed out, the other day I posted apicture of me without a tie.

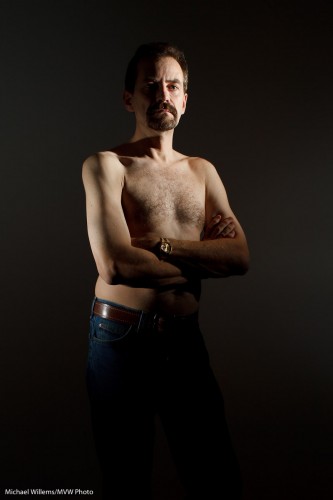
Yes, sometimes I catch myself unawares. I am my own frequent model, and today’s image is myself, again without a tie, to demonstrate an illustration of a different lighting technique from the onein the recent posts.

This time I am using two speedlights from the side. Both speedlights are fitted with a Honl Photo Speed Strap and 1/4″ grid to soften the light and to avoid it spilling onto the white wall. This gives you a dramatic light which can be very good when shooting males:

Michael Willems (by Michael Willems)

Yup. No tie.

See what this edge lighting technique provides?

  • Shape (muscles)
  • Texture (you want this for males, not so much for females)
  • Dark backgrounds
  • The ability to make other areas dark.

This latter ability is often useful. Rememer: lighting is not so much about what you light – it is at least as much about what you do not light.

Add a splash

Further to Thursday’s post, I thought I would brighten your day with some more colour.

You see, sometimes you need to shoot things that are a bit, well, drab. Like this wall – the screen is great but the wall is a bit dull:

Wall with screen

So then, as you also saw two days ago,  I shot it again, this time with two speedlites:

Wall with screen with gels

How was this rainbow effect achieved?

  • These two 430EX flashes were fired with TTL using a 580EX on my 1D MkIII.
  • They were aimed at the wall, one above the other, aimed in the same direction (good idea from my assistant).
  • They were fitted with Honl speedstraps and with a Honl gel each: red for the bottom flash, green for the top one. No other modifiers: other than the gels, they were bare.
  • The ratio between red and green was set on the back of the 580EX until I was happy.

That was simple, and I think you will agree it’s a better shot.

Doing the impossible

Often, as a photographer I have to do the impossible.

That is, of course, an overstatement. But there is a core of truth in it: photography is problem-solving.

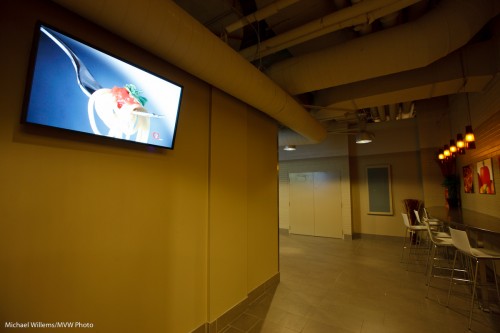
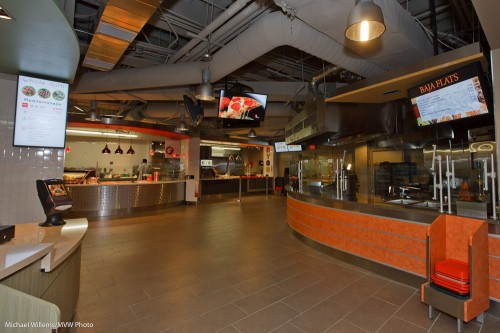
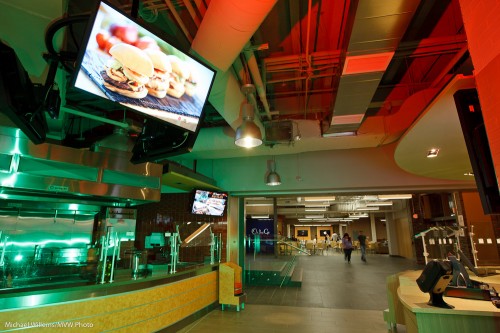
The other night I shot an excellent Digital Signage installation. Innovative screens, powered by EnQii software, in a self-service restaurant.

The problem is: the screens are bright and need to be seen. And the restaurant is dark compared to the screens. Expose for the screens and the restaurant is dark. Expose for the restaurant and the screens overexpose.

There are three potential solutions:

  1. Turn down the screens. Not an option here…
  2. Light the restaurant with flashes. Lot of work, and not practical in a working restaurant.
  3. Shoot RAW and bring bright and dark together in post-processing.

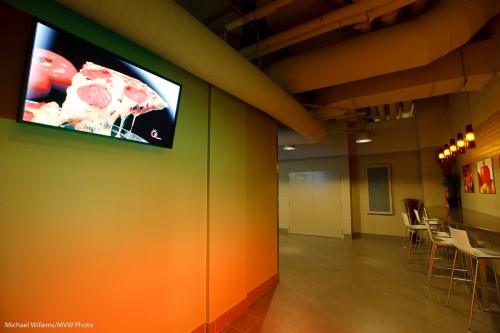
I used a combination of 2 and 3.

More 3 than 2 in this shot:

Digital Signage

Digital Signage

And more 2 than 3 in this shot – with coloured Honl gels on my speedlites:

Digital Signage and gels

Digital Signage and gels

As you see, an impossible-to-shoot scene is possible.

  1. Do a test shot or two, in some automatic mode. Ensure you shoot RAW.
  2. Ensure you use a tripod if necessary (and it will be).
  3. Now first, expose for the screens. Expose to the right, but do not lose detail. Use the histogram and the “blinkies” to gauge this.
  4. Use a tripod if necessary.
  5. Then add light if necessary.
  6. Then in post-production, use “recovery” to decrease brightness in the screens, and “shadows” to increase brightness in the darker areas.

Try it – it is really not all that difficult!

Elements of a picture

This, another photo from last Saturday’s Mono workshop, prompts me to write today’s post:

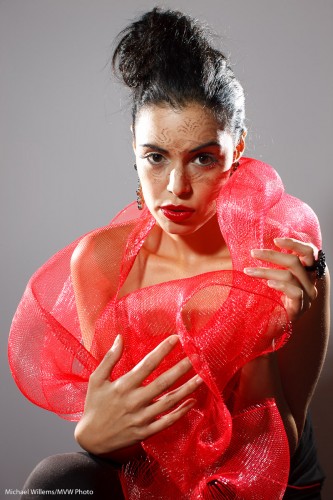
Tara Elizabeth

Tara Elizabeth in Mono, 20 November 2010

It prompts me to talk about how to make a photo like this. You see, a photo is not just one thing. It is a culmination of things all coming together.

First you need a subject. Yes, the subject is important. When all else is equal, your subject makes the image. After all, it is an image of something. Photographers are often enough all technique, to the extent that they forget about the subject. In this image, model Tara is looking great; her clothing is avant garde, her make-up, by Make-Up Artist Tea, is superb. Tara’s expression is just right.

Composition is also important, even in a simple portrait. Uncle Fred puts the subject (Tara’s eyes) in the middle. I use the rule of thirds; off-centre composition. Balance the image.

Next, you need technique and technology. I used a Canon 1Ds with a 50mm prime f/1.2 lens set to f/8 at 100 ISO and 1/125th second – pretty standard “studio” settings.  Pocket wizards were used to fire the flashes. A digital Rebel with a 50mm f/1.8 would have done the same here.

That brings me to the next factor: you need light. We used three speedlights. Two on the sides, with grids: edge lighting is always good. And one behind us, on our left, the fil-from-the-front light, down two stops, and fitted with a Honl Traveller 8 softbox. See that wonderful round catch light in her eyes? (yes, that is important.) The edge light also separates Tara’s arm, on our right, from the background.

Finally you need to simplify. A good photo is a simple photo. We used a simple white wall. I zoomed in enough to have nothing else in the picture. I used no background light or gels. Sometimes simple is better.

And there you have it, a photo worth using!

I encourage you to do the same kind of analysis on your own images. Always good to see what you are doing – it may remind you to think carefully about the image. And that will make it better. Promise.

High-key black and white

One of my favourite photo styles is this: high-key black and white, against a simple white background. This reduces the clutter to a minimum and starkly emphasizes the subject. Like in this image from the 20 November Mono, Ontario all-day workshop:

Tara, by Michael Willems

What I would say if I were to discuss this:

  • The image screams out “black and white”.
  • Clothes (white)  and wall (white) both disappear. I like the emphasis this gives the subject and the pose.
  • I like the 1970s feeling. I added a little grain to this image in Lightroom to emphasize that.
  • Slight, very slight, soft beautiful shadows are important.
  • Light is simple: one flash bounced behind me.
  • Of course you use exposure compensation and the histogram to check your exposure. But you knew that. Hit the right side (just).

Try a portrait like this! All you need is a white wall, a camera, an on-camera flash, and a model in white.

Upcoming workshop

There will be many lighting tips during the next Advanced Flash workshop in Mono (just north of Toronto) on 20 November.

Joseph Marranca and I will take students through a thorough overview, and then detail, of all types of flash (this is the same workshop I taught recently in Las Vegas and Phoenix); then practice, and then the best part: with a professional model, we create and make portfolio shots together, using all the techniques we have learned.

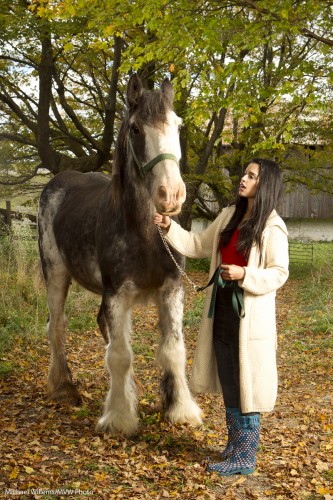
Shots like this:

Cherry and Tara Elizabeth

Cherry and Tara Elizabeth

Cherry, the horse, was old, and he recently passed away: this was the last photo taken of him.

It was lit by a battery-operated studio flash with a softbox on our right, and one bare flash (a speedlight) on our left (slightly behind the horse). Can you see how this adds some rim light to his face and legs, and hence gives them shape and offsets them from what is behind? This can be very important for well-lit portraits.

If you are interested in learning more, sign up: there are still a few places left. But hurry: we limit attendance to a maximum of ten students, which with two instructors is a great ratio.

And those of you who cannot come: sign up for a starter course at Henry’s (ask me when I am teaching what!), and of course this blog will contain daily tips, many of which I take from my workshop practice. Photography is one great adventure, and one I hope you will pursue to make ever more beautiful images.