Consider a splash…

…of colour for visual interest?

Take this off-camera flash picture, for example (taken with speedlites, of course):

Good, because it is using off-camera flash. But you might try to add some colour by using gels. I use the excellent HonlPhoto gels, part of the Honl Photo small flash modifier systems.

No, not like that.

But perhaps like this:

Much better, I think. And all that is needed is a simple gel on the background flash (ask me about the Honl Photo discount, by the way, if like me you are considering those flash modifiers).


Stop!

Before you take a picture outside, stop and think a moment.

You know you do not want a picture with your subjects squinting into the sun. So, turn subjects away from the sun.

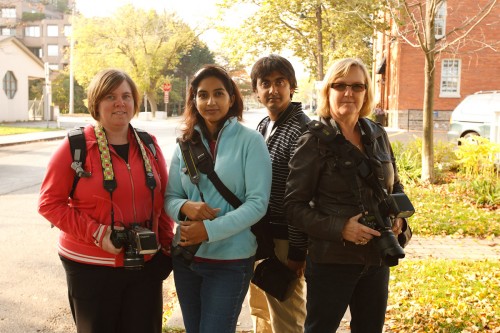
But you also do not want this – a picture of the same people pointing the other way. In tis picture, my students on my photo walk on Sunday are no longer squinting, but they are too dark, and the background is too bright:

Students (Photo: Michael Willems)

Not bad.. but noise hides in the shadows, while bright pixels are sharp pixels.

Better:

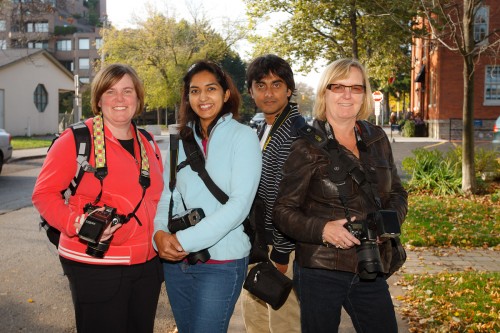
  1. Reduce exposure of the background to two stops below ambient (-2 stops, e.g. by using exposure compensation, or by using manual settings for aperture, shutter and ISO);
  2. Use flash. Even a single flash on camera.
  3. Consider making that flash warmer by using a 1/4 Hol photo CTO Gel (set your white balance to “flash”).

You now get what you want: brighter people and yet, a darker, more saturated, background. We’ve turned things around!

Students (Photo: Michael Willems)

Better eh!

(Yes, I grant you, straight flash is sub-optimal, so off-camera flash or softboxes (or a combo) would be even better of course. If I had had it at hand, I would have put my Honl softbox on the flash. Or you can use the Fong Lightsphere perhaps. Or raise the flash with a bracket. Or set up two flashes, one left and one right, to get a little rim lighting, as in image one – but lit well. Or use a flash turned down a little using Flash Exposure Compensation. Flash really has no limits to how you can use it creatively.)

For sure, this one is acceptable.

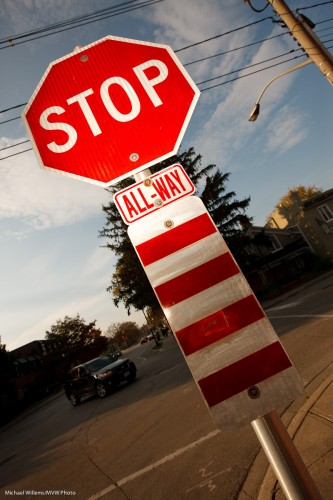
Here’s another one using the same technique:

Stop! (Photo: Michael Willems)

Make this STOP sign your beginning: go make a picture exactly like mine. On a bright day, using on-camera flash.


Magic Bowl

A simple trick for you today.

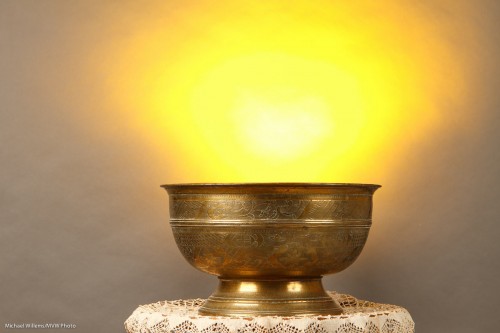
How do you create a magic bowl like this?

Magic Bowl (Photo: Michael Willems)

Gold? Incantations?

Simple technology, of course – you knew that, or I would not have mentioned it here.

  1. Use studio lighting with a key and fill light.
  2. Use a darker background – or move the subject away from a lighter background, to also make it darker.
  3. Then light the background with a flash with a gel – I used a speedlight (as it befits the speedlighter), with a Honl Photo “egg yolk yellow” gel.

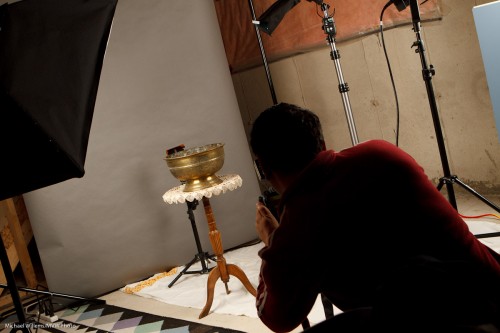
That looks like this:

Magic Bowl Setup (Photo: Michael Willems)

See the flash behind the bowl, aimed up? Simple, innit – once you know?


Hidden worlds

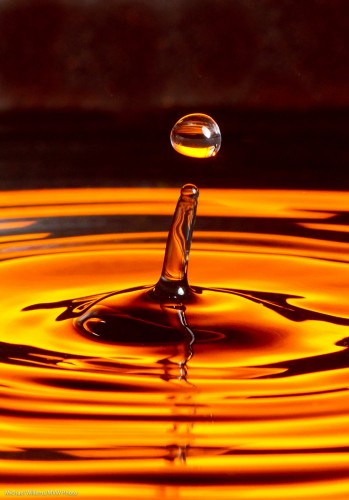
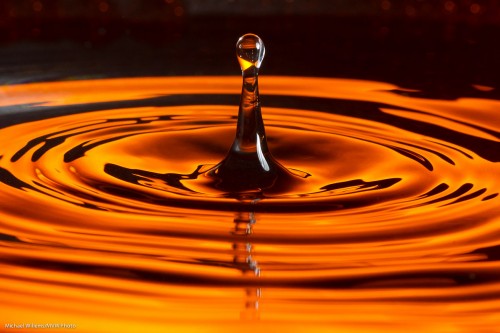
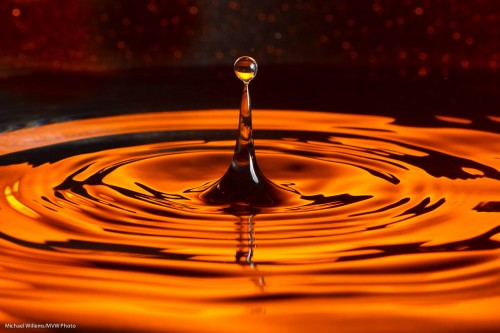
There is a hidden world in water’s surface tension. A world like this:

Water Drop (Photo: Michael Willems)

Is that difficult to photograph? Depends on how much patience you have.

Here’s how I just took this picture:

  • Camera on a tripod, equipped with a suitable lens – I used a 100mm macro lens but a 50mm or a telephoto lens may also do.
  • I set the camera to 320 ISO, f/11, 1/250th second.
  • A black background, lit up with a gelled flash – or just a coloured background.
  • A tray with water – also preferably black. I used a wok since I had nothing else, plus a wok is round, so you get circular waves.
  • A plastic bag with water. I hung it from my microwave. Poke a very small hole in it with a pin.
  • A for the background – I used a 430EX with a Pocketwizard driving it. The flash set to manual 1/4 power and equipped with a Rust gel from Honlphoto.
  • Another flash aimed at the drops from the side. Also driven by a Pocketwizard, this flash was equipped with a Honl snoot. Also set to manual 1/4 power.

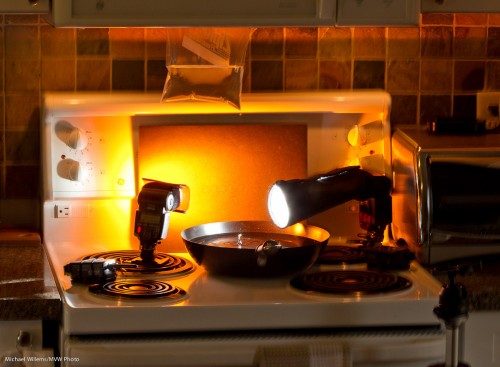
This looked like this:

Water Drop (Photo: Michael Willems)

See the ziplock stuck in my microwave door? And see the tripod on the right?

And given enough patience you will get pictures like the one above. Yes, patience is required – I just shot 500 pictures to get 10 great ones.

Gotchas to watch out for:

  • Too big a hole will give you streams of water – not flattering. You want slow-moving, large drops. Small pin hole achieves this (else, wait until the pressure lessens).
  • Like in any macro photo, you may need to clean up your picture to remove the dust you lit up with the flash.
  • You will also want to crop the image.
  • Watch for reflections of the waves in the bottom of the pan – shoot as horizontal as you can.
  • Watch for reflections elsewhere too – I got a reflection in the side of the pan; some of this I had to remove in post-production.
  • Focus manually; prefocus where the drops fall.
  • You want fast flashes – and since a flash’s power is set by its duration, this means not full power, so make sure the flashes are close.

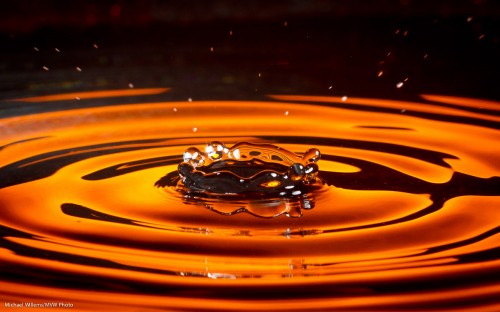
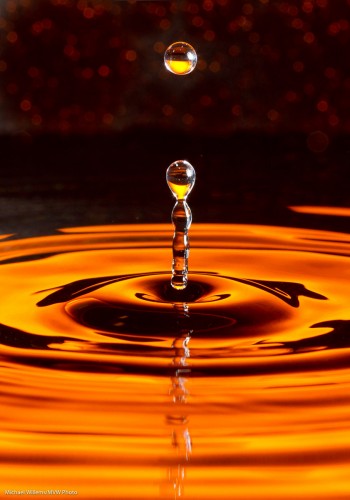
A few more samples:

Water Drop (Photo: Michael Willems)

Water Drop (Photo: Michael Willems)

Water drops (Photo: Michael Willems)

Water drops (Photo: Michael Willems)


On-camera softbox outdoors

When taking a picture outdoors on a sunny day, you may, as said many times here, want to use flash. Else you get this:

Sunlight bad. Shadows, brrr.

So instead, you use a flash.

But you all know that on-camera flash is bad. It has three major drawbacks:

  1. Harsh light.
  2. Non-directed – flat light.
  3. And the speedlite is not powerful enough.

True. But you can solve these three problems – as follows:

Harshness: use a softbox on the on-camera flash. Like the Honl Photo Traveller 8 softbox. Flash on camera; softbox on flash; aim straight ahead.

Non-directionality: a-ha. So if your model is looking to the right, say, then you turn the camera to the right, so the light is coming from the right and hitting her in the face from there. Yes, that is contrary to the way you normally hold a camera in vertical orientation! The shutter is now below, instead of on top. Bad technique normally; but here, necessary!

Power: if you want a dark background on a sunny day, you need to shoot at 1/200th second (stay below your sync speed!), 200 ISO, f/16. the only way to use a flash with that small an aperture is to be close. So you get very close!

So that is:

  1. 1/200th second, 200 ISO, f/16
  2. flash on camera
  3. softbox on flash
  4. flash aimed straigh ahead
  5. camera turned so that the flash is on the side of your subject’s face
  6. get close

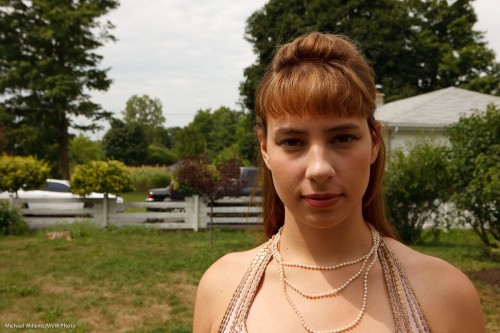
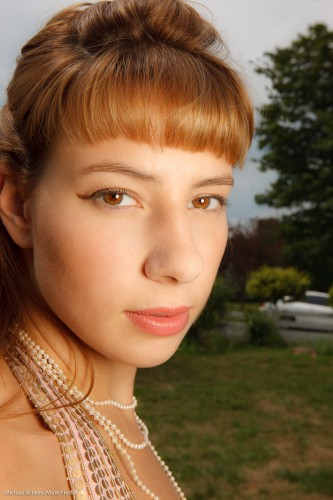
And that gives you:

Jenna Fawcett, model (Photo: Michael Willems)

Not bad for an on-camera flash snap, huh? I used a Honl Photo Traveller 8 softbox, which was essential in this shot. It also gives you those wonderful round catchlights. Beautiful.

(I took this shot as a demo for students in the all-day Creative Light workshop we did Saturday. Stand by for more dates soon. ou can do this – it’s a matter of knowing the technique!)


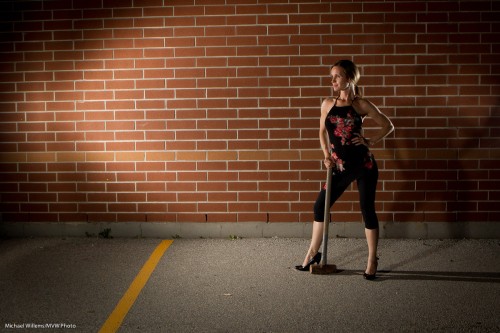
Edge lighting tip

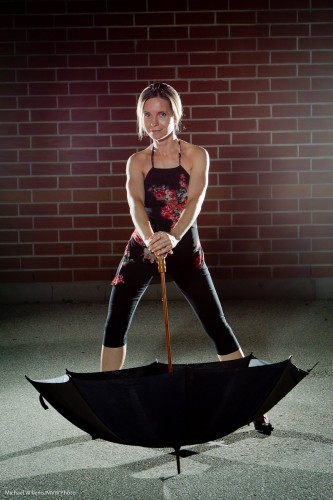
When you are using rim lighting, like in this shot of this evening…:

Mel McBride (Photo: Michael Willems)

Then I would give you a few tips:

  1. Do. It’s good. Look how well it shows off round shapes like arms and legs. It makes them look round, rather than flat, which is what they would look like if you lit them just from the camera’s direction.
  2. Light from behind – 45 degrees behind the subject aimed forward.
  3. Fill from the front. Watch for shadows behind your subject.
  4. Watch for shadows in general. You may like them. Or you may like only one of them. Or none. All good, as long as you watch for them, and feather the lights you do not want throwing a shadow, or use snoots or grids or gobos – or soften them in the case of the front fill light (I used a Honl Traveller 8 softbox).
  5. A little flare, as in this shot, can be okay. Don’t go crazy, but do not be afraid. I often include lights and flare: love them when done well.
  6. If you want flared lights to show like stars, use a small aperture, like f/8 or f/11.
  7. If you are using TTL, which is fine, then do use manual at least for the rim lights. Using TTL for those makes little sense, as this light is very hard indeed to measure in camera.
  8. And for manual flash, know how light works. The Inverse Square Law is very important. To get half the light, increase the flash-subject distance by 1.4 (the square root of two). That sort of thing. Yes, math.

Oh and when you have a wall, you can use it, of course. Like here, wher I have made oneof the rim lights into the main light:

Controlling light is fun, and is remarkably easy. And Photography is all about the light.

(Joseph Marranca and I are teaching another Creative Lighting course, this time in Fort Erie, just over an hour from Oakville, on July 23. Stay tuned or drop me a line!)


Let there be…

To those of you who are new on speedlighter.ca – this daily blog (yes, I write every day) is your resource for photography knowledge – and very often, speedlight knowledge. Speedlights, as you know, are small flashes, and as you may or may not know, they are wonderful.

When used well.

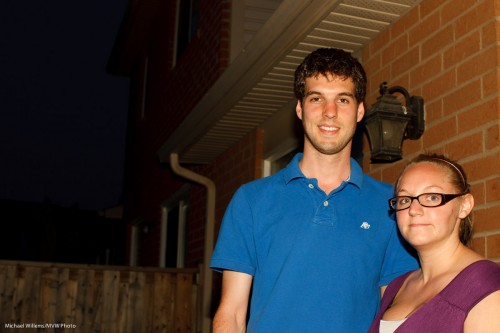
That implies that you can use them badly. And yes, you can, and that is easy. So here’s how not to do it:

Typical “this is why I hate flash” snap. Of two kind student volunteers yesterday. Shot at f/8 at 400 ISO at 1/125th second. Ouch. Thanks, guys!

To improve this – nay, to have fun and make it good – I would do the following:

  • Set my camera to a better exposure setting for the background. In my case, this was  f/4.0 and 1/30th second, which made the light meter show “-2 stops”.
  • Set my white balance to “tungsten” to make the background blue.
  • But at the same time, add a Honl Photo Full CTO gel to my main flash, to keep the subjects neutral.
  • Now add a second flash to light up the wall.
  • Add a Honl Photo red gel to this second flash.

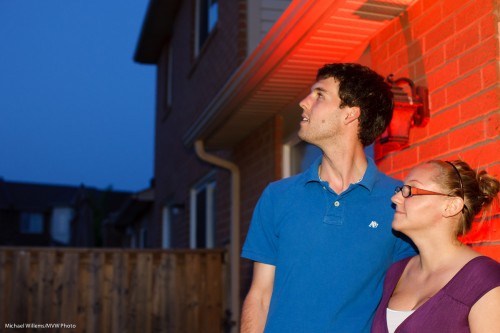
Then I would get this:

Looking Skyward (Photo: Michael Willems)

How long does that take? Mere seconds. And it results in a great picture, that belies the idea that you cannot use direct flash. When you are mixing light, you can.

What if I had had more time?

Then I would have added one more flash with a gel: a green one.In the bottom left corner. Red-Green-Blue, the three primary colours in one image, adds visual interest.


In the eye of the…

Take a day outside. You want to shoot a snap of a pretty model.

If you are Uncle Fred, you shoot in the “AUTO” mode. Or in Program, or even in Aperture mode, with a large aperture (low “F”-number), to blur out the background. OK, here we go. SNAP:
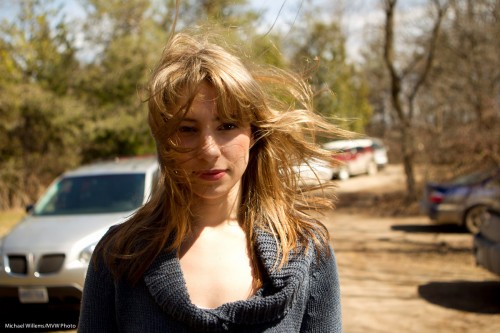
But because you read Speedlighter.ca, you realise that background should be darker. So then you shoot again, after setting exposure compensation down two stops (-2). That gives you 1/1000th second, and the image looks like this:
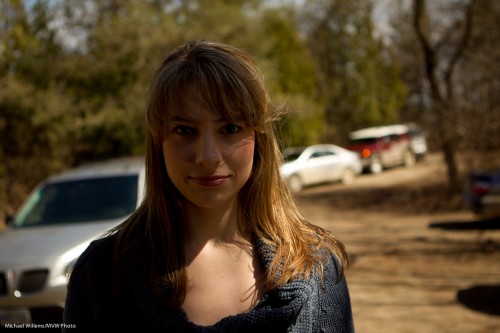
Mmm. So now you need to turn on the flash (and again, you know this because you are a Frequent Reader here).

So then you do this – and you get this:
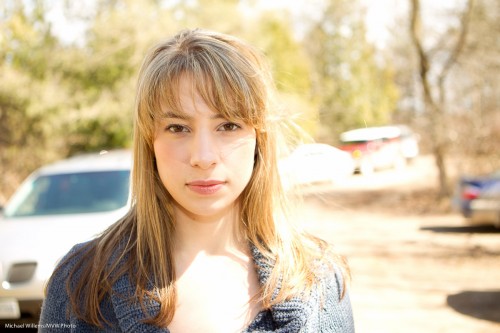
Oh. That’s right. The flash sync speed is 1/200th second, so your camera will not allow the 1/1000th second shutter speed you need. So the image is overexposed, at 1/200th second.

OK-  so now you use Fast Flash (“High Speed Flash”, on Canon, and “Auto FP Flash” on Nikon). And you move close, very close – or you have insufficient power.

That gives you this:
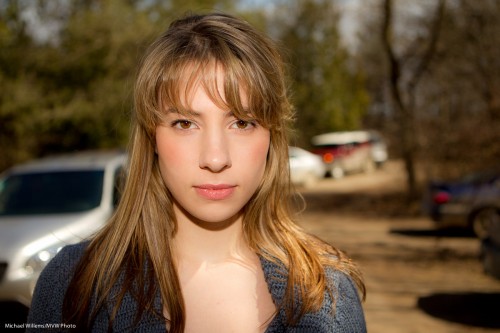
Nice.

But could that shadow be softer? Yes. So you put a Honl Photo softbox on the flash – yes, you can use a softbox like this on the on-camera flash – and now (after once again ascertaining you are close enough – even closer now, since the softbox loses some light too), you have the image you were after in the first place:
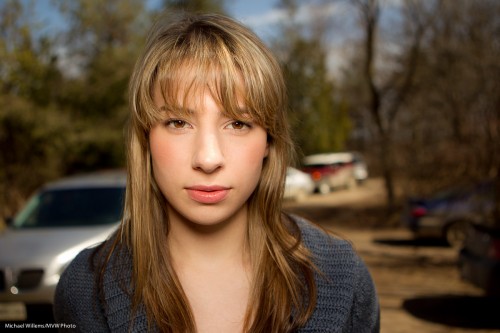
Compare this excellent image with the snapshot image at the top and you see why it pays to know flash techniques, and you see why I am passionate in teaching them.

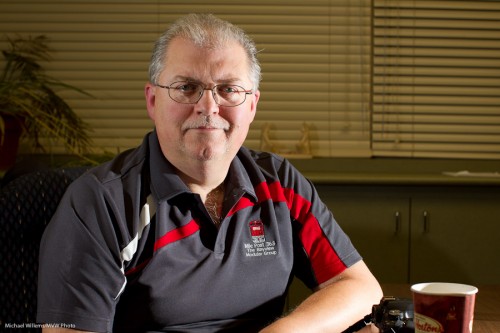
 

Since you asked…

Since some of you asked: a few more things about that type of flash portrait I talked about yesterday (and that David Honl and I showed some of you during Saturday’s workshop):

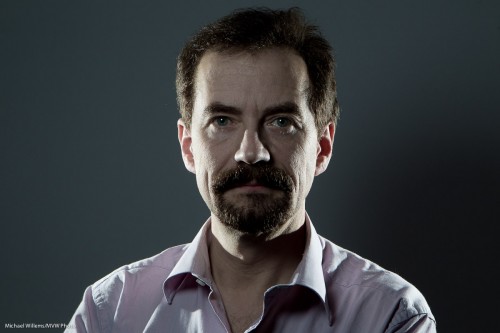
Photographer Michael Willems

Photographer Michael Willems, Self-portrait

Here’s how this shot was made:

  • It is lit with two speedlights with a grid (left and right)
  • …as well as a speedlight above and slightly off-centre in front, equipped with a Traveller 8 softbox.
  • I fired all three flashes with Pocketwizards.
  • The camera was set to my standard studio settings of 100 ISO, 1/125th sec, f/8.
  • Side lights have a grid fitted, and are overexposed by about a stop.
  • The fill light is underexposed by about a stop.
  • To achieve this, side lights were set to 1/16nd power.
  • And the front light to 1/32nd power. Why? They are all about the same distance away – why so high? Surely that should be lower, like 1/128th power? Ah – no. The softbox loses you a stop or more, so you need to increase power to compensate for that.
  • TIP: the flash in the softbox should have its “wide” adapter out.

This is done in my case by trial and error and experience, but you can of course meter the lights to get really accurate settings.

How did I manage to focus on myself? I focused on a light stand, then set focus to manual and used the 10 second self timer and while it was counting down, moved myself where the stand was.

Finally: in “post”, I used the HSL “saturation” setting to decrease orange saturation somewhat. That makes this into a “desat” portrait.

And now I am already preparing for the next few workshops: “The Art of Photographing Nudes” with Joseph Marranca on April 2, “Shooting Events” on April 3, and the last Mono workshop, “Advanced Creative Lighting”, also with Joseph, in Mono on April 23. Booking is open for all three, and they are all strictly limited in numbers.