Studio Settings

A few words to get you started on studio portrait setups.

When you are shooting in a “studio” (i.e. controlled) setting, your camera settings might be, as I recently pointed:

  • Camera on Manual
  • 100 ISO
  • Auto ISO disabled
  • 1/125th sec
  • f/8
  • “Flash” white balance

Why as small as f/8?

Because lower aperture numbers than 5.6 can give you too selective a depth of field; and with most lenses, higher numbers than f/8 create diffraction, meaning slight blurriness. If you like sharp, stick to f/8 or perhaps f/5.6.

You also use f/8 or similar because studio lights are powerful. (Someone the other day searched for “how to shoot wide open with studio light” – often, the lights are so bright even on their lowest settings that the only way to do that  is to use a neutral density filter on your lens).

And lenses?

For portraits, I use 50-200mm. Smaller focal length (like 50-70 on a full frame camera) makes a woman’s body smaller (if I shoot at head height). Larger makes the nose smaller, but can make the body slightly bigger. I.e. larger gives you no distortion, but sometimes ever-so-slight distortion is exactly what you want. My favourites are:

  • 24-70 2.8L
  • 70-200 2.8L IS
  • 50mm f/1.4 (for use on the 7D, or for body shots on the 1D Mark IV or 1Ds Mark III)
  • 35mm f/1.4 (for environmental portraits)
  • 100 mm f/2.8 macro (yes, a macro lens is a great portrait lens)

But you can keep it simple! A Canon Digital Rebel or Nikon D90 with a 50mm f/1.8 lens, for instance, will allow you to take great razor-sharp studio portraits. It’s all about the light!

Add a splash of colour

Look at this recent portrait:

You will see standard lighting with a softbox on camera right, a fill light on camera left, a hair light behind him, using a Honl Snoot, and a background light aimed at the background.

This background light has a subtle blue Honl Photo gel on it. Can you see how much of a difference that makes? No gel would mean a grey background, and blue adds a touch of interest as well as a hint of corporate soldity.

Catch that light

Every portrait, classical rules have it, needs a single “catchlight” in the eyes.  While I am not religious about this, I do tend to ensure that this is present. This very recent portrait shows the catchlights clearly. I used two umbrellas with speedlights, fired with E-TTL, and a light on the camera aimed backwards to add a bit more softening.

This is a high-key portarit: everything bright.

One light

You do not always need many lights. Sometimes, one light is enough:

f/8, 1/125th, 100 ISO

That is just one studio light, fired through a pocketwizard (but I could have used a cable) – and a reflector on the other side. This leads to this:

Yes, of course a background light, hairlight,and so on, would give me more control.

But we should all be aware that this amount of lighting is sometimes neither possible nor practical. And one light plus a reflector can give you nice light.

High Key

Here’s an assignment for you all: Take a high-key portrait.

“High Key” means that the entire photo is bright. That means light background, good lighting and light clothing. This makes the subject’s face stand out beautifully as the obvious focus of attention, and it also gives the portrait a bright, cheerful look, as in this portrait of a few days ago:

Do you need two umbrellas on light stands, fired via E-TTL, as I was using here? And a backdrop? Or perhaps a few studio strobes? A background light?

Well – you could use all of the above. But you can also just use a small room with white walls, with an on-camera flash fired in a backward direction – i.e. behind you. That makes the entire room into a giant light box. Ask your subject to dress in light colours and put them in front of a white wall.

If you want to do it well, make sure your subject has a catch light in his or her eyes. The wall behind you, lit up by the flash, should take care of that, or else use a little flash bounce card to direct some light back into the eyes.

Do keep in mind that if you are using automatic metering (eTTL/iTTL), then you either need to spot meter your flash light off a grey card (or something similar), or you need to use Flash Exposure Compensation (FEC) to increase your flash power. You may need +1 to +2 stops extra flash light.

Have fun!

Backgrounds

Another recent user question:

How do you determine the background you use for portraits?

That’s a tough one, because there is no one answer. What’s better? Look at these three “Autumn” and “Hollywood” series Honl gels:

Or this?

Or this?

Of course as usual, the answer is “it depends”.

  • For business, white is good, as is a very light blue.
  • For women, more elegant colours can be used (the purple above, for instance, is not usually considered a male colour).
  • Black is possible for dramatic low-key portraits.
  • Colours depend on hair colour, skin colour and suit colour.
  • You may, for instance, want to contrast with the suit.
  • You certainly want to contrast with the hair – avoid blending your subject into the background. (Or you use a hair light).
  • And sometimes, you may want to match the background to, say, a bright red suit, again in order to make the face stand out.

In general, the most important concerns I have are:

  1. It has to match the mood (conservative is blue, etc)
  2. Ideally, it go with the person’s clothing. That means either complementary colours (yellow and blue, say) or identical colours (A suit with purple in it? Then I can use purple in the background).
  3. Above all, I try to make the face stand out and avoid blending it into the background.

The basic rule: have fun, and keep it simple if you can. Try different colours but avoid very bright colours except for special effect. Have some very subtle blues and yellows and greens available just in case you want to add a splash of tint.

Tint is a good thing. Colour is more difficult!

I hope this gives those of you who use colour gels some ideas to try.

Yesterday snap

Just one image from a portrait shoot of a very nice realtor, yesterday:

Lit with a Bowens key light in a softbox, an Opus fill light into an umbrella, an Opus hair/kick light with snoot, and for the background, a 430EX speedlite with Honl gel (fired through a Pocketwizard).

I like tilting realtors a little, for that contemporary dynamic look.

Again, why "fast" lenses?

A tip for newcomers to SLR photography.

I often hear: “Why do I need so-called “fast” lenses – like the 50mm f/1.8 lens Michael keeps talking about? Surely my 18-55 lens also covers 50mm?”

Well yes it does. But:

  1. Less sharply. A “prime” (i.e. non-zoom) lens is sharper.
  2. A prime lens is also smaller and lighter.
  3. And especially: the prime lens has a lower minimum “F-number” – i.e. a larger aperture. The lower the “F”-number, the better. Your kit lens is f/3.5-5.6 (meaning zoomed out it can go as low as 3.5; zoomed in it can go only as low as 5.6. The 50mm f/1.8 can go as low as 1.8).

Why is this important?

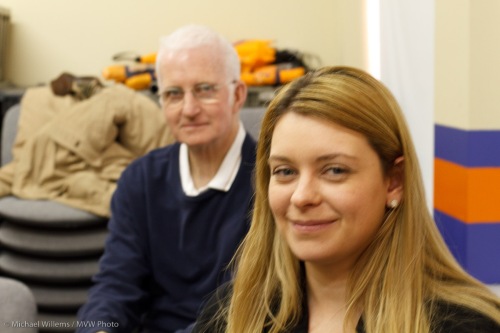
So in today’s class I took two shots of a student in available room light. One at f/5.6, and that is what you would get with your standard “kit”-lens. It looks like this:

Two things happen:

  1. Because of the small aperture (high “F-number”), the camera has to keep the lens open for a long time. This means that unless I use a tripod and tell the subject not to move, in indoors light I will get camera shake (the shot needed 1/10th of a second). And sure , do.
  2. The lower the “F” number, the shallower the depth of field, i.e. the blurrier the background. The higher the F-number, the sharper the background.F/5.6 gives a background that is somewhat blury.

Now look what happens when I use an aperture of f/1.8 (for which you need a lens that can do that, like the 50mm f/1.8 lens):

Much better – a pretty dramatic difference on both counts!

So the best way to immediately get great portrait shots is to:

  1. Get yourself a 50mm lens. On most cameras this is simple; do note that on a Nikon D40/D60/D3000/D5000 you need to manually focus this lens (that is why I recommend Canon cameras at the entry level).
  2. Learn Aperture Priority mode (A/Av) and use a low “F-number”.
  3. Turn the camera sideways and get close!

Have fun.

(Wow, three numbered lists in one blog post!)

A few portrait pointers

Today, a few quick portrait pointers.

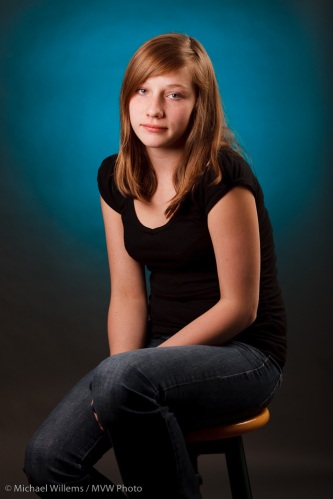
Here’s a picture from a very recent portrait shoot:

Why did I shoot this the way I did? What went into the decisions? I thought it might be good to share some of my thoughts.

  • I used a standard key/fill light arrangement, with the key light a small softbox aiming straight into the face, and the lower-powered fill light an umbrella-mounted flash on camera right.
  • I ensured the positioning of the key light gave me a catch light in the eyes.
  • I used a low-powered hair light in a snoot.
  • I selected a dark background (grey paper) so that I could emphasise the subject.
  • I used a background light with a Honl grid, so get that nice oval shaped light behind the girl.
  • I also used a Honl gel from the “Hollywood” and “Autumn” sets. I chose the blue-ish colour for its subtlety and for the way it so nicely contrasts with the girl’s hair and skin colour.
  • I took many pictures with the girl in many poses – mainly her own natural poses. Here, I particularly liked the S-curve in the pose and the triangular shapes in her legs. “S”-curves and triangles are good!
  • Finally, the bit of the stool that is visible and lit provided balance with the other yellow colours.

Every shoot is different, but here you see some of the decisions that can go into a portrait.