Light direction tip

Here’s a “quick start” for lighting a face:

  • For a man, start with having the main light come from 45 degrees above, at an angle of 45 degrees left or right (“Rembrandt lighting”)
  • For a woman, start with having the main light come from 45 degrees above, straight in front (“Butterfly lighting:)

The latter looks somewhat like this:

I took that snap at last Tuesday’s Phoenix “Advanced Flash” workshop. And you can see how: another course participant is holding a 430EX flash off camera, which I am firing from the main camera using TTL light control. Aperture and shutter speed, and ISO, are set so that available light is two stops darker (i.e. it provides the fill light).

Why this rule-of-thumb of “from straight in front” for women? Because it minimizes texture and features, and hence best shows beauty.

Please do not be hung up on these “rules” – they are merely good start points.

To some extent this snap is also an example of “short lighting”: I am lighting the side of the face that is narrower to the camera. This thins, which in the case of this beautiful woman is not necessary, but in case of larger people, or people with very round faces, can be a useful technique.

Why you shoot through umbrellas

This is why.  A portrait with glasses, in which we shot into an umbrella. Looks fine, until you zoom all the way in, when you see this:

See the light?

Now of course the next shot is “tilt your head down” shot so the glasses no longer reflect – but the eyeball will still reflect a white circle with a black light inside it. Can you see it, in both eyes?

Shooting through the umbrella instead would have shown a nice white circle, instead.

KISS – Keep It Simple, S.

This picture shows that you do not need a studio with much equipment, necessarily.

I used a Canon 1D Mark IV camera with a 580 EX II speedlite.

And that’s it. Really.

I had the camera on 400 ISO, manual, 1/60th second, f/4. TTL did the rest with the flash.

The flash which was of course pointed behind me, giving “light from 45 degrees above”. Leading to pictures like the one above, and this:

Which when you zoom in enough shows you The Man In The Pupil:

..which of course is me.

Can you see how my flash aimed backward makes a pattern on the ceiling that looks like an umbrella? That’s the  entire point!

Sometimes very simple equipment is al you need for professional work.

One light

You do not always need many lights. Sometimes, one light is enough:

f/8, 1/125th, 100 ISO

That is just one studio light, fired through a pocketwizard (but I could have used a cable) – and a reflector on the other side. This leads to this:

Yes, of course a background light, hairlight,and so on, would give me more control.

But we should all be aware that this amount of lighting is sometimes neither possible nor practical. And one light plus a reflector can give you nice light.

A few portrait pointers

Today, a few quick portrait pointers.

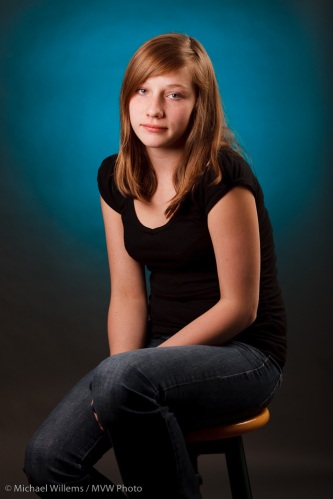
Here’s a picture from a very recent portrait shoot:

Why did I shoot this the way I did? What went into the decisions? I thought it might be good to share some of my thoughts.

  • I used a standard key/fill light arrangement, with the key light a small softbox aiming straight into the face, and the lower-powered fill light an umbrella-mounted flash on camera right.
  • I ensured the positioning of the key light gave me a catch light in the eyes.
  • I used a low-powered hair light in a snoot.
  • I selected a dark background (grey paper) so that I could emphasise the subject.
  • I used a background light with a Honl grid, so get that nice oval shaped light behind the girl.
  • I also used a Honl gel from the “Hollywood” and “Autumn” sets. I chose the blue-ish colour for its subtlety and for the way it so nicely contrasts with the girl’s hair and skin colour.
  • I took many pictures with the girl in many poses – mainly her own natural poses. Here, I particularly liked the S-curve in the pose and the triangular shapes in her legs. “S”-curves and triangles are good!
  • Finally, the bit of the stool that is visible and lit provided balance with the other yellow colours.

Every shoot is different, but here you see some of the decisions that can go into a portrait.

Metering

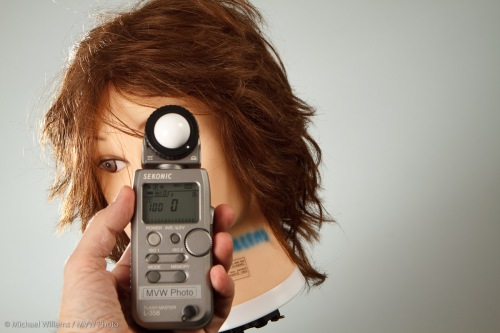
A few words on light meters.

When shooting studio shots like the ones I talked about, you use a flash meter. When doing that to accurately judge the right exposure, keep this in mind:

  • Have a spare battery at hand
  • Move the dome out. Do not leave it screwed in.
  • Use the meter in Flash-metering mode!
  • Only flash one flash at a time. Turn off other flashes when you meter one.
  • Start with your key light; then one by one meter the other flashes. These will be darker generally.
  • Ensure your meter is set to the right ISO.

Then use the measured aperture as your starting point and check the histograms on your camera for fine adjustments. I believe that “exposing to the right” is generally a good idea.

Also, don’t forget to use a grey card to get a nice white balance reference target.

A standard portrait setup

Back to the standard “small studio” setup I described earlier. This time I shall talk a bit not about how it works – I assume light sensitive slave cells and Pocketwizards and cables are all old hat to you now – but instead, I will talk about how to use it.

As a reminder, here is such a four-light setup, again:

Four lights; and after the click, more about how you use them.

Continue reading

That portable studio

So when I pack by bags to do a location shoot, like today’s executive headshots shoot, you saw in a recent post that I bring rather a lot.

And what do I use? How does it look when it’s all set up?

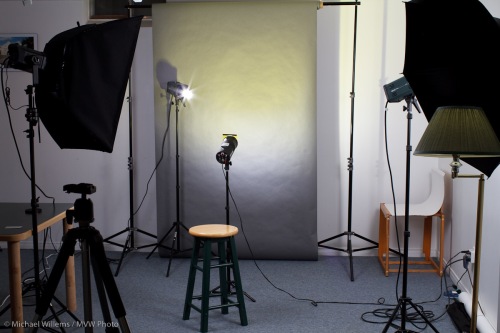
That setup process, which takes about 45-60 minutes including carrying it all from the car in stages, results in this:

This setup consists of:

  1. A grey backdrop. I like grey because you can make it any colour, from black to white.
  2. The main (“key”) light: a light stand with Bowens 400 Ws monolight in a softbox. This is fired by a Pocketwizard (just visible, top left)
  3. The fill light: a light stand with a Bowens 400 Ws monolight into an umbrella. This is fired by the slave cell.
  4. The background light: a mini  light stand with a 430EX Speedlite, with a  Honl speed strap and a Honl 1/2 CTB gel. This light is fired by a Pocketwizard, using a Flashzebra cable.
  5. The hair light: another a light stand with a 430EX Speedlite, with a  Honl speed strap and Honl snoot. This light is fired by a Pocketwizard, using a Flashzebra cable.
  6. A stool.
  7. The camera set to 1/100th sec, f/9, 100 ISO, and equipped with a PocketWizard to fire the other flashes.

It doesn’t look like all that much, but when you write it out, and then add the power cables, connection cables, bags, and so on, it’s quite a lot.

Misc

Backgrounds and sharpness and white balance: oh my!

I thought I would chat about some of the things that go through my mind when doing a portrait, like this one last night:

Questions like:

  • What camera and lens? In this case, the Canon 7D and a 50mm f/1.4 lens.
  • What settings? Well, manual at 100 ISO, 1/125th second, f/5.6 is my standard start point, as it was here.
  • What lighting setup? In this case, a standard two main lights (softbox main light on camera left, umbrella fill light on camera right) with a snooted hair light behind left, and a gridded gelled background light. Note that while the main lights were monolights, the background light was a small speedlite fired by a pocketwizard through a Flashzebra hotshoe cable.
  • What lighting ratio? In this case pretty flat, but usually more like a 3:1 key:fill ratio.
  • What body position? Usually angled, in this case toward the softbox.
  • What head position? In this case, straight on since the subject wanted it that way.
  • What colour background? In this case I used a blue-green gel from the new Honl Photo “Autumn” colour gel set.
  • What viewpoint? I carefully choose this by moving myself left and right, up and down, until the person looks best to me for the portrait wanted. If in doubt, I take multiple views and choose later.
  • What white balance? I set it to “Flash”, even when shooting RAW, just so I get OK views on the back of the camera.

That’s all there is to a quick snap like this, which took a few minutes – if that.

One more "Studio" post

I thought I would add one more picture of the small studio, and how it works.

This consists of:

  • A grey background
  • A main (“key”) light: a Bowens 400 Ws monolight, fired into a Bowens 60×80 softbox.
  • This light is activated through a PocketWizard; all other lights have a photocell that follows this light.
  • A fill light, 250 Ws fired into an umbrella
  • A 100 Ws background light with a yellow gel
  • A 250 Ws hair light with a snoot
  • A stool for the victim to sit on

The camera is set to manual exposure and has a Pocketwizard on it which drives the flashes. Don’t forget to set your camera to manual low ISO, and to check that your exposure time is under the synch speed (e.g. 1/125th second). Then meter for the right light (meter key and fill lights individually).

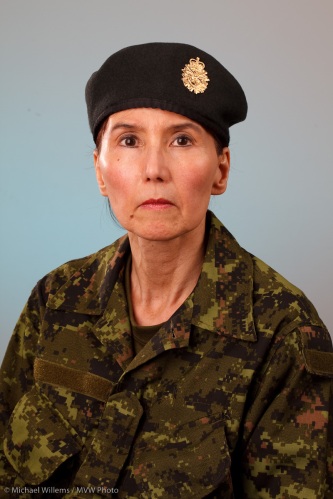
And this very vanilla setup leads to:

Photographers will know: the biggest challenge is to focus on yourself. That is why we are always hassling people to model for us.