One.

One light can be enough.

Look at this great image. How was it made?

The answer is: one flash. Yes, that is all.

In this case it was a strobe, fired through an umbrella. But it could have been a speedlight.

The difference between those two options:

  • On a strobe, I measure the light with a light meter, and set my settings on the light and on the camera accordingly. And they are set for the entire shoot. So whatever the subject, the settings are the same. Done!
  • If I am using speedlights, however, the camera meters every shot. And it meters it by measuring light reflected off the subject. So the subject matters. A dark subject will fool the camera into overexposing, so you need to use negative exposure compensation. A very bright subject, the opposite – you will need positive exposure compensation.

Those are very essential differences. Read the above until you understand it, or ask me if you do not.

They have consequences:

  • If the subject distance will be static, use strobes/manual. If, however, the distance changes, then you should use TTL.
  • If the subject brightness changes from shot to shot, use strobes/manual. If, however, the subject brightness is the same between shots, TTL may be useable.

Confused yet? It is really very simple, once you know it. But then, the same applies to brain surgery.

Reflect on this

I taught a very enjoyable class on “Portrait Photography” last night. I taught six students about studio lighting. Strobes, modifiers, light meters, backdrops, that sort of thing.

And one message was: it can be simple. One student wrote me just now:

I just wanted to tell you that I really enjoyed tonight’s workshop, which was excellent.  I learnt so much about studio lighting in just 3 hours.  I had always wondered how the big lights work prior to tonight’s workshop, and I have to say that you solved the mystery for me tonight.

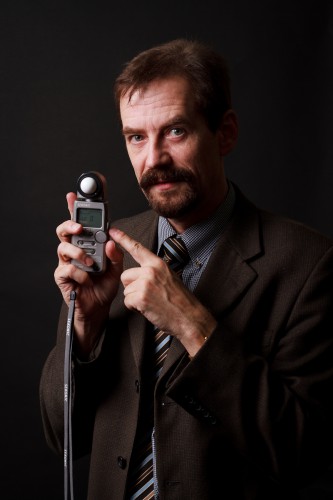
Yes it can be simple. Like in this shot, made with just one light (a Bowens 500 Ws strobe fired using pocketwizards, through an umbrella):

Michael Willems, by Franklin Wang

Michael Willems, by Franklin Wang

Observant readers (no no, not religiously observant – I mean readers who look carefully) will see that I am at 1/160s on the meter, and am using 200 ISO.

(Why 200 ISO? Should I, in a studio setting, not be using 100? Not when some students use Nikon cameras, which cannot easily go down below 100 ISO. That’s why. And why 1/160th? Because being slightly below your maximum flash sync speed, so ambient light does nothing while you avoid cutting off a bit of the image, is sensible in a studio. That’s why.)

So your settings in a studio might be:

  • Camera on manual;
  • 1/200th second at f/8;
  • 100 ISO;
  • Now set the lights to those values, using a flash meter.

I used a black background, away from the lights. That way it remains black.

So if you think that is a bit contrasty – we add a second light, right? And power it 1-2 stops below the first (2:1 or 4:1 ratio)?

Maybe.

Or maybe we just use a reflector. Saves the planet.

Michael Willems, by Franklin Wang

Michael Willems, by Franklin Wang

That way we save the second light which we can then use for the background, or for hair light, or for other funky effects.

The final picture is by another of the students:

Michael Willems, by Richard Smart

Michael Willems, by Richard Smart

Hey! Now that black background is light grey!

That is the point too. Black can be black (it is black when it has little light falling on it) or bright white (it turns white when it has lots of light falling on it). That is why I like black. White is much harder to control – it is easy to make it white, but tough to get it darker than mid grey in a typical studio.

As for the last picture: of course the top needs to be cropped off, but that is the point: these images are straight from the students’ cameras.

Oh – and the purple edge light is a simple 430EX speedlite, with a Honl grid and a Honl gel. Also fired using a Pocketwizard.

And yes, I think I can carry it off, purple.

Portrait tip

A quick tip or two – a few things to keep in mind when shooting studio portraits.

Like this one of my assistant Matt at this morning’s location shoot (where Matt kindly stood in for the subjects prior to their arrival, while we measured and adjusted the lights):

When shooting a studio portrait like this, there are a few things to keep in mind. These include:

  • Be sure you get a catch light in the eyes (usually from your main light)
  • If your subject wears glasses, do not turn their head too much.
  • Also, make sure the glasses do not reflect light. If they do, move your light source or ask the subject to aim their head very slightly down.
  • Ask your subject to move their head a little each time, and thus take various shots. I usually try to get at last four images – even the same look when shot seconds apart will lead to a different picture each time.
  • Ensure the ties, collars, etc, are well adjusted. You cannot do it over when you look at the pictures at home.

That was the quick tip of the day. Quick five tips, really.

Light as a creative tool

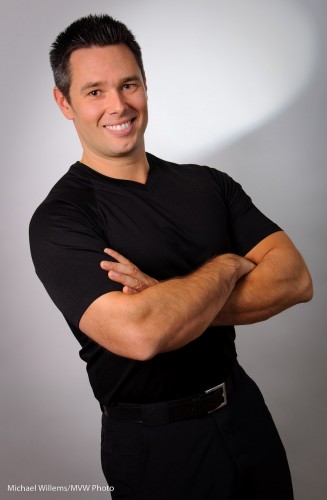
A quick tip today. Look at this portrait of a personal trainer which I helped a student take earlier today:

Portrait of Travis

Standard key light (a small strobe), fill light (in an umbrella) against a white background. But instead of onto the head, which is already separated from the background by its colour, I turned the hairlight onto the background.

And because it has a snoot on it (a Honl Photo snoot, attached to a speed strap), I get this nice parabola-shaped beam of light behind the subject’s head. A technique worth using occasionally. Avoid getting stuck in the “same old light” category!

(The parabola reminds me of a satellite, somehow. Probaby because have an engineering degree?)

Simpler then.

You may recall yesterday I asked whether you could do professional lighting with simpler means than this:

Mono Studio (Photo Michael Willems)

And indeed, you can.

The secret is to think about

  1. The background. If not simple, then make an environmental portrait and use the environment.
  2. The number of lights. In the studio above, my lights are doing it all. So I need many lights. So how about using ambient light as one source?

Here’s ambient light in an environmental subject (environment is relevant here – you’d have to know the story):

Ambient light

That’s good for ambient, but how about the subject? So, add one flash in a softbox. This gives you a finished shot. Just one light!

Kitchen Surprise (Ambient and softbox)

The recipe here is simple.

  1. Meter for outside light.
  2. Check what aperture that gives you – set sped to between 1/100th and 1/200th second on manual and aim for, say, f/8
  3. Now use your light meter to adjust the flash to that aperture (use your light meter).

Another light lit with the same technique (and again using just one softbox):

Dress in room

So while all the equipment is nice, by combining ambient and flash, you can do a lot with just one light. Keep that in mind over the holiday period.

If this all sounds complicated, at first glance it is, but once you know how to do it, it is simple. This is the kind of technique I teach at my advanced flash workshops, and at the advanced lighting courses Joseph Marranca and I teach together. The new schedule will be posted soon!

(Home) Studio

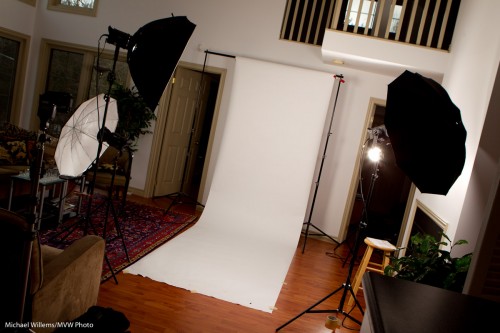
Sometimes I use big lights, not speedlights. Here’s my studio for a shoot Friday:

Mono Studio (Photo Michael Willems)

That is a tad complex:

  • Three and a bit lights. I use Bowens lights – love them.
  • A way to fire them (cable or pocket wizards – I use the latter).
  • Modifiers (softbox for the main light, and umbrella, perhaps also a snoot)
  • A backdrop stand.
  • Paper roll. White, grey or black, depending.
  • Tape to hold the roll down.
  • Clamps to stop the roll from rolling down.
  • A light meter.
  • A tripod.
  • A camera with a lens of the right range (50-150mm)

It takes up to an hour to set that up, and a good half hour to take it down (ask why photography costs money).

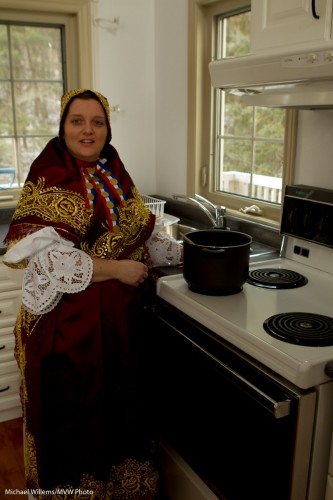
And all this results in pictures like this:

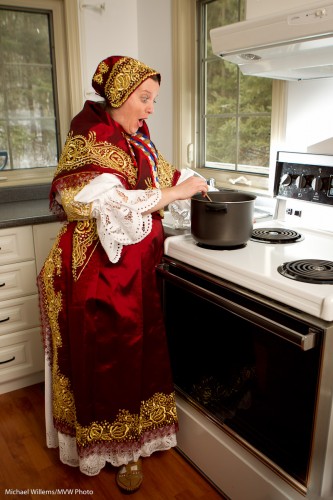
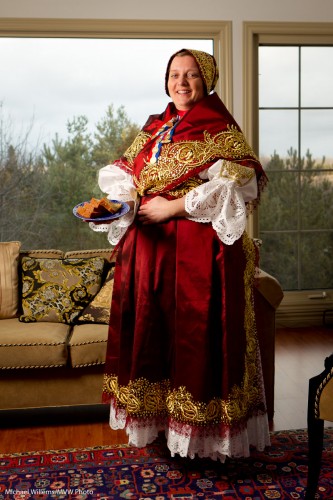
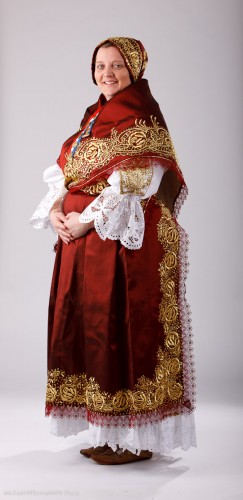
Traditional Dress

For a studio like this you need, above all, lots of space. Especially when using powerful studio lights and long lenses like my favourite 70-200. Vertical space (ceiling height) as well as lots and lots of horizontal space. In this case, also space to move the subject away from the backdrop, in order to make it darker. Otherwise, if the subject is close to a white backdrop, the backdrop turns very white:

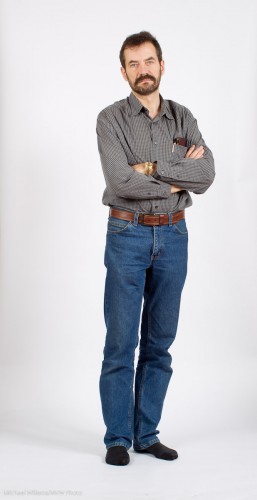
Michael Willems, self portrait

Michael Willems, self portrait

I like that look a lot, but the dress in the shot above had white, so we needed to create separation between it and the backdrop. Meaning we needed a darker backdrop.

So an important question: can you do anything with less?

Sure you can. Tomorrow I’ll show you some examples from the same shoot.

Speed lit

Since this blog is called “speedlighter”, and I kind of specialize in lighting, I thought I might do a quick post on quick lighting.

Today, I had a student shoot me, and her dog, using one studio light (a 400 Ws Bowens light). To do this you need to do the following:

  1. Set up a light on a stand;
  2. Add an umbrella;
  3. Shoot near a wall which acts as the reflector (that is why one light is enough!);
  4. Connect the light to the camera using, for example, a cable;
  5. A light meter to measure light and hence to help you set the flash’s power;
  6. Set your camera to f/8, 1/125th second, 100 or 200 ISO;
  7. Now meter to that (i.e. adjust the light until the meter read f/8).

The first test shot should be without flash, and should be black.

Then, connect the flash cable and shoot:

Michael Willems

Michael Willems

And then, after that test shot, the object of tonight’s shoot, which was not me, alas:

Duke Dog

Duke Dog

Cute, eh?

Note the simple composition, blurred background, the excellent composition and tilt (see Friday’s post), and note the catchlight from the umbrella in Duke’s eyes. (If we had shot through an umbrella, the catchlight would be even more simple, round).

Portraits at the show

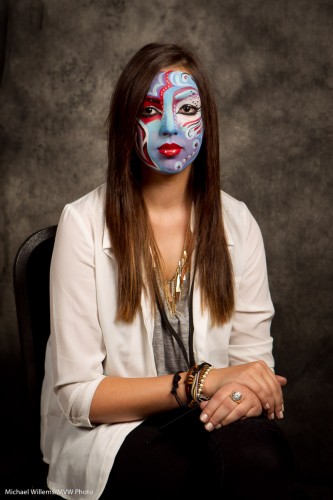
I shot a few portraits at the Imaging Show yesterday. Simple portraits with just two lights.

Like this:

Bodypaint Model at the Imaging Show

Bodypaint Model at the Imaging Show

You can do that too. All you need is:

  1. a few lights (in this case two umbrella-fired Bowens 500 Ws strobes),
  2. a light meter,
  3. a cable or pocketwizard,
  4. and a camera.

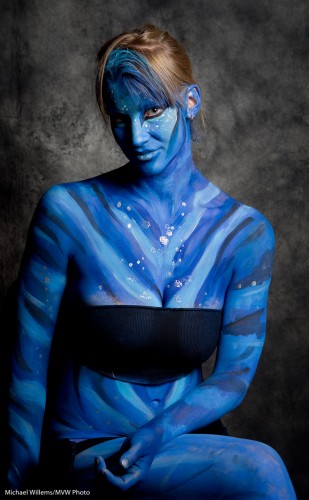
I used the 24-70 lens but would have preferred my 70-200mm lens.

Bodypaint Model at the Imaging Show

Bodypaint Model at the Imaging Show

As you can see there, it is all about what you do NOT light. That was lit with just one light through an umbrella, with no reflectors.

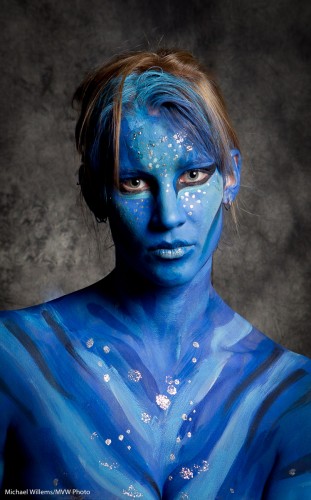
Another:

Bodypaint Model at the Imaging Show

Bodypaint Model at the Imaging Show

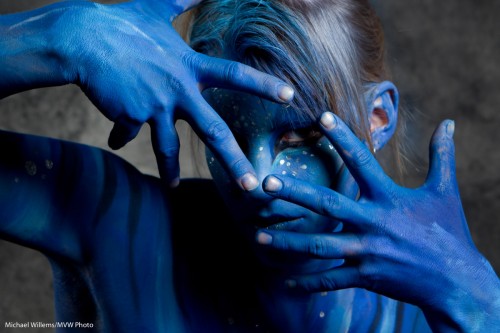
And one more, showing the importance of body language:

Bodypaint Model at the Imaging Show

Bodypaint Model at the Imaging Show

Other settings:

  • The camera was of course on manual, at f/5.6 at 1/125th second and 100 ISO.
  • Make sure Auto ISO is disabled.
  • Make sure you get catch lights in the eyes.
  • Move the model away from the backdrop if you can.

Portraiture is fun, and simple portraits like this are in everyone’s reach. Even if perhaps the “Avatar meets Cirque Du Soleil”-models are not (thanks Melony for that apt description).

Why use a hair light?

One of my favourite ways to use a light is a hair light. Add it to almost any picture to add some interest, contract, and separation from the background.

So you go from this picture of a very nice student in one of my classes recently:

A picture showing good lack of a hair light

Lacking a hair light

…to this subsequent picture of the same young lady:

A picture showing good use of a hair light

Using a hair light

Much nicer, no? And look, even the smile improves!

OK, I am kidding about t he smile. But the picture is better. A dark-haired person against a dark background particularly needs a hair light.

It is aimed directly at the subject from the back, usually diagonally. Use a grid (like the Honl Speed Grid) or a snoot for even more controlled light (like the Honl Speed Snoot).

Tip time: studio setup

A few quick setup tips – for portable studios like mine, here today for a corporate shoot:

Portable Photo Studio Setup Tips

Portable Photo Studio Setup

In no particular order:

  • Roll the paper the way I am showing here. Like a toilet roll: roll from the top. That way you get more available height.
  • The backdrop stand goes in a bag. Ensure that when you put it back in the bag, the large holes show. That way you can see which sidebar is the middle one – you may not need it (like me here).
  • Ensure cables are out of the way. Wrap them around light stands to avoid them hanging out too far where people can trip over them.
  • Always bring a power bar.
  • Use tape or something large on the floor to tell models where to stand and how to orient themselves.
  • Tell subjects “baby steps only when I ask for adjustments”. Else they always turn too far.
  • Start with the body. Then the head. Then the eyes.
  • Arrange to have a test subject available. Else your first client is the test, and that looks unpfofessional.
  • Use a tripod. Adjust height as needed.
  • Camera to 100 ISO and auto ISO off.
  • Camera on manual, 1/125th second, f/8, and use a meter to adjust the lights to that.
  • Test shot one: no flash. It has to be dark!
  • Test shot two: flash, but no subject (focus manually). It has to be white!

That is, I trust, helpful. Efficiency is all, or a two-hour shoot can turn into four hours with setup and takedown.

A studio like this one, the one I built this morning, took me half an hour to build and 15 minutes to take down.