Pink

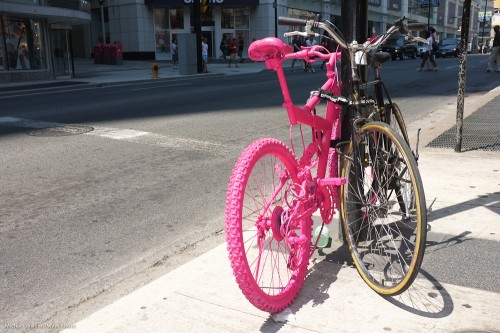
When walking through Toronto recently, I noticed this picture you saw a few days ago:

Pink bike in Toronto (Photo: Michael Willems)

Tip One of the day: when you see an interesting colour, take a shot (which is why you always have a camera handy – right?).

Tip Two: And as said in a post a few days ago, please do not automatically shoot it from 5 feet above the ground. See if tilting, or getting down on the ground (as here), or standing on a chair gives you a more interesting picture.

Tip Three. Use a little fill flash (as I mentioned the past few days).  The Fuji X100 and its tiny fill flash did all this.

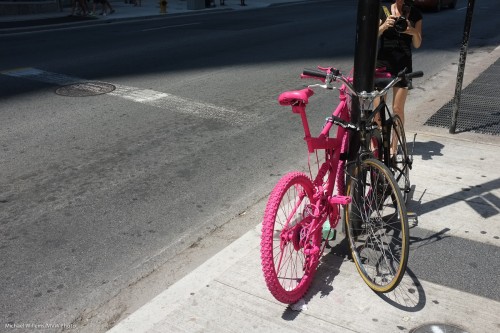
Let me share how boring this shot is when shot from higher up and without fill flash:

Point proven.


Small tip

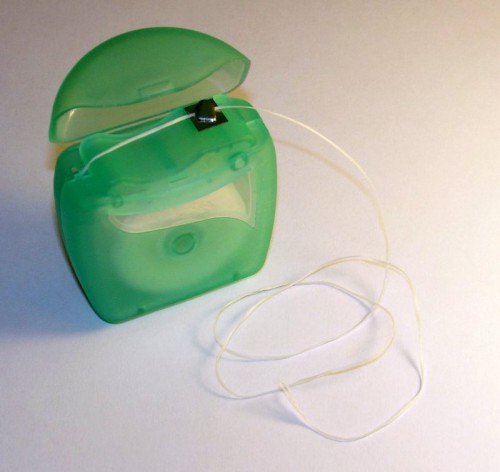
Simple, small tip: when travelling, carry dental floss.

Not only can it come in handy for emergency flossing – a piece of food stuck in your teeth would qualify – but it is extremely handy to tie things together in emergencies when something breaks. Cameras, straps, bags: a bit of floss and it’s good for the day.

Put some in your camera bag right now!


Yum.

I am glad that I always carry everything in the car. Lights, light stands, umbrellas, pocketwizards, cables, lenses, and so on.  So that when a restaurant shoot yesterday involved food instead of interiors, there was no problem.

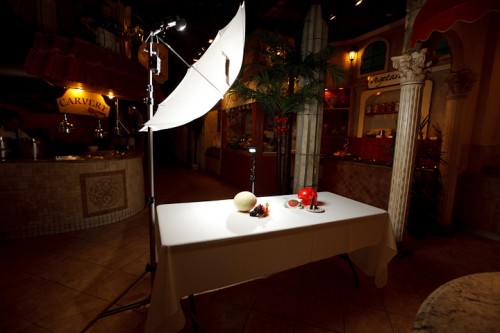
As the restaurant set up a table for the food (which was long enough so I would not need a backdrop), I prepared the following:

  • My Canon 1Ds Mk3 camera with 100mm macro lens;
  • A tripod;
  • One stand-mounted 480EX flash fired by pocketwizard, with an umbrella above the food.
  • One stand-mounted480EX flash, also fired by Pocketwizard, behind the food, firing forward;
  • On the second flash a Honl Photo speed strap and a 1/4″ grid;
  • I set the flashes to half power and quarter power, respectively. This is convenience and experience.
  • I set the camera to 200 ISO and f/8.  (and 1/125th second, but this was almost irrelevant).
  • I slightly adjusted the umbrella position.
  • I checked an image’s histogram: great. Highlights in white table blowing out slightly, none of the food blowing out: perfect. This is experience – I could have used a light meter but this was a hurried, high-presure shoot (the restaurant was about to open).

All that looked like this:

Food (Photo: Michael Willems)

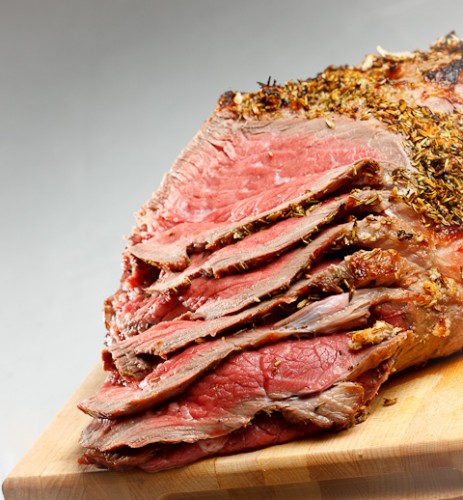
And it got me shots like this:

Food (Photo: Michael Willems)

Food (Photo: Michael Willems)

Food (Photo: Michael Willems)

Straight out of camera that is not bad, what?

Take the above recipe and copy it if you like – see how you do with food!


Confused? Your camera is here to help.

Tip of the day.

Sometimes during a shoot, you can get confused. What am I doing? Why are they all staring at me? Was I going to use Aperture mode or Manual? Why is it all over-exposed? Or under-exposed? Help!

I can identify with that feeling. The first time I took my car for a drive alone, without instructor, and I encountered a large roundabout.. brrr. Or on an early solo flight, when while I was turning final the stall warning went off. Too much to check at once: air speed, vertical rate of descent, flap setting, throttle, carb heat… all while the buzzer goes buzz buzz. Help!

So in a car or in an airplane, I have no good suggestions. Well I do actually: first of all, do nothing. Panicking makes things much, much worse. If you don’t do anything, things will likely stabilize.

But in a camera it may not work out that way, which is where today’s tip comes in.

When you get confused, take a tip from the camera.

[1] Set the camera to:

  • Auto ISO
  • Auto White Balance
  • Smart metering (Evaluative/3D Colour Matrix)
  • Program mode (“P)
  • TTL Flash (“TTL” displayed on the back of your flash unit)

…and now see what the camera does.

[2] Now use those settings (ISO, Aperture, shutter) as your starting point. Set them in whatever mode you wanted – like manual.

[3] Then vary from that starting point.

Often, that resets your problems. Perhaps your problem was an unrealistic shutter speed, or a way-too-low ISO. Well, the settings above will sort that put ad get you started right. Then you can bring your own creativity to bear from there.

See? As simple as 1-2-3.


Focus Point Confusion

I get the following question rather  lot – so when another reader asked a few days ago, I thought “let’s answer for everyone”.

When shooting, I usually use the center focus point (Canon 40D) to select what I want to focus on, press halfway and then recompose. I have recently gone through some pictures I have taken with Aperture 3, and have clicked “show focus points” and it shows that my focus point was off. It appears as though my camera did not lock the focus. I have done some research on different forums to find out what the problem could be, and some people discussed the modes “AI Servo, AI Focus, One Shot”… Should this affect the focus lock? Would I be better off changing which of the 9 focus points I wish to use for each shot rather than locking and recomposing? (I would rather not since it’s more time consuming!)

A-ha.

You are fine. You are using “one shot”, or you would not see a focus point displayed. You see, the “display focus point” function is only useful if you do not recompose, since the computer doesn’t know you recomposed. So the computer shows which point you used, but not where it was when you shot.

I.e. There’s no problems. The image is sharp where you wanted, right?

Your other question: yes, although the centre point is more sensitive, and is sensitive to both vertical and horizontal lines, it is usually more accurate to move the focus point. You can make this easier on many cameras by custom functions. But unless you are shooting with very narrow depth of field, you can usually get away with using the centre point and recomposing.


Simplify.. did I mention?

An oft-recurring subject: simplify your images.

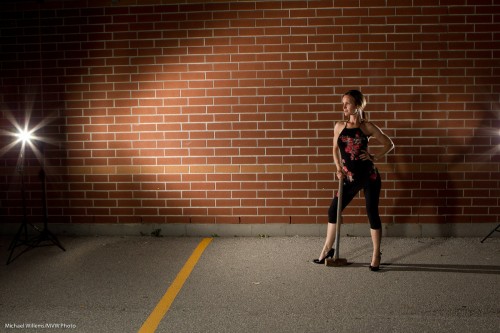
Here is a rough shot, to start, – rough meaning straight out of the camera (often expressed as “SOOC” – now you know more jargon):

Girl, wall and hammer (Photo: Michael Willems)

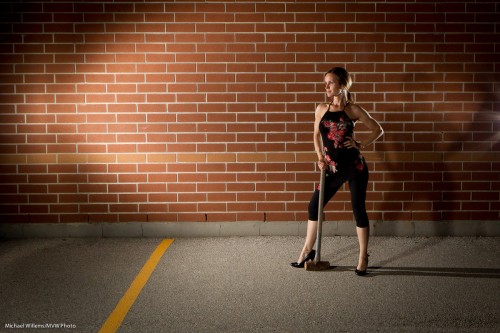
Now simplified:

Girl, wall and hammer (Photo: Michael Willems)

There was nothing wrong with the light on the left, and in some versions I left it in. But look at what I simplified other than that:

  • I fixed perspective;
  • I removed the light stand on the right;
  • I fixed a lot of the rubbish on the ground (view at original size to see the leaves, cigarette-buts, chewing-gum wrappers, and so on in the original image);
  • I removed the weeds growing at the bottom of the wall.

Not earth-shattering, but a tiny bit of simplifying makes a major difference in making your image more professional.


Props

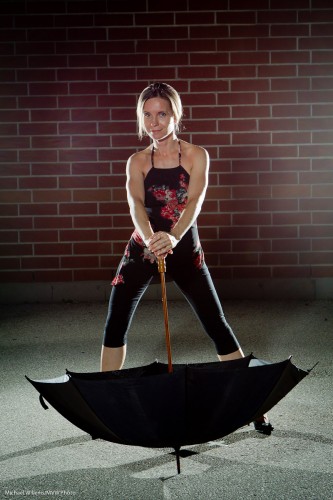
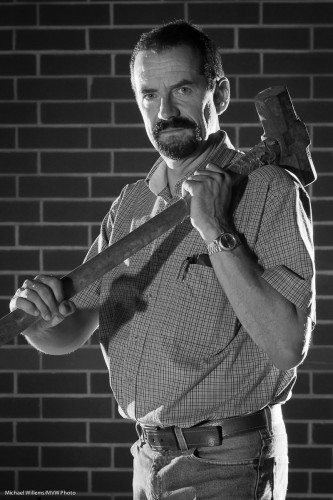
Props are often very important in images. They often help make the photo. Here are a few examples.

Props can either be:

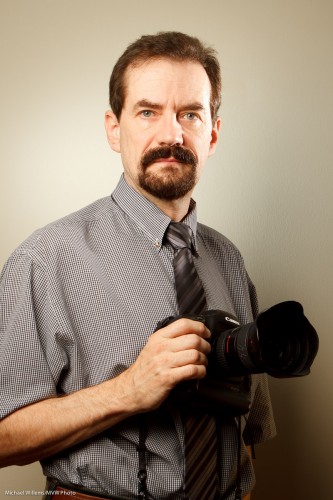
  • “What they’d normally do” (business person with note pad and pen; a child with a favourite toy; a sportsperson with his bat; a photographer with a camera), or…
  • “Juxtaposed”, eg a pretty girl with a sledge hammer, for artistic or even funny photos.

Both are good, as long as the effect you achieve is the effect you desire. Props help tell the story, put your person in the place you want them (a 1950s shot would use an old telephone, for instance). They can be very simple and obvious (shot 1 below) or they can make you think.

Without further ado: a few examples to get you thinking about using props.

Use of props in photos (Photo: Michael Willems)

Use of props in photos (Photo: Michael Willems)

Use of props in photos (Photo: Michael Willems)

Use of props in photos (Photo: Michael Willems)

Use of props in photos (Photo: Michael Willems)


August 13, Joseph Marranca and I will be doing a Creative Light workshop where I guarantee we’ll use props. There is still space if you book now!


Architecture tips

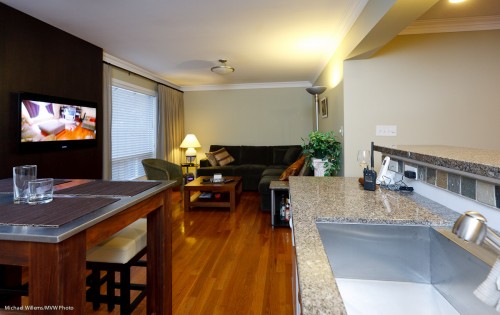
I have a few indoors architecture tips for you today.

Indoors architecture, Amberglen Court (Photo: Michael Willems)

My living room (Photo: Michael Willems)

Shooting indoors architecture is tough. Light differences, low light, rooms that are too small and distorted… many challenges. But they can be overcome with a little attention. The way to do this is as follows: take your time and consider the following:

  1. Shoot with a wide angle lens. This allows you “to get stuff in”.
  2. But do not go crazy and make every closet look like a large room.
  3. Expose for the outside.. i.e. do not overexpose the background. Else, you wil get windows that are too bright – so expose for those windows.
  4. Now expose the inside sufficiently. Start by turning on inside lights.
  5. You will probably also need flash – and you may well need flash exposure compensation (FEC), since walls are often light.
  6. Bounce that flash!
  7. Set your White Balance correctly. Consider using a gel on the flash to equalize light bulbs and flash.
  8. Focus accurately, one third of the y into the image.
  9. Avoid distortion. Shoot from 4′ above the ground, or consider shooting every so slightly upward. If you get perspective distortion, use Lightroom, Lens Correction method I explained a few days ago.

Simple. Once you know!


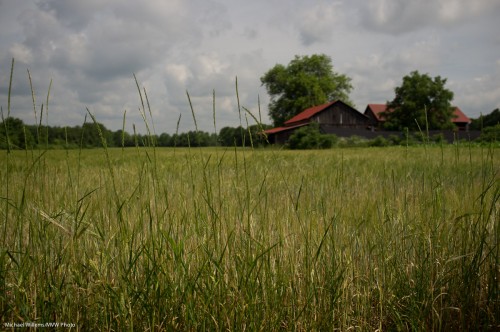
Layer cake

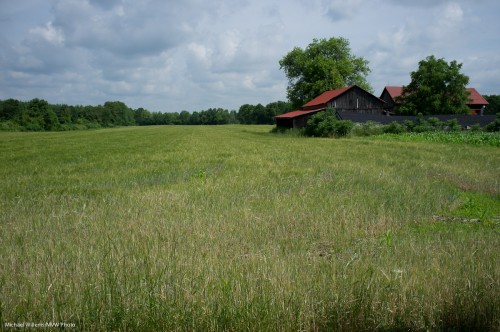
A concept that can help explain (and darer I say it, create) interest in images? Layering.

This means “dividing your image into visioble layers. You can do this by blurring parts of the image that are separate from the parts you want to draw attention to – i.e. by selective use of narrow depth of field.

Start with a fairly mundane image:

Argicultural field (Photo: Michael Willems)

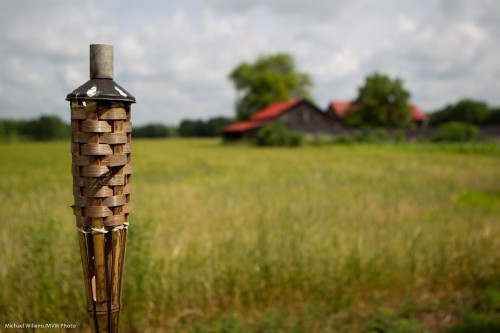
Now add a foreground layer:

Agricultural field (Photo: Michael Willems)

We could have blurred the foreground – often, that works too. The foreground becomes a frame.

And now, one more: even more extreme – get closer to a larger object:

Agricultural field (Photo: Michael Willems)

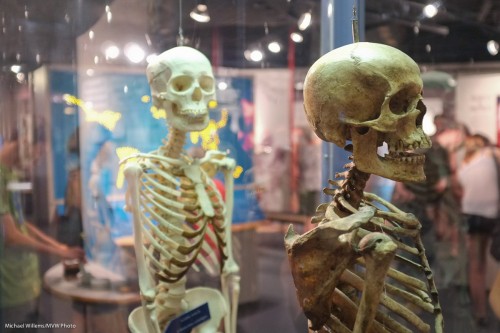
And finally, an image with three layers: skeleton 1, skeleton 2, and background:

Skeleton fun (Photo: Michael Willems)

Nice eh? And easy to do. Get close, select a large aperture, focus using one focus point.


Flash Tip: Bright Days

Following on from my previous post, one more quick flash tip.

On bright days, decrease your exposure. Then use flash to fill in the foreground.

Here: a bright recent day.

Bright Day (Photo: Michael Willems)

Not bad, but can we do better? I woujld like the sky to look blue, not washed-out. For blue, I need to decrease my exposure.

Which I do (using manual or minus exposure compensation),. Nic eblue sky – then I turn on teh flash to fill the foreground. I make sure I use high-speed flash if my shutter speed wants to exceed 1/200yh second.

All this now gives me this:

Bright Day (Photo: Michael Willems)

Not bad, eh?

Finally – also note the use of red, green and blue. All in one image. All three primary colours, saturated, in one shot makes the photo visually interesting.


August 13, Joseph Marranca and I will be doing a Creative Light workshop where I guarantee we’ll use light just like this. There is still space if you book now!