Slow flash – a misnomer

Nikon calls it “slow flash” when you use a slow shutter speed while using flash. You engage this in semi-automatic and automatic camera modes (P and A) by pressing the flash button an turning the wheel until you see the word “slow” on the top LCD display in the flash area.

This is a misnomer. The flash is fast – in the order of 1/1000th second. It is the shutter that is allowed to be slow in this “mode” (really just a technique). That is why another, more correct, term for this technique is “dragging the shutter”.

And you want to do that why? As readers here now, you want that in order to allow enough ambient light in, to avoid those dark backgrounds.

But can you use a slow shutter speed when using flash? Surely a shot at, say, 1/30th second will be all blurry?

Not necessarily. While there may be a little ghosting, if your subject is mainly lit by the flash, it will be as though it was shot at 1/1000th second.

That is why “slow flash” is such an unfortunate misnomer: it is”fast flash in a slow shutter image”. Which is why the Willems 444 Rule for indoors flash (400 ISO, 1/40th sec, f/4) usually results in crisp images.  Have you tried it yet?


The Willems Rule for Indoors Flash

So.. for indoors flash in a ‘normal’ environment (i.e. a room with not too much, not too little light), here is my new, “restated-as-an-easier-mnemonic” rule of thumb:

The 400-40-4 rule (a.k.a. the “4-4-4-rule”).

As a simple starting point, do the following:

  • Flash aimed 45 degrees up, behind you
  • 400 ISO
  • 1/40th second
  • f/4

That will give you an ambient light exposure of around -2 stops. Which looks like this:

Of course if your background is now too dark, you can raise ISO, lower f-number, or slow down shutter. If on the other hand the background is too bright, lower the ISO, select a faster shutter speed, or increase the f-number.

Often, simple rules of thumb are the secret to success. And simplicity is key – “4-4-4” sounds simple enough to remember, no?


Auto ISO

When you are using “auto ISO”, meaning the camera sets ISO for you, be careful.

In this mode, the camera will raise ISO and lower it – but it will get it wrong in some situations.

Low light. The camera will raise ISO to give you a handholding-suitable shutter speed. But do you want that? Or do you want quality (low ISO gives you that quality) and use a tripod? Night shots, twlight shots, fireworks, lightning: these are the obvious examples. For night shots, use low ISO and a tripod. So: low light: if you can use a tripod, use low ISO.

Motion needs. When there is enough light, the camera will lower ISO to give you good quality and shutter OK for handholding. But when you need that extra shutter speed, for sports, say, or for anything else that needs motion frozen, you need higher ISO. You may need 1600 or even 3200 ISO for hockey, but no auto ISO will give you that. So if you have motion, then raise ISO to suit.

My rules of thumb for ISO:

  • Outdoors, or low light with tripod, or studio shoots: start at 200 ISO
  • Indoors, even when using flash: 400 ISO
  • Difficult light – sports, motion, museums, churches: start at 800 ISO

In all cases, vary as able or as needed (if there is more light, use lower ISO; if you still get motion blur, use higher ISO).

Note – Auto ISO and manual will, on many cameras, give you a “aperture PLUS shutter priority” mode. This can be a cool thing to play with.


Mountains. Move them.

You know the saying, attributed to Francis Bacon? “IF THE MOUNTAIN WILL NOT COME TO MOHAMMED, MOHAMMED WILL GO TO THE MOUNTAIN”.

Photographers know this too – but we sometimes forget it. So let me remind you. When you have a background you do not like, or a wall with the wrong colour, or a ceiling that is too high, you can try to deal with it the best way you can.

You know how, right? So you read my blog – you know this. 4 -40- 400!

  • 400 ISO
  • 1/40th sec
  • f/4

And the flash aimed behind you.

Nice, but.. if you have a better background or a better wall, why not use that?

Ask your subjects to move.

And then you get..

So.. please remember that as a photographer, you can shape your environment. Do it, and your pics will be better.


Studio setup

A few readers asked about the “background post” of the other day – how was it lit?

Here’s how:

Studio Light (Photo: Michael Willems)

Four lights:

  • A softbox strobe as main light.
  • An umbrella strobe (not pictured) as fill.
  • And two speedlights: one with a Honl Photo snoot as edge light, and one with Honl Photo gel as background light.
  • All manual
  • One strobe and both speedlights fired with Pocketwizards; the other strobe with its cell.

That’s a very standard setup for me, and yes, you can learn to do this too.


How to learn?

Learning is key in photography – and that learning does not stop until you die, or retire entirely from making (not taking) photos.

So how do you best learn photography? I have Ten Tips that may help.

  1. Read some good photo books. They may not teach you much, but they will clarify, and teach you a few things, and above all – they inspire, and they lay the groundwork.
  2. Read your favourite blogs (like this one) – daily. Make a habit of it.
  3. Also follow podcasts and videos – there are many videos online you can learn from (I think I might start doing some, too!).
  4. Google is your friend – Google for interesting techniques and try to reproduce them.
  5. Always carry your camera.
  6. Assist a pro in a shoot. Even if you do this for little or no money, you will pick up many useful techniques and build confidence.
  7. Take scheduled courses. The homework element will force you to try techniques you would otherwise not have tried.
  8. Do individual coaching. This is very effective at quickly identifying and filling the gaps.
  9. As part of this, do a portfolio review. This is a very effective way – an essential way, I would say – of getting better quickly. “Critiquing” does not mean “criticizing”!
  10. Use your editing software (Aperture or Lightroom) to get better. This too is surprisingly effective. If you are always cropping or tilting or exposing more in post, you will start to so it in camera too.

It should be no surprise that I can help you in much of this – contact me to hear more. But however you do it – do it and improve.

The great news: in this digital age, competent photography can be learned by everyone. I do not believe in an innate ability that you simply have or lack – only in differences is how quickly people pick up good habits. But everyone picks them up in the end.


Be A Cyclops

You know that feeling? You see something impressive, like the Grand Canyon, and when you get home your pictures are… blaah. Not impressive, they just don’t do it justice.

That is because when you are there, you are moving around and you are using stereoscopic vision. Two eyes show depth.

If you are using a camera you have only one eye. So here’s today’s tip:

When shooting impressive scenes, close one eye and look at the scene that way.

You will see that to bring back the feeling of awe, you need to use a wide lens and get close to something – relative size is the only way we have to see depth in two-dimensional pictures.

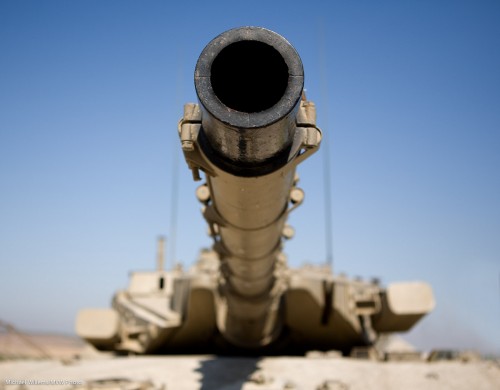
So this picture looks as good using one eye as it does with two eyes:

Israeli Tank (Photo: Michael Willems)

Israeli Tank (Photo: Michael Willems)

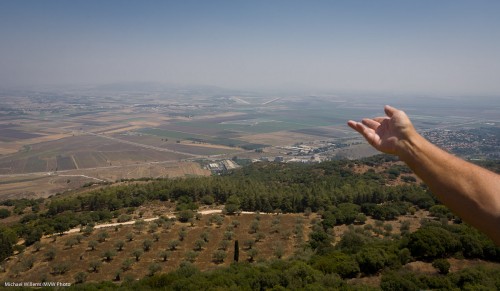
Even something as simple as  a hand held out can make a shot from Mount Carmel a little more interesting:

View from Mount Carmel (Photo: Michael Willems)

View from Mount Carmel (Photo: Michael Willems)


Background woes

Backgrounds. We like to have control over them in portrait shoots, don’t we?

One question I often get is “why can I not light up my background? Nothing I do works!”

This is quite simple. To light up a background, you need a colored light (a gelled flash?) shining onto a dark background.

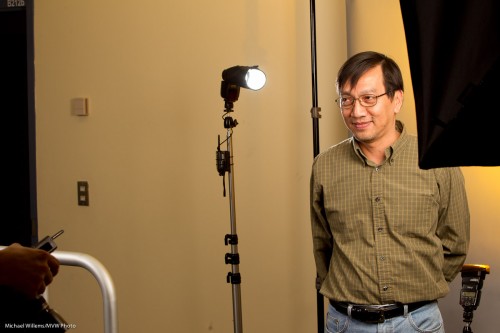
So if the background is already light, you cannot easily colour it. As in this shot of a kind volunteer in my Sheridan College course the other night:

My main two lights are spilling onto the background, lighting it up.

So how do you get the background darker?

  • Use a darker backdrop
  • Move the subject farther away from the backdrop
  • Move the light closer to the subject, so the relative distance changes.

Any combination of those three gives you something more like this picture of another kind volunteer (in this case I moved the light closer to the subject, and then turned it down correspondingly):

And now I can add my background light, a gelled speedlight in this case, set to 1.4 power, which a nice bright gel – Honl Photo Egg Yolk Yellow:

Simple once you know, n’est-ce-pas?


Interested in lighting? Consider some private coaching, where I explain all, you get to practice and take actual shots, and all will become clear. The December/January special is still on: 10% off during those months.

Sensor sizes and DOF

One factor that affects depth of field is the sensor size. Simply put: the smaller the sensor, the more extended your depth of field in any given image.

This is an approximation and simplification (it also depends on angle of view, point of view, etc)  but it is good for us as photographers.

Clearly, this means that if we want blurry backgrounds, we want large sensors. So what are the choices?

  1. Lower-end (and many higher-end!) point-and-shoot cameras usually have very small sensors. These do not make it easy to get blurry backgrounds!
  2. Then there are “almost-APS-C” sensors such as the “Micro four thirds” format – these are almost as big as a crop camera’s sensor. Micro four third cameras are twice as small as a negative. This is the trend in small cameras.
  3. The next step up is the APS-C crop sensor – 1.6 times smaller than a negative for Canon; 1.5 times for a Nikon. Most DSLRs have this size sensor. Some small cameras now also do (like my Fuji X100).
  4. Next, there is a Canon-only size that is 1.3 smaller than a negative – this is the 1D’s format.
  5. And finally, there is the full-frame sensor – it is exactly the size of a 35mm negative.

The bigger the better – also because a larger sensor gives you lower noice and hence higher ISO capability, and a larger, brighter viewfinder.

And this is why we are seeing today’s wonderful move to larger sensors. So my advice: when buying your new camera, do ask how large the sensor is, and go for the largest one you can afford.


Blurry Backgrounds

If I want a sharp foreground subject with a blurred background – you have heard me say it many times, there are several ways.

The reason this subject is always confusing is that it is very complicated. “Sharp focus” and “depth of field” are subjects for mathematicians (check the Wikipedia entry, if you wish). Hyperfocal distance, lens geometry, approximations, cropping, aperture, magnification, f-numbers, image format size, sensor size – all these have an effect. The main factors that affect DOF are:

  • Sensor size
  • Proximity to subject
  • Zoom
  • Aperture number
  • The ratio of subject distance to focal length
  • Cropping

Several of these factors are complicated and need not be taken into account all the time – but several can help you in practice. Chief among them: it is not just aperture that affects depth of field – it is also the distance to the subject. As Wikipedia puts it:

For a given format size, at moderate subject distances, DOF is approximately determined by the subject magnification and the lens f-number.

In practice, this means that to get less depth of field (i.e. a blurrier background), you need to either:

  1. Select a lower f-number, or…
  2. You need to magnify more. And you can magnify more by zooming in, or by getting closer.

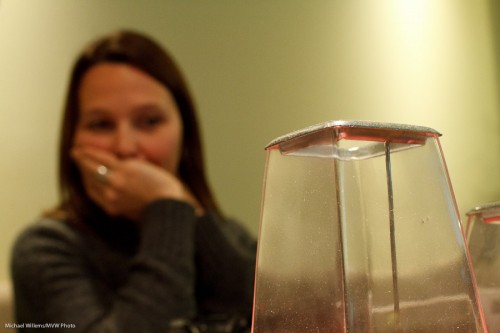
So to get an image like this, with the person behind the object blurred out, you do not necessarily need a fast lens or a full-frame camera:

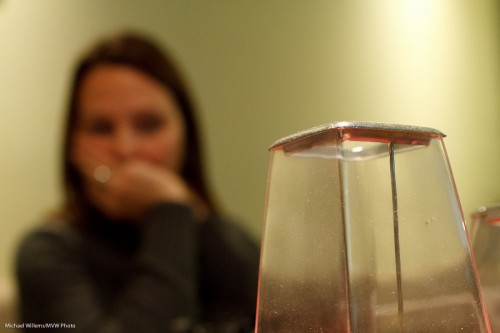
In fact that was taken with a Canon 7D with a 35mm lens (equivalent to a 50mm lens) set to f/5.6. This is an aperture that every lens can achieve. But I was close to the object!

That said, of course a lower f-number in the same situation gives you more blur. Here’s f/2.8, which good zooms can achieve:

And here’s f/1.4, for which you need a prime lens:

So the lesson, I suppose, is that if you want blurred backgrounds but you cannot right now afford that full frame camera and the low f-number lenses that you should really invest in, at least get close.