Shooting a legend

Wendel Clark was in town tonight, and I shot him tonight for Oakville.com, delivering a large cheque. Pictures here:

http://www.oakville.com/photos/

One sample here:

©2009 Michael Willems

Credit where credit is due: fellow photog Nikki Wesley of the Oakville Beaver came up with the excellent elevated viewpoint, but I will take credit for spotting the Zamboni and waiting until it was behind the cheque-holding gentlemen!

Beep

A quick reminder to all of you who shoot events. Make sure, if you would, that you turn off the focus beep in your camera when you are shooting things that like or need silence. Music recitals, weddings, chess: you will be severely dealt with. Turn off the focus beep and you will hardly be noticed.

The same goes for the beep in Nikon i-TTL/CLS flashes.

And the same goes for the shutter: on Canon 1-series bodies you can turn the shutter down to a lower volume “(“silent mode”). It’s not silent but it is less intrusive.

All part of staying out of the way!

Im asking the questions!

OK, that is, for once, I will ask a question.

I shoot with flash – I even teach the subject. My setups are often like this one I used a few hours ago today:

Tht was to shoot an exec portrait.

In a setup like that (three speedlites, one with a gel) E-TTL (or Nikon’s i-TTL) does not work well. No reflecting surfaces in that big hall,  and no line of sight, what will all those umbrellas. So, I use Pocketwizards and manual metering. Fine – no problem.

In this setup I have two needs:

  1. I need to connect the pocketwizards to 430EX flashes that have no x-synch input. So I need to find a way to connect them so the PW can trigger the flash.
  2. I need to mount all this without dangling things. I note that both the flashes as well as the Pocketwizards have threaded holes for mounting stuff. How do I use those?

So who sells the cables I need, and hwo has mounting hardware that uses those thraeded mount holes? Especially in Canada and of course “now”, not “next year”? My local camera store did not know.

Answers are therefore very welcome, and not just by me, I bet.

Oh and the portraits, for a magazine, were of this type:

Movie night

Yesterday night I and a few photographer friends watched David Honl’s two-DVD workshop combo, “Light”.

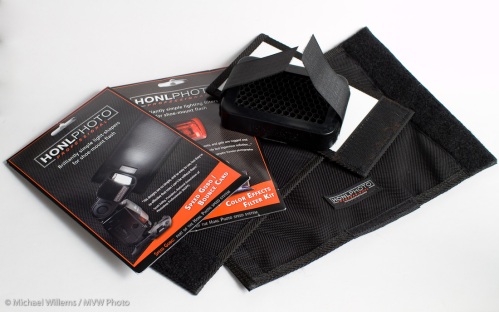
David Honl is a well-known LA-based international photographer whose blog you can see here. His DVD shows him using small flashes to do various professional shots, and he both shows and explains how he gets the excellent results he does.

Disclaimer: I am on David’s Round Table, together with Joe McNally, Lucas Gilman, Ken Cedeno, Cherie Steinberg Coté, and Gavin Blue. I am delighted to be on the Round Table because Dave’s small, light and convenient small flash modifiers have made my life easier, and I am inseparable from them.

Since the roundtable is not a paid position, I feel perfectly qualified to comment objectively on this DVD.

So, the details after the break:

Continue reading

Calgary

The other day, as we were landing (on my way back from the recent trip to Phoenix), into the -18C frigidity:

Click for larger.

How to shoot these in the first place: I have recently talked about this. Basically, low ISO but large aperture (low “F-number”), wide angle, and get very close to the window.

As is often the case with aerial shots, this image needed some adjusting in Photoshop: mainly, a levels adjustment; with a bit of noise reduction added, followed by some sharpening after resizing.

Event pic

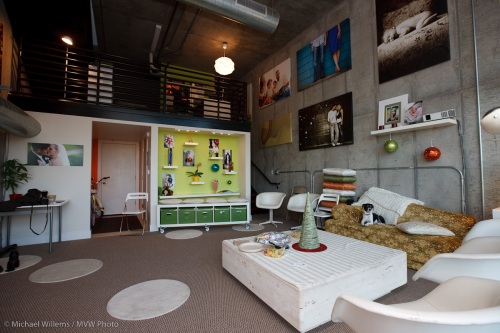
From an event I shot for The Oakville Beaver a few weeks ago:

For something like this I use flash as well as high ISO/wide aperture/slow shutter for the background, and I use a wide, wide angle to introduce depth.

If I can bounce the flash off a wall or ceiling, I will, or else I’ll use a bounce card (in this case a Honl bounce card) or if there is some bounce surface, a Gary Fong lightsphere.

The “slow shutter” thing is called “slow flash” on Nikon. It’s also referred to as “dragging the shutter”. This just means you let the shutter speed get slower than 1/60th second, to allow the background light to do some work too. I do this by shooting manual, but I could also shoot in Av mode (or in Nikon, enable “slow” in A mode).

Off-centre

When composing a picture, our proverbial Uncle Fred puts every subject in every picture smack bang in the middle.

Sometimes that works. But usually it leads to an unbalanced composition.

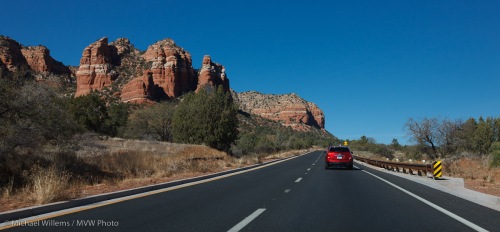
Like a scale with a pivot, I like to think as pictures needing the weight balanced. That leads more to this kind of thing (last week in Sedona, AZ):

The “Rule of Thirds” is one example of such a balanced layout. If you do not know this “rule” (which of course is only a guideline) then please look it up now. Or just click here. And you will conclude that of course I am using that rule in the photo above. I am also using colour contrasts and converging lines.

And all that in one hand from the steering seat of a Dodge Ram. You see, the point is that this is not a conscious decision. Good composition becomes second nature, an automatic reflex. With practice.

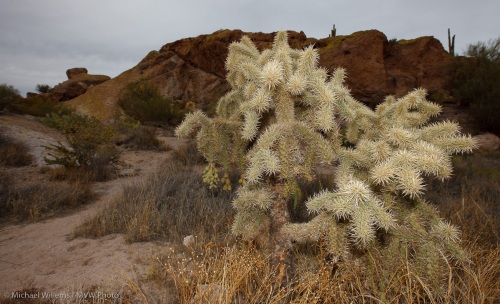
Here is another sample:

Another important thing is that any activity, motion, pointers, etc point into the middle. Not usually out of the frame.

Have fun shooting!

Outdoors Tip

You should definitely get one of these:

A Hoodman Hood Loupe. With it, you can see your LCD even in bright outdoors daylight. It adjusts to your eyes and it magnifies, as well. Invaluable, and I would not go anywhere without mine.

I am so glad I had mine in Arizona last week. Otherwise I would not have seen what I was getting in bright “creative light” like this:

Or this:

Without a Hood Loupe, you are guessing. A sin “I think they’re OK, and when I get indoors I’ll see for sure” – if you can even see the display at all.

Aircraft image

How to shoot an aircraft?

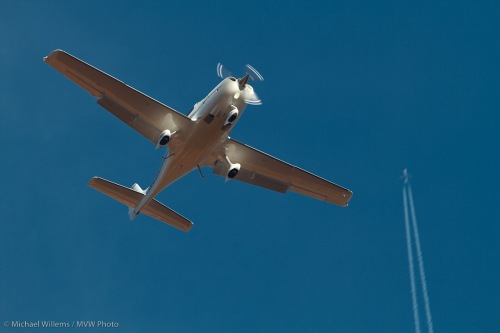
If you are a terrorist, use whatever guided weapon you have. If, however (as I assume since you are here) you are a photographer, you want to do something like this:

There are four key points:

  1. I am using a long enough lens. In this case a 70-200mm f/2.8L lens set to 200mm. Which on the Canon 7D I used is equivalent to 320mm.
  2. I am using the lens’s image stabilizer (IS), but in “mode 2”. That means I can pan – that is what mode 2 is for. If my lens does not have a mode 1/2 setting I would turn IS off, unless I intend to hold the lens still.
  3. I have shown the prop turning. Just a bit. In this case, by using 1/25oth second. This meant I needed f/5.6 at 160 ISO.
  4. I have not underexpose the sky too much. A bit of underexposure is good here, because it shows the blue. If the sky had not been blue, I would have wanted to expose more, in order to show aircraft detail. So the need is to first show aircraft detail, then if possible to expose to show a nice shy if the sky is blue.

I hope that helps and am looking forward to seeing your pictures, if you happen to live near an airport (and not be male and bearded like me).

Oh and the fifth key point? I am showing the big aircraft’s trail in the background, creating a bit of a huxtaposition.