Why use a hair light?

One of my favourite ways to use a light is a hair light. Add it to almost any picture to add some interest, contract, and separation from the background.

So you go from this picture of a very nice student in one of my classes recently:

A picture showing good lack of a hair light

Lacking a hair light

…to this subsequent picture of the same young lady:

A picture showing good use of a hair light

Using a hair light

Much nicer, no? And look, even the smile improves!

OK, I am kidding about t he smile. But the picture is better. A dark-haired person against a dark background particularly needs a hair light.

It is aimed directly at the subject from the back, usually diagonally. Use a grid (like the Honl Speed Grid) or a snoot for even more controlled light (like the Honl Speed Snoot).

Wide angles, and why?

I like wide angle lenses, as this shot, taken the other night at an event I was shooting, shows:

A wide angle shot

A wide angle shot

I used a bounced flash and set the camera to manual mode and opened up the aperture, slowed down the shutter, and increased ISO enough to allow the available light to d some work as well.

And wide angle means:

  1. I can focus easily on “everything”
  2. I can use a slow shutter speed without blur
  3. I can get close to someone or something, zoom out, and thus introduce depth.

And that is what I did there.

What's in YOUR bag?

What do I carry in my photo bag? I am often asked this question. I was asked it again a few times at the Henry’s Photography and Digital Imaging Show this past weekend, where by the way I spoke to, and with, thousands of people, and loved every minute.

(By the way, if you visited the show and have questions, do feel free to email them to me and I shall answer them on the blog – and sign up for email).

So my bag looks like this:

A photojournalist's camera bag and contents

Camera bag and contents

What does it not contain? A camera. This is on my shoulder, for fast convenient access. Always, even when I am travelling. I do not put the camera in a bag.

What this Domke bag does contain is:

  • Two spare lenses, at least one of them a fast prime like the 35mm f/1.4 or the 50mm f/1.4
  • Lens hoods, one for each lens
  • A 580EX II flash
  • A 430EX II flash
  • Flash Modifiers: A Honl grid and a set of Honl bounce cards and a Honl gel set in a roll container, as well as a Gary Fong lightsphere
  • A Hoodman Hood Loupe
  • A container full of memory cards
  • A small grey card
  • Wallet
  • Note pad
  • Spare batteries for cameras and flashes
  • Business cards
  • A small brush
  • Pens
  • Pills (headache, throat)
  • Plastic bags
  • Shower caps, elastic bands, etc

You can never be too prepared. Be like NASA (“do I really need each gram of this weight?”), but once you decide you need it: bring it!

Regrets, I've had a few…

…but then again, too few to mention. Except one, at the show: namely, that I don’t get to see the actual exhibition. I’m always presenting!

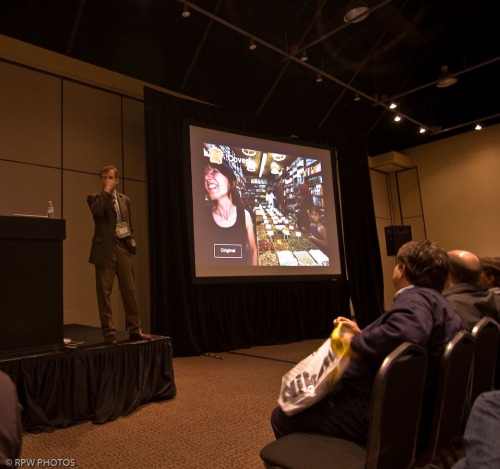
Michael Willems presenting, shot by Ray of RPW Photo

That said: I love the work.What could be better than educating thousands of people in a hobby (or profession) that is exciting, creative, fun, and extremely rewarding in almost every sense?

Those of you new to the blog: a few important tips.

  • Sign up for emails (on the right) so that you get an email every time I post. I write at least one learning post every day.
  • Search, using the search field
  • Go back – this blog is almost like a book: a post of a year ago is still entirely valid today!
  • Use the category cloud to search for key words.
  • Ask me questions – I’ll answer them on the blog!

And above all.. go shoot some nice pictures.. shoot a lot. And never stop learning.

Reiterated Trick

I mentioned this once before as an aside, but it is worth a post: a trick that tells you which flash is casting what light in your images.

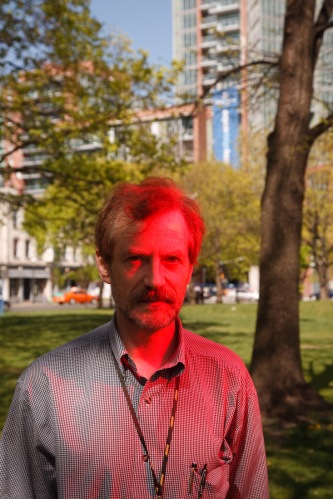
Say I am lighting a person (like me) with a flash outside. Nice:

Subject lit with an off-camera flash

Subject lit with an off-camera flash

But how can I be sure this light is from the flash? I mean, is that really all the flash? Or is the subject in the sun? Or in a mix of light?

Solution: put a coloured gel onto the flash. Now you see:

Subject lit with an off-camera gelled flash

Subject lit with an off-camera gelled flash

Ah. So it was the flash! Not only that – you can see exactly where it is -and importantly, where it is not – illuminating the subject.

Useful trick, eh? One more reason to always carry gels along with you.

Digital SLR Gotchas: Auto ISO

Auto ISO is a great feature, but use it wisely. Here’s when NOT to set your DSLR to “Auto”:

  1. When using a tripod: you want low ISO then.
  2. When shooting in a studio setting: same, low ISO
  3. When using flash at events: dfoit yourself and select 400 or 800 as your starting point (and go higher if you need)
  4. When shooting sports: your camera will go to a low ISO: you should go to 1,600 ISO instead.

My most expensive camera does not have auto ISO – you do not need it. I like having it, but I can live without it.

My starting points: 200 ISO outdoors, 400 indoors, and 800 in tough light (sports, museums). And then vary from there.

Pic of the day

And how would you like to take pics like this, shot about an hour or two ago on my way back home from day one of the excellent Henry’s Digital Imaging Show:

Oakville.com party in Oakville

Oakville.com party in Oakville

How did I shoot this:

  • A Canon 1D Mark IV camera with a 16-35mm f/2.8 lens
  • The lens set to 16m (equals a “real” 22mm)
  • A flash on the camera set to -1 stop flash compensation
  • The camera set to -2 stops on the meter in manual (1/30th sec at f/4 if I recall correctly)
  • A Honl Photo half CTO gel on the flash
  • White balance set to “flash”

That’s how it’s done. Come to my courses and I’ll explain more!

At the show today!

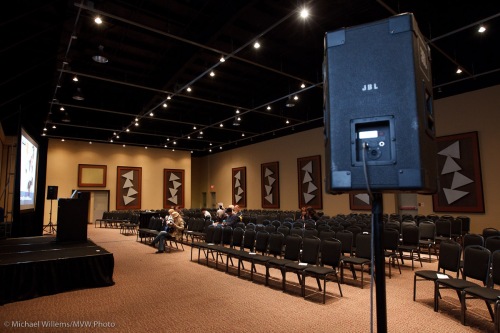
Today I had a great time, as I hope did all my listeners, at the Digital Imaging show. Before it starts, the room looks like this:

Toronto's Digital Imaging Show, May 2010

And  then the doors open and it gets hectic:

Toronto's Digital Imaging Show, May 2010

And all seats fill up. Thousands of people, and I love seeing, listening, and talking to thousands of people.

If you want to hear me talking about Travel Photography, Flash photography, Digital SLRs, Lightroom and RAW, and much more: I’ll be there tomorrow until 4, and then all day Sunday as well.

Reader question

A reader just emailed me, telling me she recently attended a course for her Nikon D5000 camera, and says:

“I will be attending a fundraiser in Oakville this evening and bringing my camera (of course).  I am have a bit of difficulty firstly with indoor dimly lit lighting and secondly I am looking to create the look of my subject which is focused and the background is faded.  I am having many, many other problems, but for know if you could help out with those two that would be splendid!”

Let’s see if I can help. Of course there is a lot to learn (it’s what photographers spend years learning), but I am sure some quick tips will be of use.

First, you want photos like this:

Gregry Talas at The Kodiak Gallery

Gregory Talas at The Kodiak Gallery

In other words, photos where the background is well-lit by available light (not under-lit) and the subject is well lit by your flash (not over-lit).

Here’s some starters, then.

  1. Lens: You will probably want a “slightly wide angle” lens setting. This is a “real” lens setting of 35-45mm: that is a setting between 24 and 30mm zoom on the lens on your crop-factor camera (see the dial on the lens)
  2. ISO: Set your camera to 400 ISO, or 800 ISO if it is darker or the ceilings/walls are far away. or your pictures turn out too dark.
  3. Mode and settings: Select “Manual” exposure mode (“M” on the dial on top ) and choose a shutter speed of 1/30th second if it is dark (1/60th if it is bright). As for Aperture, select the lowest “F”-number you can go to (e.g. 3.5 or 4, depending on your lens; as low as 2.8 or even lower on a professional lens).
  4. If the previous step is difficult you can just use Program Mode, “P”.
  5. Flash: Turn on your SB-600 or SB-900 flash (you do have one, right?) and ensure you have fresh batteries, and spares.
  6. Bouncing: Above all: if at all possible, try to bounce the light off the wall/ceiling behind you.

What are we doing here?

  1. The wider angle is suitable for events, and makes it easier to shoot at low shutter speeds.
  2. high ISO and slow shutter speed give you a well-lit background
  3. The low “F”-number gives you your blurry background.
  4. The bouncing gives you nice, soft shadows and avoids overexposing your subject with harsh, flat, horrible direct flash light. It also avoids red-eye.

I hope that helps.

Please do search the blog here for terms like “bounce flash” and “events”, and scroll down and select the “FLASH” keyword and browse through those articles. Ignore the advanced ones, just read the ones that speak to your situation. Here’s a few samples:

And that’s just a quick search. This blog is a useful resource, if I say so myself, if you use the search function.

And as for your event: above all, have fun! Tell people “heads together” when you shootthe “grip and grins”. And enjoy making them smile.

And finally: take more courses. That’s what they are for, and you will be amazed at how few three-hour courses you actually need to learn photography. See you in class!