Vignetting

My new f/1.2 lens reminds me to point out that vignetting is a good thing.

Let me explain.

Vignetting means “making the outsides of a picture dark”.

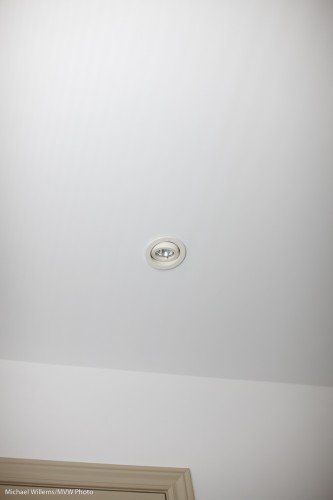
A lens, especially a fast lens, used wide open (at the lowest f-number) does this rather a lot. Like in this example. Here is the 50mm lens at f/1.2:

Vignetting at f/1.2

Vignetting at f/1.2

And here at f/2, “stopped down” just over a stop:

Less vignetting at f/2

Less vignetting at f/2

As you see, the wide open image gives you a lot more vignetting: the corners are dark. This is mentioned as a drawback for lenses that do this.

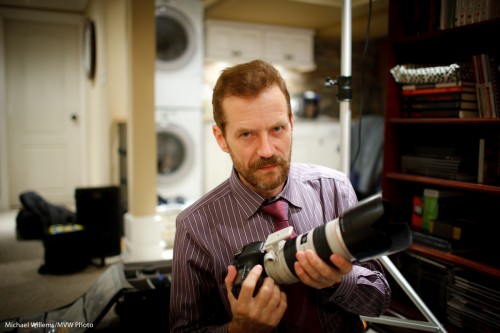
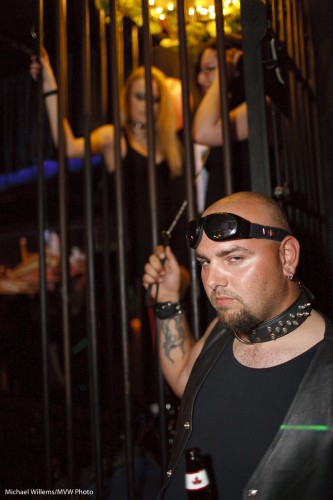
But hold on! Often, vignetting is a desirable thing. Especially in portraits.  Like many photographers, I often add vignetting using the “effects” tool on Lightroom. A little vignetting is hard to detect but makes the picture noticeably better. Vignetting, in this way, makes the subject in the centre looks like he is lit by a spotlight:

Make my day

Make my day (Michael Willems)

I could do this in Photoshop, true – but I like to say “I did it all in the camera”.

And that is why I believe that for a portrait lens, a little vignetting when the lens is wide open is not a bad thing. And I ignore it when lens reviews moan about vignetting wide open.

Faster… faster!

As regular readers will have read yesterday, I just bought a 50mm f/1.2 L lens.

As some here have mentioned, this lens is not known for being the very sharpest at wide open apertures. It is also not known for being one of the cheapest: you can buy an f/1.8 lens for $120, so why spend $1,800 on a f/1.2 lens? Especially a prime lens-  meaning not a convenient “10-500mm” zoom lens?

Because:

  • It is yet another bit faster (meaning, lets in more light) than the f/1.4. A third of a stop more. And as you saw in my post of two days ago, that is important: every little bit helps.
  • And it allows me to blur the background even more.
  • And it gives me beautiful bokeh when used wide open.

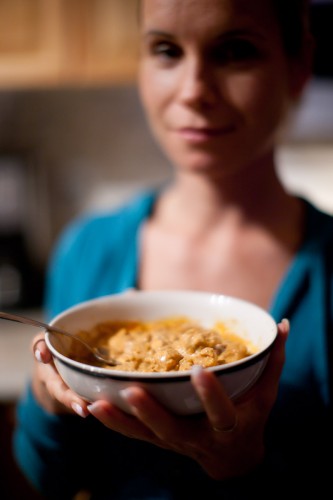
Here’s an f/1.2 snap:

Food held out

Food held out

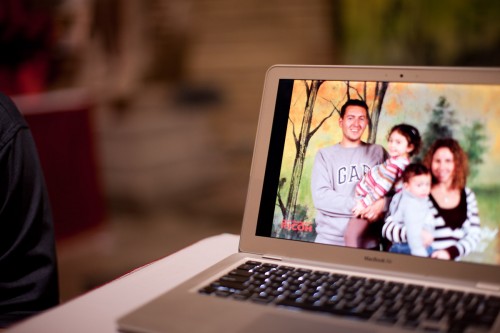
…and another one, showing nice blurry background:

Laptop at The Royal

Laptop at The Royal

Of course even at smaller apertures, like f/2.8, you can get a nice blurred background:

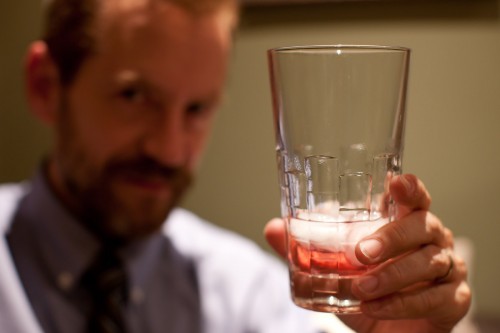
Hold out your glass...

Hold out your glass...

But wide open you get this wonderful soft bokeh (the nature of the blur):

Glass with bokeh

Glass with bokeh

And that is why I am happy to invest in this type of lens.

Plus unlike a camera, a lens keeps its value. A lens’s value depends on the intrinsic value of the optical glass, so it is great.

So when people ask me “should I spend money on a lens or on a new camera”, well – you know they are both great and useful and fun. So either decision is good. But lenses are more important to your photos, and they keep their value, so do not ever feel bad about purchasing a great lens.

A reminder about F-stops

A bit of revision, since I was asked this three times in the last few days. “Why are F-stops important?” Yes – repeat answer, but important enough to repeat, I think. So here goes.

F-stops (the clicks on the aperture adjustment ring on old cameras, hence “stops”) are important. You know: f/5.6, f/8, f/11, that sort of thing. Or on a good lens, maybe f/2.8, or for a prime (non-adjustable) lens, even lower. The lower a lens can go, the better.

Why?

  • The lower the f-stop (it is “f divided by that number”), the larger the diameter of the lens opening while the picture is being taken.
  • In other words, “lower f-number” equals “larger lens opening”.
  • The main f-numbers (16, 11, 8, 5.6, 4, 2.8, 2, 1,4…) mean twice as much light each time you go to a smaller number.
  • (That is why the ratio between these numbers is the square root of 2: after all, since the area of a circle equals pi x r squared, to halve the light that comes in you must reduce the diameter of a circle by the square root of 2)

This means two things:

  • That lower f-number means that more light gets in. Hence, you get the ability to take pictures in lower-light conditions at the same ISO. See yesterday’s post for why that is important.
  • The low f-number also means blurrier backgrounds. The wider the lens, the more paths an out-of-focus part of the picture can follow to reach the sensor; hence, the blurrier that out-of-focus element becomes.

Blurry backgrounds and low-light pictures are good things. So look at the front or top of your lens. If the lens says “1:3.5-5.6″ it is a kit lens that can open to f/3.5 at wide angle and f/5.6 when zoomed in. A pro zoom lens will just say 1:2.8”.

And the new 50mm prime lens I am buying, used, tomorrow says 1:1.2, meaning f/1.2 – meaning it is faster (more light gets in) than the 1.4 lens I now have.

Alas, more light means more glass, and hence more dollars. But you will see why this is worth it.

In general, get the fastest lens you can get, if you can afford it.

Club Hassles!

My esteemed son asks:

So tomorrow I need to shoot pictures in a club. I’m assuming my 17 – 85 f/4 – 5.6 IS won’t be much use? And I should just stick to the 50 f/1.8? There are no ceilings less than at least 10 meters, so nothing to bounce flash off of, but occasionally there may be a wall behind me.

Any other advice?

The life of a student is tough. No seriously – it is. I remember.

So OK, to the shoot. I often have to shoot clubs at crazy settings like 1600 ISO, f/1.4, 1/15th of a second. Clubs are dark!

The following example was shot at 1600 ISO, 1/30th second, f/1.6:

Club scene, well lit

Club scene, well lit

There are two things you need to do:

  1. Light the background
  2. Light the subject

Number 1 you do by using:

  • a high enough ISO (do not be afraid to shoot at 800 or 1600 ISO),
  • large aperture (the larger the better…), and
  • slow shutter (1/15th with a wide lens, 1/30th with a somewhat wide lens, maybe 1/60th with a longer lens).

Important technique to find the right settings for the background: You aim to see the background -2 stops from normal (i.e. you are on MANUAL, of course, and you adjust until the meter points to -2 when pointed at an average part of the room).

Number 2 you do by:

  • Bouncing your flash off the ceiling (at 1600 ISO this is easily doable), or
  • Using a Fong Lightsphere; or
  • Using a Honl bounce card (or even the two together, bounce card behind a light sphere: I’ve done it!)
  • Using an improvised paper bounce card

..or even by using straight on flash, but use flash compensation, say to -2 stops.

Now for you. Of course you need a wider lens (for club shots, 24mm on your camera, ie 35mm real, is ideal). But you also need a fast lens.

  • So I would first try your standard lens at 800 or 1600 ISO – wide open, i.e. at f/3,5 – and with IS you can use 1/15th second. See what that does. Where does the meter point? Anywhere near -2?
  • If that does not do the job then yes, go prime and since your prime is long, step back farther-  that will be the challenge. 50 will give you a head shots but in clubs you want to see, the, um, area below the head too. And two or three people in a shot, not just one. So find an area where you can step back.

Is that any help? Not just for my son but for all of you who have to shoot in dark clubs and so on?

Reader Question!

A reader asks this, and I thought I would make this today’s post:

I read your wonderful blog everyday, and I learned many thing about flash photography.

I am 53 y. old and I ‘d like to get a 1D camera once in my life. I am debating if I need to change my camera, a canon 50D, with the new 1D Mk IV.

I am not a pro; I own many crop lenses ( 17-55mm f2.8 is – 15-85mm is – 10-22mm 60mm macro).

My other camera is a full frame 5D old with 17-40mm, 70-200mm f4 is, 24-105mm f4 is, plus 2 canon flash 430 and 580 II. I am selling some stuff and I have now 2200€= than I could sell all my crop material and finally buy my dream with some more new lens.

What I am asking, in your opinion ..WORTH IT ? or is better to sell the old 5D and buy a less expensive new 5D mk II…?

Thank you!
Regards from Italy – Adalberto

Adalberto: great question.

Always great to hear from Italy: I lived in Rome for about a year in the 1980s, e mi manca l’Italia – tanto. La cucina Italiana; Roma; le donne; il vino; le macchine; mi mancano queste cose.

Anyway, back to cameras. This is a question we all wrestle with: Do we buy a better camera, or spend our money on lenses and so on? Which camera? I have a 1Ds Mark III, a 1D Mk IV, and a 7D, and I used to own a 5D, so I can probably say some sensible things about this choice.

First, there is the choice “crop or not crop”? A crop camera is a camera with a smaller sensor. Crop is cheaper, and can use cheaper lenses; but “full frame” (like a 5D or 1Ds) or “almost full frame” (like a 1D, which has a 1.3 crop) is better than the usual 1.6 (or for Nikon, 1.5) crop:

  1. Wide angle is wider!
  2. Lower noise, so easier to use at high ISO values.
  3. Narrower depth of field (“Blurrier backgrounds”).
  4. Bigger, brighter viewfinder.

So yes, full frame or near full frame is better.

Then there is the choice of body type: an amateur body (50D), a lower-end pro body (5D), or a pro body (1Dx)? A pro body does not take better pictures. But it is more waterproof; it has more settings; it can write to two memory cards at once; it will last 300,000 shutter releases instead of 150,000 shutter releases: all great things.

In your case, I would ask:

  1. Do I need a full frame or near full frame body?
  2. Do I need a pro 1-series body?

As for question one: yes, if I were you, I would go all full (or almost full) frame, and sell your crop lenses, if I had that budget. Sell the crop lenses, would be my advice, and sell the 50D while it has value.

As for question two:

  • a 5D MkII is a great camera.
  • A 1D Mk IV, an “almost full frame” camera, is great also.
  • A 1Ds is greater still, being full frame, but it is getting old and will be replaced soon by a 1Ds Mk IV.

In general,

Lenses are more important than the camera

…so perhaps a 5D and some f/2.8 lenses, and maybe a prime or two, would be a good way to go?

On the other hand.. I know the excitement that a really great body gives. If you really want a 1-body, get one. A 1D Mark IV.

Ask yourself:

  • Do I shoot sports a lot?
  • Do I shoot in bad weather, like rain?
  • Do I need fast performance?
  • Do I take a lot of pictures?
  • Do I shoot ultra-important things like weddings?
  • Do I charge for my work, so I need to look the part?

If you answer “yes” to even a few of those, get a 1D and a 50mm f/1.4 lens. If not, you can get a 5D Mark II and some more lenses. That is my advice.

But you cannot go wrong: all the equipment and cameras you are looking for are great. So whatever you do, you will do well. And DO get a 50mm f/1.4 lens, or even the 50mm f/1.8!

I got chaired!

Plaid chaired, that is!

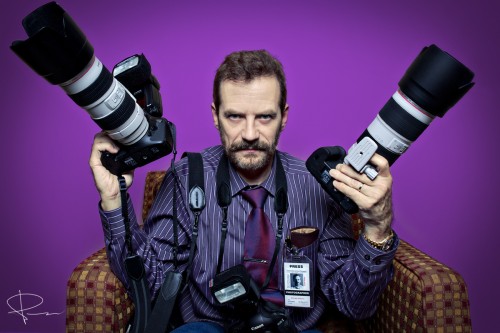
Peter McKinnon, a friend, student, and most importantly, an incredibly creative and talented emerging commercial photographer, shot me tonight as part of his famous Plaid Chair Series. Check it out on his web site.

An exclusive on this blog, tonight: here is the first shot. Michael the photojournalist.

Michael in the Plaid Chair

Michael in the Plaid Chair

Serious, camera-equipped, concentrated: Peter captured my essence, wouldn’t you say?

This was an incredibly fun experience; a cooperation between creative artist and subject where for once I was the subject.

Soon, more. Now some rest before tomorrow’s teaching and shooting.

Meanwhile, go check out Peter’s web site. And hire him.And when the Plaid Chair Series book comes out, buy it!

Upcoming workshop

There will be many lighting tips during the next Advanced Flash workshop in Mono (just north of Toronto) on 20 November.

Joseph Marranca and I will take students through a thorough overview, and then detail, of all types of flash (this is the same workshop I taught recently in Las Vegas and Phoenix); then practice, and then the best part: with a professional model, we create and make portfolio shots together, using all the techniques we have learned.

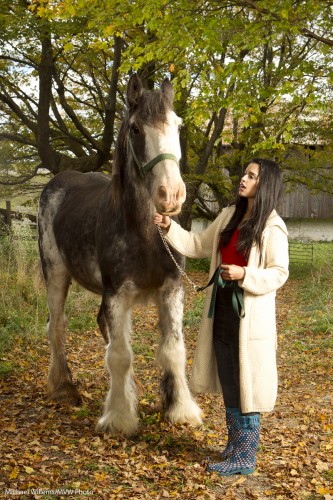
Shots like this:

Cherry and Tara Elizabeth

Cherry and Tara Elizabeth

Cherry, the horse, was old, and he recently passed away: this was the last photo taken of him.

It was lit by a battery-operated studio flash with a softbox on our right, and one bare flash (a speedlight) on our left (slightly behind the horse). Can you see how this adds some rim light to his face and legs, and hence gives them shape and offsets them from what is behind? This can be very important for well-lit portraits.

If you are interested in learning more, sign up: there are still a few places left. But hurry: we limit attendance to a maximum of ten students, which with two instructors is a great ratio.

And those of you who cannot come: sign up for a starter course at Henry’s (ask me when I am teaching what!), and of course this blog will contain daily tips, many of which I take from my workshop practice. Photography is one great adventure, and one I hope you will pursue to make ever more beautiful images.

Dust to dust

So why do sensors collect dust, and how do you detect it, and what do you do about it?

A sensor is just an electronic negative. But it collects dust for two reasons: one, it never changes (unlike a real negative, which changes for ever shot); and two, it is electrical and can therefore get electrostatically charged, meaning it attracts fine dust particles.

This dust can show up in images where you use a small aperture (like f/16) and have an even surface (like the sky). It looks like this:

So how do you know if you have dust on your sensor?

You do. Everyone does. Do not worry about it unduly – unless it shows up in images! But if you really want to know, here’s how:

  1. Set your camera to aperture mode (A/Av).
  2. Select a low ISO.
  3. Select an aperture of f/16 or f/22 or even f/32.
  4. Set the lens to wide
  5. Focus manually to the closest distance
  6. Point at, and fill the entire frame with, a clear surface like a white wall
  7. Shoot – and move your camera about while shooting.

You will now, when you zoom right in, see the dust.

If is it annoying, then go about removing it in the following ways:

  1. Use the camera’s anti-dust feature repeatedly.
  2. If that does not work, ensure you have a 100% full battery and use a blower (set the camera to manual cleaning, or bulb mode, open up, and carefully use a rubber bulb blower.
  3. If that fails, the safest way is to have it done by your camera maker.
  4. Alternately, use the Visible Dust rotating brush first.
  5. And finally, when even that fails, use wet pads.

The wet pad process is annoying and scary. You will clean some dust but deposit new dust. (Test after each attempt). You will see smears. You have to carefully repeat this process a number of times until you are finally dust free.

Finally: prevention etc: always minimise lens changes and when you do change lenses, carry the changes out with the camera pointed down. Store your camera with a lens attached, always.

Be invisible

Sometimes you make interesting pictures by being invisible and using a long lens.

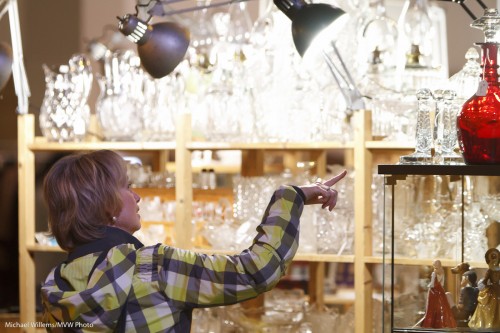
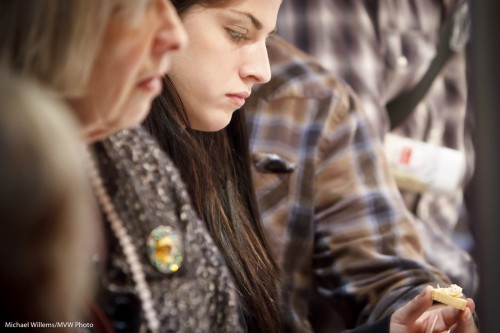
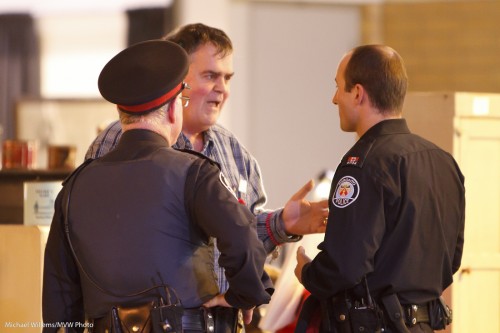
I was at The Royal Agricultural Winter Fair today, as for the last few days and the next seven, and I grabbed a few quick people “moment” shots with the long lens, while I was invisible:

Pointing

Pointing

  Cheese Sampling

Cheese Sampling

Cops

Cops

Sampling

Sampling

The secret to grabbing pictures of “the right moment” is:

  • Get close. To do this, use a long lens. I used a 200mm lens on a crop camera; that makes it effectively a 300mm lens. This is long enough to be out of the way, unobserved, and yet close.
  • Use available light. Flash will not reach.
  • Do not be afraid to go to high ISOs. 3200 ISO is usable on a modern camera with a little Lightroom noise cancellation,
  • Use a stabilised (IS/VR) lens if you can,
  • Shoot a lot! You will get some interesting shots out of hundreds.

Have fun. Go and try some moment photography!

The Royal

The last few days, and the next eight days, I am taking portraits at the Royal Agricultural Winter Fair in Toronto. Family portraits.

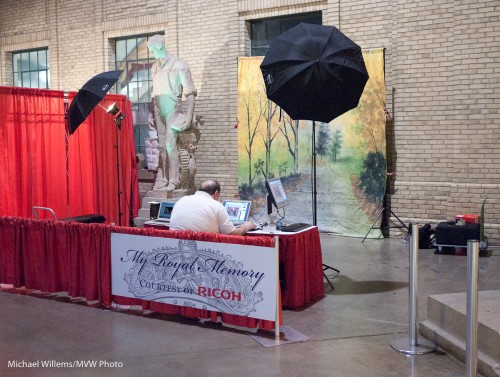
To do this, my colleague Paolo and I use this simple setup:

Setup at The Royal

Setup at The Royal

Two strobes in umbrellas, and a backdrop. That is it!

So you need a camera plus:

  • Two monolights, 45 degrees off to the side, high
  • Two stands and two umbrellas
  • A light meter
  • A backdrop
  • A way to connect the camera to the lights: perhaps pocketwizards, but a cable will do.

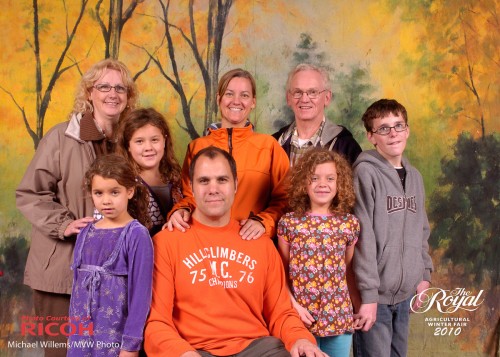
That is all. And every picture is reliable. Like this:

Family Portrait

Family Portrait

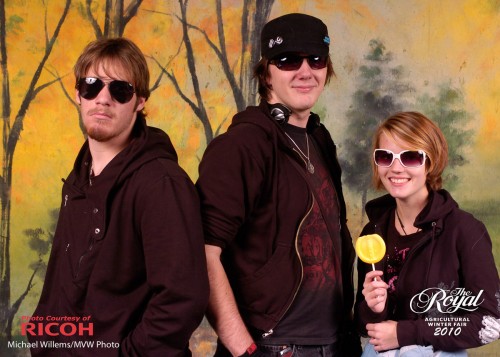
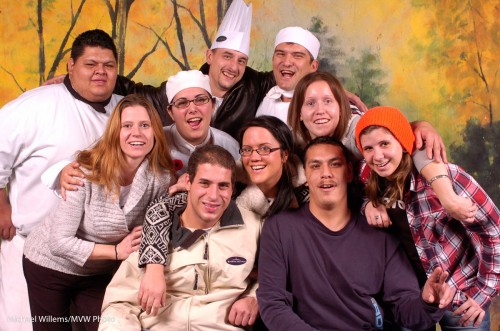
Friends

Friends

Friends

Friends

More tips:

  • People skills and compositional insight both help greatly.
  • Positioning (not “posing”) is the most important thing.
  • “Straight on” poses are not normally pleasing.
  • Telling people to “Smile!” is not a guarantee for nice photos

The moral of this post: simple light, two umbrellas, can do very well in giving you reliable images.