The making of a group shot

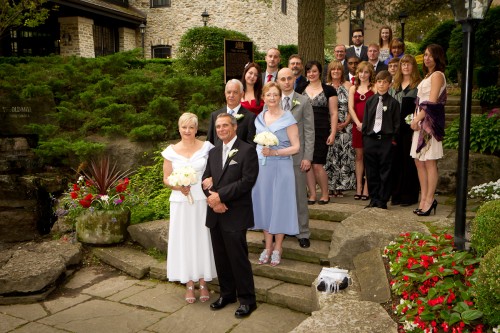
I shot this at a wedding the other day: a group shot featuring bride and groom Pat and Jim, relatives , maid of honour, and best man.

Pat and Jim Wedding (Photo: Michael Willems)

How did I shoot this? I thought it might be good to go through the process that went into creating a shot like this.

Setting

The day was ideal for photography (bright overcast). So I had lots of options at The Old Mill in Toronto. But therein lies a problem: which one to choose, out of hundreds? So I decided to look for…

  • Background: A nice, full, non-distracting and darker background.
  • Context: the background should say something about the event: it supports the image so it should provide context (notice the venue’s sign).
  • Colour: I want some colour. The flowers provided this.
  • Space: A space large enough to pose over 20 people.
  • 3-D: Preferably some various levels (e.g. steps).

Steps give you an automatically full background, so these steps were the chosen spot.  So far. so easy.

Arranging

I would often do a sit-stand-lean arrangement, but in this case, all standing is OK.  Arranging 21 people takes time and by the time you tell the last person what to do, the first person has turned around again. So speed is of the essence. I arranged bride and groom, best man and maid of honour, and from there on much of the rest fell in place and only minor adjustments were needed.

I then arranged them so I could see them all. This takes a fair amount of doing, because people move – my experience shooting sports clubs came in handy.

Now I told the group to relax – I would be doing test shots, so no worries yet – and to all breathe in deeply, and then all to breathe out at once. I demonstrated this. Silly, and silly is good, it relaxes people.I avoid saying “Smiiiiile…!” – it brings out the worst fake smiles in people, especially in men.

Then I watch body language and go, “checklist-fashion” through everyone, to see any awkwardness. If I see any, I ask them to adjust.

Technical

I used a slightly wide angle lens on my Canon 1D Mk4 body – the 24-70 f/2.8 set to 33mm effective focal length, meaning not very wide (distortion) but wide enough, giving me the following benefits:

  1. The ability to get it all in.
  2. Extended depth of field.
  3. Tolerance of slow shutter speeds.

I first of all exposed for the background. I wanted it to look nice and dark. This emphasises the people, and it also allows background colours to become saturated.

So I set my camera to:

  • f/7.1 (which gave me enough depth of field, which I needed with 8 rows of people!);
  • 1/80th second, which is fast enough for a 35mm lens hand held;
  • Getting a  dark background (between -1 and -2 on the light meter) now necessitated 800 ISO, which is great on today’s cameras. This also enabled the flash to reach far.

I then used my on-camera 580EX II flash to light the people.

On-camera, from the speedlighter? Yes, outside you can get away with it. If I had had more or more annoying shadow I would have used my Honl Photo softbox.

And there you have it. Simple shot, took a minute to make, and with little or no post work.


Groups: making them work.

I shot a music school this past weekend. Wonderful work, great people: fun.

One shot I particularly relished setting up is a portrait group of nine musicians. This is a challenge because:

  • You need to get nine people lined up in a space that is always too narrow.
  • You want to avoid making them look leaden by lining them up straight.
  • You have to light them all well.
  • You need to light evenly, too, so umbrellas and so on need to be moved back. The room is never wide enough either, of course.

First tip: always be confident when doing this. Take your time, but never hesitate. The captain is in command, just like in the USS Enterprise.

I start by deciding who sits, who stands, and who leans. Not “the older people sit”. More like “the taller people sit”. Then the older people can lean against chairs. The rest depend on height and other properties.Sometimes you just have to do what you can.

Then I look to see how people stand. What is their body language. I turn everyone. I make small groups. Back to back or facing one another.

The biggest challenge is to get everyone in front of the backdrop, which as said is always too narrow. And when people are having fun, they will not necessarily obey your orders accurately – which is fine: they are there to have fun, not to obey.

Then you shoot. Lots. Make sure everyone’s face is clearly visible in every image. Tell your subjects that when you ask for adjustments, you want “baby steps”.

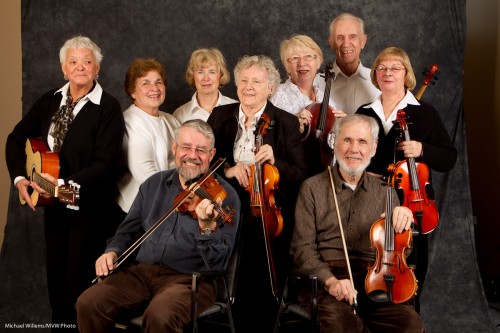
In the end I decided this shot had merit and was suitable for finishing:

A group of fiddlers (Photo: Michael Willems)

A group of fiddlers (Photo: Michael Willems)

The finishing now consisted of:

  • Adjusting white balance, exposure, and other basics.
  • Cropping and rotating.
  • Lightening a few darker areas using Lightroom’s selective brush tool.
  • Darkening bits that need darkening. Possibly even a little vignetting.
  • Now popping briefly into Photoshop CS5 and using the “content aware fill” tool to fill in the backdrop.
  • Then, one last look and  final adjustments.

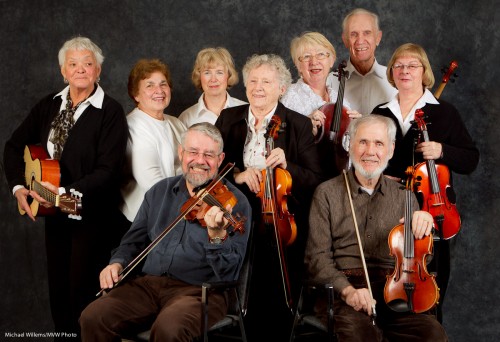
And I am done. Here is the image almost finished:

A group of fiddlers (Photo: Michael Willems)

A group of fiddlers (Photo: Michael Willems)

See it larger by clicking. Not a boring shot – a little more like Rembrandt’s Night Watch.

Yes, OK, that is a stretch – but you get my meaning.

And that, as they say, is a wrap!

Tip: If you are near Toronto and want to learn technical flash techniques using small flashes and modifiers, there are still a few spots left on the March 19 one-time special featuring special Guest Star David Honl. If you are interested, act quickly, since they are filling up rapidly.

The Royal

The last few days, and the next eight days, I am taking portraits at the Royal Agricultural Winter Fair in Toronto. Family portraits.

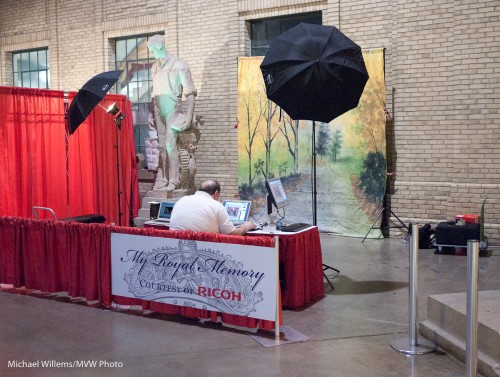
To do this, my colleague Paolo and I use this simple setup:

Setup at The Royal

Setup at The Royal

Two strobes in umbrellas, and a backdrop. That is it!

So you need a camera plus:

  • Two monolights, 45 degrees off to the side, high
  • Two stands and two umbrellas
  • A light meter
  • A backdrop
  • A way to connect the camera to the lights: perhaps pocketwizards, but a cable will do.

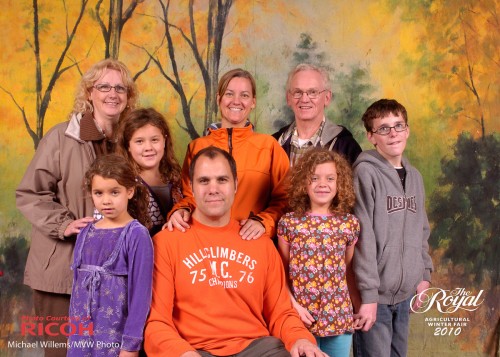
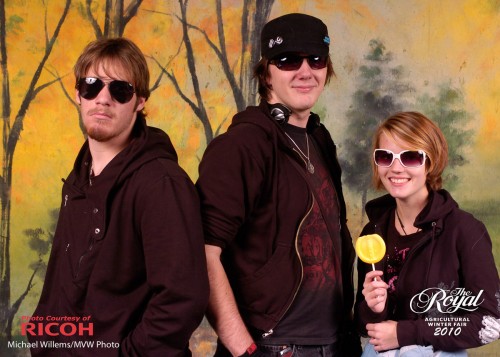
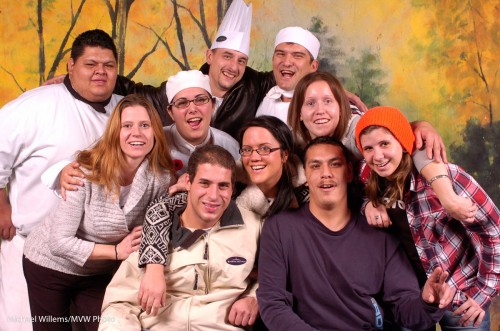
That is all. And every picture is reliable. Like this:

Family Portrait

Family Portrait

Friends

Friends

Friends

Friends

More tips:

  • People skills and compositional insight both help greatly.
  • Positioning (not “posing”) is the most important thing.
  • “Straight on” poses are not normally pleasing.
  • Telling people to “Smile!” is not a guarantee for nice photos

The moral of this post: simple light, two umbrellas, can do very well in giving you reliable images.

Sitstandlean

You know when you do a group shot – you want it to be dull and straight, with everyone standing straight up military style, and aiming and looking straight at the camera, handsa their side military style?

Oh now, wait. That’s what you don’t want!

What you want instead is a lively arrangement.

Superstar photographers like Richard Avedon and Annie Leibovitz were or are great at this. So were painters like Velasquez (Las Meninas) and Rembrandt (the Night Watch). If you want to learn composition, go study the old masters and visit a museum!

My suggestion, which I have mentioned before:

  • Do a combination of sit, stand and lean.
  • Involve chairs
  • Create little groups
  • See how people behave, and what their natural positioning is: use that
  • Use a joiner between the little groups
  • Turn people 45 degrees to the right and left,so they face each other, or look away from each other (back to back) – this too is lively.

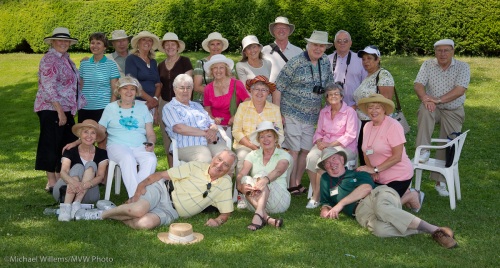
So even for a quick group snap pofthe photo club I taught the other day at the Royal Botanical Gardens, I did much of the same:

Group shot of a camera club

Group shot of a camera club

Even when it is not a museum shot, but just a shot of some very nice people who are as passionate about photography as I am, it’s fun to do a little better than just “line up in two rows and smile”.