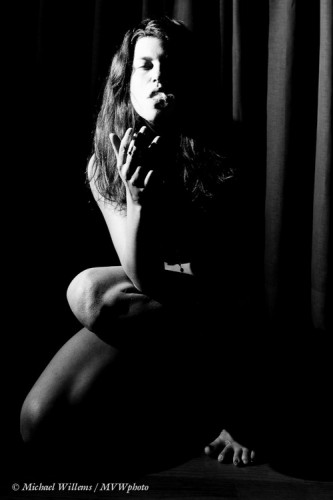
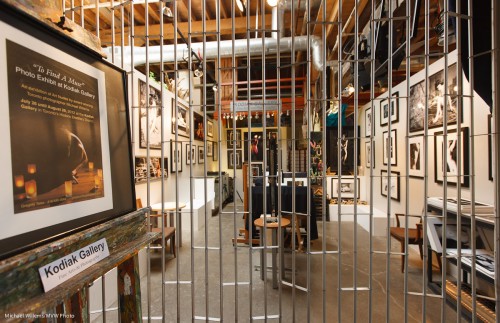
Here is (Part of) the “To Find A Muse” exhibition, yesterday prior to its daily opening.

The exhibit is open until the end of August; Daily, Noon-5pm, at the Kodiak Gallery in Toronto’s Historic Distillery District.

All prints are for sale, framed or unframed: here’s your chance to make one of them – a unique original! – your own. See you there?


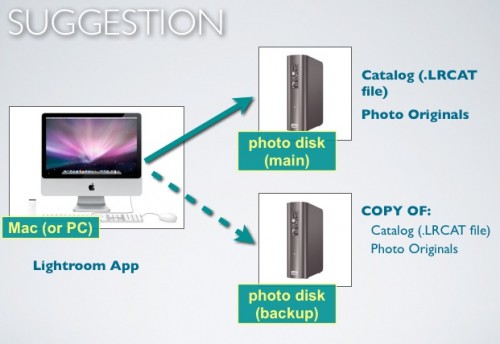
My Backup Strategy

As you make more and more photos, backups become more and more important. And of course you make them. Right?

This is what I do:

Details:

  1. My photos live on a 3 TB external drive. When I add photos from a camera, they go there immediately, not to my Mac. Straight onto the external drive!
  2. My Lightroom catalog also lives on that external drive – that way, I can take that drive to anyone with Lightroom installed and I have all my work right there!
  3. When I am happy that the pictures and catalog are good, and ONLY then, I “intelligently” copy the new stuff to a second 3TB drive. I do that only once I am convinced it is good – no sense writing bad data. The script for that intelligent copy is here (link). Intelligent means the script checks all files on both disks, and copies over the differences (anything new gets added to the backup disk; anything deleted gets deleted from the backup disk also).
  4. I do not reformat the memory card until after this is done and verified!
  5. I also back up my regular Mac, using standard backup software – but since I keep little data on that mac, it’s not critical.

OK, so I am pretty well backed  up.

Except I am not. All my data lives on the two drives attached to my iMac. That is very dangerous – many things can go wrong. Things like:

  • Lightning
  • Flooding
  • Fires
  • Burglary (you think the burglar would take only external disk 1 and leave the backup drive behind?)
  • …and more, too much to imagine.

To solve this, there’s a few things not to do:

  • I could back up to DVD drives, but that is very expensive, very slow, and very unreliable. Ditto for CDs.
  • Cloud backup – too early to be practical (making a full backup at today’s Internet network speeds would take months – literally).
  • Keep memory cards – way too expensive.
  • Drobo – this is a possibility (RADI drive), but the Drobo uses its own proprietary encryption.

So here’s the solution:

  1. Instead of more local backup, I use a third 3TB drive, and once a week everything gets copied to that third drive (again, using an “intelligent” script).
  2. And the key: this third drive lives off-site, not at my home studio! So come earthquakes, lightning, or floods, I’m OK.
  3. Finally, I have one more set of off-site drives, per year, which I make a full copy to at the end of each year.

A lot of work. But worth it, because I can sleep. Are your memories (or your business) worth less? I didn’t think so – so come up with an off-site storage strategy today!


GR, a reader, asks:

____
Hi Michael,

a few weeks ago I attended one of your Nikon Workshops in Oakville. It was a great workshop and I took a lot of info home from it.

Now I’m in the market for my first Telephoto Lense and thought you could give me some help what to look for – just keep in mind I can’t afford a 2000$ lens like you prefer. I’m already looking around for a while and found 3 lenses, I would like your oppinion when you find a moment.

The two main reasons I’m looking for a tele lens are:  my boys play soccer, and we are going on vacation to Nova Scotia on August 9th.

First lense
Nikon AF-S DX 55-300mm VR 4.5-5.6G ED

In the online reviews I could find they say it’s a great beginner lens but it looses focus after the 200mm range. same goes for the next one

NIKON AF-S VR 70-300mm 4.5-5.6G IF-ED

Third lense
NIKON DX VR 55-200 F4.5-5.6G IF-ED

Can you give me some information what’s the difference between those lenses, which one you would recommend and why I should choose one over the other.

If you know off a lense in the same price range that would work better for my purposes, let me know.

Thank you for your help and see you at the NIKON 201 hopefully this fall


My reply:

I teach and coach privately – cameratraining.ca – and at Vistek Mississauga, and at Sheridan College.

In a word or two:

– The more a lens does, the more it is a compromise.
– The VR feature is important.

So the third lens looks like an option. Not too ambitious; good for outside where you do not necessarily need f/2.8…did you read the recent article on speedlighter.ca? A few days ago? This will help you make the decision, and only you can make it!

(All that said… For travel, I would usually prefer a very wide angle lens.)

Michael

Snap to shot

Some more “post-production technique” for you here today, again using Lightroom – but if you are a Mac user, you can also use Aperture if you so prefer.

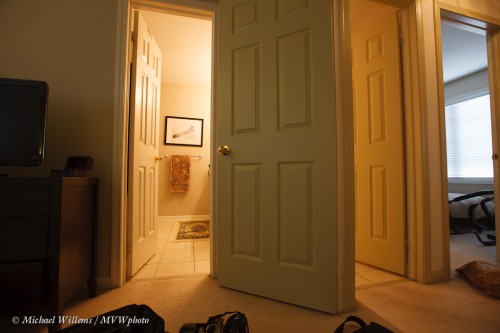
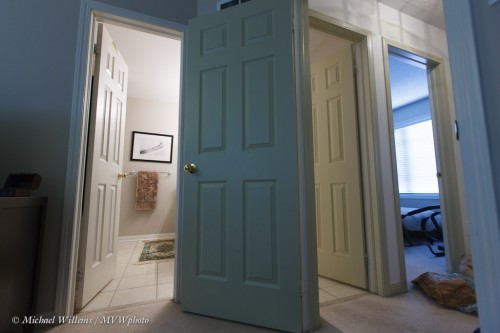
Let’s say that for some reason (you are testing a lens perhaps), you want a picture of your bathroom and hallway, using a very wide-angle lens. Like this:

But no – first, let’s retake that to get some of the foreground mess out of the picture. Remember: simple is good… simplify, simplify, simplify. Pretty much everything you can take out of a picture improves it.

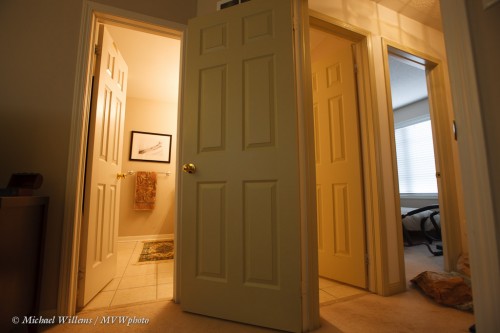
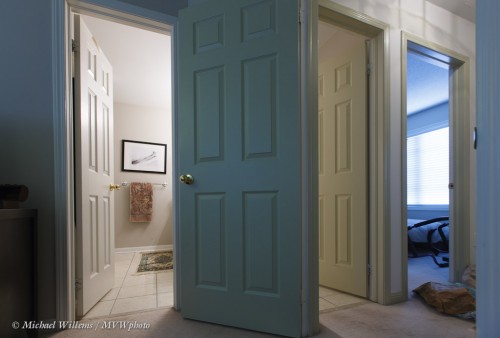
So take this shot again after you aim up a little:

Better. But it’s too dark, the colours are wrong, it’s all distorted.. waah.

Can we save this, and how long will it take?

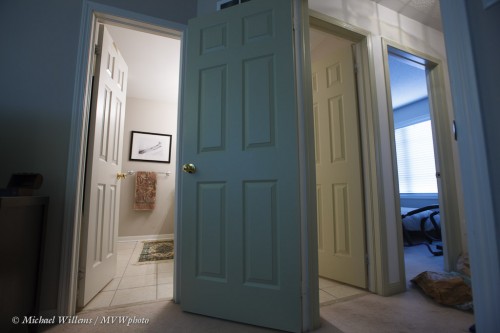
Let’s attend to the white balance first. Go to Lightroom’s DEVELOP module, enter the Basic pane, and use the dropper on a white area to set an OK white balance. You can adjust more later, but at least get it close. You shoot RAW, so white balance can be set after you take the picture (if you shoot JPG, you have to get it very close in camera).

OK, here we go.. click:

Better. Now go to Lens Corrections, and apply the Profile correction, if Lightroom knows your lens/camera combination. This fixes the dark edges and the curved lines (I was using a 16mm lens here on a full-frame camera):

The curved door is now straight!

Now, still in Lens Correction, go to MANUAL, and fix the converging lines that you got because you aimed the camera up. Dragging “Vertical” to -27, and then cropping off the excess picture, gives me this:

Good!

Now, finally, let’s fix brightness and colour properly.

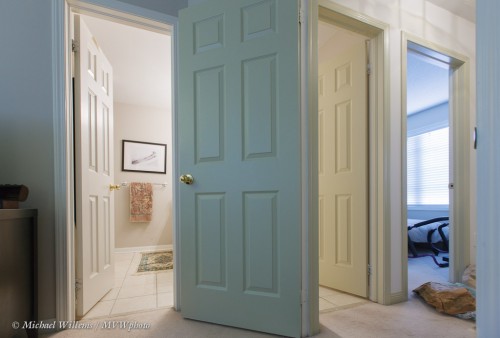
Brighter; adjust the colours again, highlights down to fix the window… a last White Balance fine tuning, and hey presto:

That entire fix took about 30 seconds. Doing this in Photoshop would take much longer. It’s still a silly “I’m just playing around” snapshot, but at least it is a technically proficient snapshot, in mere seconds.

You can see how Lightroom (or Aoerture) change your life as a photographer. Again, as in yesterday’s article, I am not advocating taking bad pictures and fixing them later, but you will sometimes want to adjust your images, and with modern software and RAW images, this is very simple.


Why you shoot RAW

One reason to shoot RAW is that it enables you to handle difficult situations, like those with too much difference between bright and dark areas, like this one, today at The Distillery, where I was attending my exhibit:
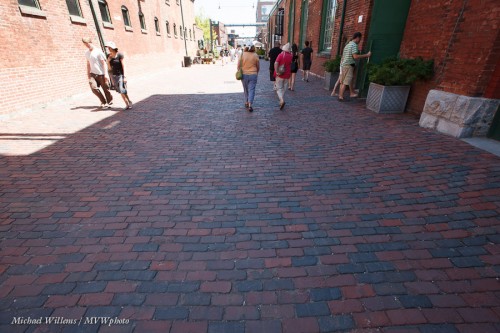
The shadow area is dark, the sunny area is way too bright.

Normally, when shooting a close-by object, I would use a flash for this. But with a wide angle like this, you would need a lot of flashes to light up the dark area. So, RAW to the rescue!

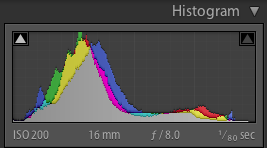
The original image look like this in Lightroom. The histogram shows that the bright areas are stuck right up against the edge:
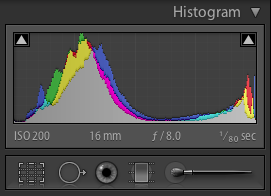
And the original settings in the BASIC pane:
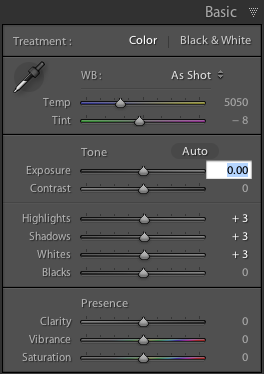
Fortunately, we have enough room in the RAW image to fix this: the bright areas have detail in them still. They may be overexposed, but they are still present in the data. So now we drag the bright areas down, thus changing the Basic settings to something more like this:
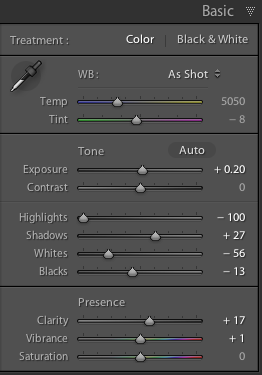
Which when you check gives you a histogram like this, much more like it – from dark to light without anything getting too close to the edge:
Which gives you a picture like this:
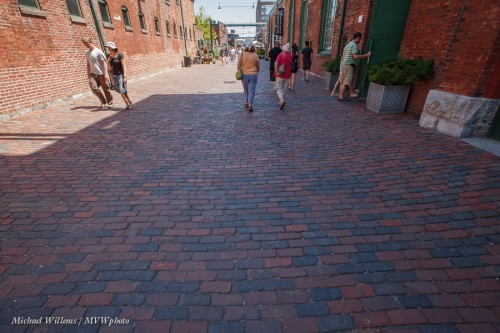
Simple, takes a second or two. This is a little like creating a HDR image from one file – which in fact is exactly what we have done here. The dynamic range in the original was too difficult for our camera to handle, but since it was only a few stops out of range, we were able to fix it in post-production.

I am not advocating doing this all the time – but sometimes, you have little choice. In those cases, expose to the right – overexpose the brights a little, because as long as it is just a little, you can fix the issue later.

How much is a little? I find that if I get some blinking (in the “blinkies”-view), I am good. Blinking is supposed to mean “no detail”, but on most cameras, blinking means something rather more like “watch out, you are getting close to losing detail here”. If the entire area is one solid black/white blink, then I have done too much to save. Stay clear of that and you can rescue the image. And Lightroom makes this very easy and quick.

One more image:
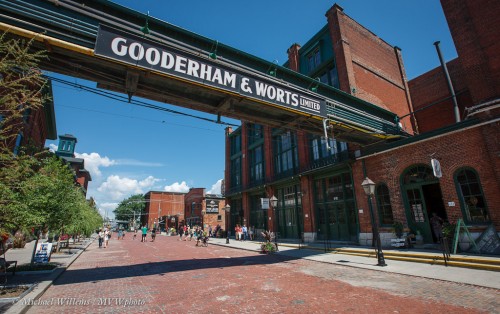
Incidentally, one reason to visit my exhibit (http://www.michaelsmuse.com), apart from the obvious one (to see my work and to buy an original framed print for your wall!), is that it is held in the Distillery District, one of Toronto’s most photogenic areas – it cries out to be photographed.

So bring your camera. I shall be there again tomorrow afternoon (Monday) – 1-5pm, come say hi. (Sssshhhh, don’t say anything: if I am at the gallery, and you mention reading this post to me, I’ll even give you a 10% discount on a print).

 

Simple secret…

Namely: keep it simple. One of the easiest ways to improve your photos is to take stuff out.

You can do that in many ways. Zoom in. Get closer. Rotate. Blur the background. Move things. Change your position. Use obstacles in between. Use light, or rather darkness. Even for simple shots, always think “what can I take away?”.

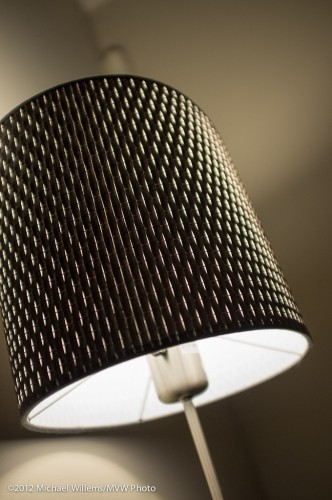
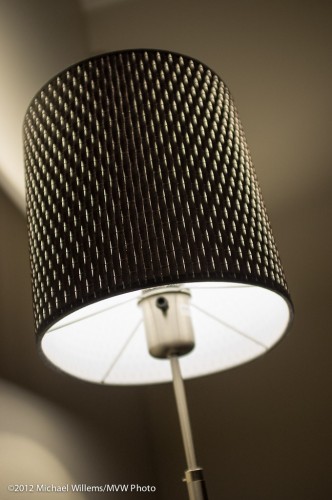
Like in this snap of one of my bedside lamps, just now:

Just a Fuji X100 snap while testing a setting. But even for a simple snap: what is the alarm sensor at the top doing in the picture? A simple change of viewpoint and rotation gives me this:

Now what would you do in addition?

Personally, I would crop off the bottom. That joint between the two rods has no place in a picture. Since the x100 is a fixed lens camera, it is best done in post-production here.

Simplifying your pictures is easy, as long as you remember to do it. My rule: everything in a picture has to be in it for a reason – or it shouldn’t be in it. If you start doing this even for snaps, it will become second nature, and your photos will look more “professional”.


What should I buy?

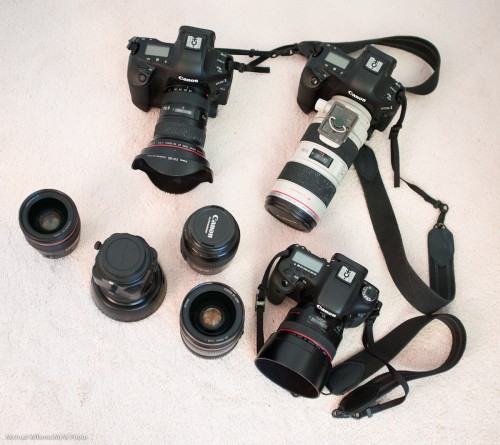
This question keeps cropping up – no surprise there. Photography equipment is expensive and making the right choices is therefore very important. Here’s just some of my gear:

The lenses are:

  1. Prime 35mm f/1.4
  2. Prime 50mm f/1.2
  3. Prime 100mm f/2.8 macro
  4. Prime 45mm f/2.8 Tilt-Shift
  5. Zoom 16-35 f/2.8
  6. Zoom 24-70 f/2.8
  7. Zoom 70-200 f/2.8

Cameras are 1.0 sensor (full size); 1.3 sensor (the 1D) and 1.6 sensor (the 7D). Which means that range of lenses can handle pretty much everything. My lenses are all I could wish for. Just about.

But do you need that kind of investment? Not if you don’t make a living from photography. I have a few tips for you when considering buying a lens:

  • Lenses are much more important than cameras. Invest in your lenses – the camera makes little difference.
  • I would simply start with a kit lens and a fast prime 50mm lens (“50mm f/1.4” or “50mm f/1.8”).
  • Always buy the fastest lenses you can afford (the lowest f-numbers). As you see here, none of my lenses are slower than f/2.8.
  • A lens that “does everything” is a compromise. The more a lens does, the more of a compromise it is. A 18-55 (crop) or 24-70 (full frame) is a better general purpose zoom; for longer and wider you add separate lenses.
  • IS/VR (Image stabilization/Vibration Reduction) is a great function, and is definitely worth the money if you can afford it.
  • If you shoot travel, if you like perspective, if you shoot street, etc – add a wide angle lens – for crop camera that means a lens in the 10-20mm zoom range. Super-wide lenses are the great under-appreciated secret in today’s SLR photography.
  • If you shoot macro, get a dedicated macro (close-up) lens.
  • A macro lens is also a great portrait lens.
  • If you shoot birds or go on a safari, get the longest lens you can buy – perhaps even adding 1.4x or 2x extenders.
  • For specialized product or architecture shooting only, get a tilt-shift lens.
  • For events, get a 24mm (crop camera) or 35mm (full frame camera) prime lens.

Now that you know those ground rules:

  • No, you cannot do it cheaper if you really want to do it well.
  • But yes, you can do it cheaper if all you want is the shot, and pro quality is not important.
  • Yes, an expensive lens is better than a cheaper lens. Sharper, faster. stronger.
  • Yes, lenses cost a lot – but then, they last a long time (decades), both technically and in terms of depreciation.
  • Yes, you really have to carry more than one lens if you want quality. I would not have those seven lenses if I did not need them. You may not need as many – but to stop as one is being over-optimistic.
  • Yes. you can buy third-party lenses (Sigma, etc) but try them out before you buy and make sure you are happy!

The above pointers should get you started. The faster the lens, the better: go have fun with lenses!


Exhibit on today

Word. In case you missed it: today is the start of the solo exhibit “To Find a Muse”. It is at the Kodiak Gallery at Toronto’s Historic Distillery District, and the official opening is today, 26 July, 5-8pm. See www.michaelsmuse.com for more details.

I shall be there at the opening, of course. See you there? (If so, please RSVP on the Facebook page, linked from the web site).

Michael

5D MkIII

Kristof, a friend, showed me his 5D MkIII today.  All good – a 7D with all its advantages including functional focus, plus a lot of 1-series features, like double memory cards and great high ISO performance.

The User Interface was not quite as good as in the 7D – it has been “improved” (i.e. dumbed down) to the point that in some cases, it makes little sense. The nice “small wheel for left/right, large wheel for up/down” navigation is now replaced with multiple menus within each menu, meaning the user base will now find Canon menus as confusing as they do the Nikon menus. Also, some UI features are ridiculous – like the remote flash setting, which is only recognizable by the word “OFF” – until you turn it on, the camera does not mention what exactly it is that is “off”. Who makes these poor design decisions? A committee, I dare say!

But overall the camera is great. Except mainly for things you can change – like some of the default settings, which are, just like on the 7D, wrong. Like default “fix bad photos dynamic range” settings which are ON; focus point setting by joystick which defaults to OFF, and a few others.

In a future article I will give you all the settings you should change from the default to a better setting.

For now, for a starter, find the custom interface settings via the Quick menu and set the default meaning of the joystick while shooting from nothing (OFF) to “Change focus point”. That way you can quickly move the focus point just by using the joystick alone, without first having to press other buttons.

Now I start saving for a 5D3 – it is usable as a pro camera now. It misses some 1-series features, of course, but enough is there to make it a viable contender.

More soon!


Weather

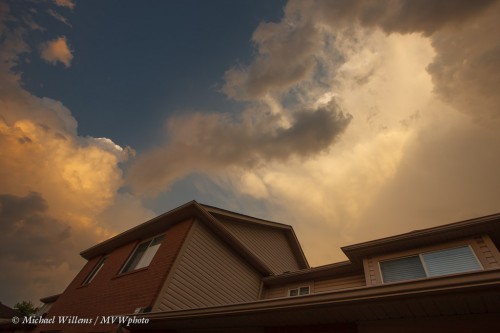
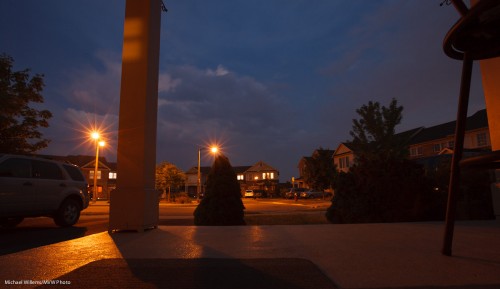
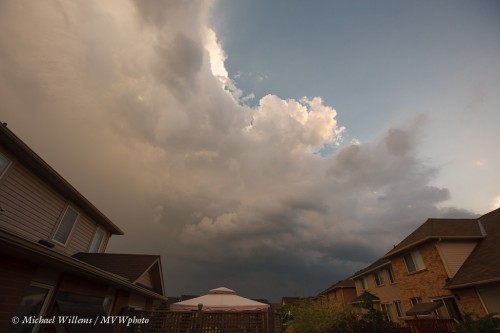
It can be quite interesting to make pictures of weather. Like the weather I had here outside my home a couple of days ago.

These were made with a wide angle lens, with the camera held steady on tables, on the floor, etc., using long exposures and low ISO. 200 ISO, 1/200th second, f/5.6 -and of course in manual mode.

So when you see nice clouds, get out the camera!