Show without showing

As I pointed out in a recent post, you can often show without showing.

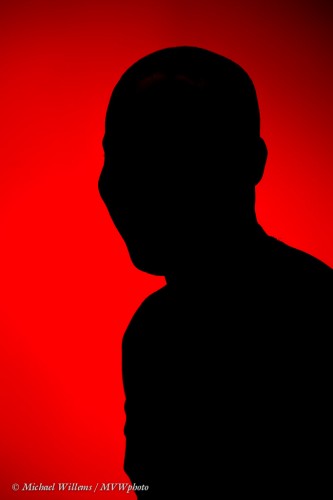
In the following image, we know that the subject is smiling:

Odd, since we did not show the one thing we are trying to show: the smile.

The same is true of many other photos. You can show expressions with eyes. A car’s speed without showing the car. An accident without showing the wreck. Disease with showing wounds. War without depicting the victims. The list is infinite.

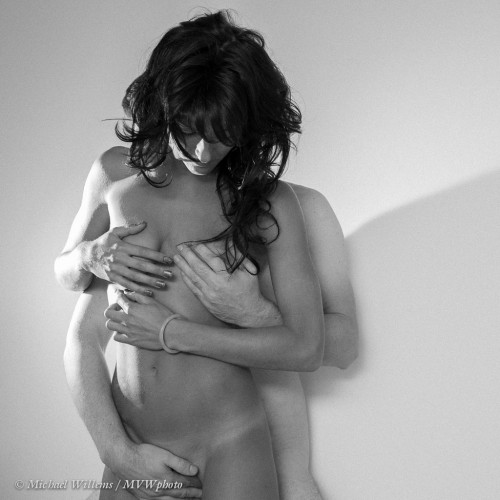
One assignment you might set yourself is to show something without showing the actual thing itself.  Like I did in the following recent examples, which show nudity and sex without actually showing nudity or sex. As in so many forms of art, implying, making the viewer work it out, is the art of it.

No-one reasonable could object to these images – the Vatican contains a lot more graphic detail in its artworks – but more importantly, all of these make the viewer do at least some the work of working out what is happening.

A side note: all these were shot the way you see them, not made in Photoshop.

Model in bath, using speedlights and high-key exposure:

Lovers holding on – two speedlights, in black and white:

Man and woman in bed:

The last shot, by the way, is a good example of why we use fast prime lenses. All of the last three were shot with a prime 35mm lens on a full frame camera – I love that lens, and in the last example I also needed that lens: blurring out with an aperture of f/1.4 is often the best way to not show something.

 
(For those interested: more of this and subsequent shoots on my tumblr art feed (nsfw): http://mvwphoto.tumblr.com).
 

Grain

Not the kind you eat.. the kind you look at. Grain. Or noise, as it is called in digital pictures. Bad! Grain must be avoided at all cost!

Perhaps not.

  • First: there is a difference between the look of electronic “noise”, which results from the use of small sensors, high ISO values, or great exposure pushing in post-production, and film-type grain. This electronic kind of noise is ugly.
  • Second: while electronic noise is ugly and must be avoided, not so for film grain; not necessarily. Film grain can be very attractive, as in 1960s photos shot on Kodak Tri-X film.

Which is why you can now add film grain in many apps. Like in Lightroom.

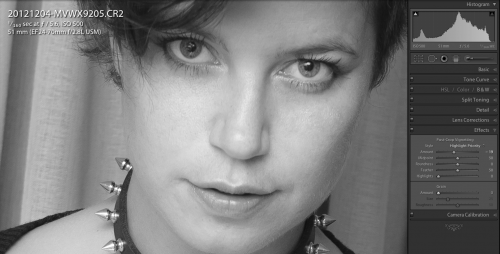
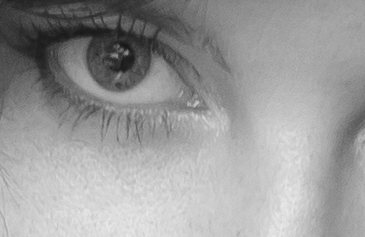
Here’s a detail of a picture. You need to click to see it at original size. This screen print shows the EFFECTS pane in the DEVELOP module:

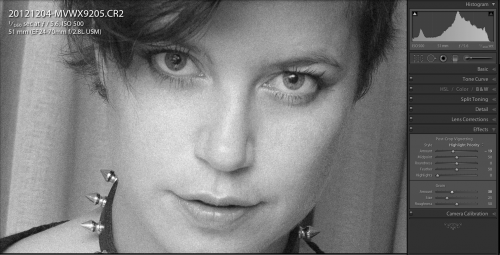
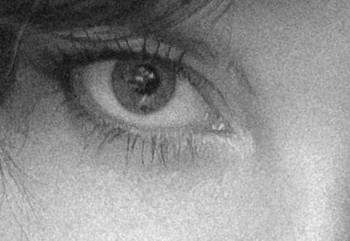
Now the same, with some grain added (look at the slider on the bottom right):

Again, click all the way through to the “Full Size” link. You will see a difference somewhat like this:

I often add some grain to my black and white images, to give it that authentic film look. As an added bonus, this treatment also hides imperfections that can result from sharpening.

Don’t go crazy and add 100% grain to all your pictures – but used judiciously, this is a great addition to your arsenal of tools (if I can be forgiven for mixing metaphors).


A lesson – for me!

I too can sometimes take a few minutes to get things together in my head. Sunday was a good example.

I was at my Santa kids shoot (using strobes). During a quiet period, I was showing my second shooter a few speedlight tricks. Bouncing, and so on.

But.. the speedlight was not working! Every time I fired, I got dark pictures. I started at 400-40-4 (i.e. at 400 ISO, 1/40th second, f/4: the Willems 444 Rule for indoors mixed light flash), and then got dark pictures -background good as per 444, but flash part dark. Huh?

  1. First thing to do in these cases: Turn your flash to MANUAL mode, at full power (1/1). That shows you if you have enough power available at all – if the picture comes out overexposed, all is well and you have enough power available, so the problem must be a metering or setting problem. And that was the case: bright pictures, way overexposed. So there was enough power available: it was simply a TTL metering problem or hardware problem.
  2. Second thing to do: check that metering is not “spot”; check all other camera settings, like flash exposure compensation; and verify that you are not sdhooting a very dark or very bright subject. Nope, no problems there.
  3. Third thing to do: reset camera and flash by powering down and up; remove flash, clean contacts; reconnect; turn it all on again. Did not work.
  4. Fourth thing to do: try a different flash. Same problem!

Now what?

This is where I was flummoxed for a few moments. Huh? I do not like surprises like this.

Until it hit me. D’oh! Each time I fired, my speedlight’s preflash (that is how TTL flash works) was setting off the nearby second strobe (which uses a cell to detect when it must fire). So the TTL measurement got way too much light back – hence the flash was told to fire at ultra-low power.

The solution was simple: turn off the slave cell on the strobe. Now, no extraneous flashes, and all was well.

So remember: Accidentally co-firing strobes can leave your pictures extremely underexposed – or extremely overexposed (whether over ort under is unpredictable because it depends on the exact timing of the strobe flash).

Of course I knew this, but I was momentarily not thinking. Goes to underscore: all photography is always problem solving, and if you take it logically the answer wil come to you!


Vivid.. I like vivid.

A common question:

“Why don’t my images look as vivid once they are in Lightroom as they do on the camera or in other software?”.

Good question. We have all seen this: you shoot RAW. It looks great on back of camera, great when first in Lightroom, but after a few seconds, dull. Why?

What you see on the camera, and in Lightroom, and in iPhoto, and so on, is an interpretation of a RAW image. A translation of the actually captured bits, if you will.

What you see on the back of the camera is a built-in JPG; an already-interpreted image. Interpreted according to your camera’s menu settings. Settings like colour space, white balance, contrast, saturation, sharpness, and especially the “autocorrect” settings. So you are not seeing the captured data; you are seeing an interpretation; often a “fixed” one (those in camera “auto fixes” need to be turned off, as I have explained here several times before).

Same in Lightroom. Initially you see the built-in JPG, but after a few seconds Lightroom switches to its own interpretation of the RAW image.

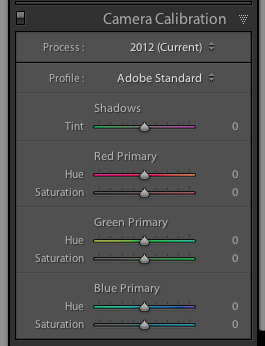
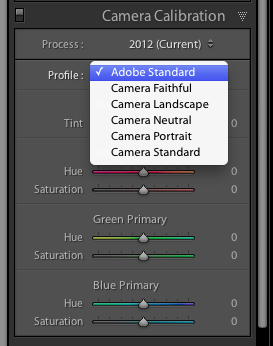
In the DEVELOP module, on the right at the bottom, you can choose the way the image is interpreted. Lightroom defaults to “Adobe Standard”. Try the others to see how your image changes.

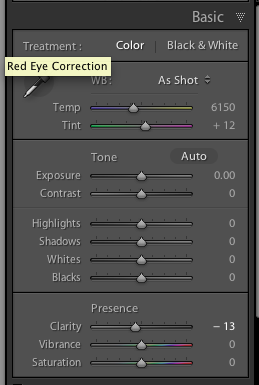
Next, to get the image you want, go to the BASIC pane in the develop module, and set this according to your needs.

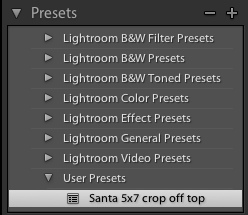
Then, still in the DEVELOP module, save all your settings as a “User Preset”. Press “+” and save the settings, naming it to something meaningful, as I named mine in the example here:

Then upon importing, apply this setting automatically. And now your Lightroom photos look just like the images you see on the LCD, or in other apps.

Oh, and when you export, choose sRGB as your colour space, unless specifically told otherwise.


Tether!

I am shooting Santa pictures today:

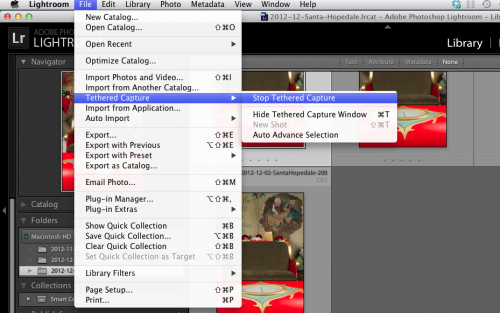
The way I do this is by “tethering” (connecting) the camera to the laptop via a USB cable. Then in Lightroom I go to the FILE menu and within that, select TETHERED CAPTURE. Then I select START TETHERED CAPTURE.

Also, unselect the AUTO ADVANCE SELECTION option if you do not want to be interrupted while working when a new shot is taken.

It’s REALLY simple in Lightroom. No extra software is needed, no Canon/Sony/Nikon/etc software.

You can even release and set the camera from within Lightroom:

If you have never tethered a camera, try!