Famous Favourites

Someone recently asked: Who is your favourite famous photographer?

That is a tough question – in fact one that is impossible to answer, a bit like asking “what is your favourite piece of music”. You are likely to have many. But I will mention just three of my many inspirations here.

Richard Avedon – fashion and portrait photographer who photographed everything from celebrities to ordinary people with a style that is recognizable and great.

Helmut Newton – German Australian fashion photographer, who shot a lot beautiful black and white (of course) of art nudes. Page here.

Nan Goldin – famous for “the ballad of sexual dependency” and other work, her work is in more museums than I have visited. Rough. New York. Not technical – she ois the least technical of all photographers here, shooting simple, in automatic mode much of the time I suspect. No matter: the images are great.

In deference to those of you in the USA and other places where the human body is considered bad and NSFW, it is after you click that I will show you a few sample images made by these greats.

Continue reading

Printing more prints

Adobe Lightroom offers great print functions. One of them is the ability to print multiple images on one sheet.

You can print the same image multiple times (a “Picture Package”), or many different pictures on a page (a “Custom Package”).

The latter is easy:

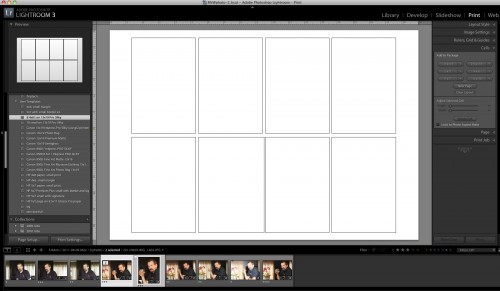
  1. To keep it easy, in the PRINT module, select a “normal” print size that you have previously defined (eg a 13×19 page, or an 8×10 page).
  2. Now go to “Layout Style” on the right, and select “Custom Package”.
  3. Go to “Cells”, and add cells of the right size( eg 4×6, 5×7, etc). These will show up as empty blanks.
  4. You can rotate and reposition each cell after you add it. You can also create multi-page layouts.

You see this:

Once you are happy, save the layout by using the PRINT – New Template function from the top menu.

Now you can make your actual print. To do this, drag the images you want into the layout from the negative bar at the bottom. Then print, and you are done!

My printer did overtime today printing a recent shoot – I find that a large page with small images is good for two purposes:

  • For me – It allows me to see an overview conveniently – a “contact sheet”, if you like.
  • For the client – I get many prints done at once. (Note that if this is for printing and cutting, I also enable “Cut Guides” in the Page section!)

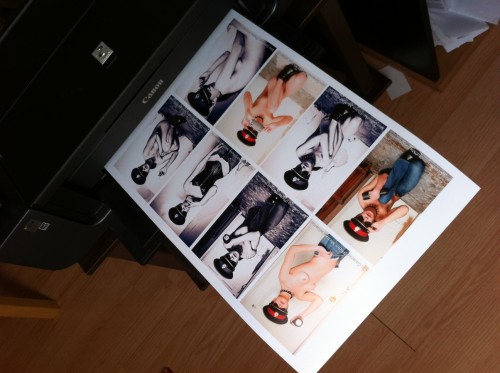
Here’s my Canon Pro 9500 printer producing a selection from a recent shoot:

Model shoot overview (Photo: Michael Willems)

Saves me a trip to the print shop, and the print is under my control – and one page is easier than 8 small pages. Once again Lightroom delivers the convenience that really makes it work well for photographers, by making life easy and saving time.

Personal note: today I honour the memory of my father, GTC “Eddy” Willems, who died of a stroke in 2002 at age 72. Today would have been his birthday.


Shadows

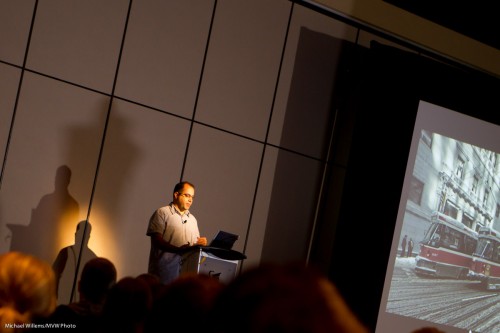
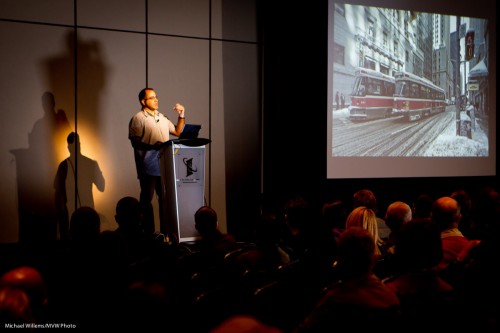
Love the shadows in the snap I took of fellow blogger Sam Javanrouh of topleftpixel:

Sam Javanrouh (Photo: Michael Willems)

We could have cropped this differently:

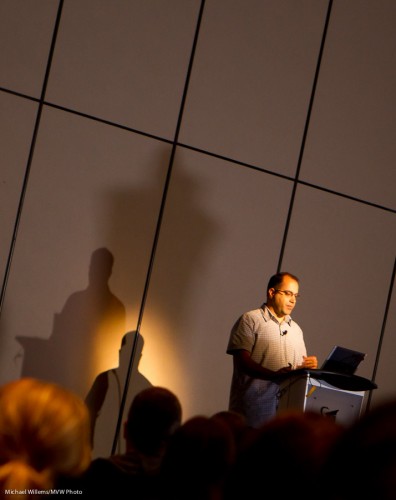
And we could shoot more. My favourite (and you need to click through several times to see it at large size):

Sam Javanrouh (Photo: Michael Willems)

My point: when you see great light and shadows, use them and shoot.

(Manual, 800 ISO, 1/50th second, f/2,8 with the 24-70mm lens in the 1D Mk4)


Ten Video Tips

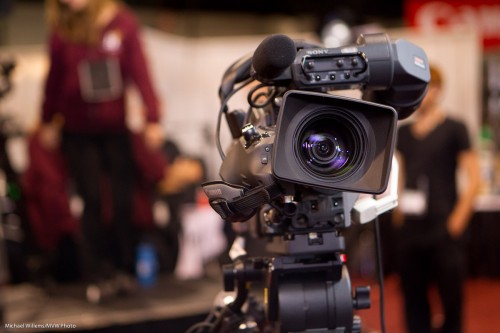
I occasionally shoot video with my DSLRs (7D and 1D Mk4). Not like this, therefore:

Camera (Photo: Michael Willems)

But simpler. And the secret is simplicity!

My top ten video tips:

  1. Shoot clips of ca 10 seconds.
  2. Add a lead-in and lead-out of a second or two to each clip so you can fade in/out
  3. Do not move the camera unnecessarily. The dog breathing is enough motion.
  4. Avoid focusing while shooting. Focus, shoot the clip, done
  5. Use external audio, or at least an external mike.
  6. Use manual exposure if you can, or at least lock exposure during your clip
  7. Avoid zooming in or out unnecessarily, and never zoom in, then out or vice versa.
  8. Use prime lenses.
  9. Shoot a “B-roll”, i.e. supporting clips that show the environment
  10. Start with an “establishing shot”

Try that and your videos get much better!


Happy New Year!

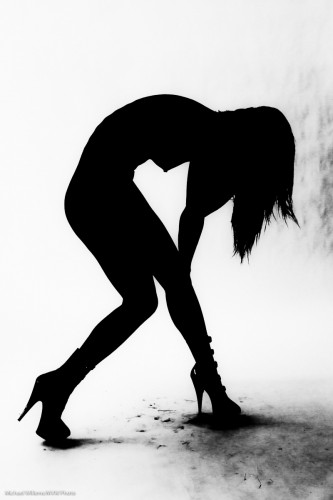
And may all your parties this year look like this, in silhouette:

Kassandra Love (Photo: Michael Willems)

A little teaching… to make an image like that, light the background well – then expose for it, while at the same time ensuring that little light falls on the model. Then do the rest in post – Lightroom will do fine. “Exposure, contrast, “blacks”, are the adjustments to play with.

Happy 2012!


Lightroom Tip: Perspective

When you aim your camera up, you get converging verticals – like this:

You can use an expensive tilt-shift lens to fix that.

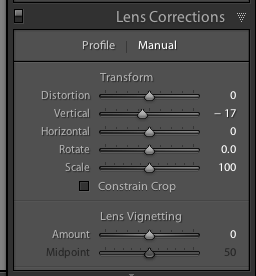
But there is an easier way: in the Lightroom “Develop” module, find “Lens Corrections”, go to the “Manual” tab, and you see this:

Pull “Vertical” to the left a little (as I did above), and you get this:

The verticals have been disciplined!

All you now need to do is crop off the edges (see bottom left).

Simple – takes only a second. Lightroom rocks!


Shoot vertical!

Remember – a very very quick tip today – that when you shoot one or two people, it’s often best to shoot vertical. Turn your camera a quarter turn – shutter above, not below – and fill the frame, and get close.

Regular programming will commence soon!

Why aim back?

You remember the Willems 400-40-4 rule (the “444 rule”)? If not, check under “ARTICLES” above. Part of that rule: indoors, aim the flash 45 degrees behind you.

Behind? Why?

Of course the main reason is that this way, the light will come from 45 degrees above, well ahead of the subject, rather than from “right above their head” – i.e. the angle of light onto your close-by subjects is good.

But the other reason is also worth mentioning – I am unsure I have pointed that out explicitly. Namely…. If you aim your flash forward, some light will go forward directly to your subject. And what does that do? Cast a shadow: the bane of flash photos. That’s something to watch for very carefully, especially when there is a wall, say, behind your subject.


Another student question

Shannon asks:

I really enjoy reading your blog, and I have a question/possible blog topic… I’m wondering how to deal with all the large raw files that I am uploading into lightroom. The other day, I had an alert come up that said that I had no more room on my computer for the files.. lol. So, I purchased a fairly large external hard drive, and thought I would move a bunch of the pictures onto it so that I would have more room. But I found it difficult to figure out how to move all the files out of lightroom and onto the external hard drive, and Im also not sure how I could access them in lightroom again unless I re-import them… do you have any ideas as to how to deal with this/managing all the files? I’d rather not delete the files if possible.

Great question.

And good news. Lightroom makes it easy. You can have your files live anywhere you like, anywhere at all – and you can move the files. Anywhere, any times.

Now for moving files.

  • When you move files using Lightroom, that is the end of the job. Lightroom knows where they now live since it moved them.
  • When you move files outside Lightroom, using your PC or Mac, then you are not moving anything “out of Lightroom”. You are just moving them, and now need to tell Lightroom where they now live. Lightroom will now show them with a question mark. Meaning, it does not know where they are. Simply right-click and “find missing files”.

As for where files live: I recommend files on an external drive; and the catalog file on that drive als (and everything backed up!). You may find this a useful post also in that regard.

Does that help? If not, a short coaching session will help sort it all out. Stick with Lightroom, sort it out – it is worth it!


Recompose during events?

A students asks:

What are your thoughts with focus and recompose when shooting events or portraits? Since it is very difficult to always move the single focus point, especially with event photography, I feel that sometimes focus and recompose is better. However, I have also read through other websites that doing the ‘focus and recompose’ technique could affect quality of the picture.

Good question.

Moving the focus point is always more accurate (because of geometry and because you might move), when you have the time – but it does take that small amount of time. So yes, I do that when I can – when I am shooting at, say, f/5.6 or brighter, and when I have a second.

When I do not, I just usse the central focus point – which on most cameras is the most sensitive! – and live with any small inaccuracies.

So if I simplify it is:

Recompose when it is dark or you are in a hurry; and move the focus point when you have time or when you need great accuracy.