How far will my flash reach?

I hear this question often enough to devote a post to it.

“How far will my small on-camera mounted speedlight reach”?

So I thought perhaps I would try to answer that for you.

At full power, if your camera is set to 100 IS, your flash will reach:

Distance = Guide Number / Aperture

The flash’s guide number, in metres at 100 ISO, can be found in its manual. The Canon 580 EX has a guide number (GN) of 58, the 430 EX has a GN of 43.  So at f/5.6 the 580EX will reach 10 metres roughly, at full power.

Things to know:

  • Smaller f-number (larger lens aperture) = more range.
  • Each time I double the ISO, I get 40% more range (square root of 2)
  • You can zoom the flash head in more to get slightly more range; wide angles give you less range.
  • Modifiers reduce the range.
  • An advanced flash will tell you the range, but only if you aim it straight ahead.
  • To test, set your flash to manual, full power.

Know your flash’s guide number at least for a rough idea!


Fashion flashin’

Sunday morning, around mid-day, in downtown Oakville I shot a fashion shot for a magazine front cover.

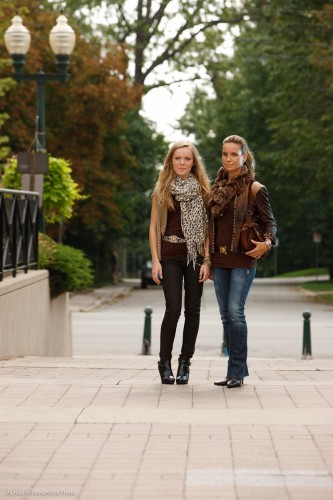
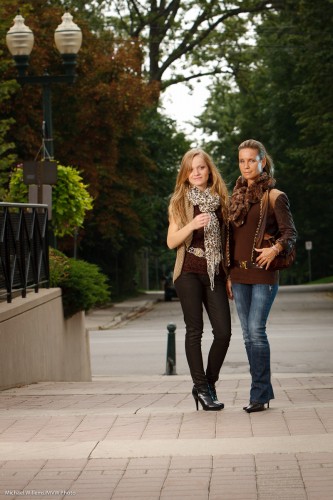
Outdoors fashion is, as always, a matter of many things coming together at once. One of those is light. Without light, even on a wonderful overcast day (wonderful in photo terms), the image lacks something. The mother and daughter models lack a certain je-ne-sais-quoi.

Actually I do know – they lack light:

Models in Oakville (Photo: Michael Willems)

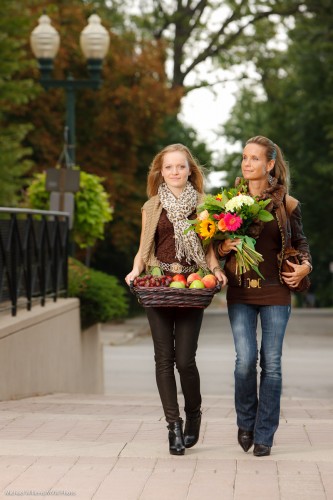
So we add a flash. I used a Bowens 400 Ws strobe, although I could have used speedlights. The sequence is as follows:

  1. I set my camera to manual.
  2. I select 1/200th second and 100 ISO.
  3. That gave me, on this particular day, an aperture of f/5.6 for a nice saturated background. (To arrive at this, I can use my in-camera meter or my light meter set to ambient.)
  4. I now add the strobe, set it to 80% power about 6ft away, and test this with the meter (now set to flash mode). Well have you ever:  the meter immediately indicates f/5.6! (This is just experience. If you are less experienced, no worries – just turn the light up and down until you do read f/5.6).

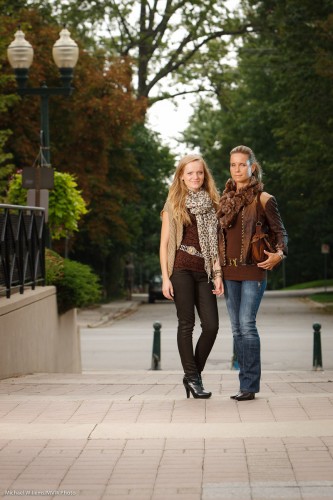
That gives me:

Models in Oakville (Photo: Michael Willems)

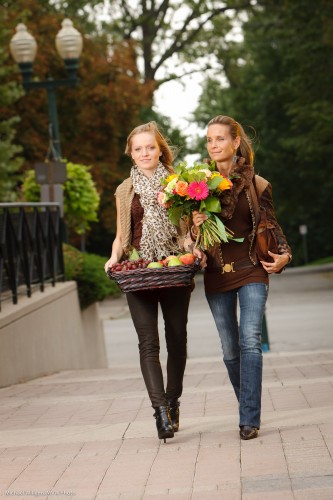
If I want the background a little darker I change the speed to 1/250th (still in my flash sync range):

Models in Oakville (Photo: Michael Willems)

Okay, we are set. If the sun comes out a little more,  I go to 1/250th, and if it gets a tad darker I go to 1/160th.

The idea of this shot is autumn – so we now bring out the props. Autumn flowers and fruits and vegetables now gives us this:

Models in Oakville (Photo: Michael Willems)

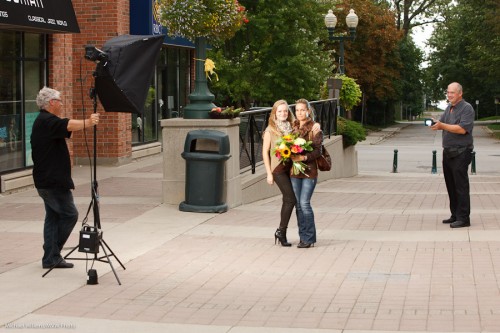
Notice the speedlight with a blue-green gel as accent/hair light on our right? The speedlight was held by Kurt, who assisted on this shoot, and was set to 1/4 power (again – experience tells me that setting will probably work – and it did).

The final step is to make that an egg-yolk yellow gel instead of a blue-green gel – yellow accentuates the late day setting sun feeling that is synonymous with autumn. (I use Honl Photo gels).

Models in Oakville (Photo: Michael Willems)

And there we have the image. (In fact this is not quite the image – that one went to the client, and I do not like to publish images in this open forum before the customer has used them!). Also – note that these are shot a little wide since this is for a magazine front page, so there needs to be space for text.

Notes:

  • Umbrellas and softboxes outdoors will be blown away, so hold on tight.
  • If the models move, use AF-C/AI Servo focus mode.
  • With two models, be very aware of the danger of blinking – one of them will blink in very many images, so check, and take many images.

The setup was as follows:

Fun shoot.

(And perhaps also, a shoot that explains why photography costs money: A car full of equipment, props that get used just once, two sets of clothing, and five people taking several hours. All this costs money!)


Help – it’s night!

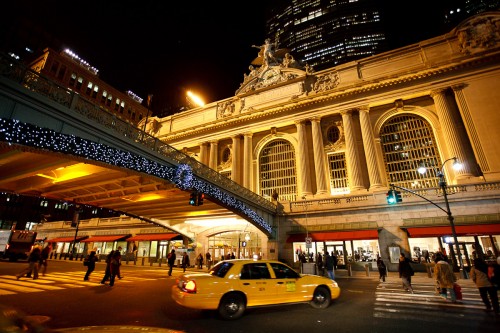
Grand Central, NY (Photo: Michael Willems)

It is night, as in this old shot of Grand Central Station. How do you deal with this?

Technique. A combination of techniques, actually. Use as many of these as you can:

  • Stabilize your camera. Use a tripod, or balance the camera securely on any surface (protecting it with a bean bag).
  • Use a wide lens. This makes it possible to shoot slower.
  • Use a stabilized lens.
  • Use exposure compensation (minus!), or spot meter off buildings, to avoid too-long shutter speeds.
  • Increase your ISO if you have to.
  • Sometimes I even slightly underexpose and then push the exposure later – better a little grain, if I must, than motion blur.
  • Take many shots – and just use the sharp ones!

As you see, there is no single answer. A combination of the above will work. Night is the best time for many shots – use it.

This shot is from the all-new “Travel Photography” course I just wrote for the School of Imaging, by the way. Completely rewritten and worth taking – if you are going to travel, you owe it to yourself!


Vegetation Tip

A quick tip, today:

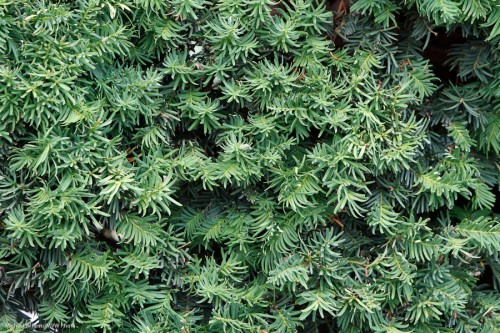
Green vegetation is dark. About a stop darker, on average, than a grey card.

That means that when you shoot green plants (a hedge row, or the back yard,or the fall colours), the image is too bright. Too bright means “washed out”:

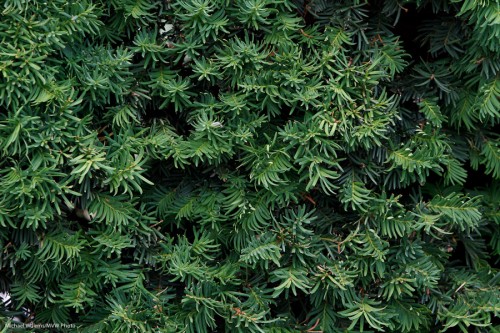
Not too bad.. but one stop darker – i.e. exposure compensation set to minus 1, or the light meter pointing at “-1” if you do it manually – gives you this:

Much better.

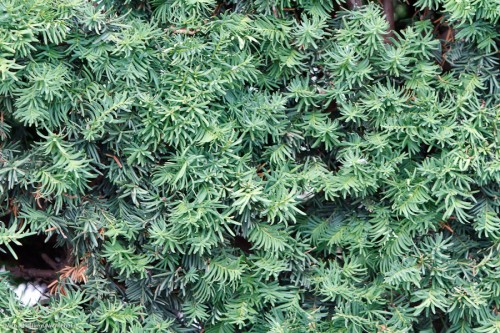
If you had adjusted the wrong way, i.e. to plus 1, you would have gotten this:

Of course this holds for average green plants – some are brighter, and if you mix sky into the mix your camera will give you different readings (you might try the spot meter).

At least you are warned now – plants will often look washed out unless you expose them right – and right often means down by a stop.


Points of view

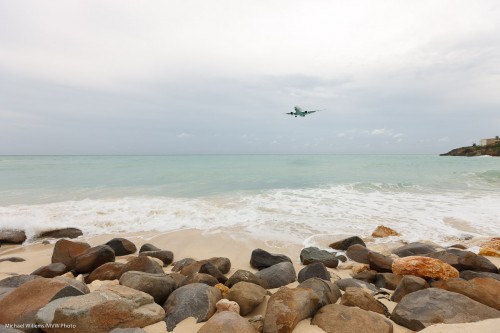
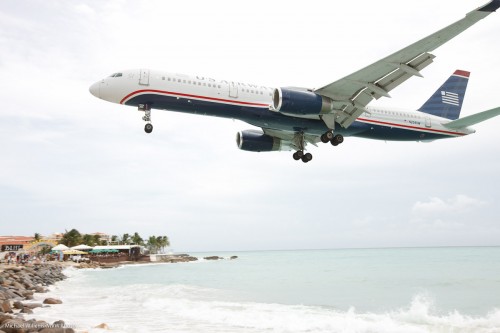
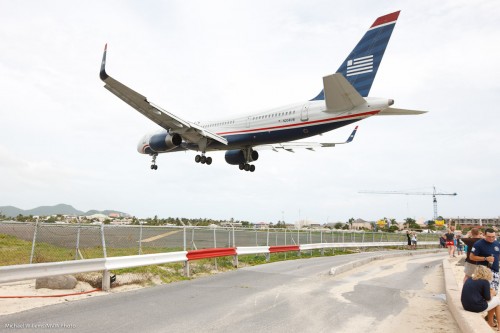
Just to show how much a few seconds and  shift in viewpoint can change your photo, look at these images:

Aircraft landing, Sint Maarten (Photo: Michael Willems)

Aircraft landing, Sint Maarten (Photo: Michael Willems)

Aircraft landing, Sint Maarten (Photo: Michael Willems)

Most people would assume that…

  • The larger the aircraft, the more impressive
  • The less perspective distortion, the better

I am not sure I agree with that.  The top picture is a favourite, even though the aircraft is tiny. And while aircraft spotter sites insist on “straight” images, I much prefer the drama a wide lens gives you (bottom images).

This is not to say that I am right. What I mean is: cameras, and lenses, are powerful creative tools, and you should think about how you use them; try to use them in different ways; be creative; experiment, and follow your intuition.


A lens experiment

On my just-finished Caribbean holiday, I decided to try an experiment.

For most of my travel shots I use the super-wide lens, but I always bring a long lens as well. Normally, the Canon 70-200 f/2.8L IS. A superb lens, but heavy and big.

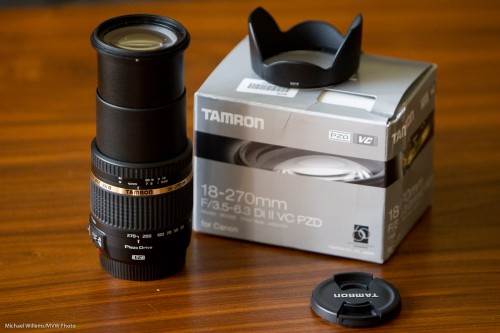
So this time I used an all-round consumer lens on my second camera- namely, a Tamron 18-270 mm f/3.5-6.3 Di II VC PZD stabilized lens for Canon. Here it is:
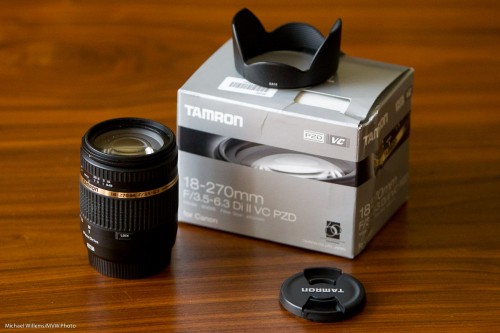
And here it is, pulled out to its full length:
I decided to try this lens for three reasons:

  • To see the differences (I have only used expenive lenses for many years)
  • For convenience – 18-270mm in one small, light package.
  • For length: 270mm on my crop camera, the 7D, is 432mm!

So how did it do?

Obviously, the convenience stands out. One lens, not three. And the lower weight. I certainly appreciated that. And the longer effective length. And if I had bought this lens, instead of borrowing it from the importer, I would have also appreciated the great price point.

Through the vacation, the lens performed well. No issues, no trouble focusing, no noisiness, no trouble of any sort. It did what it was supposed to do. I used it in one-shot focus mode, and in that mode, focus worked fine. Vibration Control (“IS” in Canon terms) also worked well – and this function is essential on a long lens.
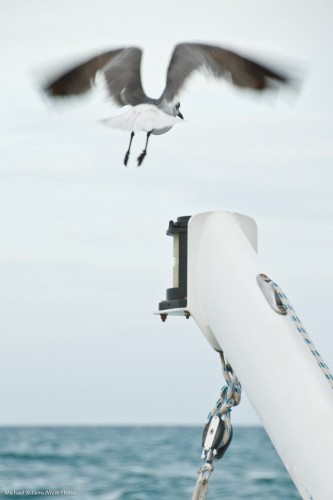
Sint Maarten Gull (Photo: Michael Willems)

As a regular and intelligent reader, you know there is a price for everything.

In this case, that price is mainly the smaller aperture (f/6.3 when zoomed out, as opposed to f/2.8 on my “regular” pro lens), with additional “small reasons”. Many people would not even notice these, but as a spoiled pro lens user, I do.

So you do need to keep in mind I am comparing apples with oranges here… given that, I see little things like:

  • The lens drops when you aim it down – hence the need for a “lock” button to prevent it doing that.
  • Turning the zoom is fairly smooth, but not as smooth as on my 70-200. The zoom smoothness is also not the same all through the zoom range.
  • Having used pro lenses for so long, the fact that the lens would not go down to f/2.8 kept making me think I was in the wrong mode – each time it took me a moment to realize why the numbers weren’t doing what I expected them to!
  • Especially when zooming in all the way, this lens is not quite as sharp as the oranges it is being compared to. Don’t be put off by that – as said, I am comparing it to a dedicated, heavy, $2.500 lens. The real question is: is it sharp enough? You judge: click on images and then click on “show full size”. This is not full size as it came out of the camera, of course, but it gives you an idea. Of course a tad of Lightroom sharpening takes care of most issues – don’t “pixel peep” too much. (Also – longer lenses are less sharp because of the air moving in between yo and your subject – do not mistake that for lens sharpness!)
  • More barrel and pincushion distortion at the wide and long ends.

A few sample shots:
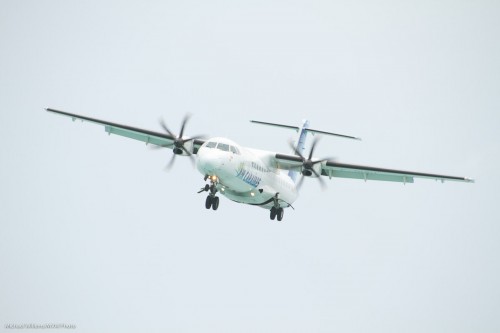
Sint Maarten (Photo: Michael Willems)

Sint Maarten (Photo: Michael Willems)

Sint Maarten (Photo: Michael Willems)

A wide angle shot; note the pincushion distortion:
Sint Maarten (Photo: Michael Willems)

I was happy (and surprised) to see no appreciable amount of chromatic aberration: I would have expected more on this lens.

Image quality seems a little less when you zoom in all the way – but that is to be expected, and in my view, 270mm is a bonus gift horse that one should not look in the mouth.

So when would I use a lens like this?

  • When I want 270mm – a great long focal length.
  • When I want convenience, and an “all in one” package.
  • When weight and size are an issue.
  • When price is important.
  • When I want to minimize lens changes, eg in dusty environments.
  • When I can only bring one camera.
  • When I expect to quickly need to change from wide to telephoto.
  • When there is plenty of light.

When would I not use it?

  • When shooting in low light environments. f/6.3 is enough in the sun or in a studio – perhaps somewhat less so in low light.
  • When quality is utterly paramount, like when shooting stock photos.
  • When shooting sports (I did not test continuous focus but I expect it would not be as good as the Canon lenses here).

This experiment was successful – I would consider carrying a “one lens does it all” again in the right circumstances, and if so, if only because of its excellent 18-270mm range, this Tamron is high on the list.


Note: As is the norm with my reviews and product mentions, I have not been paid anything for writing this review.

Aspect Schmaspect?

A question I answered on another forum bears a repeat here. The photographer asked:

I just had a client order an 8×10 of a picture but when I crop it in Photoshop, it goes beyond the picture. (like it only fits for a 4×6 or something) What do I do?!?

A common question. For some reason known only to the good Lord, cameras use a 3:2 aspect ratio, while prints, frames, camera stores, and so on usually use 8×10 (i.e. 4×5) or 5×7, which are entirely different aspect ratios.

This means when you print, you have to do one of only three possible options:

  1. Crop off part of the image;
  2. Leave white bands on the sides;
  3. As in 2, but fill those two white bands with fake picture (what Photoshop calls “content aware fill”).

For methods 1 and 2, you probably want to use Lightroom, not Photoshop: in Photoshop you get burdened with having to know the picture size (pixels, DPI/PPI) when all you want to do at this point is set the aspect ratio. In Lightroom, you can simply set the aspect ratio (like “8×10”) without yet having to worry about the size you will eventually want to print at.

For method 3, however, you do need to use Photoshop. You expand the canvas to the size you want, then fill the white areas using that “content aware fill”, and adjust as needed.

But why is this all necessary? I have many people asking me this with a certian degree of perplexity.

Simply because you cannot fit a square peg snugly into a round hole.

To help understand, imagine if the print the client wanted was square. Does your camera take square pictures? Probably not. So to print square you either need to crop, or have white edges (or fill the edges with fictitious material).

Last tips:

  • This has nothing to do with picture size, or with things like DPI/PPI. It is simply about the shape of the picture (square, rectangular, etc).
  • I typically crop to the aspect ratio I like – not to the one dictated by the frame makers of this world.
  • That said, it is often wise to shoot a little wide, then crop later – just in case of this kind of aspect ratio nonsense getting in the way.

Have fun shooting!


Manual exposure

Why do we use manual exposure mode?

We use manual exposure mode (“M” on the dial on top) when it is more convenient to do so than to use an automatic or semi-automatic mode – i.e. when the drawbacks are outweighed by the advantages.

Grand Case, Sain Martin (Photo: Michael Willems)

Aug 2011: Grand Case, Sain Martin - 1600 ISO, 1/30th sec, f/2.0

Automatic modes (camera sets both aperture and shutter) and semi-automatic modes (camera sets one after you set the other) are convenient and quick, but are also error-prone. In particular, they do not handle the following well:

  • Backlight
  • Dark or light subjects
  • Varying subjects
  • Varying light across a scene

In those situations it is often better to use manual, assuming you have a moment to work out the best setting – and then to stick to these settings. So “indoors” is often like that, as is “night scenes”. As you get more experienced, you will use manual more often.

(One more note for beginners” manual exposure mode is not the same as manual focus, or manual focus spot selection, or manual white balance setting – etc. Unrelated!)


Zip it

Travel tip repeat: you have heard me mention bags before, but now let me get specific: when traveling in a warm climate, carry Ziploc bags. Because they close with a pretty much airtight seal. And then put the camera and lenses into those bags when you carry them out. And then wait until the equipment has warmed up – maybe 10-20 minutes.

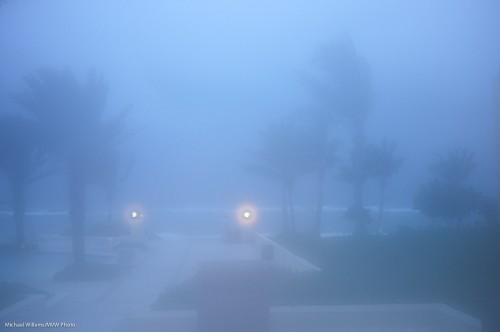
If you don’t, then the moment you walk from the airconditioned inside to the moist, warm outside,  this happens:

I.e.due to fundamental physics, the camera mists up. Viewfinder, lenses: possibly even inside. And that is bad – misting up means moisture – water. Water can lead to fungal growth in tropical climates, and in any case, it is never good.

For the camera, that is.

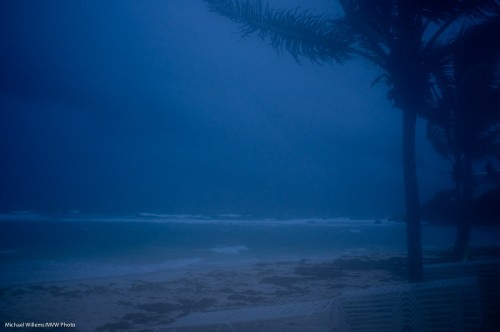
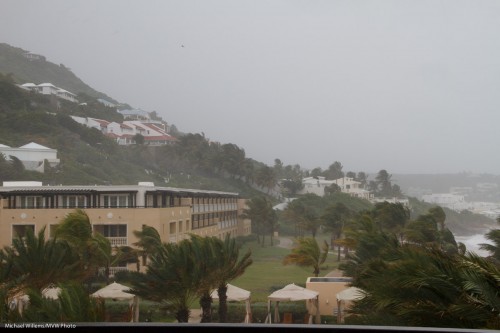
But it can work in pictures – low contrast pictures can carry a mood very well, like in the following image of tropical storm Irene, which turned into a hurricane later:

Storm in Sint Maarten (Photo: Michael Willems)

That slight residual fogging helps, here. But I would of course not recommend that, for your camera’s sake.

One more thing – carry a microfibre cloth, as well, and wipe off any excess moisture as soon as possible. Keeping your camera healthy is a good idea.


The Importance of being colourful

Colour is an interesting thing. It can help or hinder your pictures. It helps if you are using it where it is wanted; it hinders if you use it when it is not, or if you fail to use it when it is.

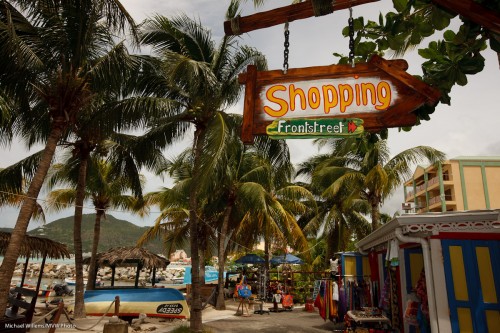
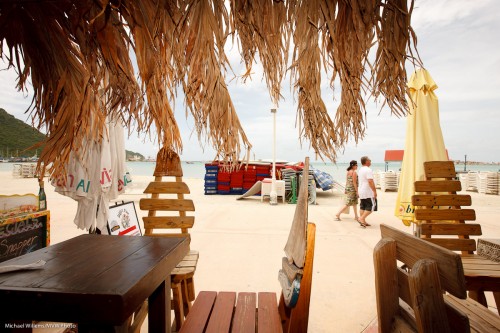
The Caribbean is all about colour. People are happy, the sun is hot, and everyone uses wonderful bright colours. So a scene like Philipsburg, Sint Maarten, needs colour:

Philipsburg (Photo: Michael Willems)

Technique needed:

  • Flash: I needed to use my Canon 580EX flash for this sign.
  • Exposure: I made the colours vibrant by exposing the rest of the image down a little: 1/200th at f/13 at 100 ISO.

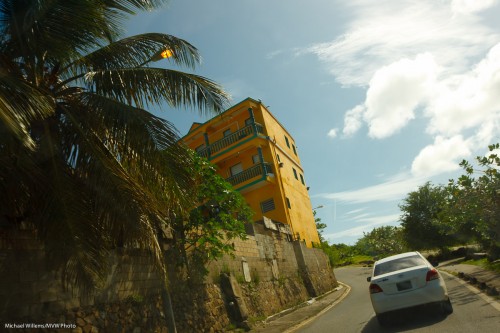
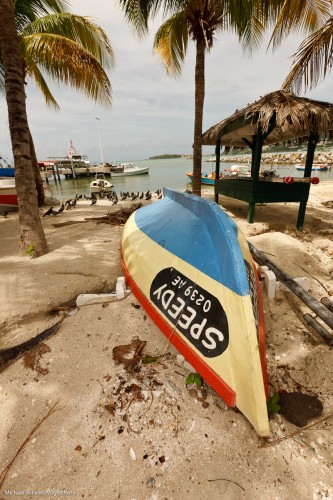
In the following image, I needed no flash – or rather, it would not have done anything:

Sint Maarten (Photo: Michael Willems)

In the next example, I needed the flash just to light the plants that make up the roof, or they would have been black:

Sint Maarten (Photo: Michael Willems)

And one more, where I used the flash:

Sint Maarten (Photo: Michael Willems)

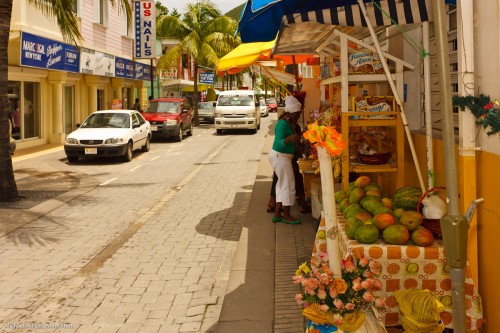
One more – a street grab:

Philipsburg vendor (Photo: Michael Willems)

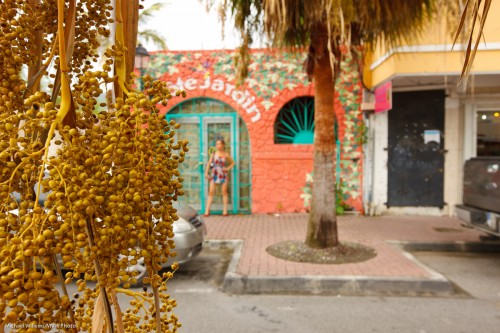
And one more, again showing wonderful Caribbean colour:

Philipsburg (Photo: Michael Willems)

I suppose this all boils down to a few simple rules:

  1. Decide if color is needed; is it an important part of the image?
  2. If so, expose well – underexposing ever so slightly will make colours more. saturated; overexposing leads to washing out. (Note: you are allowed to “expose to the right and fix in post – you get better quality).
  3. Use a flash if needed to light up areas that need lighting up.
  4. Use the right white balance.
  5. Consider a polarizer on sunny days.
  6. Add a little saturation in post if you have to.


All very logical once you think about it.