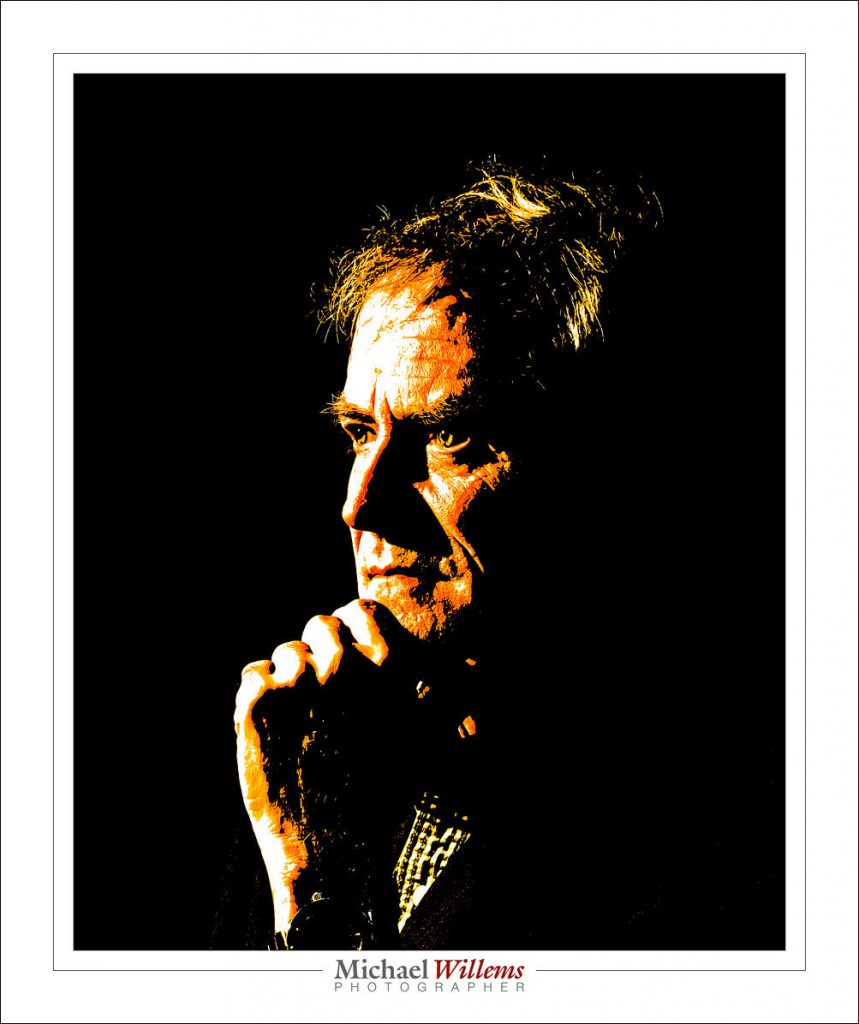
At least, “Warhol-like”. That’s what I like to call my Lightroom preset, that slightly enhances a picture taken by student Sebastién in yesterday’s Flash Photography class.
The image was lit with one single gridded off-camera speedlight, connected to the camera via non-TTL Pocketwizard triggers. Knowing flash is a good thing!
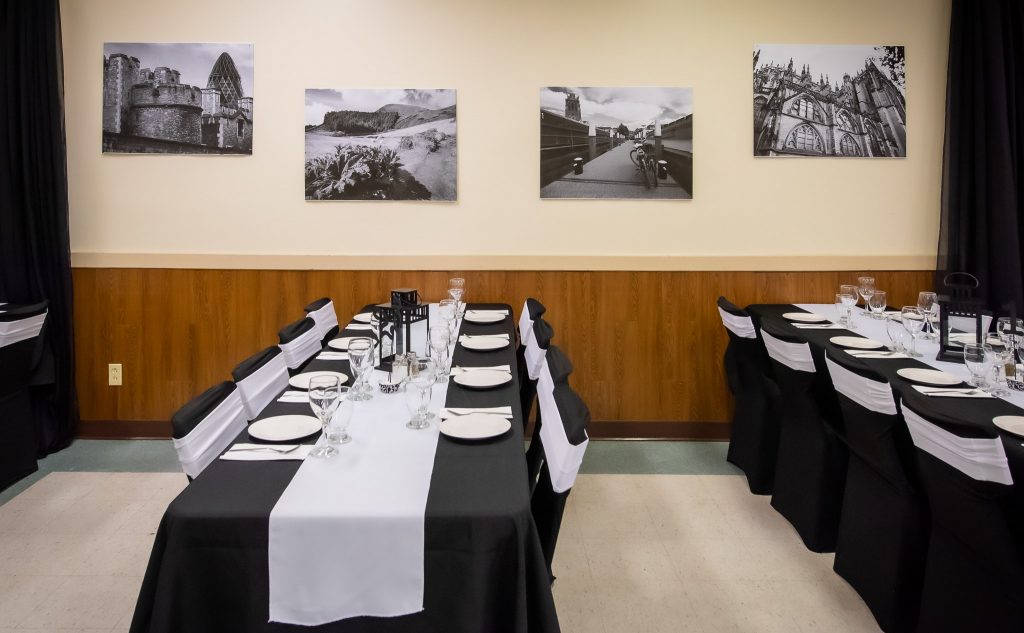
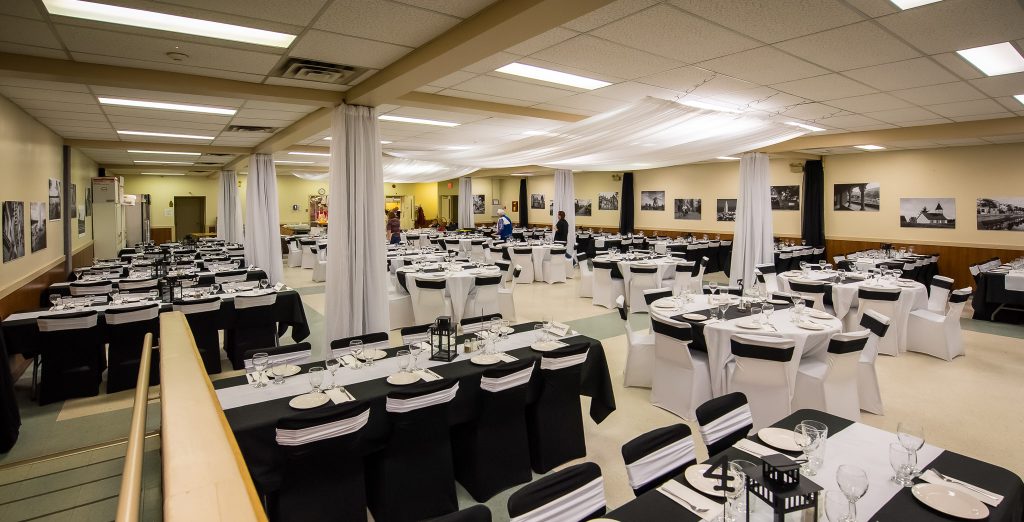
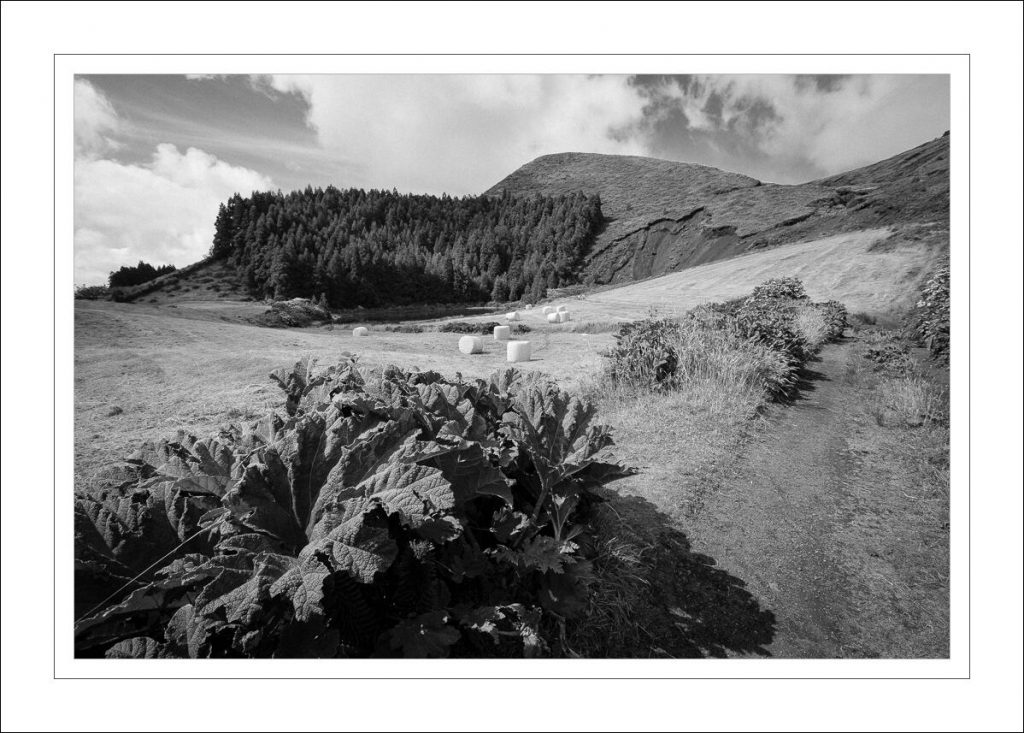
I am flattered that a charitable society in Timmins, Ont. decorated their event hall with some of my Black and White pictures–specifically, pictures of European scenes. Like this:
I am sharing this for two reasons. First–to show how impressive B/W photography can still be. Not everything needs to be in colour. Setting a mood can often be done better, I think, without it. Black and White photography reduces things to their essence.
Second, to encourage all of you to do the same with your pictures: print them, hang them, and look at them. Don’t just have them on your Facebook wall: put them also on your real wall.
Adobe Lightroom, incidentally, does a great job converting colour to B/W, with full control of all the shading. Give that a go.
The charity people have now asked whether they can keep the photos on the wall for a while longer–to which my answer, of course, is “sure thing. Enjoy”.
The most common question I get. “What should I buy?”.
That’s a tough one to answer. It’s a little like asking “what car should I drive?”. It depends entirely on your needs, wants, budget, and many other factors.
“Wildlife” – of sorts
Someone just asked:
My wife is wanting to get into wildlife photography.
What would be a camera to start her out with? Thanks!
So without knowing anything, I would at least say this.
Get a camera that is not too heavy for you, but that does have a traditional viewfinder – an SLR. A Canon DigitalRebel (like a T5i or similar) would do just fine. Or a 7D Mark 2 if you have the budget. (Weatherproofing, dust-proofing: if these are important, spend a little more.) If you want “full frame”, a Canon 6D Mark 2 would be great.
Then the most important thing: the lens. A long lens. But it does depend on the kind of wildlife. Small bugs? A Macro lens. Deer? A 70-200 mm lens should do. Birds? Something longer – or a 200mm lens with a 2x tele-extender (that makes it into a 400m lens). In any case: the “faster” the lens (meaning, the lower the minimum “f-number” that lens can go to), the better. That way you can get fast shutter speeds without high ISO values, and blurry backgrounds, and you can use a tele-extender and still have useful aperture left.
Then do carry multiple memory cards and a spare battery or two; a flash just in case; and maybe also a tripod, depending on, again, your wife’s circumstances. And finally, a hood loupe. And have fun!
I teach photography. Take my courses in Ottawa/Orléans to learn all about this: cameras, lenses—and what you do with them, and how. See www.michaelwillemsphoto.com and kick start your photography today!
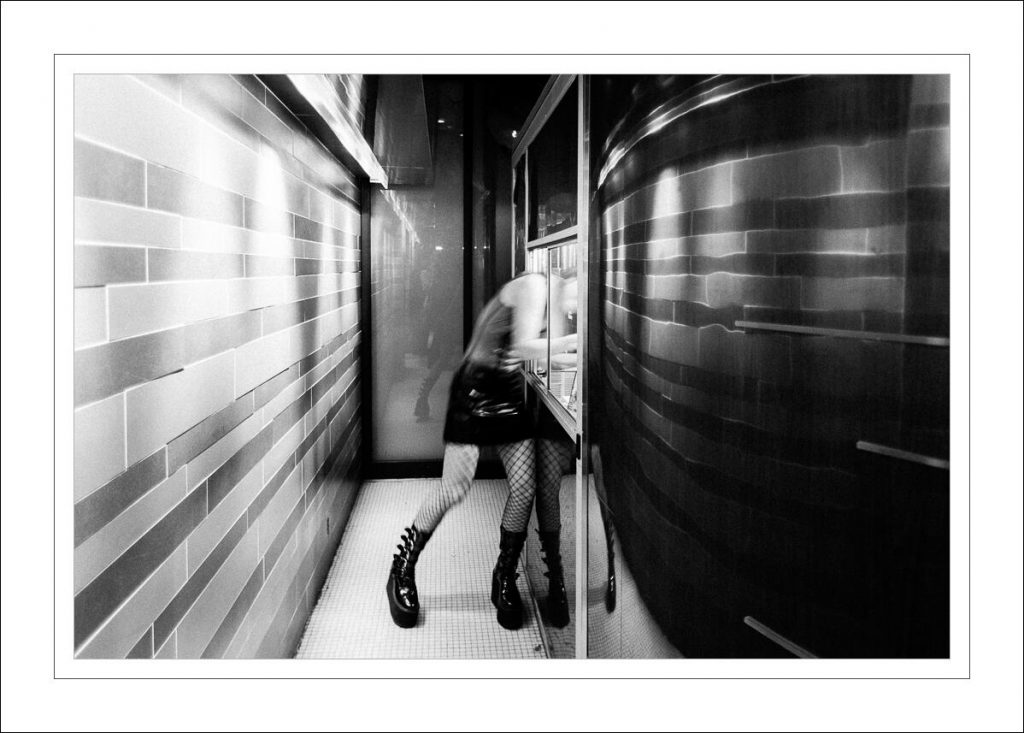
I see a lot of photography every day, and every day I am reminded of the way Black and White, or B&W, can work so very effectively—and of the fact that this seems almost a forgotten art. Even in landscapes:
Azores, 2019
…or in storytelling Wall Art:
Say What?Guitars, VegasBicycle, Schoonhoven
..or in so much else. Everywhere where colour is distracting. Where colour isn’t the story. Or where colour tells the wrong story.
So how do you do it? Well – set your picture style to B&W but shoot RAW. That way you can see a rough preview in B&W but do the actual conversion in post (Lightroom comes to mind as an excellent tool).
However you do it: When you shoot, try some B&W and see how powerful it can be.
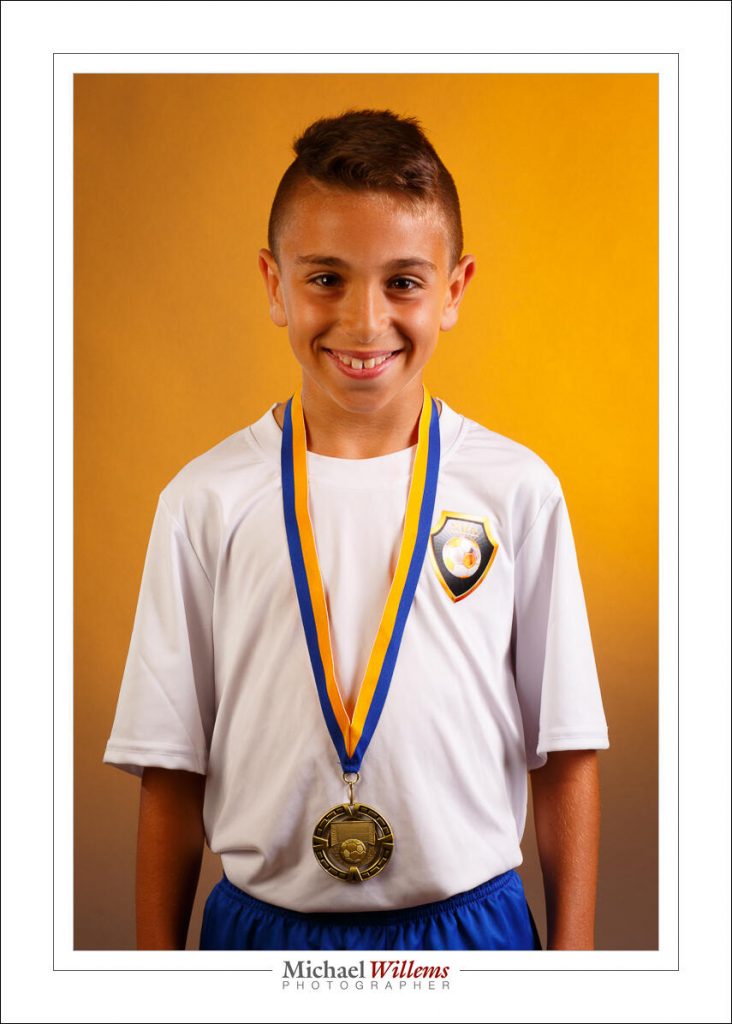
You know—every photographer eventually starts doing portraits. Even landscape or bird photographers eventually take photos of people as well. And that’s important. People are everything to us in our lives.
That’s why I love to do portraits. Like this one, done in the michaelwillemsphoto.com studio last week, of Abraham, an excellent soccer player who just won a tournament with his team:
He clearly shows he is happy about the whole thing. And of course his parents have the picture on their mantlepiece, right now. And it will stay there forever.
Your pictures are better on your living room wall than on just our Facebook wall.
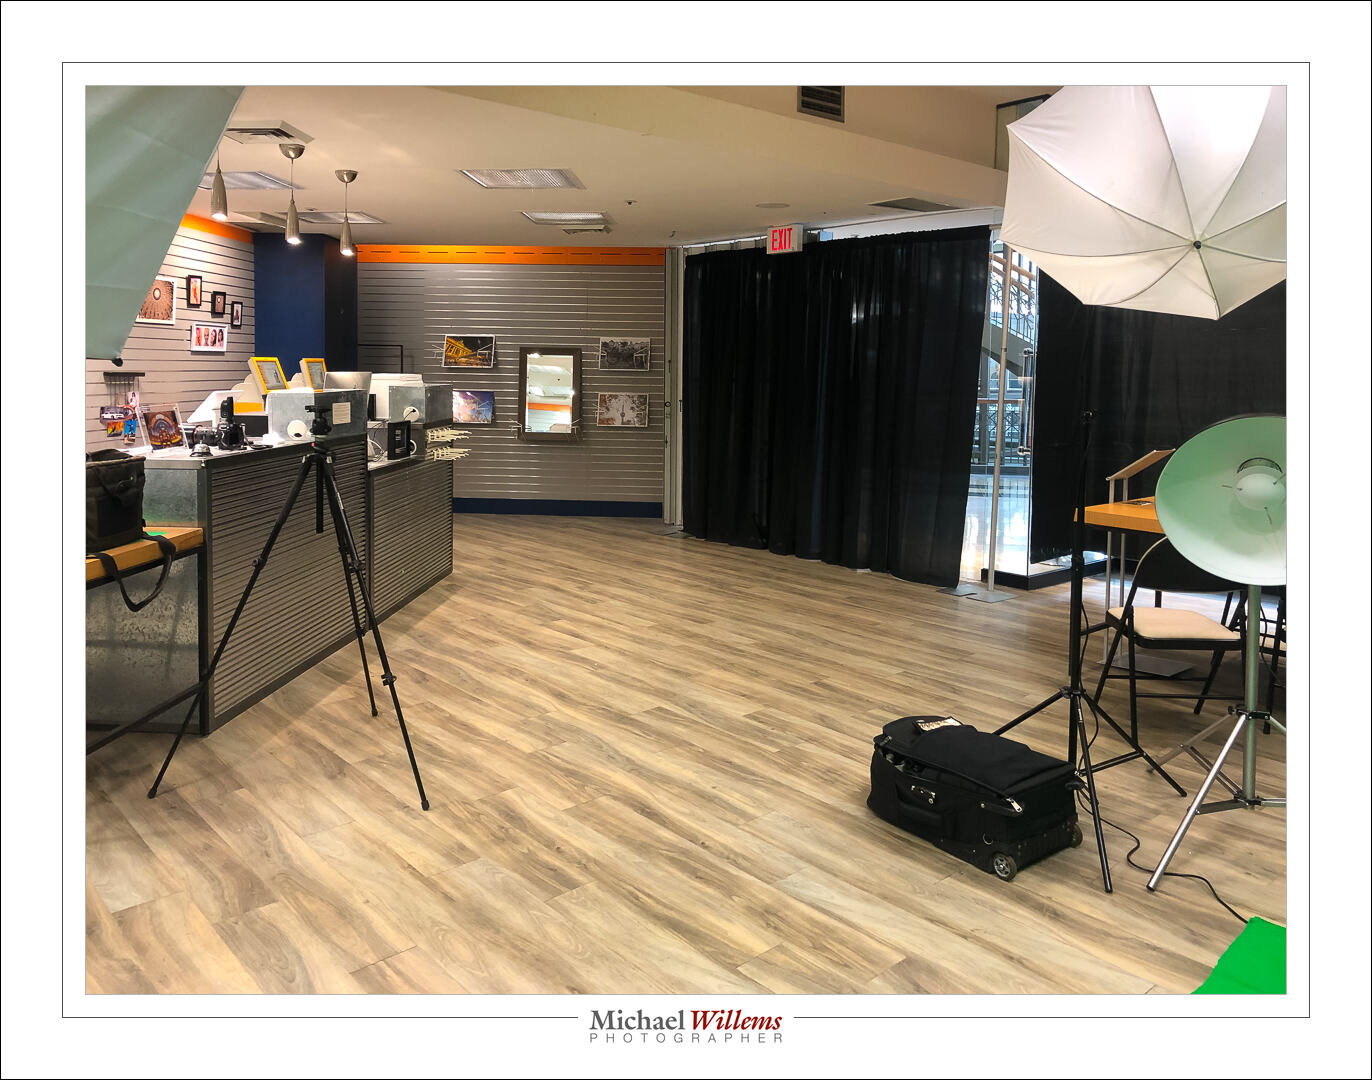
Big news — in a few weeks, I am opening my new mall studio/school/store/gallery on Orléans, Ottawa, Ontario. Based in Place d’Orléans mall, this shop will have me in it much of the time and will do the things outlined in its web site, www.michaelwillemsphoto.com.
The opening is August 15, but as you can see, it’s almost ready for business. If you are in or near Ottawa, give me a call!
“Mirrorless” is all the talk. Everyone, it seems, “is going mirrorless”.
But not me, and not many other photographers either: not quite yet.
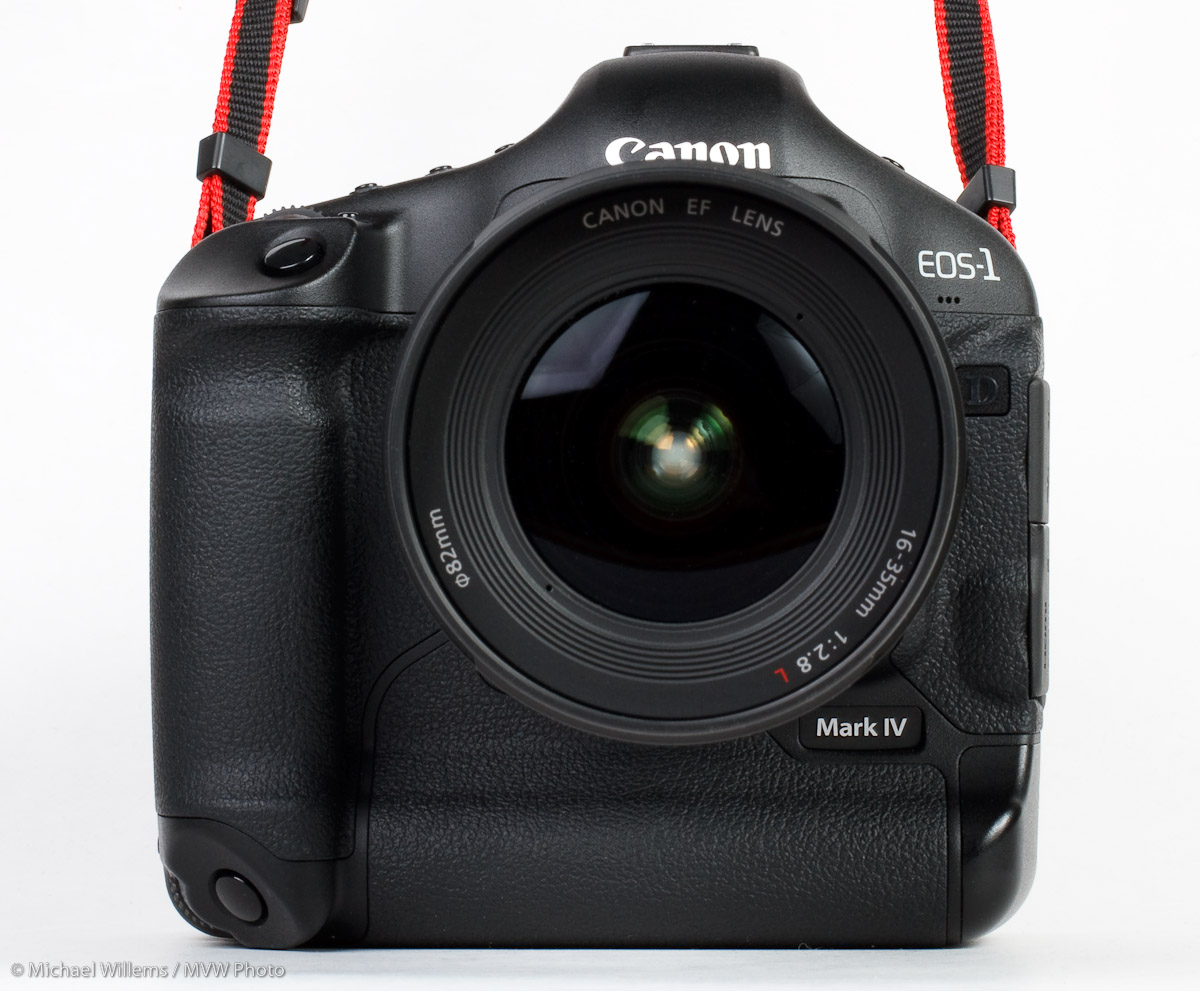
Canon 1D Mark IV camera
Why not switch to the latest technology?
Well, while mirrorless offers advantages, like
Preview information (eg histogram) through viewfinder.
Post-shot view.
Smaller, lighter! Especially if you get the new lenses.
…there are also good reasons for pros to hesitate and hold off. Here’s a few:
If it ain’t broke, don’t fix it.Why mess with something that is proven to work?
Mirrorless is unproven. Looks good, but it’s new. Why risk it?
Battery life. Not as good, not nearly as good as the pro DSLRs
Dust. The sensor is exposed and every lens change introduces dust.
New lenses needed—and that’s a major investment. Or you use adapters and invest in those, and forego the “smaller” advantage. Adapters are always iffy anyway: another point of failure.
As you see, there are good reasons to not mess with something that ain’t broken.
I’ll give you a few landscape tips for beginners, today.
Use the right lens. I recommend either the ultra wide lens (10-20 on a crop camera, 16-35 on a full frame camera), to show perspective and depth; or a telephoto lens, to bring backgrounds closer.
Use a low ISO, like 100 or 200.
Use a high f-number, like 11 or 16. Especially important if you use the telephoto lens above.
If you can, use a tripod. The two settings above may well require it.
Focus one third into your scene. That gives you the best sharp focus range.
Just in case, carry a polarizer and an ND filter. The polarizer for removing reflections or to emphasize some blue skies, and the ND filter for slow shots of waterfalls or water surfaces.
Consider shooting some panoramas. For those, use manual setting, so that all pictures are exposed equally. Avoid foreground objects. Turn the camera while on the tripod, overlapping successive images by, say, 30%.
Don’t pack too much. Weight doubles hourly when carried!
shoot at the best time of day. Often, that means 5pm or 5am, the “golden hour”.
Consider bringing a flash. More than you’d expect, you’ll want to light up your foreground.
Keep the image simple. Pay attention to detail.
Look for attention points in the foreground, middle ground, or background. Like frames, reflections, s-curves, juxtapositions, etc.
Prepare. Enter location coordinates, found on google, into your gps.
take one iPhone picture so that you have the coordinates, and then copy them in Lightroom from that iPhone picture to your other photos. Unless, of course, your camera already has a gps built in.
These fifteen rules should get you going! For a little more detail, see my Landscape Photography book on http://Learning.photography .
Come to my April 27 workshop in Toronto, if you want flash techniques that work. See the previous post.