Myths

Canon myth: The Canon 7D (the original one) has the name of being not great at high ISO values. High is 800 or above.

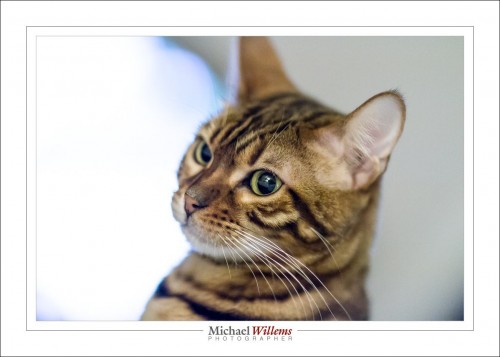
Well… depends. This is pretty good, at 2,000 ISO:

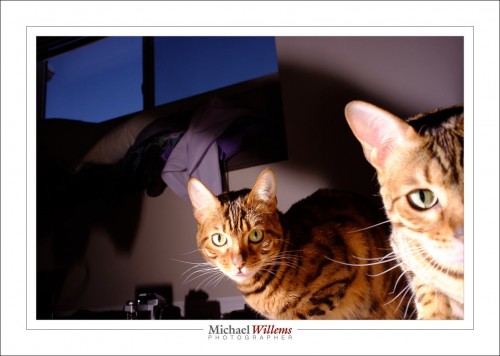
Isn’t it? That’s what an f/1.2 lens will do. That is 1/125 sec, 2000 ISO, f/1.2. Handheld. And a little noise cancellation. Taken just now in available dark bedroom light.
Lightroom Myth: Lightroom has the name of not being very able. You can’t do this on it, for instance:

Except I just did. Not that I know why I would want to.

Anyway, my point is: when you look a little deeper, often these “truths” are just not true.

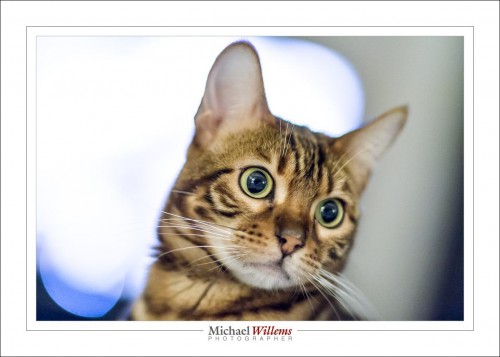
And I leave you with another cat picture. Because.


x100: Can you see a theme?

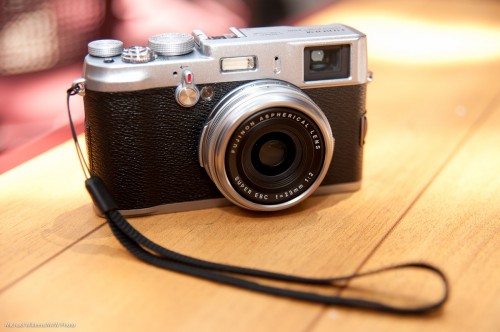
Regular readers will see that the last few days, I have been shooting with, and talking about, the Fujicolor x100 camera that I carry:

Fuji X100 (Photo: Michael Willems)

The theme has been: given the right light (e.g. flash!) and the right techniques, you can take professional pictures with it that are as good as those taken with an SLR. This is almost straight out of camera (a crop and a few dust spots removed):

Now while I am not recommending product shoots with the x100, this goes to show it can be as good as an SLR.

But now let’s take it a step farther. It can be better.

Yes, better. And here’s how:

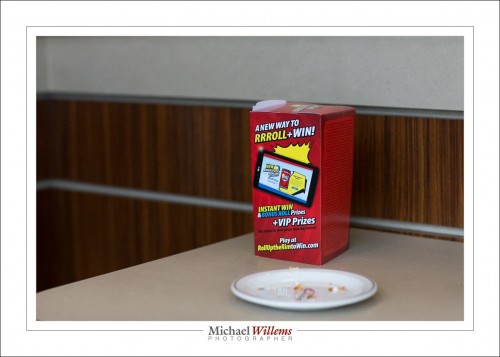
I just took that picture at 200 ISO, f/8, 1/1000 sec. That makes for that nice, dark sky.

Wait. Did he just say 1/1000 sec, one thousandth of a second? That is impossible since the flash sync speed of 1/250 second limits the shutter speed you can set the camera to when using a flash. Right??

Wrong. The x100 has a leaf shutter. And it allows flash up to 1/1000 second. And as said, that is why that sky is so wonderfully dark. It is in fact noon and it looks bright to my eyes. But 1/1000 sec makes it dark. Two stops darker than my other cameras could have done!

But he could have done that with aperture, with a higher f-number. Or with an ND filter.

Nope. If I had, I would have run out of flash power. The flash needs to get through that filter, or through  that small aperture, and it is not bright enough at higher apertures, especially when a modifier is being used.

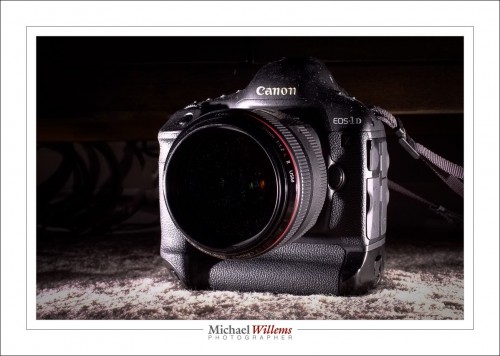
So the x100 may be small, but it can do things my $8,000 1Dx cannot do. Just saying!


Dot by dot

Have you ever looked in front of a projector as it is projector? What do you see?

What you see is little white dots of dust floating through the air. Lots of them. Dust everywhere. Normally invisible, but visible under bright light.

And that is exactly what happens under bright light when you take close-up shots with a flash.

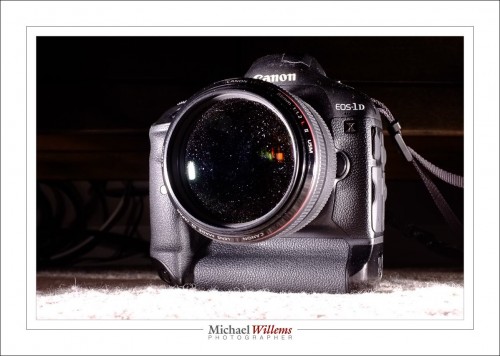
And as I pointed out yesterday, this needs a lot of work to remove. View this at full resolution (click through until you see it at maximum size) to see all the dust spots:

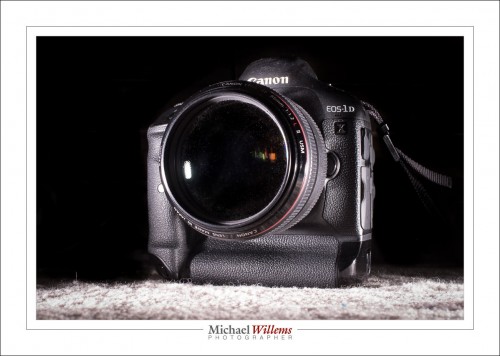
And this turns into this after a lot of manual work:

And I mean a lot of manual work. Here’s the healing brush tool and what I did with it to produce the image above:

The moral of this post: As I said yesterday, it is well worth cleaning objects before you shoot them: otherwise you have a lot of work, and work like the healing brush work above will cause Lightroom to run out of memory and other resources.

___

Want to learn all the cool tricks of Adobe Lightroom? Or the use of flash, so you can use a little camera (or your big DSLR) to take shots like the above? Contact me (michael@michaelwillems.ca) and I will help you. In person, at your location or mine; or through Google Hangouts, wherever you are in the world. Worth every moment of your time, I promise. Photography is an amazingly fun and rewarding endeavour, whether as a hobby or professionally.


Yes, you can.

I teach Lightroom, among other favourite things I teach. And that means I see many students’ computers.

And often, I see less than I expect. Often, options, important options, are missing.

Like the toolbar.

What toolbar?
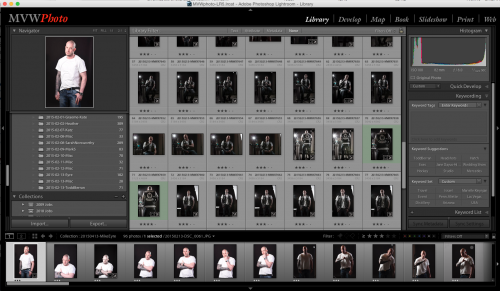
No toolbar there.

I mean the toolbar that appears when you turn it on by pressing the letter “T” (it toggles, so if it is already there, it will be removed), or by using the menu function VIEW–TOOLBAR. This toolbar, in other words:
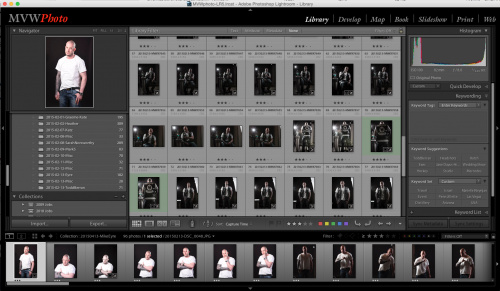
See it there, between the grid and the negative strip?

Now, within that toolbar, see the last option, that pulldown arrow? Click on it and you see a bunch of options. You may want to turn those on:
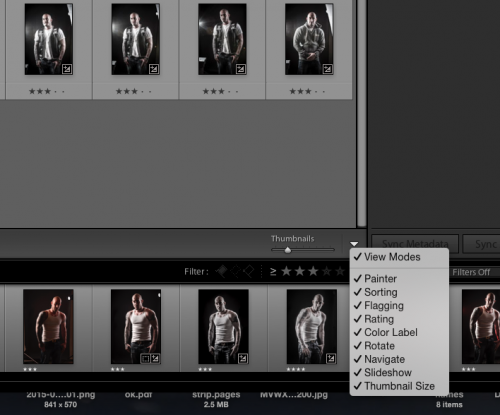
Now your toolbar will have all the tools. Check them out, then disable the  ones you are sure you will not use.

Another option that is often missing is also a very handy one: the filter bar. At the top. You toggle that one by first being in the LIBRARY module (press “G” to go directly to the Grid view, for instance), and then pressing “\” (the backslash key).

(NOTE: In the DEVELOP module, the backslash key \ has a different, but also very useful function: it shows you the “before” view of a picture. In other words, the picture as it was when you imported it, or when you made the virtual copy. The image at the start of its edit history, in other words).

There are many, many other cool little tools in Lightroom. You do not need to use all of them, but I recommend that you use the ones you like; the ones that are good for your way of working. And there is one simple way to learn them: just check out all the menus and try every function. Learn them. Yes, you can!


End notes:

First, I teach Lightroom, and I will help you set up your Lightroom installation: file structure, import methods, backups, disks, and more. Worth every moment of the session I assure you.

Second, Lightroom only takes a few days to learn and is 100% worth your time and effort. Learn it. And as a supplement to my teaching and consulting, also watch my tips videos: see www.youtube.com/user/cameratraining/videos.

Third: just saying: if the subjects interest you, then my e-books (see http://learning.photography) are worth your money also. As is my teaching (see the same site).

 

How much is too much?

I get asked “you say use higher ISO when bouncing, if the ceiling is high. So what is too high an ISO value”?

There is no answer for that. It depends o you and your camera. My 1Dx is good, and it shows this:

12800 ISO, no noise reduction:

51200 ISO, no noise reduction:

51200 ISO, Lightroom noise reduction:

51200 ISO, Lightroom noise reduction, detail actual size (once you enlarge to real size:

So this shows that with this camera, even at 51,200 ISO, all is well and you can use this for large 13×19″ prints that look great until you are right on top of them. Even then, they look better than my pictures looked in the 1980s.

So… no worries. Be happy. I shoot up to 1600 ISO without even thinking about it. Learn what you will accept from your camera, and then live a happy life unworried by high ISO concerns.


Workflow Tip

Here’s part of my Lightroom workflow:

  1. Import. Rename during import to YYYMMDD–<old filename> (e.g. file MVWX1234.CR2 gets renamed to “20150129–MVWX1234.CR2”).
  2. Rate pictures 1-5 stars, where 1=technically bad, 2=technically OK but not inspiring, 3=good to be shown to client; 4=one of the best in shoot; 5=portfolio photo.
  3. Set filter to “3 and above only”.
  4. Out of these, now decide which ones to actually use by flagging (“P, or “pick”).
  5. Set filter to “flagged only”.
  6. Edit them. Mark green (8) when done.
  7. Set filter to greens only.
  8. Export as required.

As you see, I create a funnel. As in “1000 images gets made into 850 “3+” images, and eventually to 600 picks”. It’s all about efficiency.


Fringe.

Or rather, de-fringe.

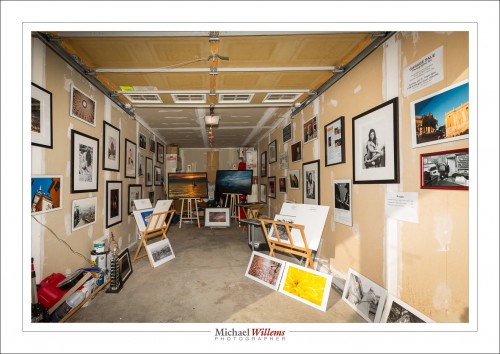
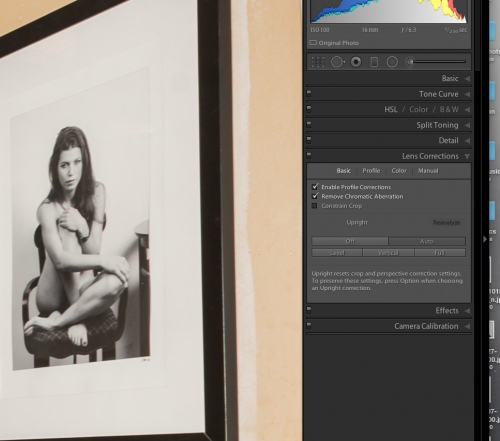
Look at this photo of my garage during last Sunday’s garage art sale:

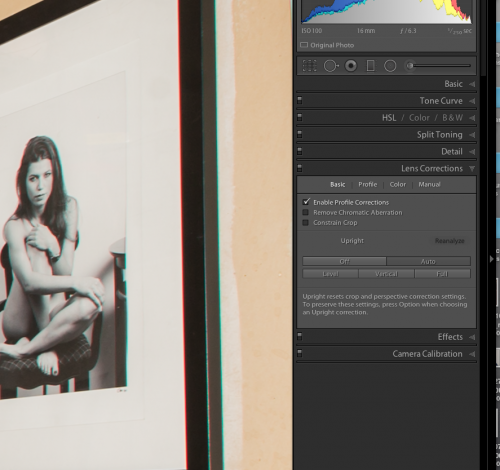
But look at original size and at the very edges, where there is back light (think: a tree against a sky), you will see some colour fringing (known as “chromatic aberration”). Look at the black picture frame, or perhaps even more clear, at the model’s head, and you will see purple/red on the left, blue/green on the right (it may help to look at the image full size):

Now, in the “Lens Corrections” panel, you see the option “Remove Chromatic Aberration”? Let’s click that on. Now we see:

Can you see how it is now gone? You can go into the “Color” tab within this panel and tune the settings, but you usually do not need to do that.

Now, back to the exhibit. Look at the full image at its original size. That was my Garage Wall Art Sale. Now “was”: it is my sale, since it is ongoing. I am selling framed prints and unframed prints, mainly at 13×19″ size, some larger, in categories including:

  • Colourful: images whose bright colour is the main feature
  • Travel and cities: images of iconic cities like New York, Hong Kong, Toronto, London, Jerusalem, and so on: I have worked in 40 countries.
  • Black and White: images that look great as artistic B/W prints on any wall.
  • Nudes: artistic nudes, of which I have hundreds, featuring my muses
  • Sailing: showing that even “Lake Onterrible” can look great.

These prints are handmade by me on permanent museum quality paper using permanent pigments (not dyes, which can fade after just a few decades). They are also autographed, and are made in limited editions or even as one-offs.

In other words: they can form the basis of your wall art collection. Collecting such wall art can be an amazing hobby. See www.michaelsmuse.com for more detail, and remember: if you buy out of the garage, Garage Sale prices apply, and these can be as low as one quarter of art gallery prices. So, come see what’s in the bins and display racks and decorate your home with originals today.


Exposing to the right

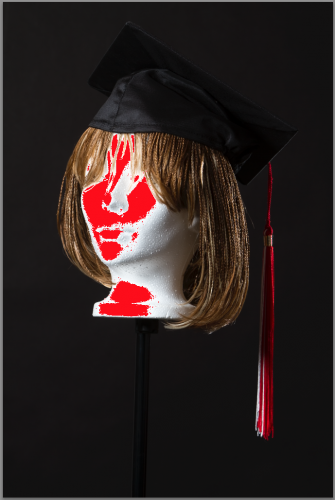
I am studio shooting, and I like to get my exposure right. And there’s one things that always occurs to me: the difference between camera and Lightroom. The camera says this image is overexposed:

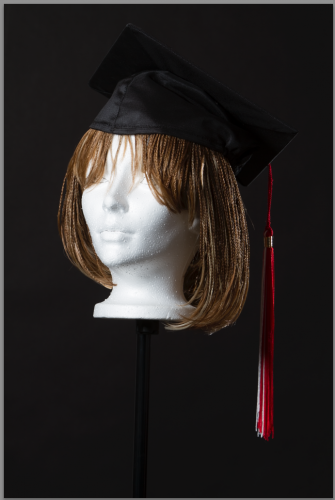
That’s what it looks like on the camera. But in Lightroom, that same image looks like this:

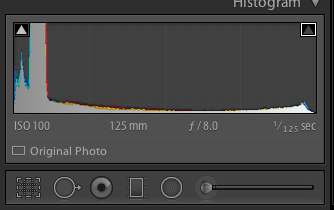
Looks pretty perfect, and that is confirmed by the histogram:

There are several reasons for this.

  1. The camera shows me the JPG that is built into the RAW as a preview. But in Lightroom, I have the actual RAW. Which has more exposure space due to its having more bits per colour channel.
  2. Lightroom prevents overexposure when importing, as part of its current develop profile (so if you like overexposed backgrounds, tough—I have commented on this before).
  3. Cameras and Lightroom are not calibrated the same. There’s always some difference.

So here’s my studio tip for the day: know your camera, and know how to expose on your specific camera to get an image that is exposed to the right (i.e. bright white areas appear at the very end on the right in the histogram, without actually touching the right side). Every camera is different. On my 1Dx, for instance, I need to see overexposure by about 2/3 of a stop, in order to get a Lightroom image that is just shy of being overexposed. As long as you know, this does not matter.

1/1/2015: you have a few hours left to buy three of my e-books at a 50% discount. Only today!


Full-frame sensors: The advantages

Full-frame sensors have several advantages over smaller sensors:

  • Full frame sensors have lower noise (better quality) than crop sensors with the same number of megapixels. This means they are better at high ISO values, where noise can become a problem, than crop sensors.
  • The viewfinder is larger and brighter.
  • You can achieve slightly blurrier backgrounds.
  • Wide-angle lenses work as wide-angle lenses on a full-frame camera (as opposed to on a crop camera, where each lens works as though it were longer, compared to using the same lens on a full frame camera).

That’s a nice list, and it explains why most pros use full frame cameras, but there are also advantages to using slightly smaller sensors:

  • They cost less.
  • They are smaller, so cameras with a crop sensor can be slightly smaller.
  • They can use special lenses (DX lenses for Nikon, EF-S lenses for Canon, etc) that were made especially for smaller crop sensors; these lenses are therefore smaller too, so they cost less and weigh less.41
  • Lenses “appear to be longer” by the crop factor compared to the same lenses used on full frame cameras: this is obviously an advantage if you need a long lens, such as when shooting lions in Africa.

Drawback of these lenses: if you upgrade to full-frame, you need to replace your lenses.

Effect on Apparent Lens Length

As said, crop cameras “appear to lengthen a lens”. That is, a 35mm lens works like a 50mm lens when used on a crop camera; a 50mm lens works like an 80mm lens when used on a crop camera; a 200mm lens works like a 300mm lens when used on a crop camera, and so on.

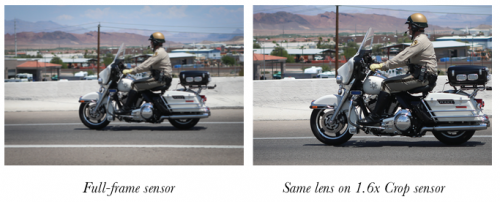
The same lens, for instance, mounted on two cameras with the same number of megapixels, one with a full-frame sensor and one with a crop sensor, might give these two images:

In this example, on the 1.6x crop sensor (the sensor that is 1.6x smaller than full frame), the same objects in the resulting image would be 1.6x larger. An advantage when you want telephoto behaviour; a drawback when you want wide angles.

Let’s Be Clear: Unless otherwise mentioned, in this book, when we discuss lenses and what they do, we use the behaviour when that lens is mounted.

on a full frame camera, i.e. we describe the lens “as it would work on a full- frame camera”. So when I say a 50mm is standard lens, I mean it is a standard lens on a full frame camera (on a crop camera you would use a 35mm lens for the same effect).

“What type of lens should you buy?” The choice is up to you. Both full-frame and crop lenses have advantages and drawbacks. Only you can decide whether quality is most important to you, for instance, or money.

Either way, any modern DSLR will provide quality beyond that of good professional cameras even just a few years ago. This is a great time to be a photographer.

The article above is part of Michael’s “Mastering Your Camera” book, obtainable from http://learning.photography. You can get a full chapter preview from here.