De gustibus..

…non est disputandum. You can’t argue over taste.

As regular readers know, I like to shoot “in camera”, and keep post editing to a minimum. For the most part, my photos are basically SOOC: “Straight Out Of Camera”. But sometimes. I make exceptions.

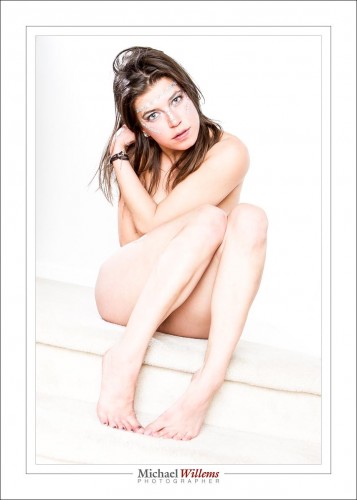
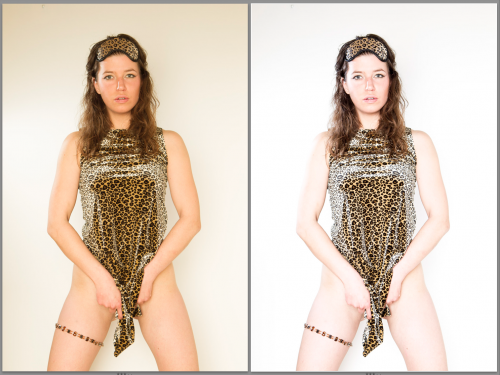
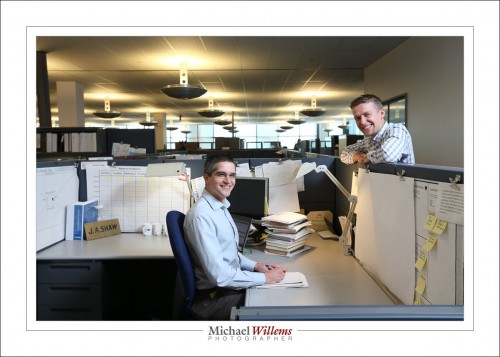
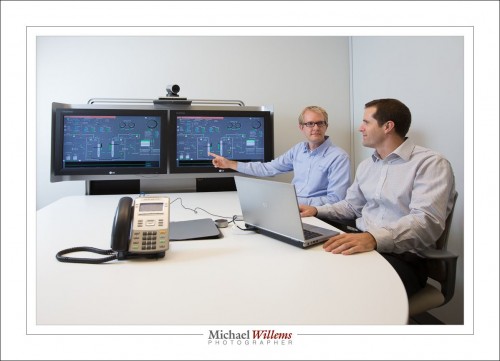
One is this style, a very bright, contrasty, cool, desaturated, sharp style that mostly loses everything into pure white, making eyes and other features stand out dramatically.

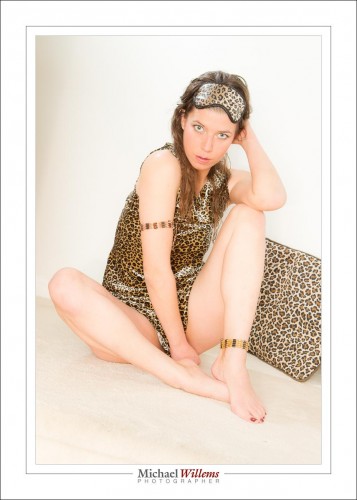
Here’s another example, before and after, so you can see what I did. Here’s the original, before the edit:

Shot at the following settings (press “i” in Lightroom repeatedly to cycle through the Information options):

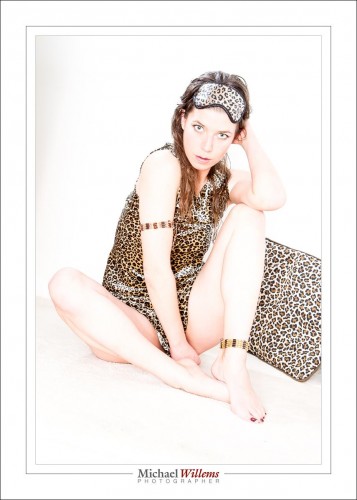
After the enhancement:

Note: the “before” picture was not bad. I strongly believe that you should use techniques like this to enhance, not to fix.

I like this so much that I made it a User Preset. After making your adjustments, click on the “+” in the Develop mode’s preset panel on the left.

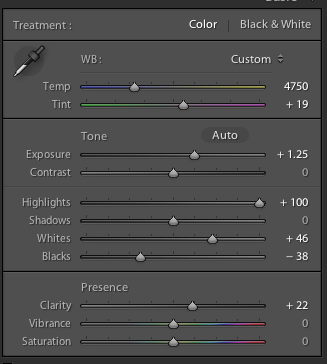
This preset consists of the following adjustments:

…in addition to which, I set “sharpening” (in the DETAIL panel) to +80 and “noise reduction” to +20.

Here’s a side-by-side comparison of an image before and after:

I like that sharp look a lot.

Be careful not to overdo it and apply a particular “look” to all your work. Aim to do it in camera, and apply styles (via presets) only when needed, when they add something. As I believe this one certainly does.

___

BUT MICHAEL, I hear some of you say. “you are giving away your secrets”. Yes, I am. Because adjustments can be found anywhere. What cannot be easily copied is my artistic insight, people skills, $30,000 in equipment, and experience.

Would you like more secrets? Be my guest: have a look at the Christmas Specials on learning.photography: see http://learning.photography/blogs/news right now.

Miss Info

A friend and student, the other day, would not let me format her memory card. “Nooo”, she almost shouted. The reason? Some Internet-famous wedding/family/baby photographer said, on her blog, that formatting is harmful for memory cards.

That is spectacularly bad advice. Let me assure you that not only is formatting a card not harmful, it is beneficial for you. Without formatting each time, eventually, memory errors such as lost clusters, excessive fragmentation, and so on will creep in and destroy your content. natural degradation will not result in areas being mapped out, as would happen if you formatted. Of course data loss can happen anyway (see yesterday’s post), but the chances are greater if all you do is delete rather than format. Bad, bad idea.

Where did this photographer get the idea that formatting is bad? What qualifies her to give opinions on technical issues like this? Now, I do not know this photographer; I do not even know her name,. What I do know is that her advice is bad. Perhaps she has an electrical engineering degree, like me, but that does not mean she cannot be wrong. And here, she is.

Which brings me to today’s subject: the Internet is a dangerous place, full of misinformation. Read, but read more, and read counter-opinions, and check out the writer’s qualifications. I would ask Sandisk and Lexar, or canon and other camera makers. And I am pretty sure they’ll recommend that you format a memory card after, or rather before, each use.

Yes, formatting wears out a drive, as does every type of writing to it. But only after many write cycles—think millions. If you format a card hourly for half a century, you may perhaps see degradation. But that is hardly likely, is it?

My moral: careful whom you believe. Hesitate before you take legal advice from me, dental hygiene advice from an obstetrician, or electronics advice from a baby photographer of some repute. Just sayin’.

Oh yes, and format those cards. Frequently. Every time.


Remember: Ten Memory Card Tips

A word, and a few tips, about memory cards. And how today, another CF card lost its content during—in the middle of—a shoot.

My CF card failed with “error reading contents” while importing into Lightroom, during a commercial shoot today. This was a CF card, connected to my Macbook Pro through a card reader, on location. Embarrassing to say the least.

I suspect the card reader is the issue, since this is the second card in a month, same way. Regardless, I lost the contents and had to reshoot a part of my shoot. Ironically, this happened after I had, just moments earlier, remarked to my assistant that I was taking a risk, shooting part of this shoot on a Canon 7D, which does not allow saving the same issue to two cards simultaneously. And sure enough. Note to self: use the 1Dx every time, not almost every time.

Ten Tips for memory cards:

  1. After use, format your memory cards; do not “delete all images”.
  2. Do this formatting every time—after you make and verify a backup of the photos, of course.
  3. Do it in the camera, never on the computer.
  4. If a piece of equipment fails, discard it. Take no chances.
  5. Use cards that are as fast as you need—no faster or slower.
  6. Use cards that are as large as you need—no larger or smaller. I recommend that you use multiple smaller cards, not one large one. I use 16 GB cards and 8 GB cards.
  7. Push cards in, and pull them out, gently and slowly. And preferably after you turn off the equipment’s power.
  8. Unmount the cards before removing them from the computer.
  9. Deleting is never permanent; formatting may or may not be.
  10. You can often recover bad images. Both Lexar and Sandisk offer utilities that help recover images from “bad” cards.

My assistant today was Maged:

As always, he offered good advice; he was a “second pair of eyes”, which is what a good assistant should be.

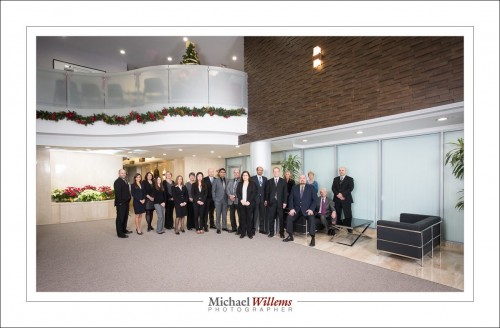
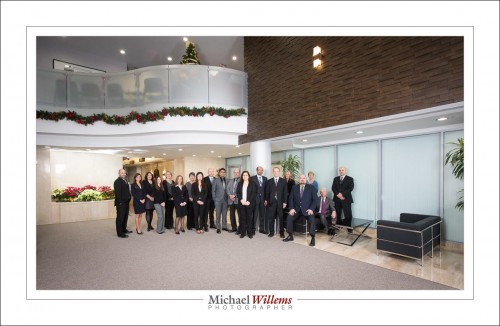
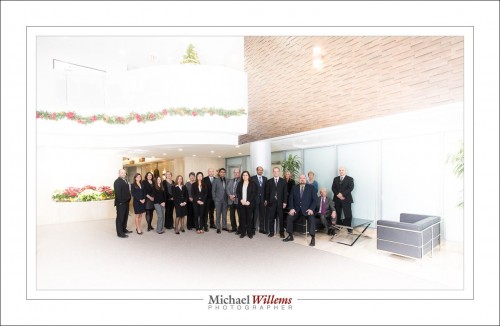
Here’s that group shot with a little post-crop vignetting:

But we could go the other way for effect, and vignette positively:

I have never done that, but one day I will.

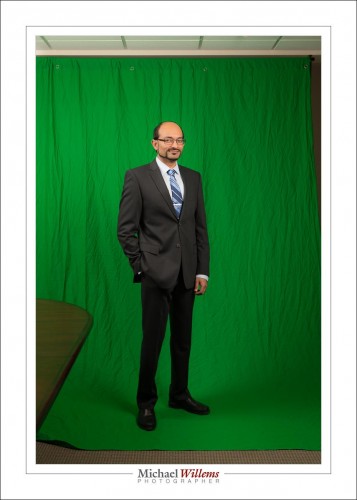
Part of today was a “green screen” shoot:

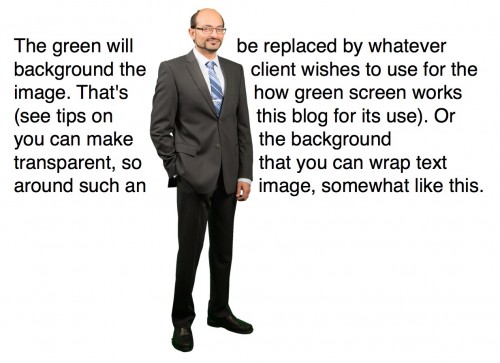
The green will be replaced by whatever background the client wishes to use for the image. That’s how green screen works (see tips on this blog for its use). Somewhat like this, where I made the background transparent:

And now, back to finishing my images. After I unpack the truck, that is. Photography keeps me fit.


High speed flash.

High Speed Flash. Also known as High Speed Sync, or HSS, or “Auto FP” flash. Your camera/speedlight combination probably has it. Let me explain what it is, why it’s good, and why it’s nevertheless seldom useful.

First, the term “High Speed” is a misnomer, since it is actually slow speed flash. Let me explain.

Normally, a flash lasts 1/1000 sec or less. At 1/32 power, it’s only about 1/30,000 second. Very, very fast.

But there’s a problem: the shutter cannot keep up. You see, the shutter needs to be fully open for that quick flash to be able to illuminate the whole sensor, but at speeds above 1/250 second, the camera makers use a trick to get faster shutter speeds: instead of opening fully, an ever narrowing slit of light travels down the sensor, so the shutter is never actually fully open.If you try to use flash, only part of your picture will be illuminated.

But there is a trick: HSS, or “Auto FP” flash. When using HSS, instead of flashing once, the flash goes FlashFlashFlashFlashFlashFlashFlashFlash very rapidly (at a rate of 30,000 times a second).  This makes it into what is effectively a continuous light. As the narrow shutter slit travels down, the FlashFlashFlash keeps going on and hence the flash illuminates the sensor gradually.

So, set your camera (Nikon: camera menu, select “Auto FP” flash sync) or flash (Canon: set flash to HSS symbol) to high speed and you are set to go. You can now use any shutter speed, up to whatever. 1/4000? Sure. Go for it.

The problem? HSS loses most of your power (you are illuminating the closed part of the shutter, after all), so your flash range is reduced. At 400 ISO and f/8, my flash has the following maximum range:

  • 1/30 sec:     9m
  • 1/60 sec:     9m
  • 1/125 sec:   9m
  • 1/250 sec:   9m
  • 1/500 sec:   3m
  • 1/1000 sec: 2m
  • 1/2000 sec: 1.5m
  • 1/4000 sec: 1m
  • 1/8000 sec: 0.7

So up to 1/250, varying the shutter speed, as you would expect, has no effect. But then HSS kicks in, and the range starts to drop dramatically. At 1/8000 sec, my flash, at full power, only reaches 70cm (about 2 ft). And if you are using a modifier, like an umbrella, forget that: you would be lucky to get a few inches.

So while HSS is a great idea, it is not very useful in most practical situations. Because you are most likely to need to need it when it is bright outside, but that’s also when you need most power and cannot afford to lose any. Catch-22, since HSS steals from Peter to pay Paul. Now you know.

Math buff note: can you see any math logic in the numbers above? Yes, every stop faster shutter speed loses you the square root of 2 (roughly 1.4)  in available range. So, two stops faster shutter means half the range.


Post

I shoot RAW always. But today I shot JPG, in a corporate annual report shoot.

One of those started off as a JPG; one as a RAW. Can you tell the difference?

No. And that is the point: if you expose well, and need no changes, JPG is fine. It is because we don’t always shoot well and get all settings right, and because we sometimes want changes, that we shoot RAW.

So why did I shoot JPG?

Because my main memory card went south in the middle of a this all day corporate shoot. I lost the RAW pictures. Yes, cards go bad randomly sometimes.

So I used the backup pics, the JPGs I wrote onto card 2 in my 1Dx. Thank God for the dual card system.

Fun shoot, and the day was saved thanks to this camera feature.

I am so tired at 2:15Am that I cannot type. But I want ed to share this, one more time: Please, please, please make backups of everything, always. Please, please, please make backups of everything, always.Please, please, please make backups of everything, always.


Canon 1Dx note.

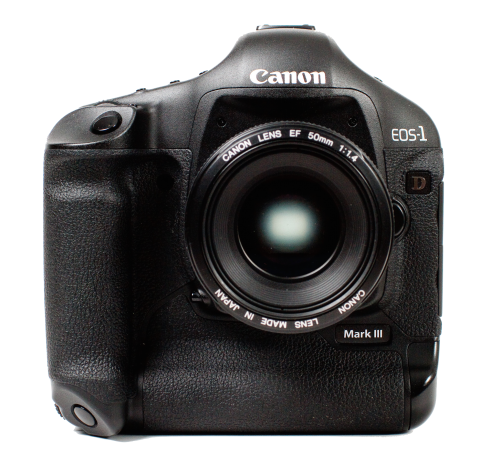
A note for fellow owners of the Canon 1Dx — but in general, for all others too: it always pays to learn your camera inside out.


You use your camera by looking through the viewfinder only, as you are shooting. That is the way to do it quickly and, if you will, professionally. Never take your eye off.

The problem is that you can change aperture and shutter and instantly see the meter move, without taking your eye from the viewfinder. But ISO? You need to find a button, and while you adjust the ISO value, the meter display goes away. So finding the right exposure by adjusting ISO is an iterative process: trial and error. Takes time. Not professional.

Until you know the camera!

The solution:

  1. Go to the Quick menu (“Q”)
  2. In that, navigate to the bottom right option, “Custom Controls“.
  3. In that screen, go to the SET Button.
  4. Adjust it to Set ISO Speed (hold btn, turn wheel).

Now to set ISO while looking through the viewfinder, you simply press the SET button and turn the front wheel. ISO adjusts and the meter still displays throughout the process. Problem solved!

Owners of a 5D MkIII: is it the same? Other cameras: same?

___

Solve your Xmas shopping needs right now, this minute: buy a gift certificate and/or the e-books. Scroll down to yesterday’s post.

Beginners Tip: Backups

I just encountered someone who had a Canon 5D Mk3 and who did not know that this camera can write images to two cards at once. This lack of knowledge of basics is surprisingly common: it’s not as thought he manuals are clear, and if you are not technical, there’s many things you will never find out. (That is why you take training: if you come to me for a private session, I will go through all your camera settings with you).

But this one is important. Because every picture needs to be in two places, from the start.

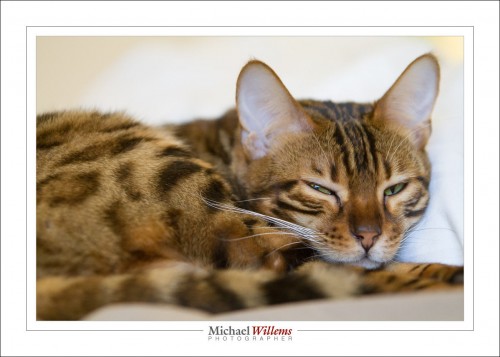
I say that because all media are temporary. All memory cards break, all hard disks break, all computers break, all CDs and DVDs and Blu-Ray disks develop “read errors”. Even if that did not happen, things fall (ask my cats); things get stolen; homes catch fire. You need to count on this. And if you count on this, you will have backups from the start.

When I shoot something important like a wedding, therefore…

  1. I use my 1Dx, because it can write to two cards at once. I send RAW images to one, and write large fine JPG files to the other as a backup. JPGs will do for the backup: if I do have a card disaster, I will live with them, and my work is good “SOOC”.
  2. As soon as I have the images on the computer, I verify them and I make a backup to a second disk.
  3. It is only then that I format the memory cards (yes, format every time).
  4. I regularly make a backup onto a third disk, which is stored off premises. Just in case (fires, remember?)
  5. And finally… I make prints. Large prints. Files can disappear; prints, good prints, will last for hundreds of years.

Have no backups? Please make them today. I have seen to many disasters. Real disasters, like the woman who lost all the pictures she had of her deceased son. Irretrievably lost. Yes, that happens: sometimes recovery services can get important files back, but often, lost really is lost.

And backup disks are not expensive:

And this ad is older, they are even cheaper today. So please—back up your files today. You’ll sleep better.


Manual or TTL?

When making flash pictures, your camera will be on manual mode—I hope so, anyway. It’s the way to go. This means you set ISO, aperture and shutter yourself.

But your flash does not need to be on manual. That is to say, flash power can still be metered and be adjusted by the camera, automatically. We call this “TTL” (Through The Lens metering). And TTL can work even when the camera itself is on manual.

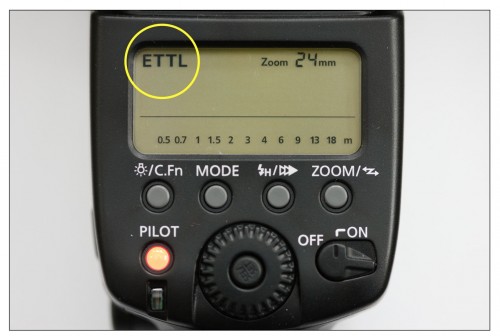
When your flash is in TTL mode, the back looks something like this:

You see TTL, ETTL, TTL-BL, i.e. something containing the letters TTL. This means the flash power is adjusted automatically by the camera. If you are close to something, the flash will fire at low power; if you are far away, a high power flash will be emitted. Magic!

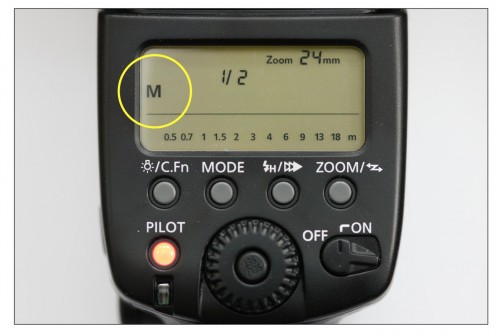
The alternative is that you set the flash power. Manual flash, in other words. Press the MODE button on the back of the flash and set it to Manual:

In the photo above, the flash is set to half power (1/2). It could also be set to full power (100%, or 1/1), or to quarter power (1/4), or one eight power (1/8), one sixteenth (1/16), and so on; or to some level in between.

Try this now. Set your camera to manual mode, 1/40 second, 400 ISO, f/4. Now turn on your flash and set it to manual, and set it to 1/64 power. Using the viewfinder, take a photo. Check the photo: You will probably be hard pressed to see the flash, especially if your subject is far away.

Now set it to full power (1/1, or 100%). Do the same again. Whew, probably a grossly overexposed picture!

But you probably noticed something else. You did not see the flash through the viewfinder. “Did it work?”, you may well have asked. That is because when the flash is on manual, it fires just once, at the power level you set. You do not get the metering pre-flash that it uses when set to TTL mode (a flash at 1/32 power that is used to determine the needed power level). And that preflash is the one you can see through the viewfinder. The actual flash you cannot see!

Now, an exercise.

  1. Find an object to photograph. With the camera set as before, and the flash on MANUAL, find the correct power level for a good picture. Aim the flash straight ahead for this exercise.
  2. Now move 40% farther from the object. E.g. if your original distance was one metre, make it 1.4 metres. Or if you were 4 feet away, make it 5 feet 7 inches (that is 40% farther than 4 feet).
  3. Now find the correct power level for this picture. How much more power did you need? And (an advanced question for mathematicians): why? (Hint: it’s actually 41.4% farther).

Have fun.


High ISO on a Canon 7D

You know, forget using a Canon 7D (original) above 800 ISO: it’s just too noisy.

Oh? So how did I take the picture above at 3200 ISO?

Simple. By exposing right. I.e. by exposing bright.

Bright is right.

Bright pixels are sharp pixels.

If you expose on the bright side, noise is not nearly as bad as you may think. Just avoid muddy, murky, noisy pictures. “3200 ISO and bright” is much better than “800 ISO and dark”. Cockroaches hide in the dark. As do millipedes, politicians and noise and grain.Bright is good; “extra bright and then pulling the picture back in post” is even better.

The moral of this story: Do not be afraid to go to high ISO values if you have to. Just do it right: and expose brightly.