RAW or JPG fine?

A friend just asked:

Hey Michael, How would you rate JPEG FINE vs RAW or TIFF? I am getting 8 meg JPG FINE file sizes and they are also OK to upload onto face book, go figure… I like the idea of RAW larger file sizes, even though they do require extra processing to use in Photo Shop. Is it worth it in the end?

Good question.

JPG fine and RAW are about the same quality, sure.

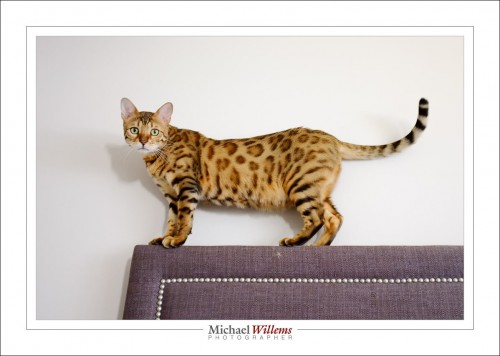
A JPG of Shiva the Bengal

But JPG is the end result, while RAW is like a negative. RAW is better because:

  1. It has more colour bits (11 or 14 per colour, not 8 like the JPG). Meaning, more ability to fix, if you under- or over-expose or if the picture contains a high dynamic range.
  2. Settings are not yet applied, they are suggestions only. Setting like colour space, white balance, contrast, sharpening. In a JPG, what you see is what you get; in a RAW, you can roll back the settings.

Both reasons are showstoppers in some images.

So you can shoot JPG if you never make a mistake, and if you never need to change your mind on a setting like colour space or white balance. (Get the idea?)

But extra work? In Lightroom, select all, then “save as JPG”. Two clicks of extra work–but you get the chance to edit before you do that, if you like.

 

Upgrade

Yoo hoo! I upgraded today.

To this:

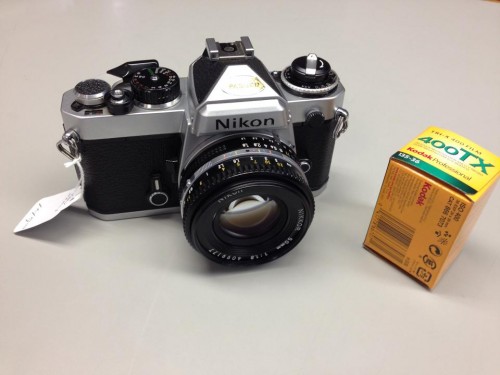
A Nikon FE SLR with a 50mm f/1.8 lens. Great condition, $150.

OK, so maybe a Nikon FE from, I am guessing, 1981 or 1982, is not an upgrade. But in some ways it is, and that is what I want to briefly talk about.

First, though, what is missing on a film camera like this Nikon:

  • “Each click costs $1”.
  • No instant feedback so I do not know if the picture worked.
  • After pictures, I need to wait a week to see my images.
  • A lack of virtually all technical functions.
  • No autofocus, no matrix metering.
  • No program mode, no shutter priority mode, no scene modes.
  • On-off switch is the wind lever, and for a left-eyed person like me, that is inconvenient
  • Just 36 clicks and you have to mess about changing films!

And some of those are huge drawbacks, the first two in particular; and that is why we shoot digital now.

But now we come to the benefits, and why in many ways this is an upgrade.

  • The camera is small and light. No ten pound brick, and yet it has full SLR functions and a full frame sensor… well, negative.
  • It is incredibly well made, Workmanship, engineering, materials: solid.
  • It has a “split screen” viewfinder with manual focus. That kind of manual focus is so accurate, and is such a pleasure to use, that I totally miss it today.
  • It has an analog meter, not a display consisting of little LEDs. That means fast response and great precision.
  • Its battery lasts for years. Not “a day”. Talk about retrograde steps in technology.
  • It is beautiful.
  • Above all: it is simple. It allows me to adjust ASA to match the film, and to set aperture and shutter speed in one stop increments. Shutter can also be automatic, so that is Aperture priority mode. (I.e. “M” and “A” are the only two modes). Those are the basic controls; that is exposure!
  • In addition, I can set exposure compensation; it has AE lock; a self timer; a mechanical backup of 1/90th second only, Bulb mode, a sliding battery check button, and an aperture preview. And that is it!

With a film camera, you have to get it right, So, just to show I can still do it, I bought a roll of Tri-X and I’ll take some photos in Toronto tomorrow. And then I’ll hunt down someone who can develop and “digitize or print”.

Fun fun fun~!


HDR

HDR, or “High Dynamic Range” is a digital technique that squeezes together two or more images that were taken with different exposure settings, and then take, if you will, “the best from each one” and combine those.

At issue is the dynamic range in an image, which can exceed what your camera can handle. “Dynamic Range” means the difference in stops between the darkest and the brightest areas.  On a sunny day with dark shadows and bright sunlight this  simply cannot be handled by your camera: either the darkest areas are exposed properly, or the brightest areas, but not both.

HDR solves that: you take one image with the darkest areas well exposed, one with the lightest areas well exposed, and perhaps one or more in between, and then magically combine them, using software like Adobe Photoshop, which has HDR functions built in, or market leader Photomatix.

Problem solved: the entire image is now well exposed, dark areas as well as bright areas. In essence, the software reduces the dynamic range; we call this tone mapping.

“Artistic” HDR—More than using HDR to solve dynamic range problems, you can use it to give pictures a strange, hyper-real, otherworldly look. This is very popular.

It is also very risky, I think, for several reasons.

One is that the novelty wears off very quickly. Initially, the first time you see such an HDR, you think “WOW!” in capitals. But a little while later, you shrug, and say “oh, yet another HDR image, yawn”. In the future, we will say “oh, HDR special effects… that’s so early 21st century”.

The second reason is that when you do this kind of HDR, you are not really a photographer, but rather, a graphic artist. That is fine, but do realize that this is what is happening: you are getting praise for something you did not do (great photography), and for something that wasn’t actually there (unless you were taking LSD). Nature simply does not look the way that “obvious HDR” makes it look.

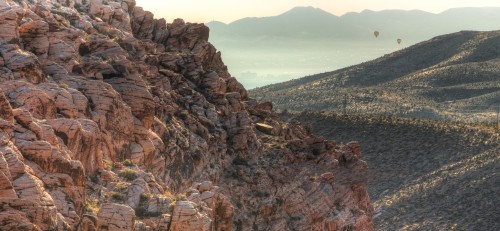
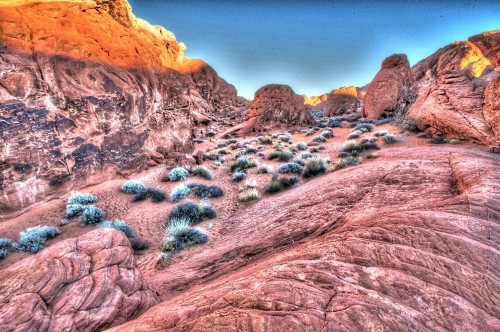
But that is my personal opinion. By all means play with art effect HDR (I have, too), and by all means produce some works of art this way. Just don’t do it for every image you produce forthwith. Now, an example of that kind of HDR. Deliberately overdone and bad:

Ouch!


Lightroom trick

You have an iPhone or similar? Then do this: in every location you shoot, take an iPhone shot first. Because iPhones have GPS coordinates built in.

First add all pictures to a collection. Go to that collection. Select all pictures.

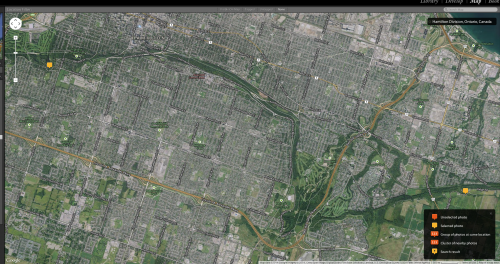
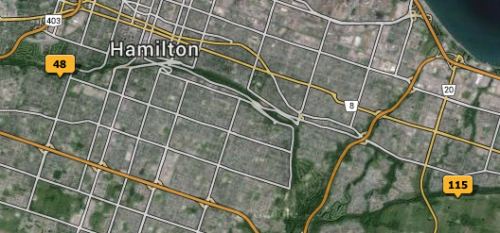
Now go to the Maps module. You see the locations show up. But look at the numbers: you see only the iPhone shots show up, like this, of the two locations I shot waterfalls at, the other day (the yellow dots top left and bottom right, and both say “1”, meaning “in what you have selected, there is 1 shot at this location”):

Now in grid view, select all the shots you took at the first location They all show as selected. Then click once on the JPG shot: it shows as more brightly selectd.

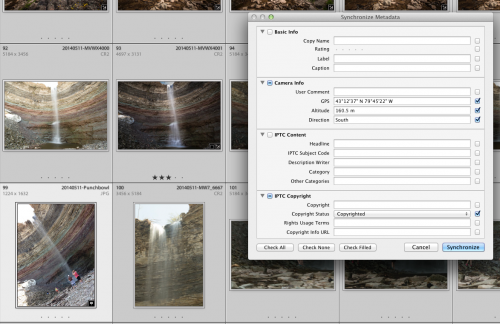
Now you can, from the METADATA option in the menu, select “Synchronize Metadata…”:

And if, as here, you “super-selected” the iPhone shot, which has GPS data, the GPS and altitude fields are filled in. Now turn on the tickmarks as I have done, and when you click “Synchronize”, these fields will be synchronized to all the other photos in that location.

Now repeat that for the next locations: select them, super-select their iPhone shot, and sync.

Now the numbers show the actual numbers, i.e. all photos now have locations built in:

A simple, effective way of getting GPS data into your pictures even if your camera does not have built-in GPS.

Cool, or what? Yes, Lightroom is full of such tricks. And so am I.


Full frame or not?

I am often asked “should I go full frame”?

A full frame camera is a camera whose sensor is the same size as a negative used to be. Cheaper cameras, on the other hand, have a slightly smaller sensor. We call these “crop cameras”.

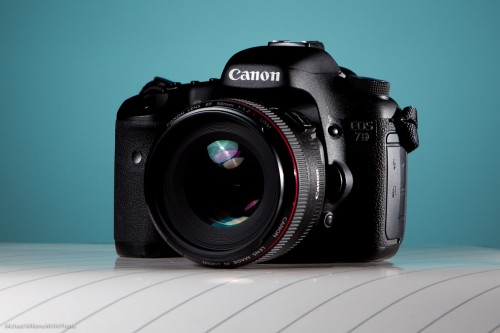
The Canon 7D, a crop camera

Making a camera with a smaller sensor means that it, and its lenses, can be:

  • Cheaper
  • Lighter
  • Smaller

That’s good. But it also means a few not-so-good things:

  • Smaller viewfinder
  • Lower picture quality (more “noise”)
  • Slightly lower ability to create blurry backgrounds
  • Lenses “appear longer”: good when you want telephoto; less good when you want wide angles.

So you take your pick. Most people start with an affordable crop camera, but go to full frame eventually.

More importantly: lenses. Some lenses can only be used on crop cameras. These lenses (EF-S for Canon, DX for Nikon) are cheaper, smaller, lighter—but they are less future proof. The other lenses can be used on any camera: crop as well as full-frame. It is the latter kind of lenses I recommend, in case you go full-frame at some later stage.

Now, off to a Toronto bank to do executive portraits. Later!


Flash too dark. Why?

Say you take a picture, and say that the flash part of that picture is too dark. Like this:

There are two possible reasons, and it is important to distinguish between them, since they have two entirely different solutions.

  1. The flash part is too dark because your camera and its TTL metering system metered the flash incorrectly, so it somehow decided on too low a flash power setting. This could happen because of subject brightness (a white subject); because you moved the camera; because of spot metering errors; because you set the camera to the wrong mode (it should be on “TTL”); or simply because of errors in the metering system.
  2. There is simply not enough flash power available, given the chosen aperture and ISO settings.

So how do you know which one of these reasons is causing your dark flash picture?

Simple. Turn the flash, which is normally set to TTL, onto MANUAL mode, and select full power (100%, or 1/1). take the photo.

If you now see something like this, then the error was metering:

This means: given the selected aperture and ISO settings, there is enough power available, the camera just chose not to use it. The solution is to meter accurately, perhaps using matrix metering, or spot metering off a grey card; avoid recomposing; ensure that the connections are all clean and intact.

If, however, on full manual power you see the following, then there simply was not enough power available:

I.e. the camera would have liked to select more power, but it simply was not available. The solution in this case is to increase your ISO, or decrease your “f-number”, or bring the flash closer to the subject—or a combination of several or all of those.

___

Many more tips when you take one of my courses, or read my e-books, especially “Pro Flash Manual”, from this page on the e-store.

Trixie

A trick for you today; a post-processing trick.

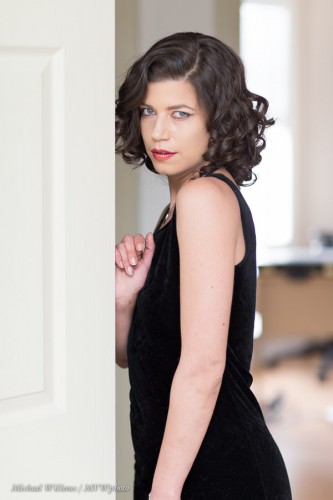
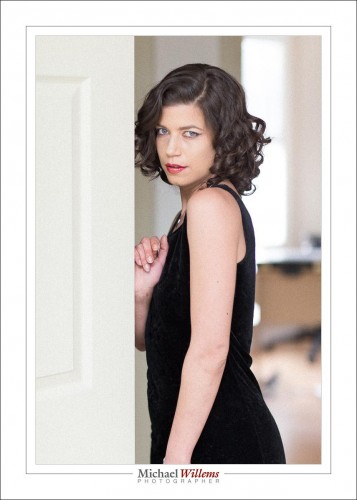
Say you have a shot you like, like this model pose:

(1/125 sec, f/2.0, 800 ISO, using a Canon 1Dx with a 85mm f/1.2L lens. Ambient light plus bounced flash set to +1.7 FEC.)

But… when we look closely, we see that alas, it is out of focus:

Sharpening does not help, with an image that is out-of-focus to this extent:

So now we add film grain by moving the EFFECTS–GRAIN slider up to +66:

Unlike “digital noise”, film grain looks pretty cool. Like old higher-ISO Kodachrome film. And the key point here: we no longer notice the unsharpness as much. This image is now acceptable!

As a bonus, any skin blemishes now also disappear into the grain. The final image looks good:

So if an image you have is not ideal, do not give up. Images worse than this have been rescued. If it is really bad, make it B/W as well. And often, you end up with a perfectly good picture where the grain adds to the atmosphere.


The secret of fluorescent

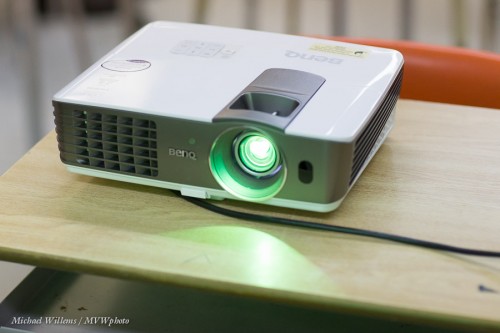
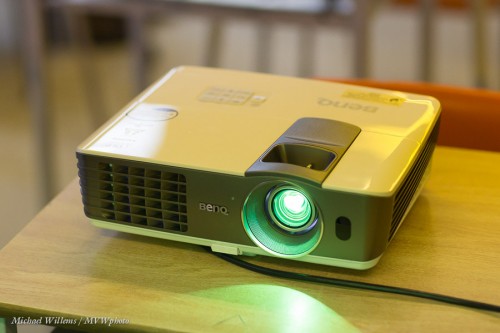
Consider this: two images taken at the same time.

Same projector. Same time. Huh?

A hint of what happened is in the projector light. It is the same hue in both images. So the camera’s white balance setting did not change. So the colour changed.

And the light, what was it?

Fluorescent, and that is the reason for what you are seeing.

Fluorescent lights are not continuous. Instead, they go off and on many times every second. Some flash on and off 1,000 times per second, but the cheaper ones go on and off 60 times a second. And that means that if you use a long shutter speed, like 1/60th of a second or slower, you will not notice any strange effects. But if you use a fast shutter speed, like 1/1000th second, then you can easily accidentally hit the part where the light is only just beginning to glow or where it is just going off.

So, when using fluorescent light, use slower shutter speeds than the light’s frequency. Which can be 1/60th second for the traditional older fluorescents.


Effective Black and White

Black and white (“Monochrome”) is very effective when you want to draw attention to the subject, not the surrounding “stuff”. We should all do more black and white.

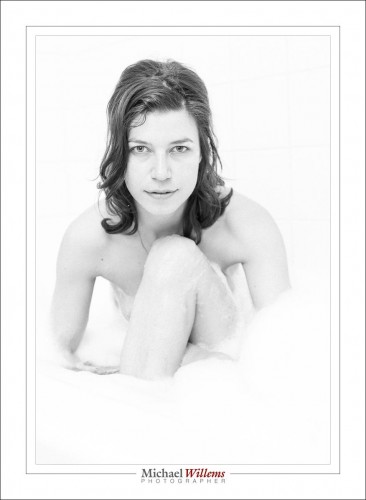
I find that in particular, high-key photos like this benefit greatly from being in B/W:

Any colour in the walls etc take away from the effectiveness. And B/W makes it much easier to make a face really stand out in this kind of light.

How do you do a picture like that? Very simple:

  • Camera on manual.
  • 800 ISO, 1/125th sec, f/5.6.
  • Flash Exposure Compensation set to +2 stops.
  • Flash aimed up, behind me. .

Why 800 ISO? To give the flash enough power. Why Flash Exposure Compensation? It’s a white scene and I want the camera to shoot it as such.

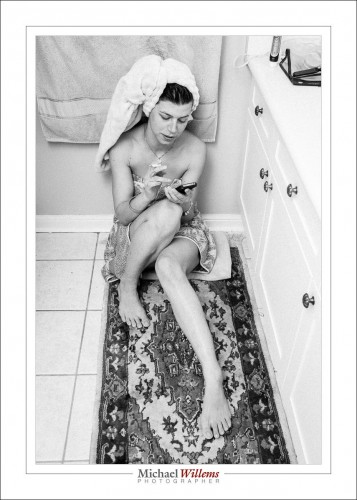
A little post work can be good in “documentary” shots like this:

Wide angle lens creates pleasing shapes.

And that post work I mentioned consists of B/W conversion, cropping/rotating, and adding a little contrast and a little film grain. Yes, ADDING film grain. Film grain (a standard option in Lightroom’s DEVELOP module, in the EFFECTS pane) is nice (unlike digital noise). Makes this look like an old B/W film picture.

Photography is such a rewarding activity.

___

Video too! I now have a new course, “Video with your DSLR”: see www.cameratraining.ca or ask me for private training. Worth it, learning to do pro video!


High ISOs again

As for what I said the other day about high ISO values, here’s a reminder. It is better to get a grainy picture than to get no picture.

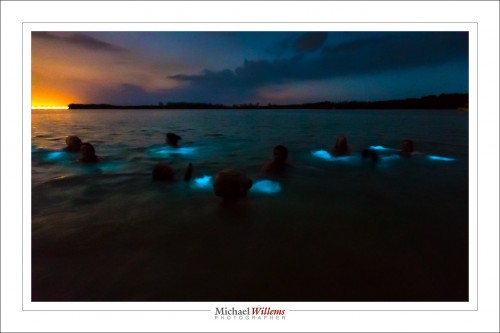
Case in point. Here’s Jamaica’s Luminous Lagoon last year, with swimmers :

That was taken from a moving boat at:

  • 12800 ISO
  • f/2.8
  • 16mm lens (on a full frame camera)
  • 1/4 second

Yes, yes, 12,800 ISO. And yes, one quarter second on a moving boat. So it took a few attempts. Note that I used the 16mm lens to get as wide as possible: the longer your lens, the faster the shutter speed needs to be for a motion-free picture. So the wider, the better for slow shutter speeds.

But the moral of the story: even when it is pitch dark, you can often get better pictures than you thought. Always try, and do not be afraid of high ISO values if that is the only way to get the picture.