Delete?

A reader asked me this:

I am now using Lightroom to manage my images (used to use Picasa because its quick, cheap, free).  I have searched the Lightroom help about clearing the CF card once the images are imported but it doesn’t seem to have that function.  It does talk about in camera formatting.  What do you suggest?

That is very simple.

  1. Do not delete images from your card after importing;
  2. Do format in the camera (but only after backing up your images).

If you delete images upon import, you are deleting them before you have secured them; What if your computer crashes? Also, by not formatting, you are open to file errors formatting errors, and differences between one manufacturer’s idea of good formatting and another.

So import images, back up, and then (and only then) put the card back in the camera and format using the camera’s menu.


Evolution of an exposure

To help you see how to expose something well, here’s a way – the thought process that might go through your head.

Of course the way to guarantee a right exposure is one of:

  1. Use a grey card and spot meter off that.
  2. Use an incident light meter.

But failing that, you can do it with the in camera meter, if you are willing to go through a little bit of a process. With experience this comes were quick indeed.

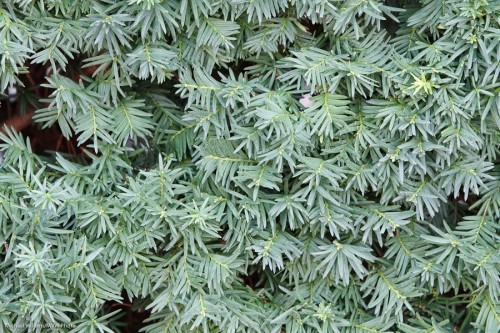
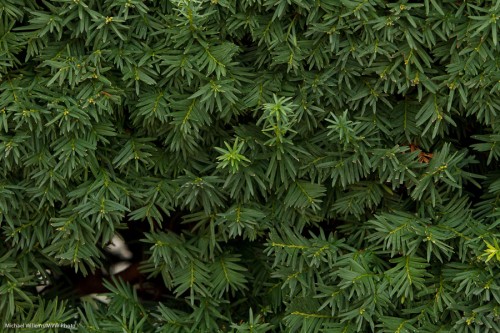
First, shoot:

Uh oh, too light. Oh yeah… plants are dark. But the camera does not know it is shooting plants, so they look “normally bright”.

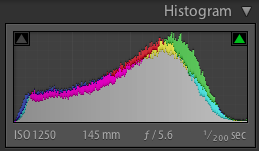
The histogram for this shot shows this:

Yeah, a general “normal” exposure.

You could now stop and pull the exposure back in Lightroom alter, of course (exposing to the right, a good technique to get best quality and lowest noise), and that would be fine.

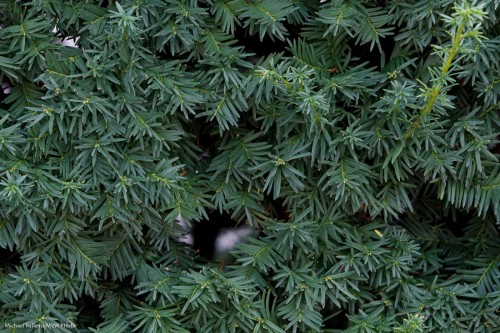
But let’s say you want to expose well in the camera. Then find the right exposure… say -1 to -2 stops of exposure compensation.

And that gives you a proper hedge row:

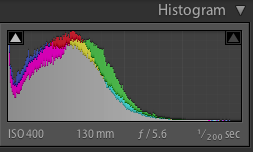
Proven by the now correct-for-the-scene histogram:

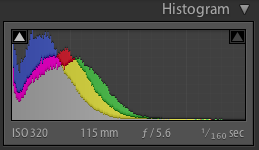
But the colour. Mmm. Wonder if switching to “cloudy” or “shade” might give you a less blue, more green plant?

Evidently yes. See the histogram: the blue is pulled back:

And so that is how you might make an exposure without a grey card or incident light meter. A little thought is all that is required – and the histogram helps!


Lightroom Shortcuts

Abobe Lightroom is about productivity. The faster you can work, the more time you have for shooting, not editing.

My main three Lightroom shortcuts are very simple:

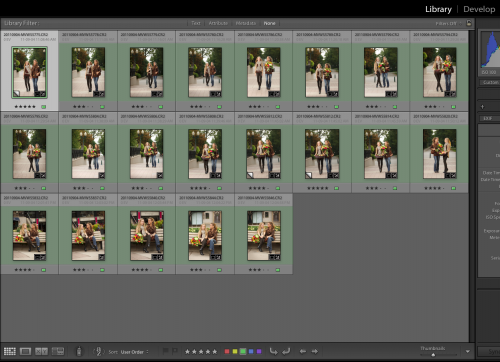
G – takes you to the “Grid” view in the Library module:

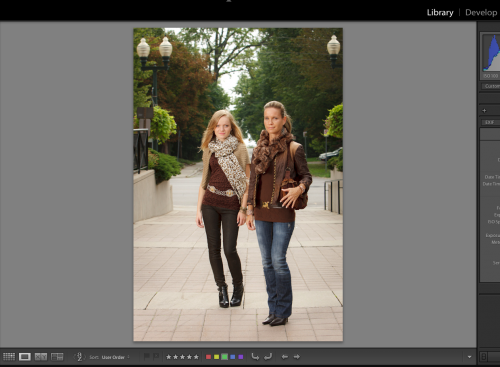
E – takes you to the “Loupe” view in the Library module:

D – takes you to the Develop view in the Develop module:

I switch between these views many times a day – it is amazing how a few simple shortcuts like this can make your life more productive.

Also try F (full screen toggle: tap it three times to cycle through the options) and L (Lights out – ditto).


There are of course many more shortcuts and nice-to-knows: Michael does photographer coaching, both remotely and in person on location: contact me if you are interested.

Lightroom tip – today only

I see that today, Adobe is offering their Lightroom 3 software at 50% OFF.  (Today only – that is October 11th – until 11:59pm).

That’s $149.50 (US) – half the usual $299 price.

… and yes, this offer is valid in Canada.

Check out www.adobe.com for details. Right now. Lightroom rocks, I run my entire workflow on it – and it is available for Mac or PC.


Lightroom Tip: Go Solo

In Adobe Lightroom, the organizing/editing app of choice for most pros, you can use (and hence, see) a lot of panes full of functions to the left or to the right of the image or images you are looking at. In Develop module, these panes include Basic, Tone Curve, HSL, Detail, and so on; each pane with its own set of functions.

All those panes can result in a long list of functions: one that can be impossible to get a quick overview of.

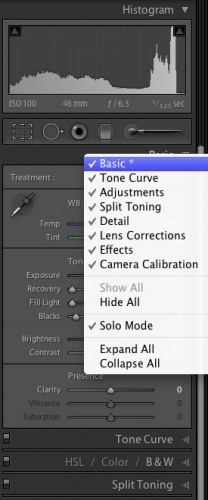
And that is why we have “Solo” mode. Right click on any pane’s name, as for instance I am doing here on the “BASIC” pane in the DEVELOP module:

And as you see, there is an option called “Solo Mode”. Turn that on, and from now on only one pane opens at a time in that module.

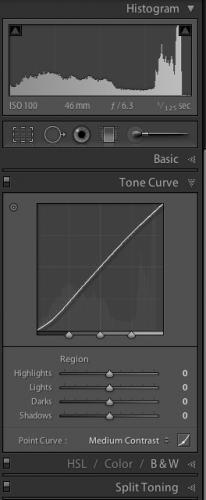
So if for instance I click on the “Tone Curve” pane, the Basic pane and any other panes that are open, instantly close.

This makes Lightroom much easier to use.

Note, you only need to turn this on once, but you need to to it on each side (left and right) in each module (Library, Develop, Print, etc).


There are of course many more shortcuts and nice-to-knows: Michael does photographer coaching, both remotely and in person on location: contact me if you are interested.

Photoshop, Elements or Lightroom?`

An often-heard question, here at Willems Central: which one should I use?

  • Adobe Photoshop Creative Suite, at around $1,000?
  • Adobe Photoshop Elements, around $ 100?
  • Adobe Lightroom, around $300?
  • Apple Aperture, around $150?

Actually, that’s a comparison of Apples to Oranges. They are different and address different needs.

Photoshop and Photoshop Elements address the need for “deep editing” single images. Getting Vogue front page and want to move a nose? Stretch legs? Turn red into green? You probably want to use Photoshop.

Lightroom and Aperture address a different set of needs. They offer:

  • Asset management. Great tools for comparison between images. Ranking, rating, organizing, searching, sorting, filtering, keywording, and so on. Amazing tools.
  • Quick editing – much quicker than in Photoshop. Not as deep, but as deep as a photographer usually needs.
  • Non-destructive editing – your original images never get touched.

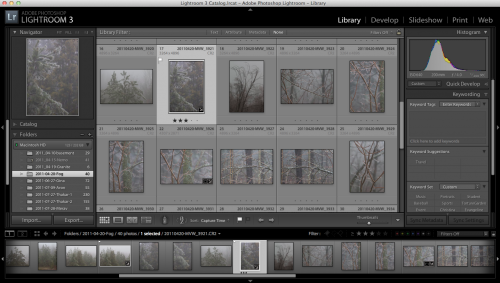
You can see Lightroom here:

Other differences:

  • Lightroom and Aperture can be learned in a few days. Photoshop will take you months to fully master.
  • Aperture is more Apple-like in that it wants to organize where your files are; Lightroom is more free in that it more readily leaves it to you.
  • Aperture is for Apple only; Lightroom is for Apple or Windows.
  • Photoshop CS contains “everything”; Elements is “for photographers”.

So what did I choose:

Both.

I work in Lightroom 99% of the time. LR saved me 75% of my post-production (finishing) time. ‘Nuff said! But occasionally I need to pop from LR into Photoshop. If you have more tan one image to finish, I recommend you start with Lightroom (or Aperture); and add PS/Elements later.


Make it RAW

If you are shooting with a digital camera, your camera may give you the option to shoot in JPG format or in RAW format. All SLRs have this option; many compact camera do, too. Check the menu.

Why shoot RAW? It has drawbacks!

  1. A RAW file is three times larger than a JPG, so fewer images will save on your card, and it will take longer to download them. And you will need more hard disk space.
  2. A RAW file is in a camera-maker’s proprietary format and you may need extra software installed to read it. You cannot take it into the camera store for a print unless you first convert it to JPG.

Yes, true.

But it also has advantages, which greatly outweigh the drawbacks.

First, a RAW file contains much more information about light than the JPG that you will eventually make from it. That is a key part of your understanding: eventually, a JPG file will be generated. If doing this in camera, this means that the image is processed a certain way by your camera. While if you do it later, on your computer, then if you have under- or over-exposed a RAW image, for instance, you can “fix” it before you make that JPG.

And second: When a JPG is made, many settings are applied. Settings like:

  • Should it be a colour or black and white image?
  • How much sharpening should be applied?
  • How much extra saturation should be applied?
  • How much extra contrast should be applied?
  • What white balance should be applied?
  • What colour space should the JPG be encoded in, sRGB or AdobeRGB?

Believe it or not, you have settings in your camera for all of the above, so whether you are aware of it or not, whenever you take a picture, you are always making all these decisions. And if you are making a JPG in the camera, all these settings are applied to the image. So they are final. While a RAW file also contains your settings, but only as suggestions, and all the original data is part of the file. So if you want to change your mind: no problem. One click in Lightroom, Aperture, Photoshop, or whatever software your camera maker gave you, and you can change any of these settings, without any loss of quality.

So if you set your camera to black and white and you create a JPG, not all the king’s horses, or all the king’s men can bring the colours together again. But if instaed you shot RAW, one click and bingo, colour is back.

That is why I only shoot RAW images, ever.

“But it’s extra work, Michael!”

No it isn’t! IF your exposure and all the above settings were all correct in the camera, your software will follow them and create the right JPG for you – correct first time. No extra work.

It’s only extra work if you choose to not set it all while shooting. I often don’t  worry about white balance while shooting, for instance, since it saves me time while shooting – one click later at home will set the white balance. So in choose to not spend time worrying unduly about white balance while shooting, so I can concentrate on composing. That’s a choice!

SO if you are not yet shooting RAW images: you should be. Unless all your camera settings are all correct whenever you shoot. In that case, hats off to you, and carry on with JPGs!


Histogram Hints

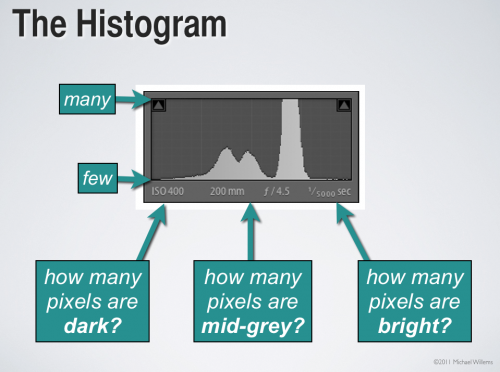
What is the graph you see on the back of your camera when you press the “DISP”, “INFO”, or “up” or “down” buttons on the back of your camera?

It is called the Histogram. It should really be called the “Exposure Histogram”.

It tells you about your exposure in much more detail than a light meter does. In a way, it is like 256 little light meters in one.

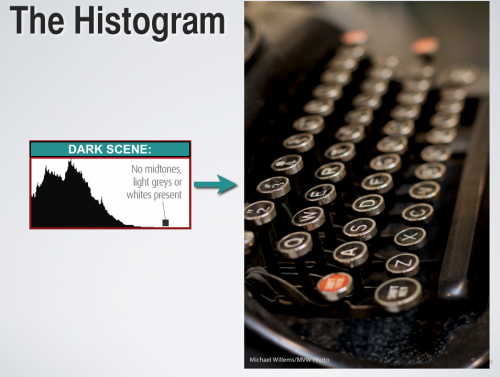
A histogram of a correctly exposed dark image would look like this (unless you are shooting RAW and “exposing to the right”, which is a good technique – but more about that again some other day):

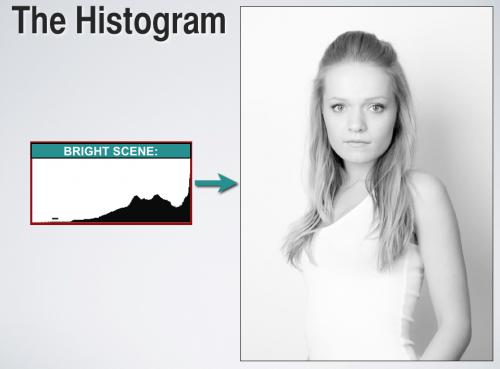
And a histogram of a correctly exposed overwhelmingly bright image might look like this instead:

The words “correctly exposed” are key. If you expose either of the images above incorrectly, you would see a different histogram than the ones above. And that is the power of the histogram: it helps you expose correctly.

Try it now: go shoot a black bag or coat or wall. Fill the entire viewfinder with that bag or coat. Now check the image – and the histogram. Then do it again, using exposure compensation to get a correct histogram.


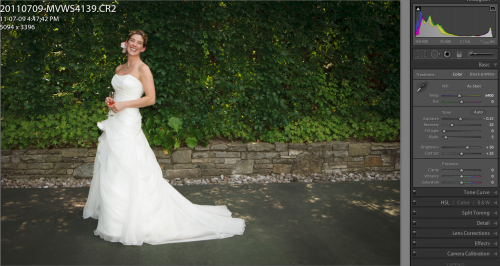
Of blinkies, histograms and the dress

In your camera menu, you can enable a view called something like “highlight alerts”. Either by enabling it, or by pressing “DISP” or “INFO” until you see it.

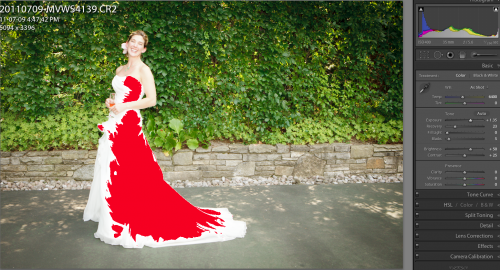
This means that when reviewing, you get to see black and white blinking areas where the image is overexposed. Where it blinks is where it’s over-exposed.

You can also see this in software like Adobe Lightroom (By clicking on the arrow on the right of the histogram, in Lightroom’s case):

Dress (Photo: Michael Willems)

This means the dress is overexposed. All detail is lost on the red area. Bride not happy.

If you had left the camera to itself, it would have perhaps underexposed the dress, especially if it is large in the image:

Dress (Michael Willems)

Not bad, but bride still not happy, because a white dress should be pure, 100% white. Meaning it should edge against overexposing, but only just.

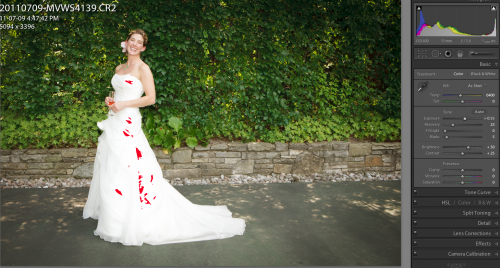
And that is where the blinkies come in. Enable the blinkies, and expose so that the dress is only blinking a little bit, and only just. In Lightroom, that looks like this:

Dress (Photo: Michael Willems)

And that is how you use the blinkies: expose so you see a tiny bit of blinking in the white areas – but only just.

The blinkies and the histogram represent a major contribution to photography – use them, and ace your exposures.


Aspect Schmaspect?

A question I answered on another forum bears a repeat here. The photographer asked:

I just had a client order an 8×10 of a picture but when I crop it in Photoshop, it goes beyond the picture. (like it only fits for a 4×6 or something) What do I do?!?

A common question. For some reason known only to the good Lord, cameras use a 3:2 aspect ratio, while prints, frames, camera stores, and so on usually use 8×10 (i.e. 4×5) or 5×7, which are entirely different aspect ratios.

This means when you print, you have to do one of only three possible options:

  1. Crop off part of the image;
  2. Leave white bands on the sides;
  3. As in 2, but fill those two white bands with fake picture (what Photoshop calls “content aware fill”).

For methods 1 and 2, you probably want to use Lightroom, not Photoshop: in Photoshop you get burdened with having to know the picture size (pixels, DPI/PPI) when all you want to do at this point is set the aspect ratio. In Lightroom, you can simply set the aspect ratio (like “8×10”) without yet having to worry about the size you will eventually want to print at.

For method 3, however, you do need to use Photoshop. You expand the canvas to the size you want, then fill the white areas using that “content aware fill”, and adjust as needed.

But why is this all necessary? I have many people asking me this with a certian degree of perplexity.

Simply because you cannot fit a square peg snugly into a round hole.

To help understand, imagine if the print the client wanted was square. Does your camera take square pictures? Probably not. So to print square you either need to crop, or have white edges (or fill the edges with fictitious material).

Last tips:

  • This has nothing to do with picture size, or with things like DPI/PPI. It is simply about the shape of the picture (square, rectangular, etc).
  • I typically crop to the aspect ratio I like – not to the one dictated by the frame makers of this world.
  • That said, it is often wise to shoot a little wide, then crop later – just in case of this kind of aspect ratio nonsense getting in the way.

Have fun shooting!