A New Modifier!

You know how I like the Honlphoto range of small flash modifiers, and I use them all the time. Small, light, sturdy and affordable is a great combination of properties for travelling photographers. Right now David is just outside Mosul in Iraq. This brings back memories: I was in Mosul in 1982 (see me next to Nineveh’s City Gates), and I stayed at the Railway Hotel. Small world.

(Full disclosure: David is a friend of mine: but that is not why I recommend his stuff. The reverse, rather: I like his flash stuff so much that I contacted him and we became friends.)

Broadly speaking, there are three types of small flash modifier:

  • Modifiers that change a flash’s direction, like snoots, grids, gobos.;
  • Modifiers that change the flash’s colour (gels, coloured reflectors);
  • Modifiers that change the nature of the light, usually by softening, such as softboxes, reflectors, and bounce cards.

So you modify where the light goes, in what colour it goes there, and how it goes there. And now there is a new modifier in the latter category.

To place this new modifier, let’s start with the existing ones.

First, we have “no modifier”: aimed straight at the subject from atop the camera. When I use that, I get cold, harsh light. Look at this object in front of a wall:

Then I bounce the flash behind me, up at 45 degrees, to get a much better result:

Much better, but I cannot always do this. The ceiling is sometimes too high, or it is a bright colour, or there are objects in the way that stop the light from my flash from reflecting back; or there simply is no ceiling.

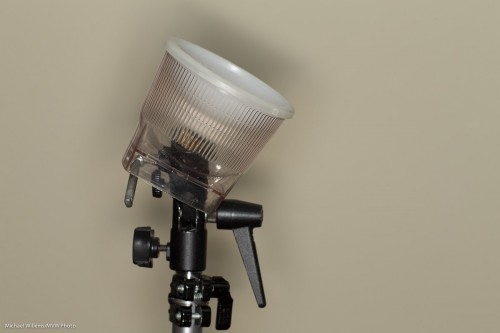
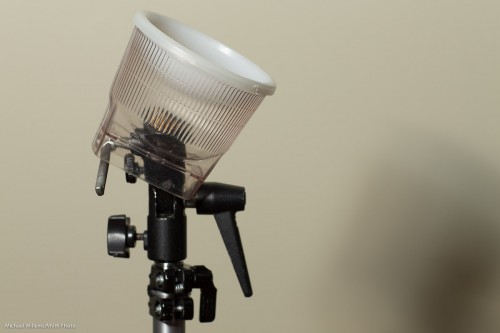
In those cases, I can use a reflector on the back of the flash. The Honl Speedsnoot doubles very nicely as a reflector. While this is not perfect, the shadows are a lot less hard than they would be from direct flash, and the light comes from a higher position.

This solution is not always easy: the reflector takes a little manual dexterity to tie to the speedstrap on the flash, and it can flop down all too easily.

I can also put a hard reflector card (bounce card/gobo) behind the flash. This is hard when there is no bounce at all, but it works very well when combined with ceiling flash:

Next: a great modifier is the softbox. In the next photo, I used a Honlphoto 8″ Traveller8 portable softbox off camera. The shadow is under my control: bring the flash closer and it softens, and the flash’s position determines where the shadow goes. Now that nasty shadow becomes a creative tool under your control.

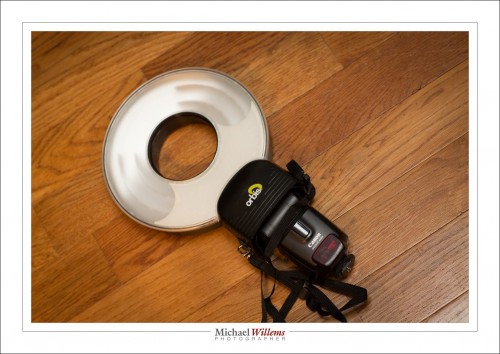
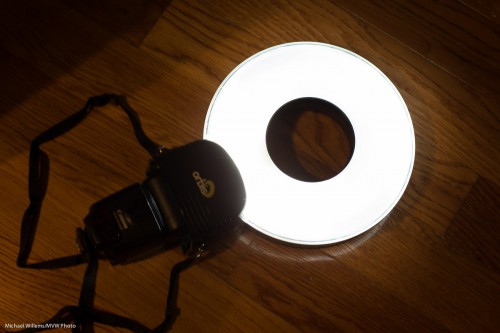
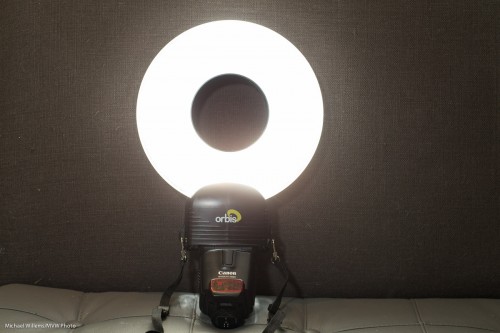
Another great option is the ring flash. Rather than buying one, you can go with the Orbis ring flash attachment for your speedlights. I will talk more extensively about this in a next post, but for now, just look at the light with its distinctive halo, a halo that shouts “Ring Flash!”:

And if I take it off camera it’s still great:


NEW: THE LIGHT PADDLE; A MINI REVIEW

There is an all new small flash modifier to add. Dave just sent me one, a hands-on mini review of which I am hereby delighted to bring to you as a Speedlighter Exclusive… the Honl Photo Light Paddle.

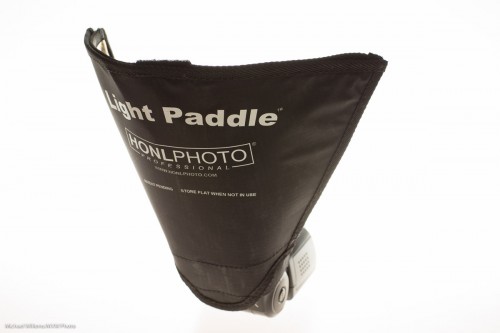
When you take it out of the package, the light paddle is a flat modifier, and in fact the package says “store flat when not in use”:

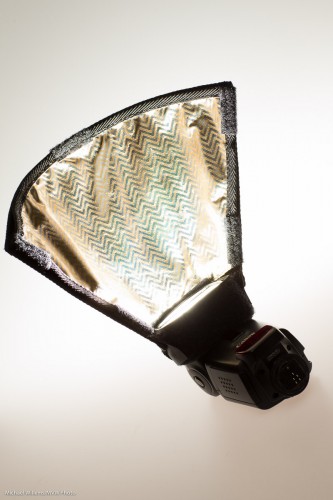
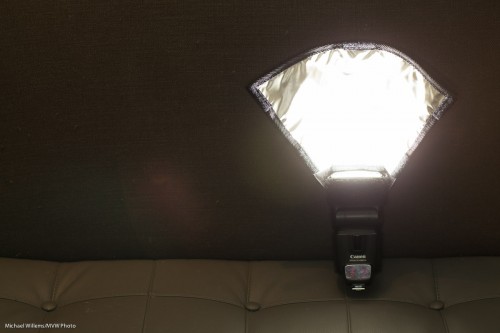
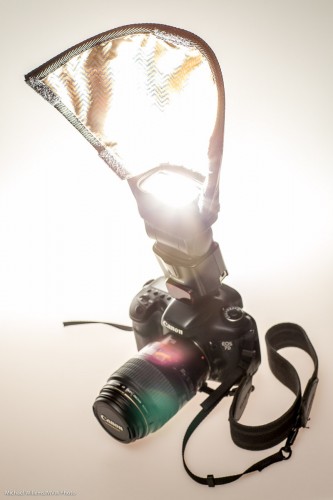
But attach its Velcro to a speedlight’s Speedstrap, and it becomes a convenient paddle that grabs the light, and nothing more or less, from the f;lash and bounces it forward.:

The Light Paddle is like the reflector, but having used both, I find that the Light Paddle has some big advantages over that and other modifiers.

  • It takes the right shape immediately. No guessing, adjusting, re-adjusting: it is the perfect shape each time.
  • It reflects the optimum amount of light from the flash, i.e. it catches the light, no more and no less, so it takes that worry off my hands.
  • It is sturdy: unlike a “free form” reflector, it holds its shape. I only used this sample for a few days but it looks and feels just as sturdy as the other Honl Photo flash accessories. And as said, light, sturdy and small, when combined with affordable, is a great combination for flash aficionados like me.
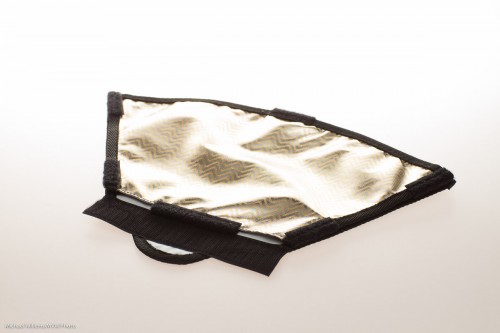
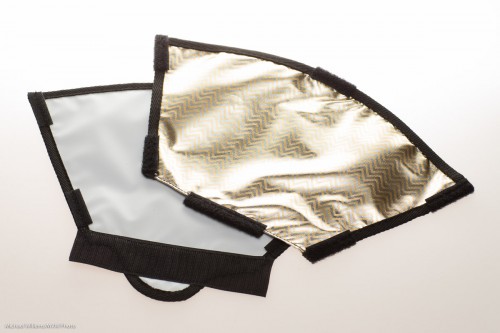
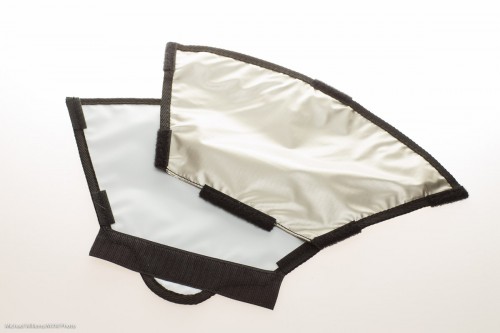
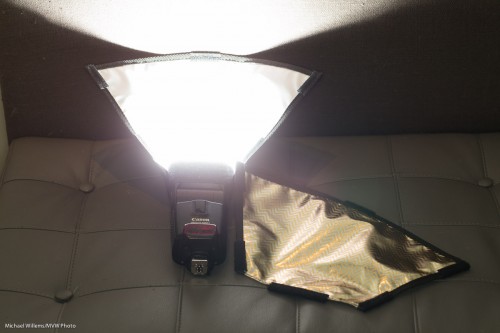
  • It has not one, but three bounce surfaces. As you see in the image below: peel off the reflective surface. which is initially CTO (Colour Temperature Orange, i.e. tungsten/warmer light), and you get white; reverse it and you get a lighter slightly warm orange.

Here’s what it looks like with its three bounce surfaces:

I found the Light Paddle to be directional where you would want it to be.

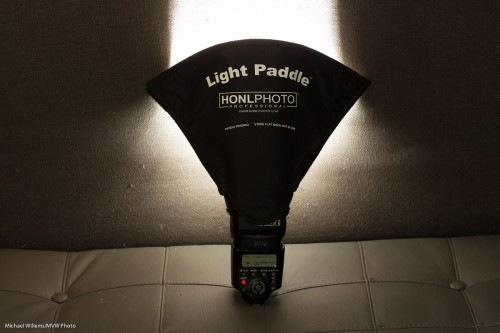
You can use the Light Paddle on an on-camera flash or on an off–camera flash. In either case, I found that it provided a surprising amount of directional control and consistency. Here it is again, and as you see it reflects the flash fully, and makes its surface much larger and higher:

The Light Paddle in Practice

Let’s look at the Light Paddle in practice. Here is a usual operating mode:

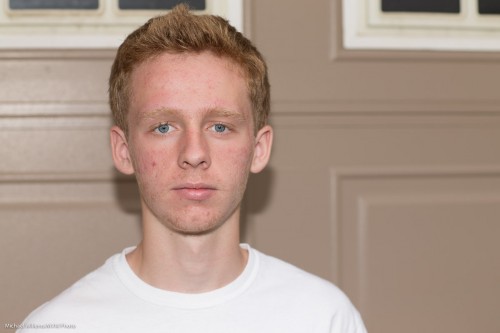
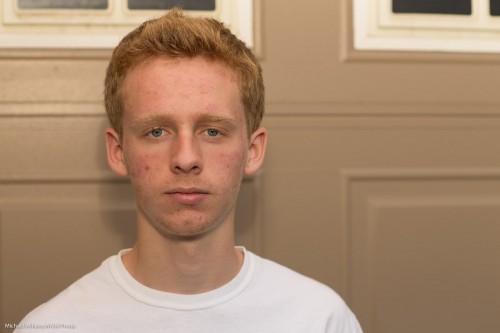
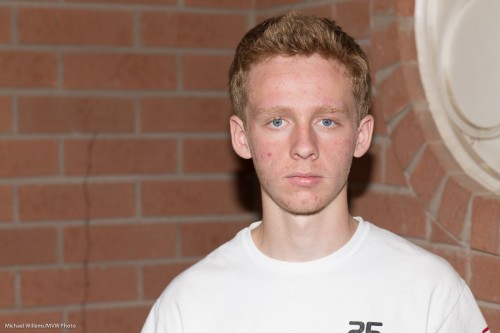
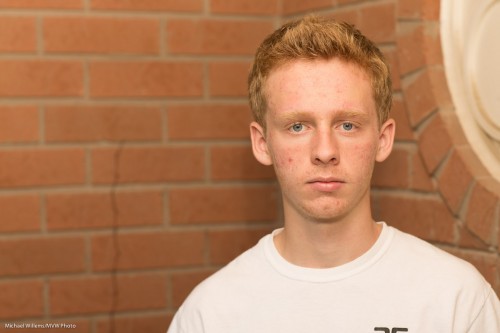
First, straight flash, in a situation where there’s no bouncing (and thank you, kind July Intern Daniel H., for your volunteering):

Now in the same no-bounce situation, the Light Paddle:

But it is outside that this really shines. Another before and after:

Another outdoors example, once more with the CTO (warming) side reflector: again, straight flash, then flash with Light Paddle. The difference is very clear.

Based on all this,. the Light Paddle is certainly going to be a staple part of my flash bag for events and creative use. It is not the only flash accessory, but it fills in the gap between bounce card, reflector, and softbox ever so nicely. Thanks, Dave.

If you want one, go  to Honl Photo for orders as soon as it will be available—I am sure that will be soon, both there and at your favourite local retailer.

 

Ring a Ring o’ Roses

I talked about ring flashes recently, if you recall. This time, a few notes about the Orbis Ring Flash—a flash that is not a flash.

It is a flash modifier. An attachment with clever light guides, that makes your speedlight into a ring flash. In order to achieve this, your flash fits into the bottom:
Result: a ring flash. And a remarkably good one, with amazingly even light all around the circle:

This needs you to insert your flash into the unit’s base, then set it off using light- or radio-driven TTL, or some other way. You hold the flash in your left hand, while you hold the camera in your right hand, with the ring around the lens.

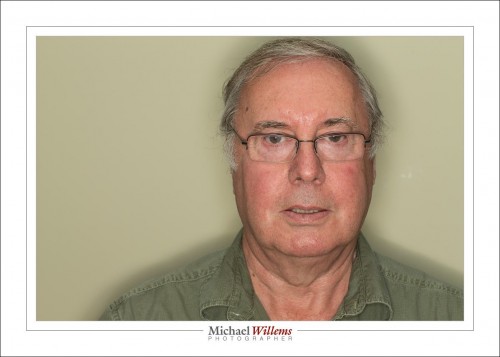
And this works remarkably well. See the characteristic halo, and the very recognizable ring flash light, shown by student Tony:

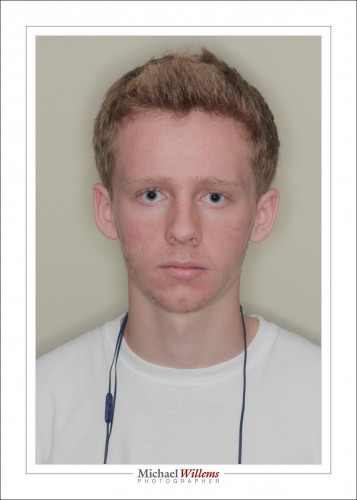
And again, as shown on my intern Daniel:

As said, this device contains incredibly clever engineering. To make it this even, the light paths have to be very cleverly engineered. And they are: whatever I tried, the ring always lit evenly.

From prior experience, I am sure the cheap knockoffs that seem to be around do not work nearly as well.

You can, of course, also use it off camera, rather than around the ring. It also works well when you do that, still providing better light than a straight flash. Like here:

I can see that this device is going to be a fixed part of my flash gadget bag. Thanks to David Honl of Honlphoto.com for sending this to me.

And, um, yeah… it is even good for shooting cats.

…including the donut shaped catch light that tells you immediately that this is a ring flash photo:

And I can tell you that this is a remarkably good device for shooting…

….you guessed it:

…cats! (Canon 7D with 100mm macro lens, f/5.6, 800 ISO, 1/125th, ring flash).


Portrait extremes

Within minutes, I made three different pictures today during the class I taught at Sheridan College. I wanted my students to see how simple it was to do various portrait lighting types.

A traditional portrait with key light, fill light, hairlight (“Shampooey Goodness”), and background light looks like this (made with four flashes):

Key light on our right through an umbrella; fill light on our left, two stops lower; hair light behind left, shining forward; and background light bright on the background from behind the subject. to blow out the background completely.

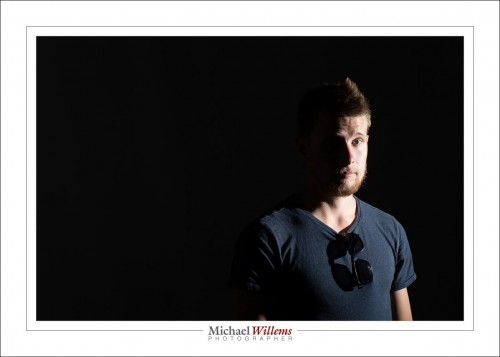
So now the opposite: one with just the key light, off to the right, unmodified except for a grid:

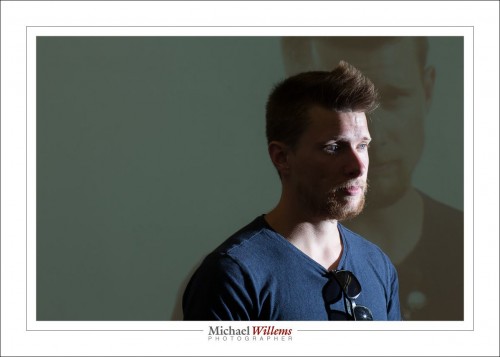
And a hybrid: same settings but I turned on the projector behind the subject with a previous picture. A picture within a picture, as it were:

All these were made at 1/125 sec at f/8, ISO400.

Simple setups can make interesting pictures. What can you do with simple light?


About that grid

Once more about the grid, my favourite flash accessory.

This was the setup with my intern Friday:

The subject will be lit with a single flash, on the left side (as seen by us), on a light stand, set to 1/4 power and fired using Pocket Wizard radio triggers.

I want drama., Sine the lamp will not appear in the photo, I do not need to see all that ambient light. so let’s kill the ambient light.

How? How do I make the ambient part go darker? Smaller aperture (=greater “f-number”), or faster shutter, or lower ISO. I used 100 ISO, 1/125th sec, f/8, to get this:

This is not bad: Rembrandt lighting with one flash. But I want the wall to be dark.

Why is it light? Not because of ambient light, Nope, it is simply because the flash throws light al over the place. The wall is lit by the flash.

So then I fitted this Honlphoto 1/8″ grid to the front of the flash (using a Velcro “Speed Strap”, also from Honl photo):

Which gives me this, since the flash is aimed at the wall outside the picture:

Straight out of the camera (“SOOC”), that is a pretty good result, eh? (*)

Remember: lighting a picture starts with no light, and then adding light where you want it. And only where you want it.


___

Foot notes:

(*)I am Canadian


Reflecting a mood

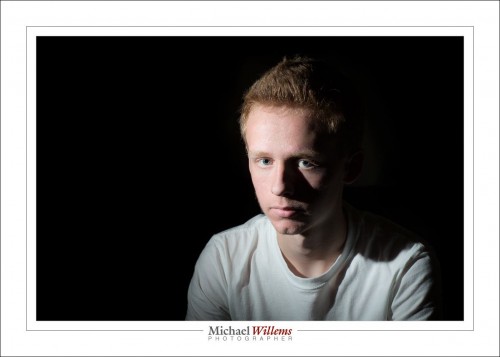
Today’s shoot was themed “Sad”. I have a student, Evelyn, who is a talented photographer herself, who asked for some help to learn how to shoot a sad portrait/self portrait.

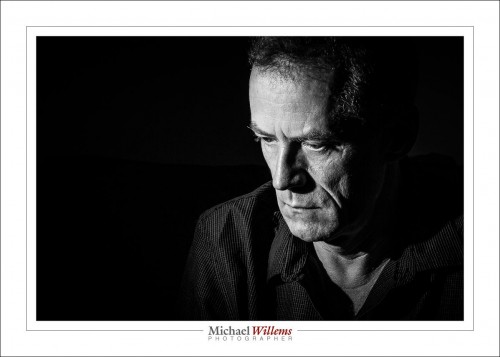
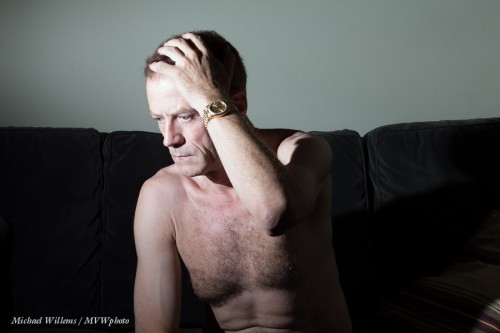
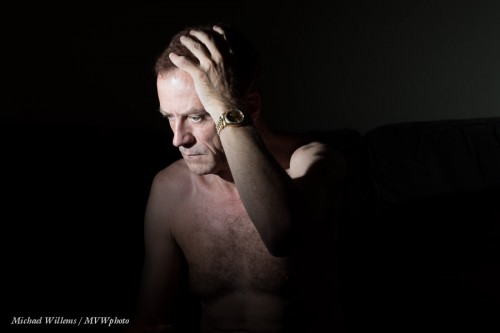
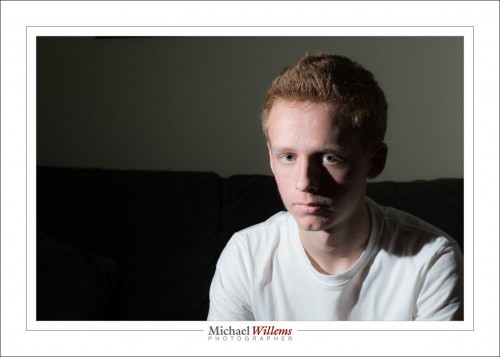
So before she arrived, I quickly shot one of myself. It ended up like this:

The shot took just a few minutes to produce, and I will share the history of how I made it.

First, I decided to not use the studio, but the couch. The studio is too clinical for the subject to get into a sad mood. Sad mood makes me think things like:

  • hard light
  • lots of darkness
  • b/w or desaturated
  • extra contrast and presence and sharpness
  • no eye contact
  • eyes cast downward
  • using hands, arms, etc

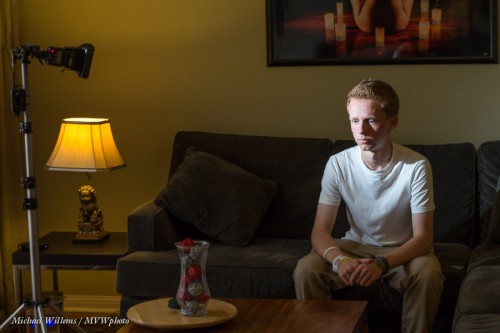
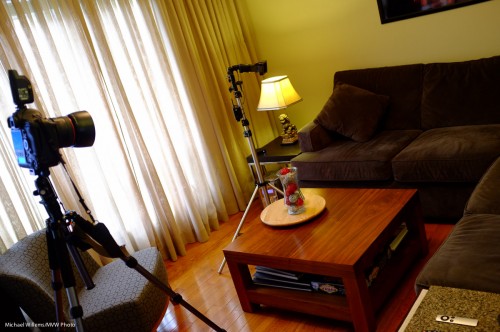
So I used one flash, off camera. The camera was on a tripod. I used pocketwizards. Here’s the obligatory “pullback shot”:

The camera was set to 100 ISO, 1/125th second, and f/8, standard studio settings, with the flash set to Manual mode, 1/4 power. Experience tells me that those settings will work at that distance.
When I use that setup and those settings with a bare flash, I get this, straight out of the camera (“SOOC”):

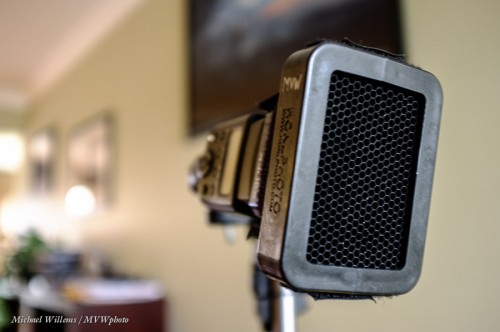
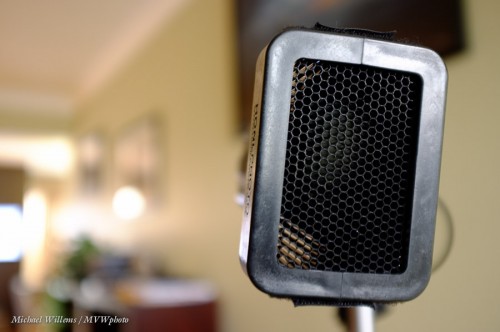
One of the elements of a sad picture is darkness. Lots of darkness—a metaphor for a dark mood. So I want a chiaroscuro picture. Hence, I do not want the wall lit up. The solution: a Honl Photo 1/8″ grid fitted to the flash does what I need. Here, also SOOC:

Better.

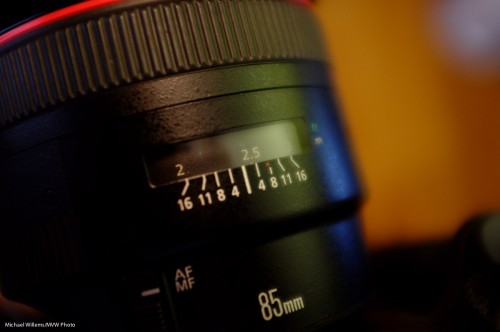
With the lens set to “M” (manual focus) I used the lens scale to manually set the focus distance to the distance between the camera and where I would be. That’s why you have that lens distance scale:

I checked by zooming in to 100%. After one slight adjustments, my pictures were razor sharp. I used the timer shutter release.

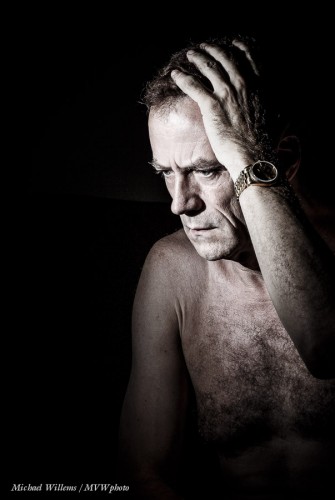
After I took the image, I desaturated it using my standard “Desat” develop preset, and I cropped the picture vertical:

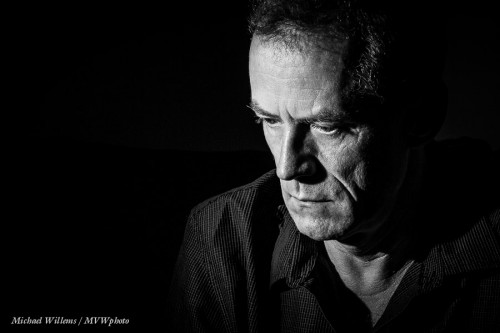
I decided to go B&W for most. Here again is the winner:

Having that, I awaited my client and after she arrived, we shot some similar ones of her. All using the 85mm prime lens. Of you have a crop sensor camera, a 50mm lens would do great for these shots.

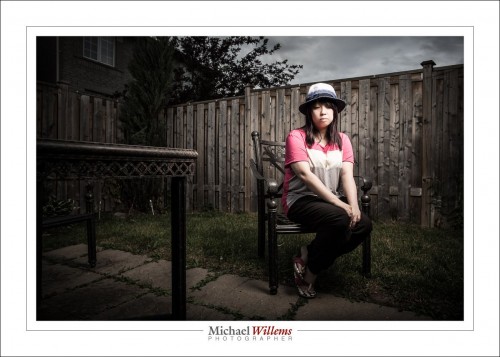
In the above image, the sadness is produced almost entirely by the person’s expression and body language. But sometimes the background is not absent, but instead is an essential active part of the mood-setting. That was shot two, made outdoors with a Bowens studio strobe powered by the Travel Kit.

I used my 85mm lens for the previous shots, but I used a 24mm prime lens for this shot. A wide angle, so the subject will be small in the image (else I get distortion). An environmental portrait.

Here it is, also desaturated, but otherwise SOOC:

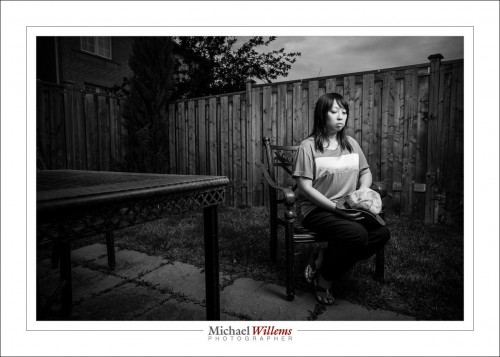
And finally, one in B&W:

What do you think? Sad enough?

___

Want to learn this? Do a custom training session like this, designed for your unique individual requirements. Check out http://learning.photography and contact me to find out more. Whatever your level of knowledge, you will kick your photography into overdrive by filling in knowledge gaps and refreshing creative ideas. In person or via the Internet. Do it!


One more…

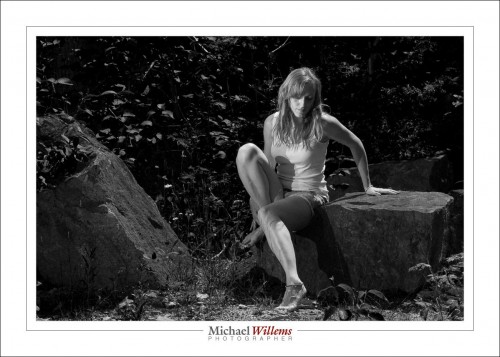
…from today’s shoot, here’s one image. A black and white image:

Why black and white? Because that enabled me to make the green really dark, and to make this beautiful young woman stand out very clearly against the dark background.

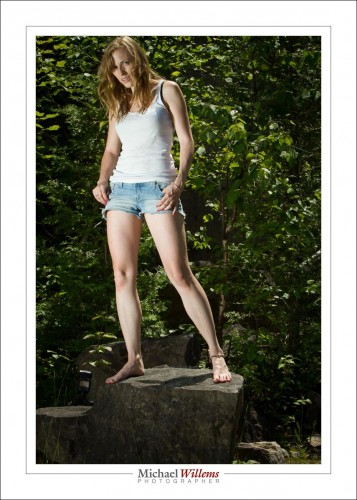
Don’t get me wrong, the colours were beautiful, because I used flashes (two of them, direct, manual, fired by Pocketwizard radio slaves).  So most of this session was made in colour.

But as you can see, the subject does not stand out against the background in quite the way that she did in the B&W picture:

Don’t be Uncle Fred: learn these techniques! How? Read this blog, and read the e-books and take some lessons: both of those available right now on http://learning.photography. Enjoy!


Before you know it.

I remember when my children were babies. Like yesterday. One day they arrive (and having put them in there in the first place, I watched them pop out too, and yes, I am sure the term “pop” is making it sound waaaay too easy); a few days later you are holding them on your shoulder while they struggle to lift their little heads. Everyone who has children will remember this. And everyone who has children will also share this experience: about three days later you blink and they have graduated university and have jobs and cars and cameras, and they help you do complicated things.

Time moves quickly. And you cannot get it back. Our time on this planet, in one of billions of solar systems in our galaxy, which itself is one galaxy among billions, is limited. We came from stars, and we shall all return to stardust very soon.

And alas, we cannot travel in time, except to “where the casement slowly grows a glimmering square” (that’s Alfred, Lord Tennyson for you, yes, he battled depression for most of his life).

We cannot travel in time… except through photography.

Which is why you should photograph your kids. Or better still, have a pro do it. Properly, artistically, in a way you can’t, unless you have read this blog and bought my e-books and practiced for 10,000 hours and bought cases full of equipment.

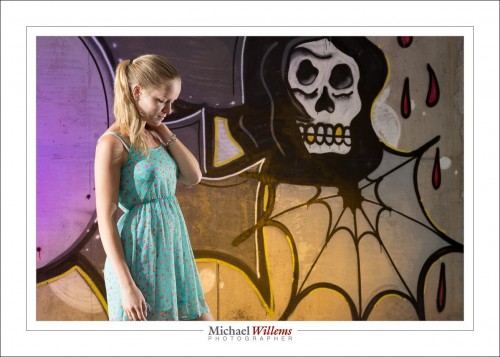
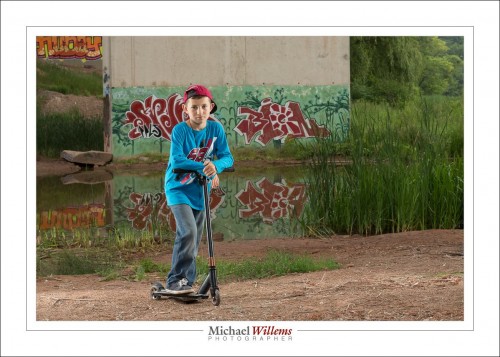
So photographing kids is what I did for a friend today. Together, we photographed her kids. One is 12, the other almost 20. And we did this in style. Outdoors, by a bridge with graffiti. Using six flashes and countless speedlights—well, six speedlights to be precise.

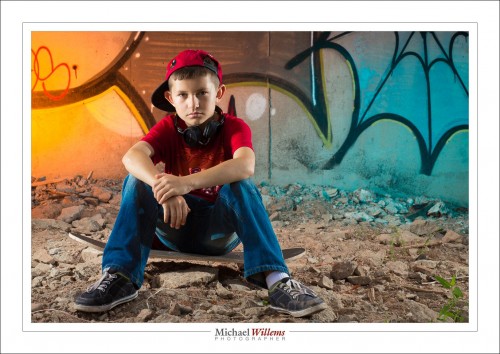
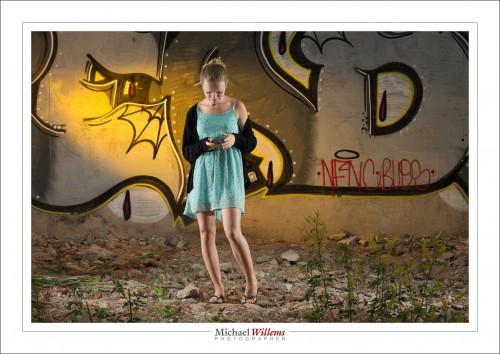
We pictured them doing what kids do:

(400 ISO, 1/125 sec, f/11)

(400 ISO, 1/125 sec, f/11)

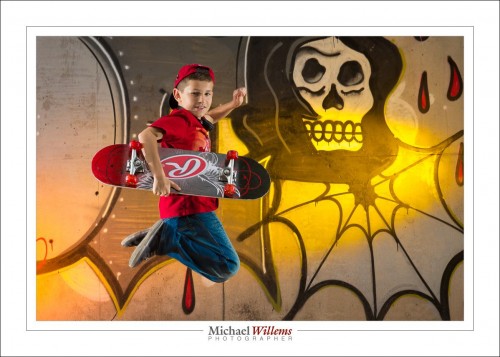
Those pictures are basically straight out of the camera (“SOOC”). And I am sure mom will like them on the wall. And later, the kids, who soon will have their own kids, will love them too. Time travel: accomplished.

I only used my 85mm f/1.2 lens (my friend used her 85mm lens too); on a full-frame camera. The shots were taken outside, during the day, under a graffiti-loaded bridge.

This is a case of “light from behind, fill from the front”, but the fill was ambient light.

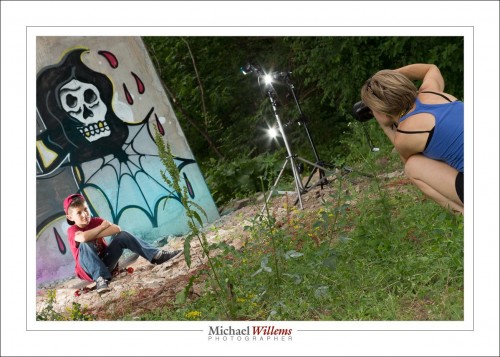
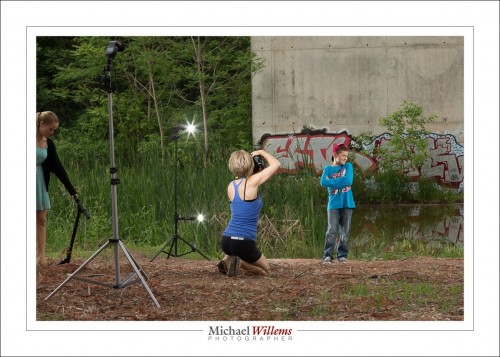
The subjects were lit with four flashes driven by Pocketwizard radio triggers. Four speedlights: two on each side, in each case on a lightstand. One high on the light stand, one lower; thus providing a vertical band of light. (One light would lead to the head being brighter than the legs, or vice versa).

The background was lit too: we used two flashes aimed at the background graffiti, each fitted with a gel for colour. We switched up the colours regularly.

I set all flashes to manual mode, 1/4 power. 1/4 is a great starting point. At that power, f/8 should get you close. And indeed, little tuning was needed. I used the histogram to ascertain that the settings worked. I want to fill the histogram with light; I can reduce exposure later on the computer, if I choose. Also, 1/4 power means the flash can fire again rapidly and does not readily overheat.

Jumps are cool:

Getting close is cool, too:

Here, we did not use a light aimed straight from the camera onto the kids, because of the close wall: a nasty drop shadow would result. But aimed the other way, across the river, the wall was far, so there is no shadow problem:

(You see the reflections? If you have bought my last two books—see http://learning.photography—you will know that you always look for reflections).

And again, side lit from behind; this time with a fill light where we were. The fill light was set to 1/8 power, plus it was moved 40% further back than the other lights were (i.e., it was two stops darker: can you work out why?)

Here’s the pullback shot:

The technique described here works well, and if you master it, you will need to do very little “post” work. The images shown here are basically straight out of the camera—I took them just a few hours ago.

Last note. Why 400 ISO and 1/125 second? Because I also took some shots with my Nikon FE film camera and that has a flash sync speed on 1/125 sec and it is loaded with 400 ASA film. 🙂

_____

Now get some flashes and go wild. If you do not know how to do this, take some private training and I can teach you this stuff in a few hours. Go to http://learning.photography and book a one-on-one or small-group course now.

Alternately, just hire me to do your kids’ photos. You’ll have great pictures to remember today: once you have a photo, no-one can take today away from you. And, bonus: if you hire me, you will see how I do it and get what amounts to a free lesson along the way. Win-win.

It is truly worth doing: please, however you do it, do it and beat time at its own game.

Lighting a portrait

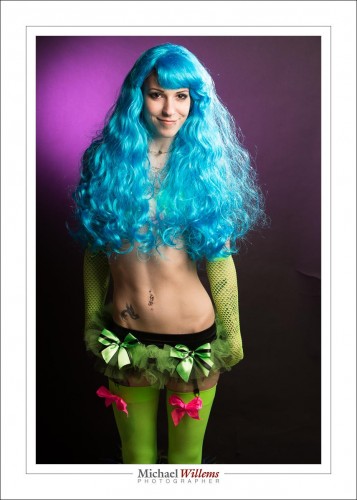
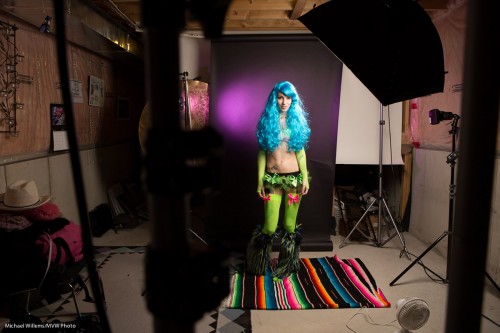
Here’s a recent portrait of model Khoral in her rave outfit:

Cool, eh.

And here’s the lighting behind it.

We light each part of the picture separately. The model; the hair; and the background. Here’s how:

First, the main light, for the model. That is a softbox on a boom, close to Khoral. Why close? For two reasons, namely first that this makes it large as seen by her, and the light is therefore soft, and I can dispense with the fill light; second, that this way I do not light the background. And that is important: it needs to be dark.

Then the fill on her opposite side. I did not need it here, since the softbox is on a boom and lights her face fairly evenly. Any less light on our left and I would use a reflector, or a second light, for that side.

Then the hair. I have a light behind her on our right, aimed toward us, at a 45 degree angle. This light is fitted with a snoot, which restricts it to a narrow beam, so it lights only her hair, Shampooey goodness!

Finally, back to that background. First, I used a black backdrop. Then, the main light was close to the model so that the intensity is not high; hence., the background stays black. And only if it is black can I give it colour. Which is what I do using a flash on the left fitted with a grid, 1/4″, and a gel, purple. Why purple? Because it goes well with her hair and clothing.

And that’s it. Now all I need to do is set the lights to the right brightness, using a meter or trial and error. And then I am done, and we can shoot.

The flashes were lit by Pocketwizard radio slaves, except for the hair light which is operated by its cell (it detects a flash and goes off at the same time). The camera was set to the usual studio settings: 1/125 sec, f/8, 200 ISO.

___

Want to learn this? Come for a studio lighting session: book it now on http://learning.photography


Polarizer

Happy summer (southern hemisphere friends, happy winter…)

Summer. Hence Sun. Right? So you need a polarizing filter for your lenses?

Yes, this is a good filter to have. A polarizer, as you know if you have been reading, actually does stuff:

  1. If you turn it to the correct angle, it makes the sky go darker (best at one angle, roughly perpendicular to the sun).
  2. It removes reflections (non-metallic reflections, like those on the surface of water).
  3. It can often help saturate colours (especially greens, like in vegetation).
  4. Fringe benefit: it darkens a little (usually, about a stop), so it acts like an ND filter. But just a little.

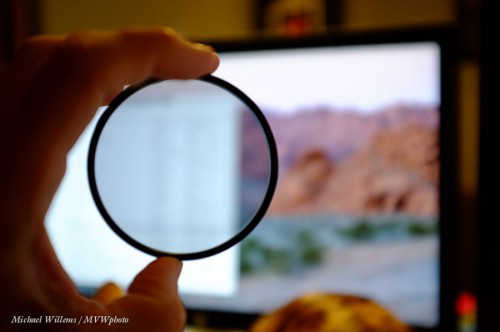
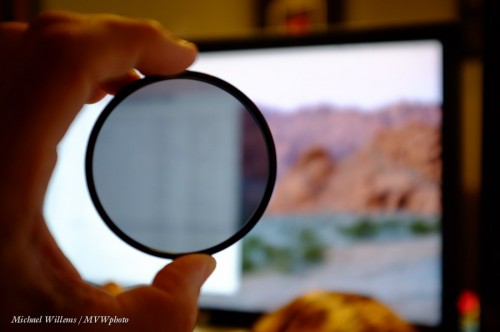
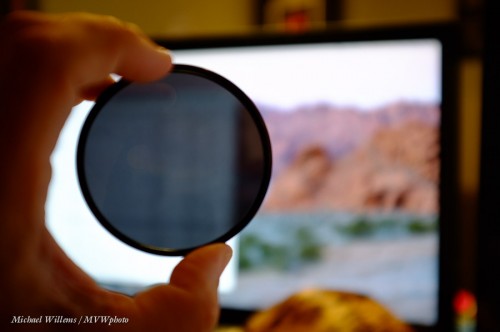
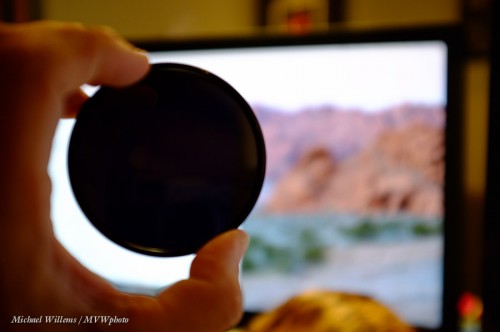
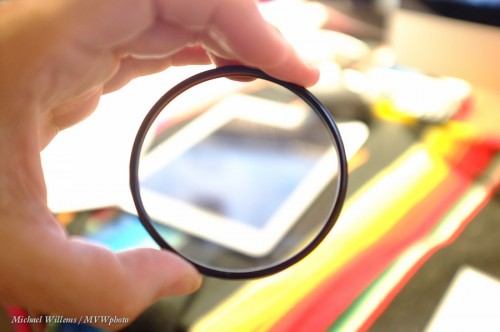
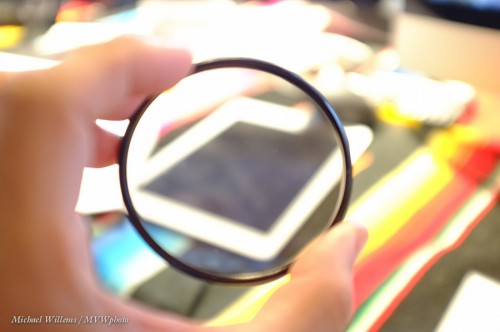
Here, a polarizer. In picture 1, it lets through polarized light (emitted by the LCD screen). In picture two, it is rotated to let through less. In picture three, it is rotated to allow even less polarized light to enter; and picture 4, none.

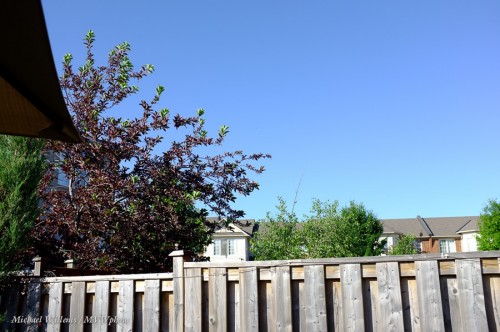
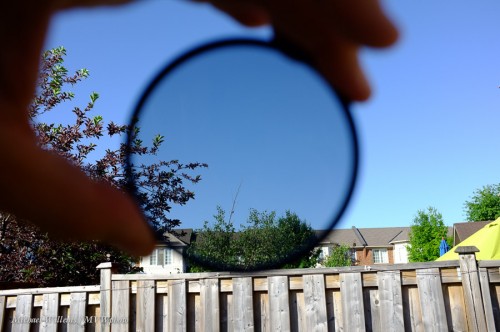
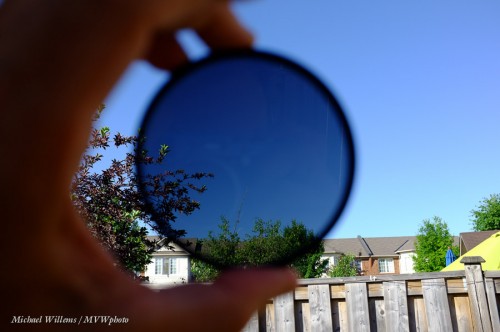
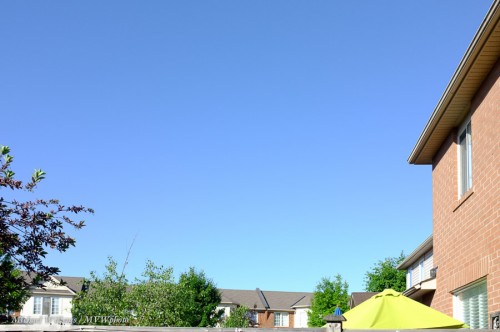
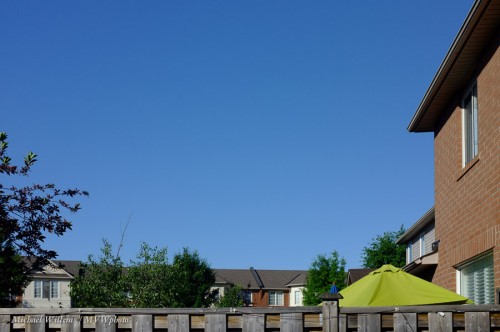
Below, the same while looking at the sky, which emits polarized light as well as unpolarized light: no polarizer; a polarizer rotated to allow in most polarized light; and one rotated to allow in almost no polarized light.

You will hear many people talk about “circular polarizers”, as opposed to “linear polarizers” You need a circular one for a digital camera. Let me explain.

A linear polarizer is just a polarizer. It lets through all, or none, or some amount of, polarizer light. But polarized light like this can confuse your camera’s AF and exposure sensors. So a circular polarizer is one that has two layers: the polarizer, followed by a filter that makes the light circularly polarized (basically, unpolarized). That way, no bad effect on the AF anmd exposure sensors.

This also allows you very easily to see whether your polarizer is circular: a circular polarizer only works one way. Turn it around (screw threat in front), and it does not work. Because the second filter makes the light basically unpolarized, so that the subsequent polarizer does not do anything.

So if your polarizer works the same whether you look through it one way or the other way, it is a linear polarizer, and will give you problems.

Here’s a polarizer taking away reflections (again, only off non-metallic surfaces):

Note that a polarizer can give you issues with mirrorless cameras. My Fuji x100, for instance, does not show the real effect when I use the electronic viewfinder. Beware!

Finally, a sequence with the polarizer turned to let progressively less polarized light in (using the Fuji x100):

You will note in the last images that part of the sky is darker than other parts of the sky. Yhis is becuse, as said earlier, teh angle matters. Parallel to the sun (i,.e.. the sun is behind you or in front of you) the polarizer does very little; at 90 degree angles it does a lot more. The only solution: use a longer lens.

And the last note: if you have only one polarizer, you can use only one lens? Nope. here, I used a large thread polarizer, a 77mm, simply held in front of the tiny x100 lens. Where there’s a will…

___

Have you had a look at my five e-books? All are over 100 pages long, well organized, illustrated, and a great source of information that gets you started immediately. Head over to learning.photography now!

Always Look On The Bright Side…

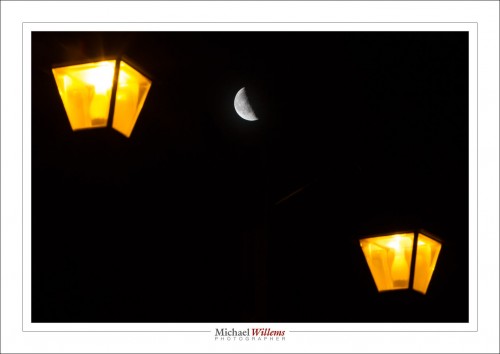
…at least when you are shooting the moon. Like in this shot, made at 3AM right outside my front door:

(1/80 sec, f/10, ISO800)

What is the salient point about this photo, would you say?

For me, it is another chance to point out to you how bright the moon is. About as bright as the earth on a sunny day. Because when you see the moon it is experiencing just that: a sunny day.

For a starry night, however, you need a much longer exposure. Many stops difference. You show the stars, or you show the moon; never the two together. A rough calculation gives me:

  • Moon: 400 ISO, 1/400 second, f/16 (“Sunny sixteen”) or lower (last night: f/8);
  • Stars: 3200 ISO, f/1.4, 20 seconds.

So how many stops difference between those two?

  • ISO: 400 to 3200 is 3 stops.
  • Shutter: 1/400 to 20 seconds is around 13 stops.
  • Aperture: f/8 to f/1.4 is 5 stops.

So the total difference in brightness is around 3+13+5 = 21 stops!

So until the dynamic range of our sensors and cameras is 21+ stops, you cannot show the moon and the stars in one picture. You would have to use HDR, or just combine a star picture with  moon picture in Photoshop.