About A Shoot

Often, people who do not know photography think it is simple. Just press the button.

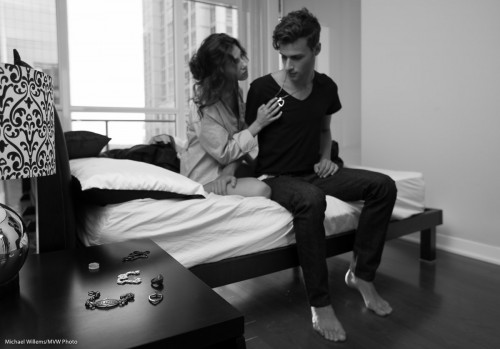
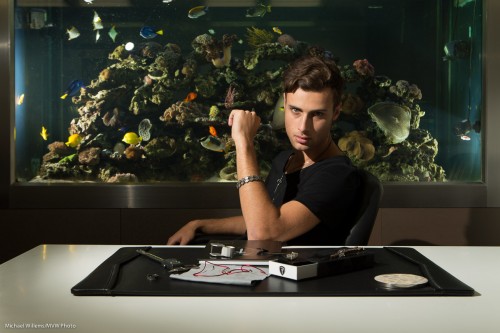
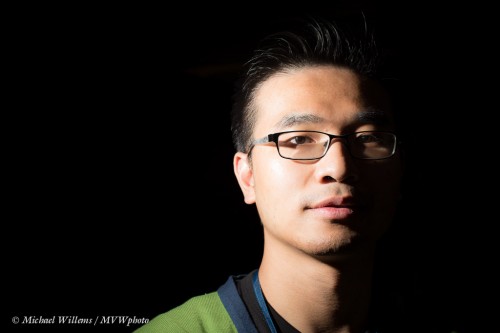
Alas, not so. Yesterday, I did a lifestyle/male jewellery shoot:

Not so. I didn’t – not alone. I was helped by another excellent photographer, my colleague and friend Kristof, but also by, among others:

  • Business owner and stand-in creative director.
  • His assistant
  • Male model
  • Female model
  • Clothing providers and coordinators (3)
  • Jewellery coordinator
  • Make-Up Artist
  • Hair Stylist
  • General assistant

In all, about 15 people were involved. And we took about eight hours to get what amounts to something like eight shots at three locations. Make-up and clothing can easily take as long as the shooting. And this was an awesome shoot: fun, and everyone worked exceedingly well together. Not always the case: here, it easily was.

As for the work: that is a lot – but it is not all. Those chosen shots are then finished meticulously. The post work takes as long as the shoot. Cropping, fixing, simplifying, adjusting perspective – all this takes time.

In technical terms of course it is not just the camera. It is the camera and lenses and lights – two off-camera speedlights in the shot above, and four, fitted with modifiers such as snoots and grids, in this shot:

So while the final click may only take 1/200th second, the preparing, packing, carrying many things from site to site, setting up, make-up, clothing, coordination, creative, post work, logistics, and so on take much work from many people. That is why photography takes time and costs money.

For these shots I used off-camera flash; manual flash with Pocketwizards for the first shot above. and TTL flash for the second shot. The camera was in manual. In the first shot, to give pretty good exposure – almost enough – using ambient; in the second, to give a totally dark room.


Welcome to new readers

Welcome to all my new readers. As you will see here, I am a Toronto-based full time photographer and teacher of photography – I teach my signature “Advanced Flash” and “Event Photography” seminars and courses worldwide and I do private coaching as well.

This site is free. All I ask is that you tell all your friends. I write an article here every day (yes, I must be a masochist) with a photography tip, a technique explained, or a technology clarified. Often about speedlighting -flash rocks once you know intimately how it works – but can be about everything. Aimed at every level from beginners to pros.

Speedlighting is my forte, and has been for years; but I engage in every type of photography. I shoot everything from news to art nudes to weddings to family pictures to food and product to corporate headshots. That keeps me as fresh as an amateur. “Amateur” is not a bad word by the way – it means someone who loves something. Amateurs have the best of all worlds in that there is no pressure and they can shoot what they like. As a photographer, I always try the same: to shoot what I like, and to keep it varied.

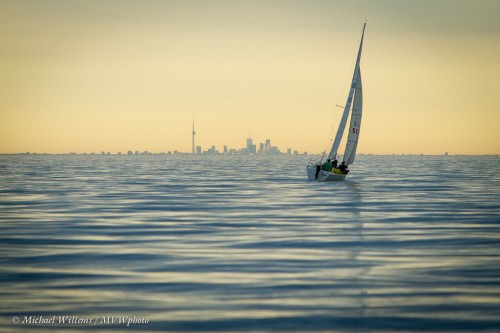
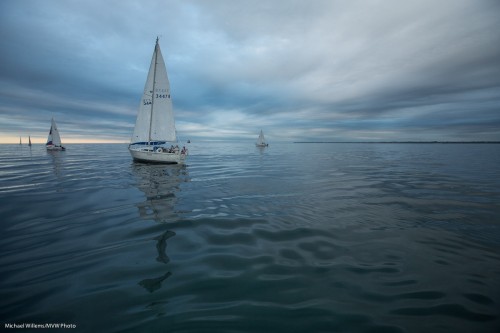
So today, then, a quick word or two about my recent Lake Ontario sailing pictures. Shot during the last three Wednesdays.

Pictures like this one:
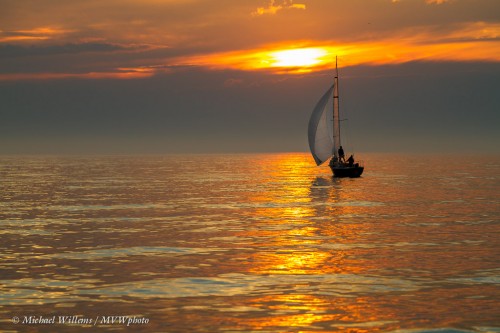
That used – unusually for me – a long (70-200mm) lens. And on a 1.6 crop camera, to make it 110-320mm.

Why? For two reasons:

  1. The obvious: boats can be far!l
  2. The less obvious: lake sunsets are often small, and the long lens ensures that I get “all of it”.
  3. The reflections are essential-  they too would be too small without the long lens.

Key is to keep the exposure time fast enough, even with a stabilized lens. Boats move!

Of course sometimes the sunset throws its light wider – then, the 16-35mm lens is called for:
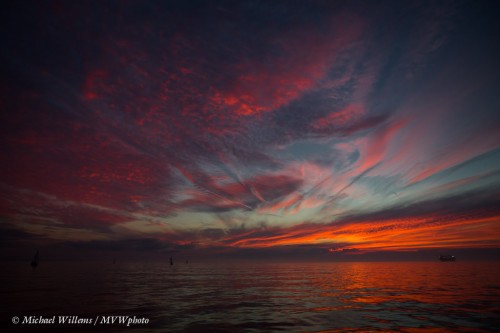
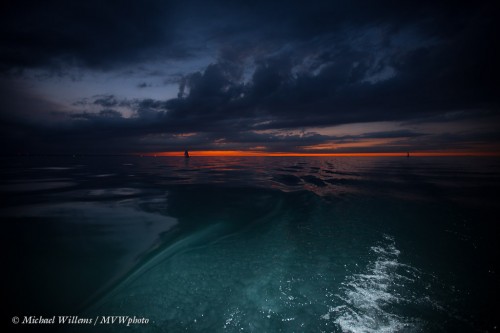
Now it’s not about the barely-visible boats, but all about the sky and reflection.

The key element in this image? Time. I had literally two minutes to capture that sky before it turned dull again. I was using two cameras: there was insufficient time for lens changes – plus, who wants to change lenses on the water?

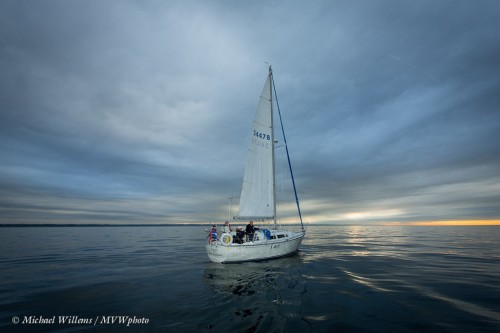
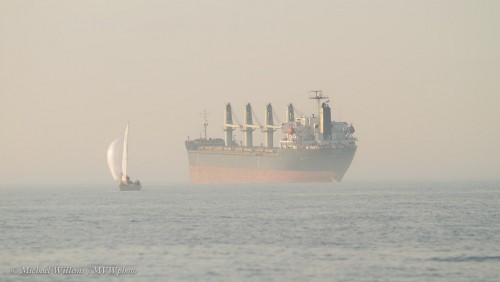
Fog is always good. Not every picture needs to be high contrast:
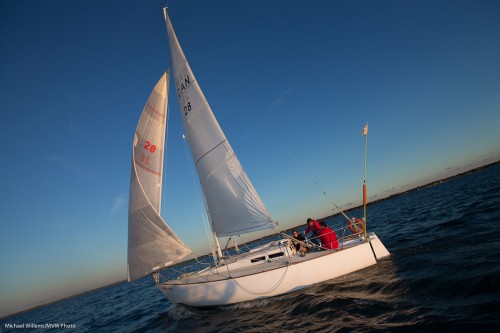
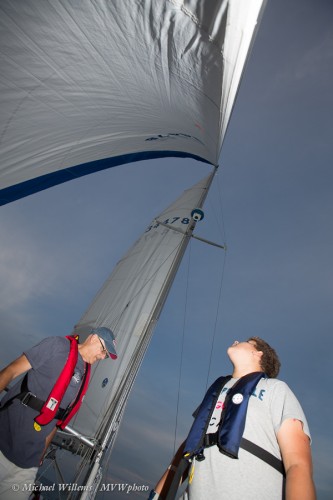
For crew pictures on a sail boat, a super wide lens is a must. The 16-35mm (on the full-frame 1Dx again) gives me this:
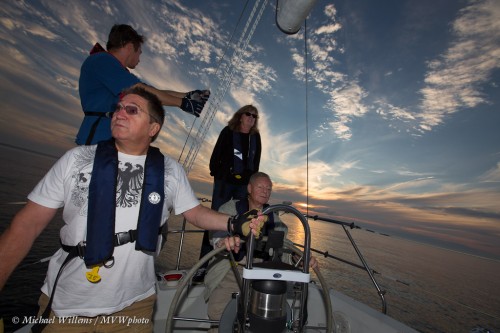
I tilted phe picture to give it a dynamic look, as well as to get everyone in. And you see the fill flash, of course? My flash is always on the camera when shooting, and is often used.

Do not forget to use the flash wide angle adapter when using the 16mm lens (that is the clear flap that pulls out of the front of the flash. As readers here know, that is not a “softening adapter” – it is merely a wide angle adapter!)

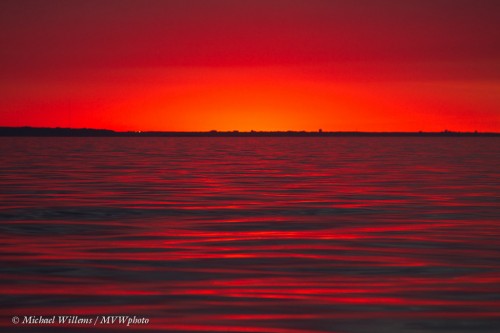
Going back to sunsets: sometimes, for a minute or so, they get spectacular like this:
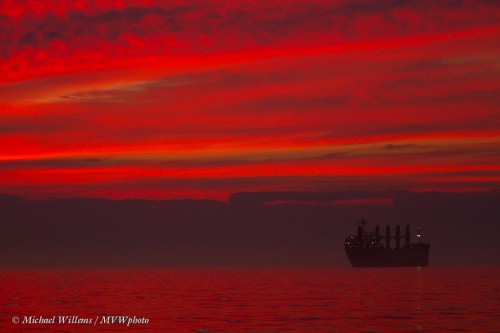
Important in that image is the long lens and good exposure. Making the image too bright makes it less saturated.

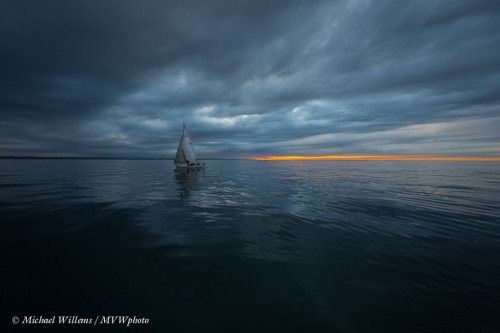
With a wide lens, skies and lakes can be great even when not lit up in red: the super wide lens (16mm on the full-frame camera) makes this all about the shape; the world bending in, wrapping around the centre.
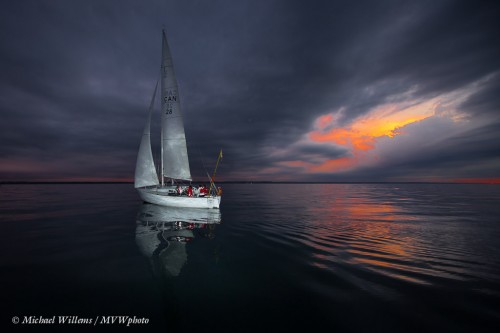
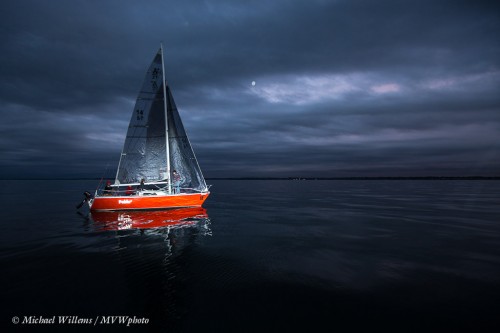
Finally, one more to show the effect of flash.
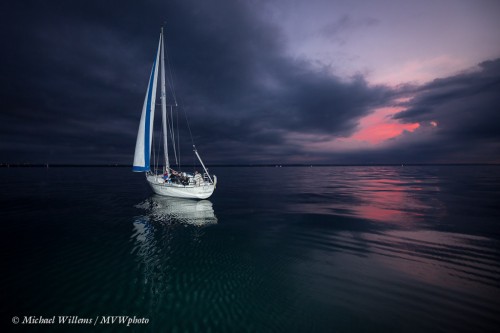
With tow notes:

  1. I exposed for a dark background.
  2. I then used the flash (a 600EX) to light the boat.
  3. I zoomed the flash in manually to 100mm to get the range I needed – if the flash had been sending its light as wide as the lens was looking (ca 24mm), most of its light would have been wasted and not enough would have been left to light the boat, even at f/4.0 at 400 ISO.
  4. I turned the flash slightly to the left, since my subject is not in the centre!

Now go enjoy sunsets and lakes while you can – on the Northern Hemisphere there’s little time left.


Portrait note

Two notes for you today.

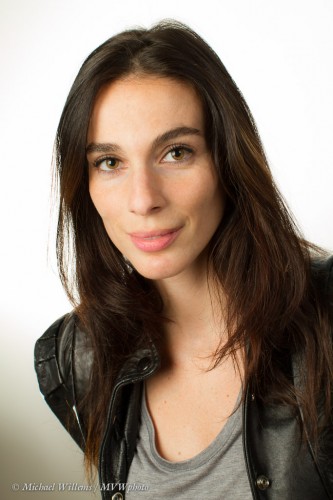
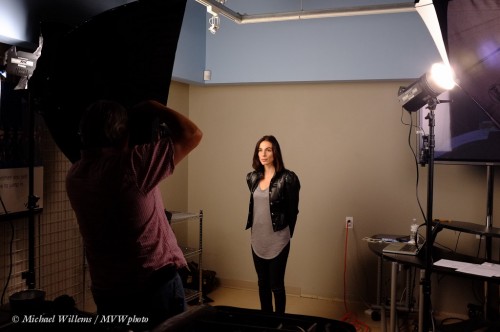
When you are doing a portrait, first, always at some stage take a pull-back shot. So when you shoot something like this (of a very beautiful student, as shot in the course I taught at Vistek last Saturday afternoon):

Shoot this also, so you remember how you did it:

Then the second note. The background. Think about what you want.

  • If you want a full white background, start white and blast it with light.
  • If however you want a saturated colour, do not overexpose: first ensure that little or no no light from the other flashes falls onto the background, then shoot it not too bright with gels.
  • Or if you want a nice falloff, like I often use, and as I used in the picture above, then merge the two. Start dark, light up in a selected area, perhaps using a close-by flash, if necessary with a grid. Sideways lighting gets you a parabola (remember your cone cuts in math).

We often forget to think about the background, concentrating instead on the foreground only. The background is a very important part of the image… think about what you want, then try to get that.


You can do this too.

Here’s a quick portrait of Ivan, the manager of Mississauga’s Vistek store.

Took about… oh, all of one minute.

Here’s how.

  1. Set camera to manual exposure.
  2. Select values for Aperture, ISO and Shutter Speed that will make the room go dark. Here, that was 1/160th sec, f/8 at 100 ISO.
  3. Put a flash on the camera in MASTER mode (a Canon 600EX here, set to using light, not radio, as a master). (You can use the popup flash on a Nikon or on modern Canons like the 7D, 60D, etc.)
  4. Make sure that this master flash will not fire during the shot – it fires only commands (“morse code”) to slave flashes, prior to the shot. Set this on your flash or camera.
  5. Hold a slave flash (in my case a 430EX in slave mode) in your left hand.
  6. Ensure that this flash in in TTL slave mode on the same channel as your master flash.
  7. If the room is very small, put a grid (eg a Honl Photo 1/4″ grid) on the slave flash.
  8. Aim that flash directly at the subject (really).
  9. Focus, recompose
  10. Shoot!

It really was as quick as that. When you learn good technique, you too can be quick with creative shots like this.


Easy Vignette

We often like vignettes in our pictures – meaning, the outside is darker so that the subject, closer to the centre, stands out more. Gives your pictures that professional “wow” feeling.

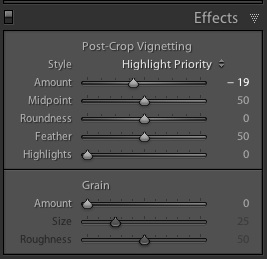
You can do that in post-production, of course, by using Lightroom’s “Post-Crop Vignetting” function:

Your best strategy is to decrease the “amount” setting by a small amount, say minus 15-20. Any more and it often becomes obvious.

There are of course ways to actually shoot with vignettes. I prefer to do that when possible.

One is to use a fast lens, normal to wide angle, and to shoot with it wide open. Like my 16-35 lens:

That often introduces a bit of a vignette: stopped down, lenses behave “better”. So if you want a vignette, “wide open” gives you that not as a problem but as a benefit. And you still get depth of field when wide open with an ultra-wide lens.

Another way is to light selectively. I did that in the above picture also. You can use an off-camera flash (and I often do!), but in this case I used on-camera flash. My lens zoom angle was wide, but instead of letting my flash automatically also zoom to “wide”, I manually set the flash zoom to 135mm. That means the flash’s light only lights up the centre (or where you point the flash head).

Another benefit of this technique: the flash has much more power now, going forward. And you are often going to be fighting at the limit of what power you have, so this is not a bad idea.

Last note: Some flashes (like the 600EX) also have a mode to always send the flash light to a slightly wider or narrower area than the lens covers. I use narrower, to give me some natural vignetting. Check out this function on your high-end flash!


A-sailing….

The Dutch are a seafaring nation and I spent many days sailing, as a kid.

The last few weeks I have been lucky enough to go sailing with some very nice new friends. I am going to share a few of the photos I made last night.

First, for shots in the boat, and for shots showing “wide” landscapes use a wide angle lens. You get that “world wrapped around your subject” feeling, as in this shot of Lucy:

Can you see in the image above that The Speedlighter Strikes Again? if not, here is an even more clear example: I made the boat stand out like an almost ghostly apparition:

For that, I exposed the background dark, and use my flash, zoomed manually to 135mm, to light the boat.

I also made sure I got enough setting sun:

As well as background objects of interest:

And the sunset itself. Sailing is great for photography becuase there is no foreground clutter!

The skies were cloudy. I love clouds with wide angles.

And as you saw in picture three, I also like the long view. Here’s Toronto again:

Lessons from the shott:

Hope for interesting skies. Expose the background well. I used manual mode for everything. Light up close objects with flash. Use wide angles but also bring a long telephoto lens.

I’ll share one more:

Tropics? Nope, Lake Ontario. Speedlighting rocks.


Pythagoras Today

I am often asked: “why do you tilt?” in some pictures?

For many reasons, as I have pointed out before here: to get a more dynamic picture; to move the important subject into the Rule of Thirds areas; and so on – but also, very often, for a simple and alomost “pedestrian” reason: Pythagoras.

What I mean is this: the hypotenuse of a right-angle triangle is longer than either of the other sides.

Take a photo: a rectangle with 3:2 ratio of the sides. Pythagoras teaches us that the hypotenuse is the longest line in that square: if the long side is, say, 3 units long, and the short side is 2 units long, then the length of the hypotenuse is the square root of (3 squared plus 2 squared), or the square root of 13, which is about 3.6.

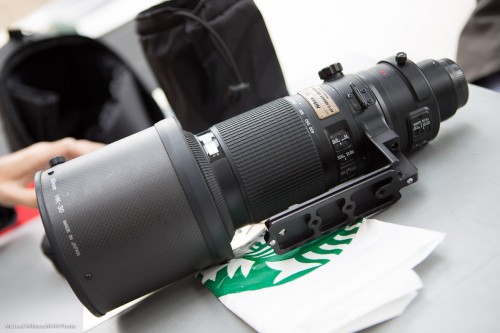
So if the 200-400m f/4 lens a friend was buying does not fit and I can neither zoom out or step back, then I turn my camera diagonally – and now it fits.

Simple, and a very valid reason to turn and tilt. And often, a more dynamic and artistic photo results – and that is added bonus,.

And yes, the sail boat too was a case of deliberate tilt.


Scenes

Sometimes you tell a story by not making things clear.

Like here, from yesterday morning, and what is happening:

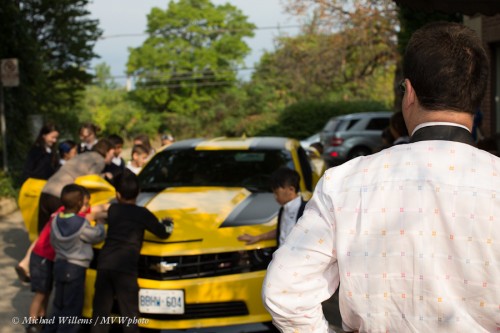
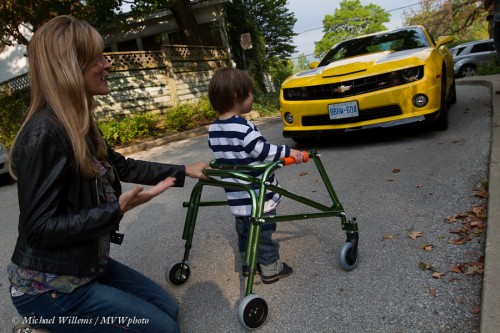
Transformer Bumblebee visited Mississauga for three days, courtesy of GM and Dan Bodanis of the Dan Bodanis Band.

The kids lovingly admiring the car are emphasized not by them being sharp, but by the onlooker (that’s Dan) being large and sharp. Your eye goes where his are looking. Then you see the story.

I used a 50mm prime lens on the 1Dx – my 24-70 is in for repair (the moving lens element is loose). Manual mode, 200 ISO, 1/500th second at f/5.6, meaning I used high-speed flash for the fill flash.

Here’s Bumblebee again, still using the 50mm lens:

Wide angles give much more depth of field: f/5.6 again, showing Dan’s wife and son, and using the same storytelling technique:

So today’s lesson: ask what story you are telling, then decide how to tell that using foreground subject and background, and the interaction between them.


Golden

The Golden Hour: when the light turns a beautiful golden colour.

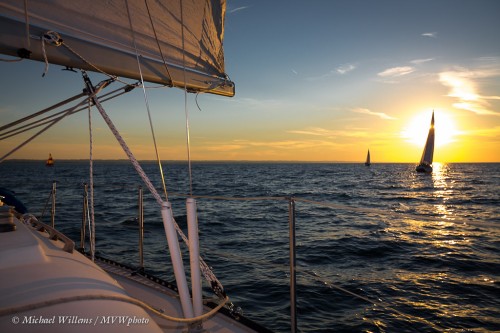
Like Wednesday night on Lake Ontario, while sailing:

Apart from the fact that I used the right lens (35mm on a full frame camera) and the right time of day (the “golden hour” is around sunset), you may want to notice a few things here.

  • First, the composition. Rule of thirds left-right, but symmetrical up-down, because of the reflection in the water, and the boat on the left.
  • Second, I used fill flash, or the boat I was on would have been black.
  • Third, as explained in yesterday’s post, I underexposed the background – or rather, I exposed it correctly to get the correct saturated colours.
  • Fourth, and very importantly: I waited for exactly the right moment. The Decisive Moment, in Cartier-Bresson’s words. The sail is exactly in the middle of the setting sun.

A photo turns from a snapshot into a photograph when you apply a little thought.


Open Wide…

…I mean the lens angle – wide is good.

I have gone sailing the last couple of Wednesdays, and here is an image from last week:

How did I take this dramatic image?

  • I used a wide angle lens: 16mm on a full frame camera, i.e. like using a 10mm lens on a crop camera. On a 33ft boat this is essential to get it all in, but also to create depth.
  • I underexposed the background by a stop or two. Manual mode, 1/80 sec at f/5.6, ISO 100. That’s where I start, with the background. I underexposed it in order to get drama, to get my subjects to be the “bright pixels” once I light them up with flash, and to get deep, saturated colours.
  • Since 1/80th second is well below the maximum flash sync speed, I did not need to use high speed flash, and the flash has its full power output available.
  • And I used the wide angle adapter on the (on camera) flash, to ensure the light goes as wide as the lens is looking.
  • I compose to avoid unwanted shadows.
  • I also aimed up, and I tilted the lens. The latter for three reasons: for “rule of thirds” composition; to get everything in; and to get rid of stuff that does not belong in the image. Simplify, simplify, simplify!

That’s how. You too can produce dramatic images with simple equipment (you do not need a 1Dx!) once you learn how. Keep reading!

(And once you really want to put it all together, come to one of my courses, e.g. at Vistek; but also, consider some one-on-one training. Give me a call to learn how easy that is – you owe it to your photography).