Limits

When you determine exposure for a photo, the principle is simple: only three things make a photo brighter, assuming everything else remains the same (which is the case when you are in manual mode, so this is how you should learn):

  1. Higher ISO
  2. Larger aperture
  3. Slower shutter

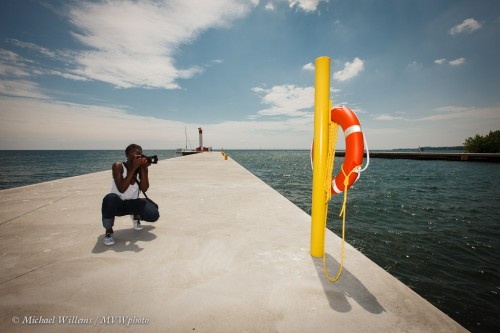
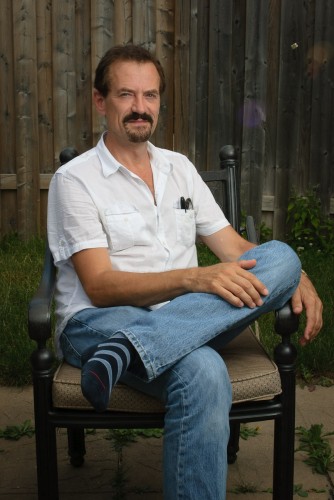
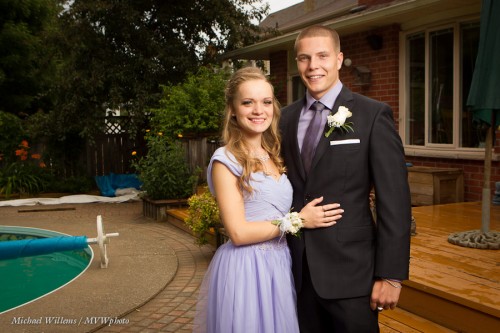
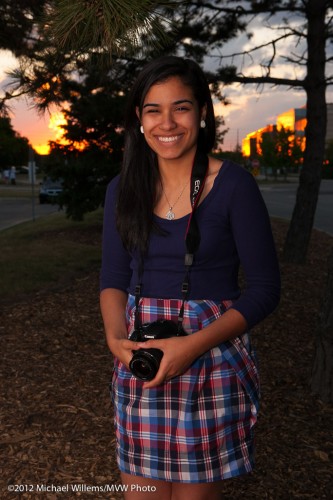
So it should be simple to get a beautiful darker background like this one here, in a recent picture – taken two weeks ago of one of my Sheridan College students:

It is simple – once you realize a few things.

Darker or Lighter? It may not be obvious to you whether you want the background lighter or darker. In fact darker brings out (saturates) the colour, but you may think brighter is better. Your great advantage is that you have a digital camera, and each click costs $0, so the best thing I can advise you: practice.

What About The Foreground? You may need different light for the foreground. Here, I used an off-camera flash into an umbrella.  My advice is: worry about the background (the ambient light) first, as above; then worry about where you may have to add light.  One thing at a time!

But where do I start? You will soon get a feeling of what settings are in the “acceptable range”. One thing you could do, as a sort of training wheels, is set your camera to P (Program mode); see what ISO/Aperture/shutter settings the camera would suggest, and then use those as starting points in your manual settings. But soon, you will get to know what you want:

  • for motion (blurring or freezing), shutter is your first thought
  • for depth of field, aperture is your first thought
  • for quality, ISO is your first thought

And you will then have only two other variables to worry about. Combine that with ISO starting points (200 outdoors, 400 indoors, 800 in difficult light) and you have only one to worry about.

Learn The Limits. Learn what aperture will give you too-shallow DOF (e.g. f/1.4 when you are 2 inches away), What aperture will give you fuzziness (eg f/45). What shutter speed will give you motion blur (slower then 1 divided by the lens length). And so on!

Put all those together, and exposure becomes much easier. The key: reduce everything to the above very simple principles.

Exercise: this week, shoot only in manual mode. Both inside and outside, so you have big changes to deal with, This is the best way to handle learning exposure, and once you know exposure, photography becomes much easier.

 

Macro Tip

For close-up photos, I have four quick tips.

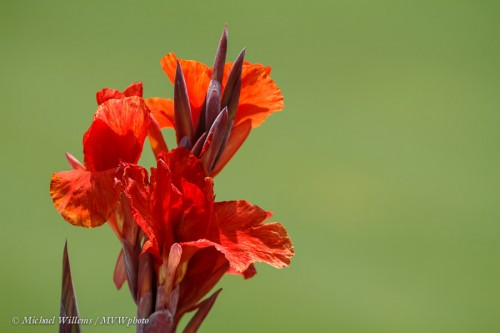
First: you may not need a macro lens. Yes, of course it’s great to have one, and for small objects like bugs you need one – but there are many types of macro shot you can do without a macro lens. Small-sensor cameras (point and shoots) can get very close without any spacial lens. So can long lenses, like my 70-200mm lens, which takes pictures like this, from the Oakville walk the other day:

Second tip: use simple backgrounds. Again. like in the pic above. I defocused the grass by shooting at f/2.8.

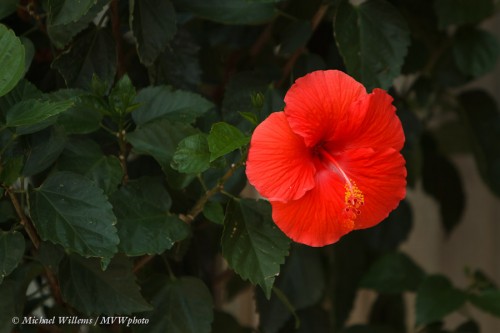
Third tip: use contrast to make your subject stand out. Like in the shot above, where I used colour contrast. Or in this next one, where I used brightness contrast:

This time, I simply selected a dark background. You can hold a sheet of black paper behind the flower if you like, too.

Tip four: avoid direct sunlight if possible, though translucent flowers are nice. Else, soften the light, e.g. by using a diffuser.

Go try – point-and-shoot, or SLR with large lens: go take a flower picture right now. Questions? You know where to find me.


Wide Lens Caution

I am a big fan of wide lenses – 16-35mm on my full-frame camera, or 10-20mm on your crop camera.

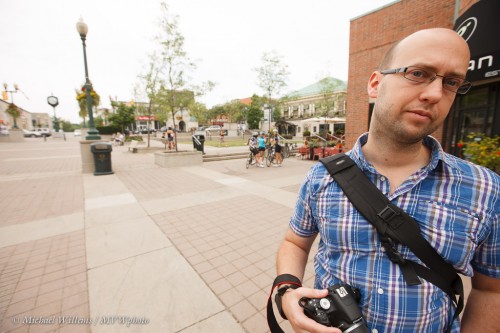
But there is one thing to watch out for: do not get too close to people. Especially, do not put them into the corner: here is volunteer student James on Sunday:

Avoid the corners!

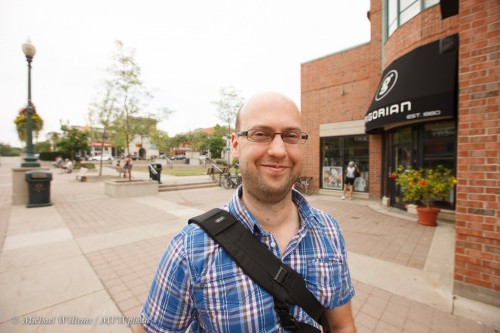
And avoid getting too close in general. As in this one, which is much is better, but the extreme proximity to my subject still distorts his face:

Wide lenses rock, as long as you avoid this gotcha. What they do do is give you diagonals. depth, perspective, and a few technical advantages also: the ability to shoot at slow shutter speeds, and almost infinite depth of field. so if you do not yet have a 10-20, go buy one, and shoot this kind of image:

QED.


Water flow tip

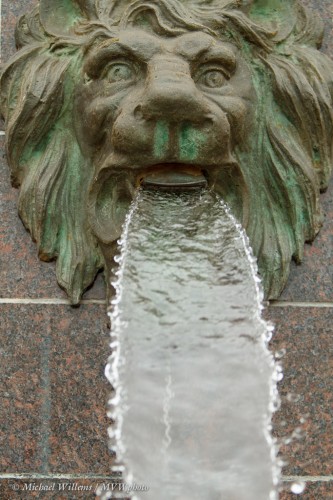
Shooting a river, waterfall, or as in this case, fountain?

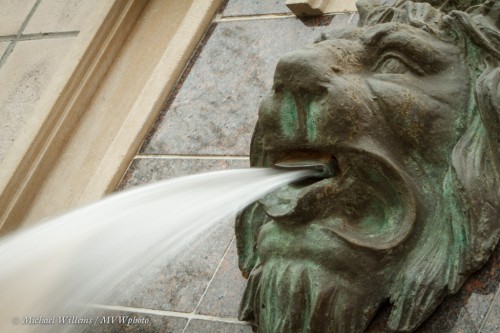
In that case consider not shooting it as above – if it is a moment in time (waves hitting rocks) you can. but when it is a flow, show it like a flow:

To do that:

  1. Use manual or Tv/S mode (shutter priority)
  2. Use a shutter speed of 1/4 to 3 seconds.
  3. Use a tripod – this is a must.
  4. If the light is too bright even with low ISO and high f-number, then use a simple dark filter (a “neutral density filter”).

Tip: if you do not have an ND filter, a polarizer will also darken the light by a couple of stops.

And now a secret: I shot that handheld, at 1/4 second, with no tripod. The secret? Experience; a steady hand; holding the long lens at the end; sitting down steady; and especially, a stabilized lens. Got the shot in one try!


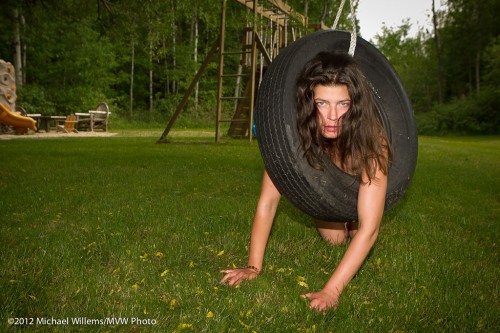
Today I shot soccer kids in Malton. Using a simple flash on camera. Pictures looked like this – although this is not a soccer player but my model recently, the technique is the same:

To do this, you

  • Underexpose the background by 1-2 stops
  • With the camera in manual mode
  • Try to get aperture around f/5.6 with the shutter between 1/100th and 1/200th second
  • And then use your flash to light up the subject.
  • If the background is too dark you will see shadows.

Note to Sheridan students: Tomorrow, I am going to walk my Sheridan students around Oakville at 11AM – yes, students, we are on, unless it is pouring with rain in which case I will post here before 10AM. Towne square and Lakeshore Rd, Oakville, under the big clock, 11AM.


Wedding Season!

An exciting new initiative: Kristof Borkowski and I are now shooting weddings, engagements, etc as a team. We shoot locally in Ontario, but also do destination weddings all over the world: our all-new web site, www.tolivetolove.com, explains more.

Lucy and Matt at their recent wedding (photo by www.tolovetolive.com)

One exciting part is that since this initiative is new, unlike older businesses, we have openings even this summer.  Give us a call or drop us a line if you are interested in great photography of your special day or event.

And now what you are here for… a few Wedding Photo Tips:

  • When shooting a wedding, get a detailed list of required shots well in advance from the bride and groom.
  • Go over this list in detail until it is complete. That way, there will be no surprises!
  • Print the list!
  • Make sure you have the name and cell number etc of someone who can help you get all the people in the required shots together on the day. They know who Uncle Frank is; you don’t!
  • Use a camera with two memory cards, and write e4ach image to both. Cards fail, and precious moments never appear again – they happen once, and that is it.
  • Use fast lenses. A minimum of f/2.8 is required (even then you will shoot at 1600 ISO often!); prime f/1.4 lenses can often be even better.
  • Carry twice the number of flashes and cameras that you need. Things break!
  • Carry twice the batteries that you need – and then double this number again.
  • Change batteries for every segment of the shoot.

Use those and you’re set to go. (But… one piece of advice: do not shoot a wedding as the only shooter if you have no prior experience: shoot with a pro as an assistant, and then as a second shooter, a few times until you know the drill!)


Light Meters Are Old Hat. Not.

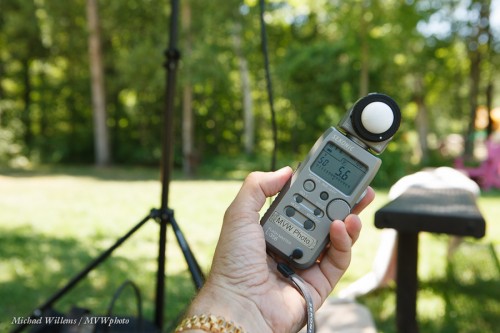
Not! A light meter is an indispensable tool if you want to ace your exposures first time.

Take this scene (taken, incidentally, amidst a whole bunch of naked people):

That meter is well exposed. Perfectly, in fact. Values were 100 ISO, f/5.6 at 1/50th second.

How? By reading the values off the incident light meter (a meter you hold where the subject will be):

  1. Set the meter to ambient (not flash) metering
  2. Move the ball out
  3. Select the camera’s ISO and the aperture you want
  4. Hold the meter where the subject will be.
  5. Click and read the value for shutter.
  6. Set those values on your camera
  7. Click.

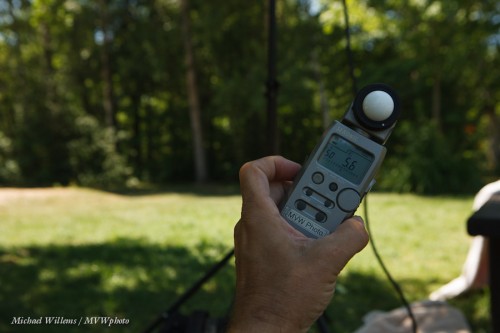
With the camera’s built-in light meter, however, the exposure came out like this, since the light background was also read by the meter:

That’s nice for the background, but if the meter is the subject, this exposure is all wrong – 2 stops too dark (the camera thought 1/200th was the correct shutter speed).  You would now have to adjust the exposure manually, or instead aim your camera, set to spot metering, at a gray card held there. Which is less convenient.

And that is why light meters are far from old hat. Pros use them all the time, even as ambient light meters as here.


July Celebrations

We had July 1st in Canada yesterday, and our US friends have July 4th in a few days.

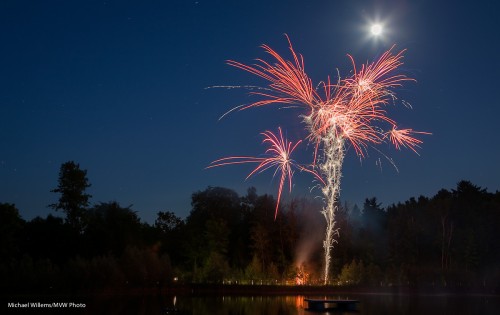
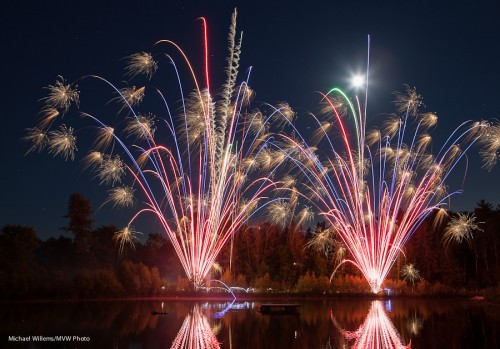
This is from our Canadian July 1st celebrations, in Newmarket, Ontario:

Technical tips:

  • Mode: Bulb, with remote release
  • ISO: 100
  • Aperture: f/8 – f/11
  • Shutter: 1 to 30 sec; usually 2-5 seconds if there is some background light at all.
  • Focus mode: Manual focus, prefocused “where it will happen”
  • Shutter mode: One shot
  • Camera mount: Tripod (this is mandatory!)

And the usage tips:

  • Set up your camera on a tripod, and aim at the fireworks source
  • Avoid being downwind (the smoke will ruin some of your pictures).
  • Manually pre-focus where the fireworks will go up (or on “infinity”).
  • Use wire/radio release, so you do not need to touch the camera.
  • Start before or as a particular firework goes up, and hold the shutter open until that one  is done (but avoid getting the next one in the picture, unless it is aimed differently). This will usually take 2-5 seconds but can take longer to get light into the background.

Because it was an extremely dark country setting, the venue yesterday needed 30-60 seconds per shot to get any light into the background at all, so you can imagine I was happy that there was a short break between firework volleys going off, so each time I was able to open the lens for 30 seconds prior to the fireworks. Otherwise the background here would be pitch dark.

Try it out – above all, have fun, and happy 4th of July!


Prom Season

To help out a proud mom, I shot some images the other night of a young couple about to go to their high school prom. I thought I might share that process here.

The day was wet and dark – warm, but raining. And then it stopped raining – but it was still very dark, totally overcast, and remained that way.

Perfect. We want dark, so that:

  1. The sun will not cast harsh shadows;
  2. Our speedlights can overpower the ambient light, to make our subjects the “bright pixels”;
  3. We can render colours saturated (darker is more saturated).

So let’s start. First of all, of course I shoot manual. I set my camera to “sunny sixteen”, i.e. 200 ISO, 1/200th second, f/16. Then I go to f/5.6 to match the light (look it up: Sunny Sixteen, and totally overcast, no visible shadows). Then I go back to f/11 to make everything two stops darker. Then I go to 1/300th and f/9.0 – that is the same exposure but f/9 makes my flash more powerful than it would be at f/11, while the shutter speed makes no difference – provided I stay at or below my sync speed (on the 1D4 this is 1/300th).

Then I added flash – off-camera flash firing into an umbrella. My on-camera 600EX was disabled except for commands; the 430EX in the umbrella did all the work. So all I carried was a camera, two flashes, and a light stand with umbrella, with bracket to mount on pof those flashes. Light and easy.

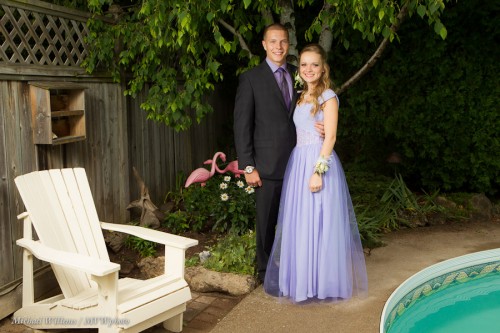
Then, the setting. As the Speedlighter, I opted for outside, of course. A great back yard with a pool gives us this shot:

Note the Rule of Thirds, and note that I wanted a “home backyard prom” look, not a studio look, so while I photoshopped (Lightroomed, actually) away some items I did not want, I did want the chair, the pool, the lovely pink flamingoes, and the other items that show where we are.

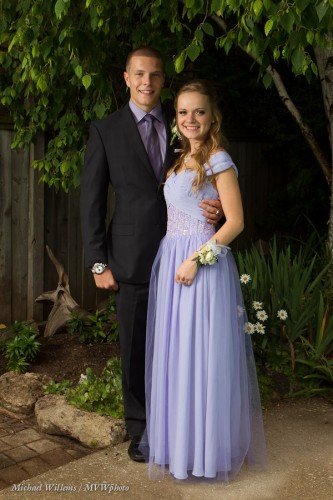
Still, I did also take one more traditional vertical shot without all those trimmings:

The important thing is to have models look toward the umbrella: always watch where the light is.

I used TTL flash for this, so needed to occasionally change Flash Exposure Compensation (FEC).  Note: In my courses I teach you all this stuff. I do private coaching – and stand by also for my seminars at Vistek in Mississauga, starting 21 July – dates here soon.

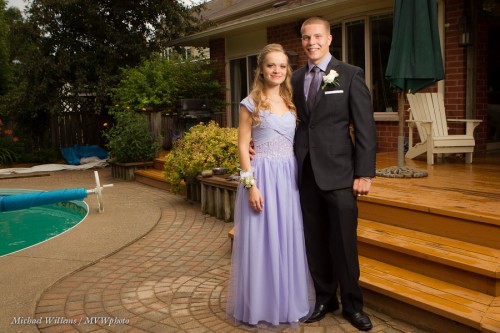
Finally, I made some that make the scene even more of a home scene. In the following shot I electronically removed a container of chemicals, a barbecue gas tank, and a decorative frog:

…but I also made sure to zoom in and do a close-up:

In the above shots I had the umbrella on my right so that Vanessa was looking into the light – flattering for women – while her date James gets Rembrandt Lighting – flattering for men.

Postscript: when I say “looking toward” – I should be clearer, I mean “their faces turned toward”. Photographer’s jargon!

Do you see how this all works? Fun, isn’t it?

___

If you are in the Toronto area or elsewhere where I find myself and want lovely family portraits or “senior shots”, please contact me – you owe your family some great heirlooms…!