Simple portrait with background

A simple portrait recipe for a portrait with background:

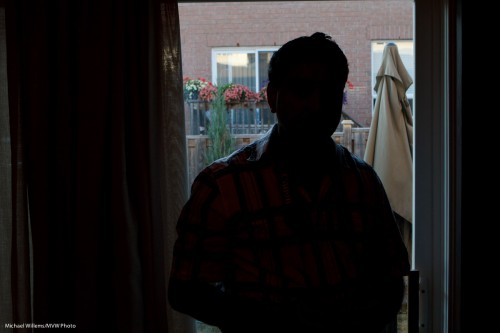
Find a background. Then, using manual mode, set your ISO, aperture and shutter to expose for that background – like here:

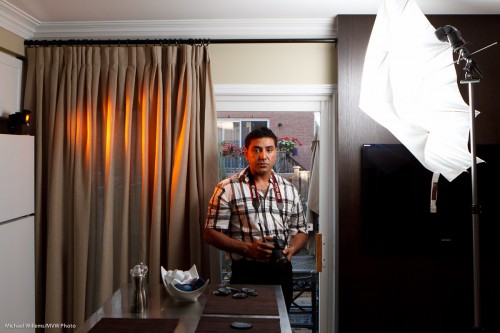
Balwinder (Photo: Michael Willems)

As you see, the outside is well exposed. The inside part will come later.

Now:

  • Remember to keep the shutter below your sync speed.
  • Exposing for the background means your subject is dark, if it is inside. So you will need flashes to light up that subject.
  • First,  add a main light, diffused – in my case through an umbrella, on our right. Measure that, and ensure its brightness is good.
  • Then add an edge light – in my case, a rust-coloured edge light, using a Honl Photo “Rust” gel, and a Honl Photo 1/4″ grid.
  • Remember, an umbrella does not have to be all the way open.
  • For the main light, shoot-through is best.

All that gives me this:

Balwinder (Photo: Michael Willems)

Note the curtain.

And the finished image.. now crop judiciously. Avoid reflections. And note the use of the rule of thirds in my image here:

Simple, takes a minute to set up. You can meter, or you can use TTL (I used TTL, with an A:B ratio).

The point here is not that kitchen portraits are the thing to aim for – the point is, a background adds (both the curtain texture here and the garden), and a portrait like this is easy to set up and quick to do.

 

Pan pan pan

In an aircraft, a “pan” call is a request for assistance without an immediate emergency – i.e. you are lost. Tune to 121.5 MHz, put out a pan call, and some controller will help you figure out where you are, and save the day.

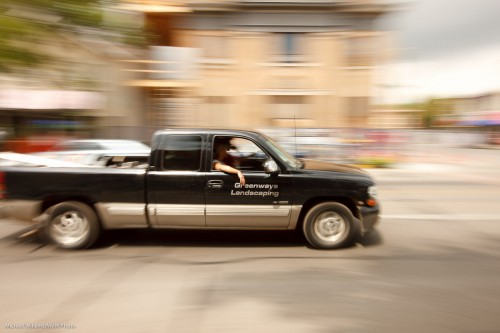
Although the word comes from the same Greek word, in photography, panning means something else entirely. It means “moving with the subject while using a slow shutter speed”.

I have talked about it before, of course, but let me refresh your memory, and give you some more recipe detail.

  1. Use an appropriate lens (this does depend on subject, location, and situation, but often it is slightly wide angle, like 35mm).
  2. Set your camera to S/Tv mode (shutter priority).
  3. Select a shutter speed of 1/15th of a second.
  4. Pre-focus where the moving object will be in front of you. Either pre-focus and hold, or pre-focus and then set focus to manual (“M” with the switch on your lens).
  5. Wait for the subject to enter your field of view – point there, where the subject enters.
  6. Now aim at the front of your subject and follow along with the subject.
  7. When subject is straight in front of you, while you are still moving, click.

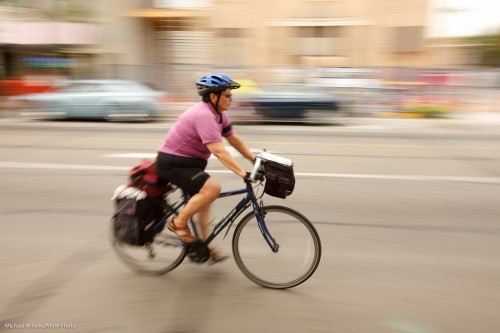
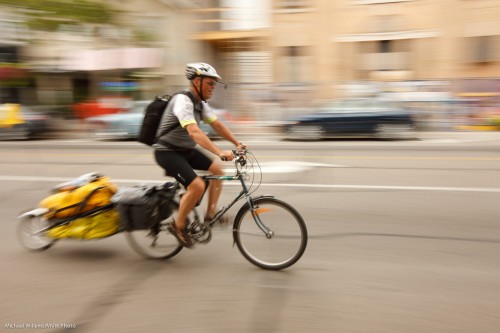
Takes a bit of practice but it works very well. Here, from an Oakville walking tour the other day:

Oakville Panning Photo (Photo: Michael Willems)

You do this, in other words, when you want to show motion; when a static picture would look odd. Motion blur can be good!


Yum.

I am glad that I always carry everything in the car. Lights, light stands, umbrellas, pocketwizards, cables, lenses, and so on.  So that when a restaurant shoot yesterday involved food instead of interiors, there was no problem.

As the restaurant set up a table for the food (which was long enough so I would not need a backdrop), I prepared the following:

  • My Canon 1Ds Mk3 camera with 100mm macro lens;
  • A tripod;
  • One stand-mounted 480EX flash fired by pocketwizard, with an umbrella above the food.
  • One stand-mounted480EX flash, also fired by Pocketwizard, behind the food, firing forward;
  • On the second flash a Honl Photo speed strap and a 1/4″ grid;
  • I set the flashes to half power and quarter power, respectively. This is convenience and experience.
  • I set the camera to 200 ISO and f/8.  (and 1/125th second, but this was almost irrelevant).
  • I slightly adjusted the umbrella position.
  • I checked an image’s histogram: great. Highlights in white table blowing out slightly, none of the food blowing out: perfect. This is experience – I could have used a light meter but this was a hurried, high-presure shoot (the restaurant was about to open).

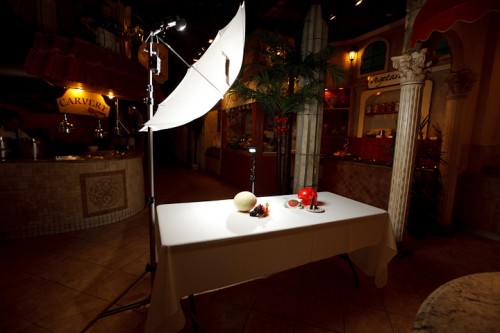
All that looked like this:

Food (Photo: Michael Willems)

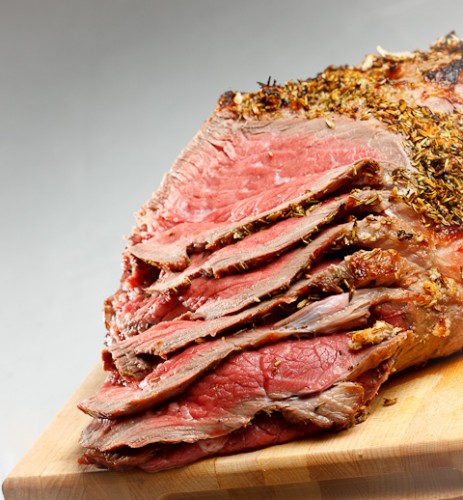
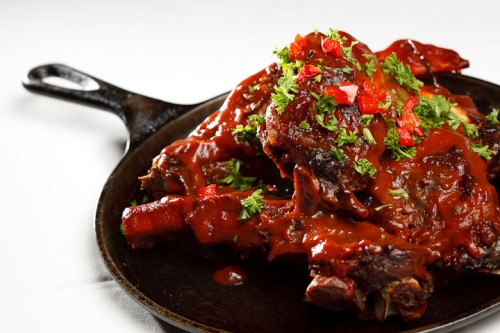
And it got me shots like this:

Food (Photo: Michael Willems)

Food (Photo: Michael Willems)

Food (Photo: Michael Willems)

Straight out of camera that is not bad, what?

Take the above recipe and copy it if you like – see how you do with food!


Confused? Your camera is here to help.

Tip of the day.

Sometimes during a shoot, you can get confused. What am I doing? Why are they all staring at me? Was I going to use Aperture mode or Manual? Why is it all over-exposed? Or under-exposed? Help!

I can identify with that feeling. The first time I took my car for a drive alone, without instructor, and I encountered a large roundabout.. brrr. Or on an early solo flight, when while I was turning final the stall warning went off. Too much to check at once: air speed, vertical rate of descent, flap setting, throttle, carb heat… all while the buzzer goes buzz buzz. Help!

So in a car or in an airplane, I have no good suggestions. Well I do actually: first of all, do nothing. Panicking makes things much, much worse. If you don’t do anything, things will likely stabilize.

But in a camera it may not work out that way, which is where today’s tip comes in.

When you get confused, take a tip from the camera.

[1] Set the camera to:

  • Auto ISO
  • Auto White Balance
  • Smart metering (Evaluative/3D Colour Matrix)
  • Program mode (“P)
  • TTL Flash (“TTL” displayed on the back of your flash unit)

…and now see what the camera does.

[2] Now use those settings (ISO, Aperture, shutter) as your starting point. Set them in whatever mode you wanted – like manual.

[3] Then vary from that starting point.

Often, that resets your problems. Perhaps your problem was an unrealistic shutter speed, or a way-too-low ISO. Well, the settings above will sort that put ad get you started right. Then you can bring your own creativity to bear from there.

See? As simple as 1-2-3.


Flash Tip: Bright Days

Following on from my previous post, one more quick flash tip.

On bright days, decrease your exposure. Then use flash to fill in the foreground.

Here: a bright recent day.

Bright Day (Photo: Michael Willems)

Not bad, but can we do better? I woujld like the sky to look blue, not washed-out. For blue, I need to decrease my exposure.

Which I do (using manual or minus exposure compensation),. Nic eblue sky – then I turn on teh flash to fill the foreground. I make sure I use high-speed flash if my shutter speed wants to exceed 1/200yh second.

All this now gives me this:

Bright Day (Photo: Michael Willems)

Not bad, eh?

Finally – also note the use of red, green and blue. All in one image. All three primary colours, saturated, in one shot makes the photo visually interesting.


August 13, Joseph Marranca and I will be doing a Creative Light workshop where I guarantee we’ll use light just like this. There is still space if you book now!

Tip time: Fill Flash

Tip time: fill flash and how it works.

Fill flash means flash “helping a little”. It is not a particular type of flash; it is a particular use of flash.

In fill flash, the flash is used to light up the foreground a little, to get rid of shadows. On bright days, say, or when backlighting, or when a subject it being hit by harsh sunlight.

As in this example:

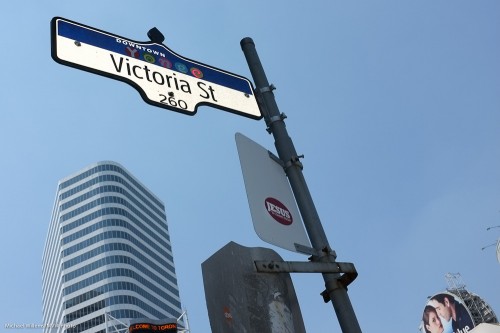
Yonge-Dundas (Photo: Michael Willems)

The sign above is lit up by my Fuji X100’s little flash, on a bright summer day.

Tip one: traffic signs will light up with minimal added light, since they are designed to reflect brightly.

Tip two: when you use exposure compensation to decrease the exposure to get a darker blue sky, the flash may also decrease in power. It does that on Nikon, but not on Canon. This is an arbitrary design decision. You can solve it by either of these two options:

  1. increase the flash (i.e. opposite adjustment) using Flash Exposure compensation;
  2. Simply set the ambient exposure in manual mode. That way flash is not also adjusted.

Tip Three: when it is bright, turn on high-speed flash (“Auto FP Flash” on Nikon) and get very close to your subject.

One more:

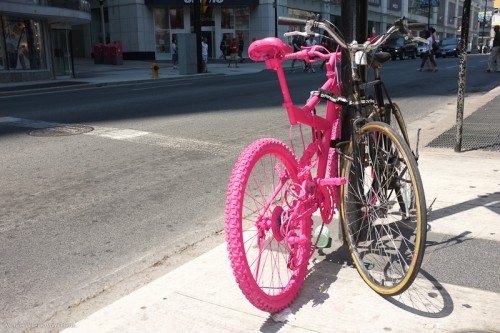
Pink bike (Photo: Michael Willems)

Try fill flash – start in program mode, then work your way up to manual modes and adjustments.


Fuji X100 tips

Two more Fuji X100 tips for you today. This little camera continues to amaze me.

First: turn off the shutter sound. And perhaps also the focus chirp, although I must admit I find it hard to dispense with that altogether, so I leave it on but turn its volume down to the minimum. Why add a shutter sound when the super-quiet operation is exactly why you bought a rangefinder-like camera in the first place?

Second: pre-focus. Do this as follows: set focus to “manual”, then aim at your subject, then press the AF-L/AE-L lock button to focus. The camera now focuses (i.e. manual was not all that manual). You can now let go of the AE-L/AF-L button: focus is taken care of. You can now worry about moment, composition and exposure.


Tip: Help yourself

Quick tip of the day:

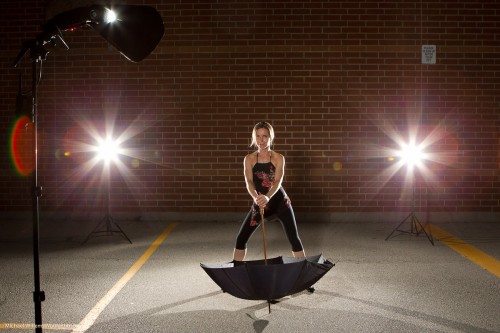
When setting up a complicated shot, always do a “pull-back” shot to remind yourself of the lights you used.

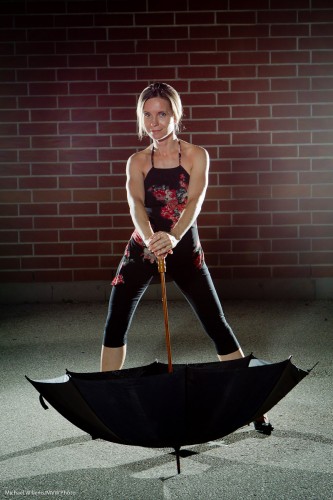
So when you shoot an Emma Peel-like pose such as this:

Emma Peel-like pose (Photo: Michael Willems)

…you should also shoot at least one like this, to remind yourself later of how to do it:

Emma Peel-like pose (Photo: Michael Willems)

That was two bare speedlights 45 degrees behind aiming forward, and a single speedlight in a Honl Photo Traveler 8 softbox as fill light. But seeing the picture says so much more than those words.


SLR Tip of the day

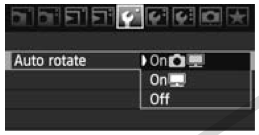
When you are using an SLR to look at images you have taken on the back of your camera, set your camera to not autorotate the images. That way you can see the image fill the entire LCD instead of part of the LCD with big black bars on both sides.

On some cameras you even have two options: on the camera, or in the image itself.

In this case I set autorotate ON in the file, but OFF when reviewing on camera (the middle option).

You will find thise fuction either in the playback menu of your camera, or in the settings menu.


Lightroom tip: Recovery

Yesterday I shot a wedding in broad hard daylight. That prompts me to write about a convenient Adobe Lightroom control you will need: recovery. Here’s how you use it.

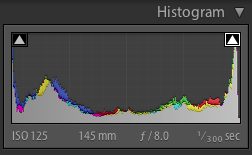
Look at the image. Then, in Lightroom’s DEVELOP module, turn on the highlights warning (on the histogram, click the right little arrow):

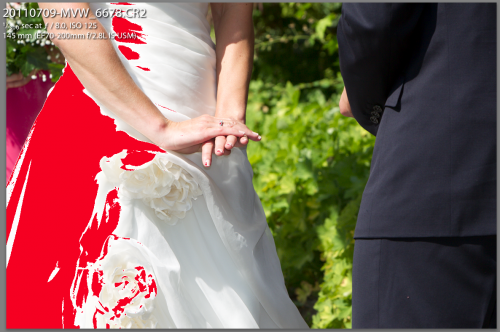
You now see the overexposed areas where there will be total loss of detail:

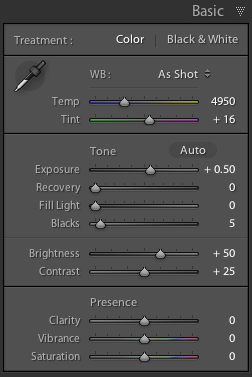
This is how the “basic” edit area looks:

Assuming you were sensibly shooting RAW, you can fix this.

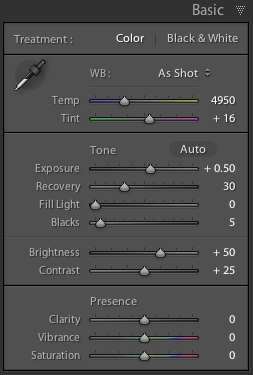
In that “basic” area, drag the “recovery” slider to the right until the red almost disappears:

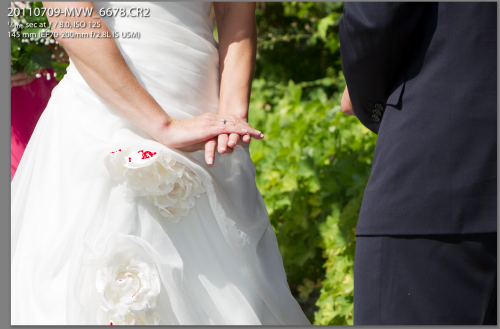
Now you see this:

And that means there is now detail in the dress. In the immortal words of George W. Bush: “Mission accomplished”.

Discussion:

Q: Why all the way to the right? A: Since the dress is pure white, we want its brightest bits to show extremely, totally, white. Hence the adjustment until the dress is only just showing some highlights.

Q: Could we have done this in camera? A: Yes, by decreasing exposure, but then we would have lost all detail in the dark areas. By slightly overexposing the very brightest areas and then fixing this, we are using the full dynamic range available to use – with the camera in RAW mode.

Q: Could we have done this by just dragging down exposure and increasing fill? A: Yes, perhaps – but in pictures where a small area is blown out totally – sunny day pics – the “recovery” slider is often the quickest, most convenient way to solve these issues. And speed matters when you have 300 images to finish!

Q: Doesn’t a high-end camera provide for this? Some kind of a highlights mode? A: Some do – but only if you shoot JPG, which kind of defeats the purpose of it all.