Flash and what you want.

Your background is what you want, not what it is.

Huh?

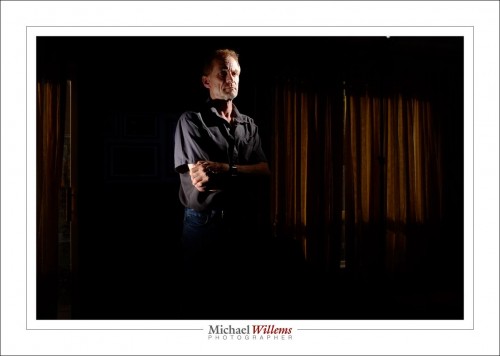
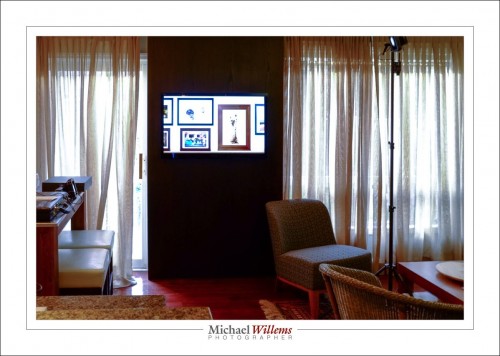
Take this example. My room looks like this, right now.

(0.5 sec, f/8, 200 ISO).

But when I set my camera to 1/250 sec, f/8, 200ISO, I get:

Dark. Even the TV is almost entirely dark.

Why? Because that is what I want. I do not care that the room is pretty well lit; I want it to be dark. So what do I do? High f-number, fast shutter, low ISO. And that gives me not what there is, but what I want.

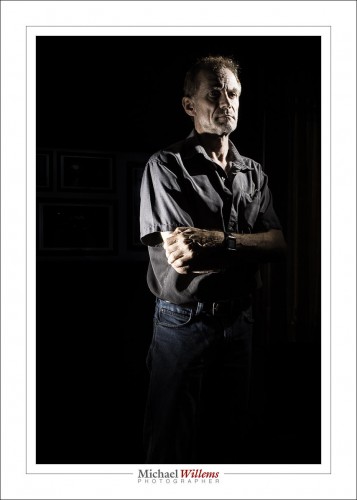
And when I crop that, decrease saturation, and increase clarity, then I have a low-key portrait.

…which is of course what I wanted all along.

Note that I use two flashes to light me. They are set to manual at 1/4 power, my standard flash setting. I also have a grid mounted on each flash (a Honlphoto grid). These stop the light from spreading through the room. If it did, the room would be visible.

You can have serious fun with one or two flashes and a few radio triggers, and this is how. Make ambient go away , then use flash to light where you want the photo to be lit.

 

Colour

Again, let me point out today the effect a bit of colour can have. A splash and a dash here and there can make all the difference.

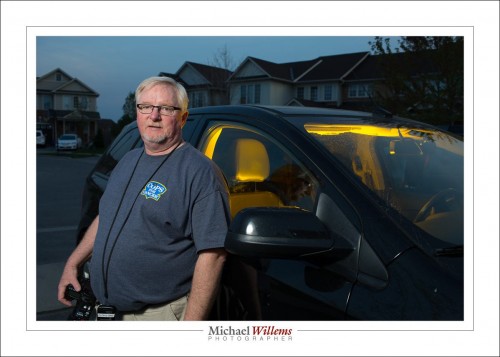
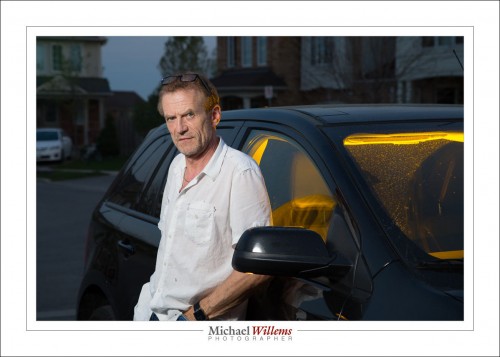
Take this picture, of yesterday’s student by his car:

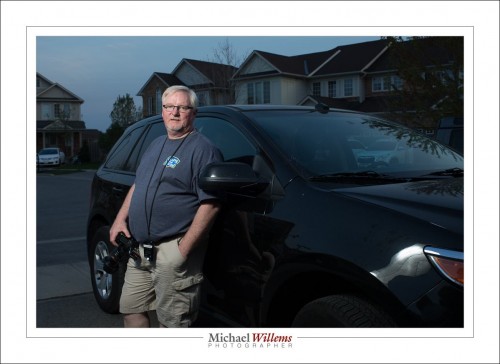
Without that gelled flash inside the car, the picture would miss something. It just does not look the same:

So I always have a flash standing by just in case. To be precise:

  • Flash, like a 430EX (Canon) or SB-610 (Nikon)
  • Light stand
  • Bracket, for mounting flash onto light stand
  • Clamp, for when I want to clamp the flash to something
  • Pocketwizard radio trigger
  • Hotshoe cable between Pocketwizard and flash
  • Set of Honl photo gels (use discount code “willems” upon checkout, for 10% off)

The gels are important: over time you will get a good sense of what colour suits what occasion. The Honl gels I use are very sturdy, easy to use, and are chosen very well: I have all the colour sets and use them extensively.

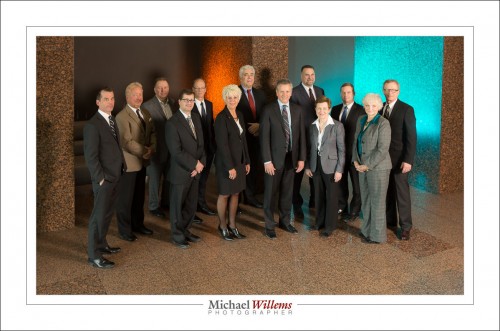
Another recent example, where I used two extra little flashes with gels to liven up a board of directors:

That, too, would have been dull without the colours. And you should never allow a board to look dull.

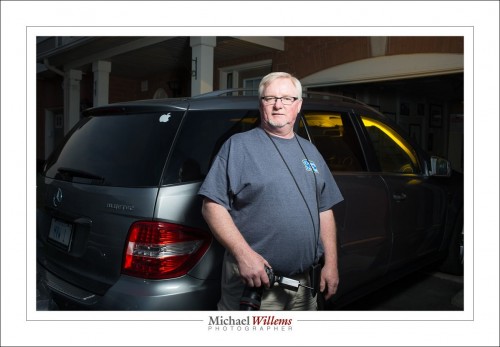
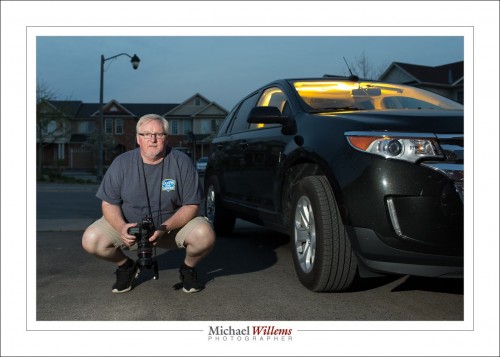
Here’s me, followed by a few more of my student:

You should know, it was not dark when we took those. As you know, your camera is a light shifter. As you know if you have taken my lessons, you start with the background. Set your A/S/ISO to whatever it takes to get that the way you want. Not the way it is. Then, and only then, add flash.

___

If all this is mystery to you, do what my student above did and take a private lesson. In person, or worldwide via Google Hangouts. And start with the books: have those ready during and after the lesson to ensure it all sticks. You too can make artistic professional pictures, and quickly, and without major investments in gear.


Beginner’s Point

A beginner’s tip today.

You should usually focus as follows:

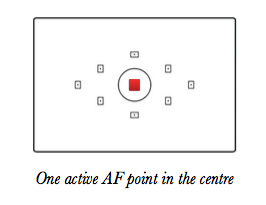
  1. Select a single AF Point (focus point), rather than have the camera select one or more from all available points. Set your camera to the mode where this is the case. You will see something like the illustration above;
  2. Ensure that your focus point selection is not “locked” with a switch on the back of the camera, as is possible on many cameras;
  3. Using cursor or control wheel, move that focus point to where you want it;
  4. Ensure that the focus point is on an object at the distance you wish to focus on (either on your subject, or on some other object that is the same distance away). Note that “an object” means contrast/lines;
  5. Press the shutter half way down, until you see or hear confirmation that focus is achieved (“the beep”);
  6. While holding your finger on the shutter, recompose if need be;
  7. Now press fully down to take the picture.

The mode where the camera chooses focus points often results in multiple points lighting up. Does this somehow result in “more focus” (as in, greater depth of field)? No! It simply means all those focus points found something at roughly the same (close) distance. It is still just that distance that is in focus.

The point is this, and the pun is intended: more focus point does not give you more focus.

___

Learn more from my e-books, including the just released book 7: See http://learning.photography to learn more. You should order now!

“My first… etc”

I very often hear people who are a little ahead of themselves. They do paid portrait shoots before learning how to focus, that sort of thing. They do not want to learn formally, for instance from a course, or books, or seminars; and yet they expect the knowledge to come to them for free, somehow.

Wishful thinking, and you know it. So let me grab a few of these things by the horns. Starting with portraits. You are doing a studio portrait; you have a backdrop; but the rest is mystery. So your images end up:

  • Badly lit.
  • Under- or overexposed.
  • With a background that is sharp instead of blurred.
  • With the subject not separated from that background.
  • Out of focus.
  • With the background white, not coloured even though you use gels.

That is because you never learned the basics. But there is good news: studio portraits are simple. All you need to learn is:

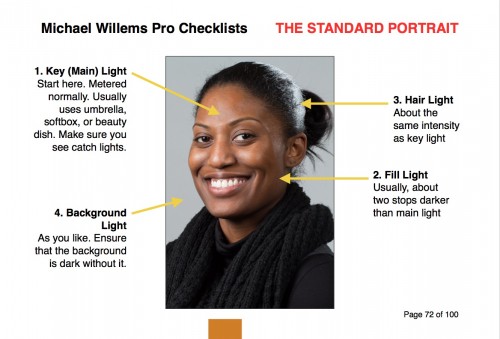
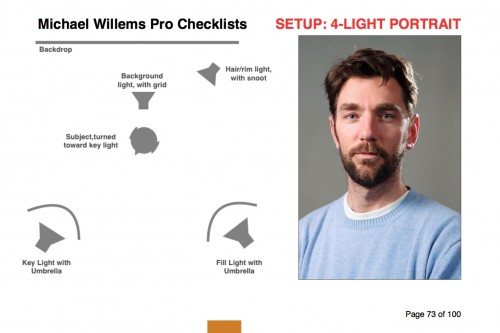
  • Lighting. A main light, 45 degrees away from subject. A fill light, same on other side. Hair light, opposite main light. See diagram, from my new book:

  • Exposure. Set your camera to manual mode, 1/125 sec, f/8, 100 ISO.
  • Turn the flashes to half way (obviously  the flashes are on MANUAL too).
  • Now meter the main flash. Adjust main light until it reads f/8.
  • Same for hair light.
  • Fill light: meter this to f/4 (i.e. adjust this light until meter reads f/4 when it flashes).
  • Background light: same as main light, again.
  • White balance to “Flash”.
  • Focus using one focus spot. Focus on the eye using that one spot.
  • Use a lens longer than 50mm. I prefer my 70-200 or my 85mm prime.
  • Move subject from background as much as you can. Then you can gel the background light. If, whoever, much of the normal light falls on the background, you cannot gel. Test this by turning OFF the background light: the background should be dark.
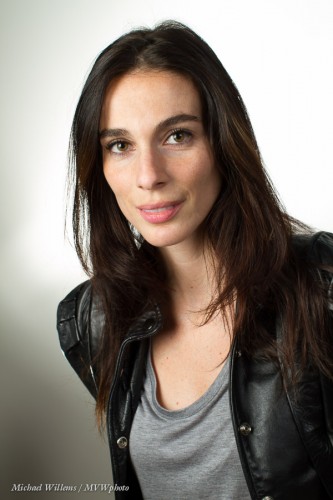
  • Turn subject toward main light, then head slightly to you.

Like this:

That really is all. Click., You have a competent portrait.

What you must not do is pretend that no learning is necessary. Go find a course, go buy my e-books; read this free resource www.speedlighter.ca; take private training; sign up at Sheridan College; : whatever you can do, do it now.

It really is simple. But not as simple as “I just bought a camera and next week I am shooting a wedding”—and believe me, I have heard that very statement more than once.


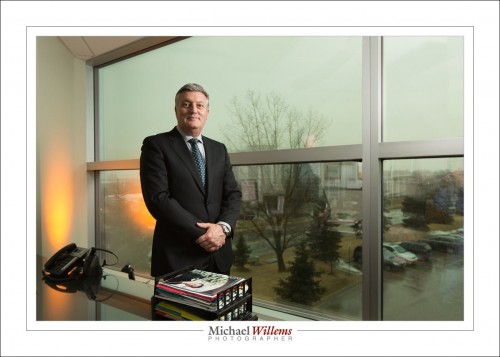
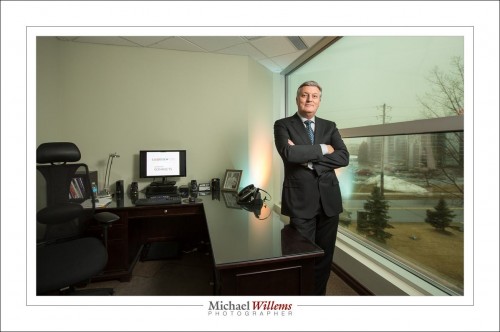
CEO

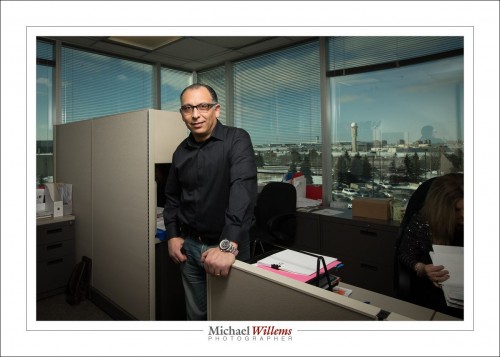
So today I did yet another CEO shoot. I do love environmental portraits.

So what do I look for in such a portrait? How do I make one? I thought it might be interesting for you to follow along, so to speak, with my process.

It starts with the lens. I start with a wide angle lens, because I will probably want the person “surrounded” by the rest of the shot. By their environment, in other words. Probably, not necessarily: so I also bring lots of other lenses. If I do use the wide lens, I am careful not to get too close to my subject: distortion is always a possibility.

Then the light. I will usually start with one off camera flash in an umbrella. So, since it is a flash picture, I start with the ambient light. 400/40/4 is a common start point. Whatever it is, I continue until I am happy with the ambient light, that I typically want at –2 stops, and only then go on to flash. For the flash, I ensure it is aimed at the subject’s face from the right direction, at the right angle (e.g. 45 degrees off-centre, 45 degrees up).

Then the location. I look for something that is typical for the person I am shooting. An office, for instance. But I also look for good composition. The rule of third, for instance. Leading lines, diagonals converging where the subject is, leading the eye there, are good.

I watch carefully for reflections in glass, and position lights and subject accordingly. I check that the subject’s clothing and hair are all OK.

An extra flash or two, with gels, are always ready to be used. A dash of colour here and there is great.

And now: in practice. Can you see how I applied all these techniques to today’s CEO portrait shoot?

Of course I also use all other standard composition and portrait and technical rules. But it’s not about those; it’s about showing something of the subject’s world, and of his or her personality.


Launch

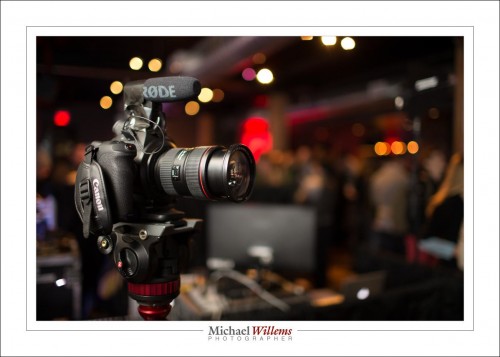
I attended a Canon Canada industry event today: launch of the C100 MkII video camera. Here it is:

(1600 ISO, 1/60 sec, f/1.4, bounced flash).

Hey. Wait. Let’s talk about this shot. Why those particular settings?

  1. It was dark, and bouncing was tough, so the lens will need to be open at f/1.4 to let in enough light. Also, this creates round bokeh background lights, not hexagons. So, aperture done.
  2. I wanted a handheld sharpness guaranteed shutter speed. Say twice the lens focal length. And with a 35mm lens, that means 1/60 second. So, shutter done.
  3. So now I wanted the background to read around -3 stops, or something thereabouts: dark, but not pitch dark; a nice warm glow. My first guess was that 1600 ISO would get me there. If it had not been, I would gave tried other ISO values until done.
  4. White balance to zero. Flash compensation to minus one (the camera is black and the flash is metering off the camera).

That wasn’t so difficult now, was it? And note, I am not saying that my way is the only way. If you have another way of getting to good settings, good for you. But this works for me and you should think about what works for you. And then, and you are probably starting to recognize a theme: practice. practice. practice.


Challenges in a

I shot portraits yesterday. Some were headshots. These are sometimes challenging because you want to get great expressions out of people who are not professional models. Saying “smile” doesn’t do it.

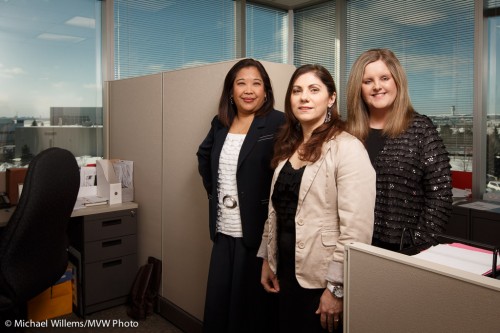
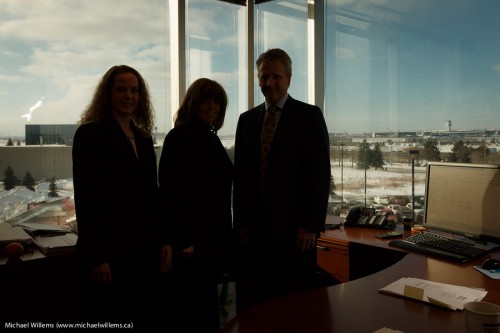
But then, even more fun, the environmental portraits. And these should be storytelling pictures. With good group composition.  Three colleagues:

In these, as you see I like drama, so I expose for the outside. 100 ISO, 1/100 sec, f/8. Why not the usual 1/250 sec? Because that would have meant f/5, and in this case I wanted f/8 for DOF.

The story is to do with the airport, of course. And individual shots are easier: see my friend and assistant Maged yesterday as I was setting up for the shot.

Nice wrap-around light from an off-camera umbrella.

Here, another one:

The biggest challenge? The flash has a big umbrella. This is visible in almost every picture as a window reflection. And it lights up the ceiling: ditto. And I needed an angle that shows the radar tower. So in the event, I moved left and right, up and down, back and forth, and I made the light and the subject do the same, until I finally had one angle that had sufficient light in the subject and that had no umbrella showing, and only acceptable ceiling reflection. It’s always possible: I learned that long ago. But I also learned that it’s always a challenge. So: persevere.

Why not do without an umbrella?

That’s why!


x100: Can you see a theme?

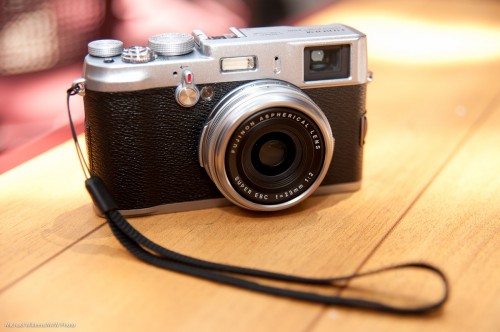
Regular readers will see that the last few days, I have been shooting with, and talking about, the Fujicolor x100 camera that I carry:

Fuji X100 (Photo: Michael Willems)

The theme has been: given the right light (e.g. flash!) and the right techniques, you can take professional pictures with it that are as good as those taken with an SLR. This is almost straight out of camera (a crop and a few dust spots removed):

Now while I am not recommending product shoots with the x100, this goes to show it can be as good as an SLR.

But now let’s take it a step farther. It can be better.

Yes, better. And here’s how:

I just took that picture at 200 ISO, f/8, 1/1000 sec. That makes for that nice, dark sky.

Wait. Did he just say 1/1000 sec, one thousandth of a second? That is impossible since the flash sync speed of 1/250 second limits the shutter speed you can set the camera to when using a flash. Right??

Wrong. The x100 has a leaf shutter. And it allows flash up to 1/1000 second. And as said, that is why that sky is so wonderfully dark. It is in fact noon and it looks bright to my eyes. But 1/1000 sec makes it dark. Two stops darker than my other cameras could have done!

But he could have done that with aperture, with a higher f-number. Or with an ND filter.

Nope. If I had, I would have run out of flash power. The flash needs to get through that filter, or through  that small aperture, and it is not bright enough at higher apertures, especially when a modifier is being used.

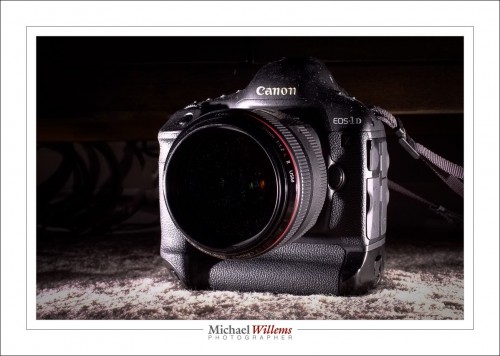
So the x100 may be small, but it can do things my $8,000 1Dx cannot do. Just saying!


Let there be

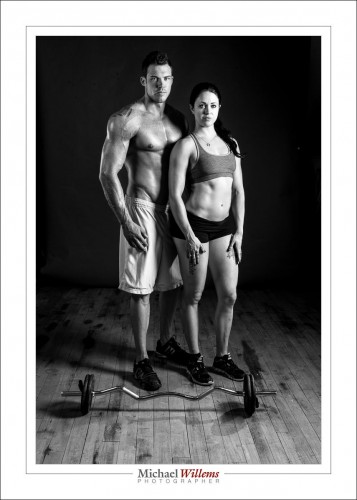
I shot a couple of bodybuilders recently: reason enough to share a few of the pictures and the settings.

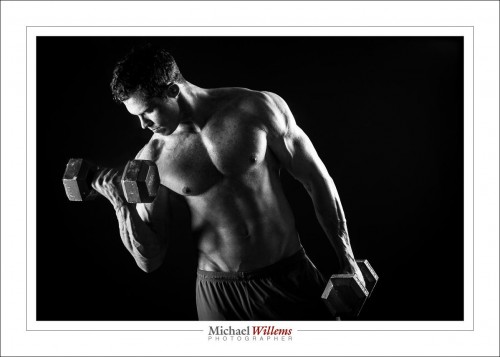
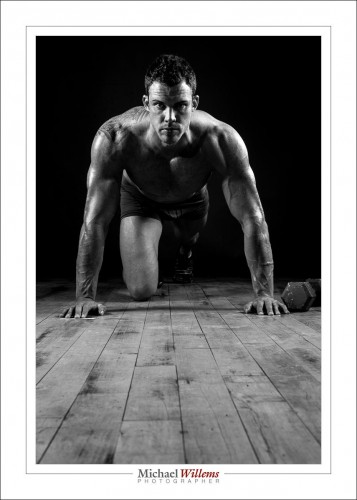
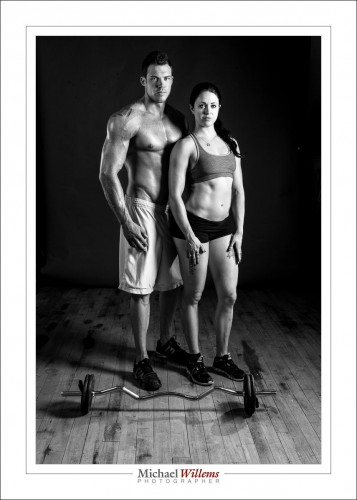
I decided, for this shoot, to use pretty dramatic light, with a significant sidelight component. Why? Because sidelight shows texture, muscles, and similar detail. So I used a softbox on each side of the subject, aimed forward and positioned carefully to keep it off the background:

(100 ISO, 1/100 sec, f/13)

Post treatment is minimal: B/W setting; then in the BASIC panel, I moved the whites and highlights up a tad, and the shadows and blacks down a bit. The resulting images are dramatic and show muscle:

Do keep in mind the fact that the face should be appropriately lit. Like in the image above.

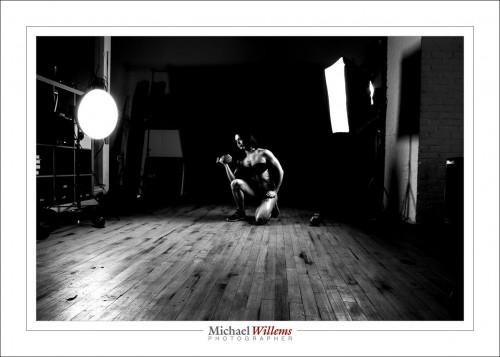
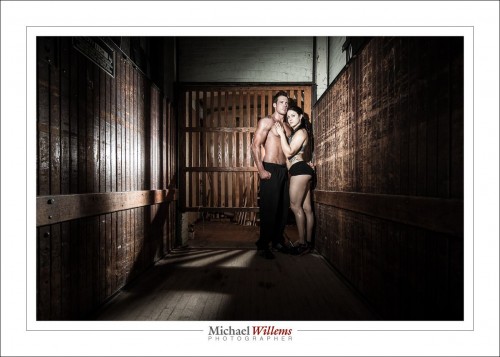
In the image below, a flash behind the subjects aiming towards me, and a flash with a grid on camera left, aimed at the subjects:

This shoot was all about light.

___

Want to shoot better portraits? Get the new e-book! Click here to buy, and immediately improve your portrait photography.


Ad lucem

…or “to the light”.

But contrary to that Latin phrase, a little tip today for when you don’t want light. Like when you want to hide something.

Hide something? Example, please?

OK. Say you have a roll of paper in your studio. and you want to shoot a full length portrait. Normally you would pull the roll all the way forward so the subject stands on it. No transition can be seen at their feet because there is no transition.

But if the roll is too short? Then you will see a clear (and ugly) transition from “floor” to “roll”:

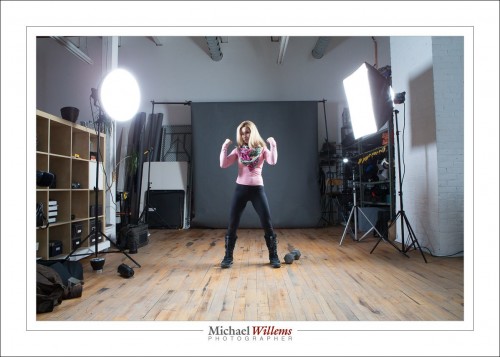
But this is solvable. It is in fact simple: keep the transition in the dark. Then you will not see it. Like this:

To keep it in the dark, you must do two things:

  1. Set the camera so that ambient light plays no role (i.e. without flash, the picture is all dark), Standard settings like 1/125 sec, 100 ISO, f/8 will take care of that. This means all light in the photo will be from your flashes.
  2. Ensure your flash light does not reach the transition. By definition, that will result in the area being dark. So you need to point away from the area and have enoughdistance from the background.

That is it. So if I use two softboxes as above, and feather them away from the background, I will not throw any light on the background. That means it will be dark. And since the floor is light when you are, it will be a gradual darkening.

Simple. Two softboxes and a too-short-really paper roll, and that’s the result. Things do not always need to be complicated.