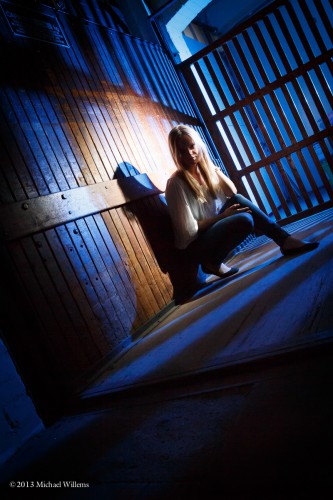
Power Tip

And I mean: a tip about power.

A photographer on a forum I attend corrupted some photos due to her turning off the camera power after every shoot segment before the image had saved fully to the card.

Bad idea. You risk losing images. You lose time. You wear out the switch. You use extra battery power by cleaning the sensor each time, when every now and then is enough. But more than that: when the camera is “off”, it uses the same minimal amount of power that it uses when it has gone to sleep. It is never really fully off. So while you are shooting, just leave it on. Just turn it off when you put it away.

And when you are not using cameras for an extended period of time, do recharge the battery every few months. Else, it will lose its charge – not a good thing.


Studio is simple

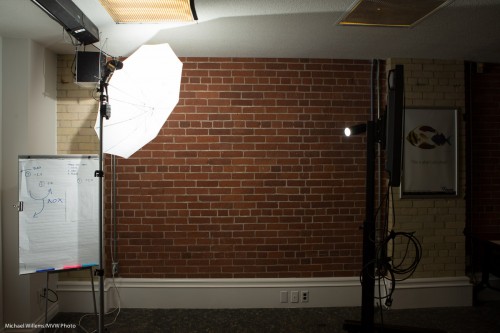
Studio shooting is very simple. This, today at my Vistek flash course, took but a moment or two to set up: a studio, using just ordinary speedlights and a few accessories:

Two speedlights, fired by pocketwizards. One on a lightstand, through an umbrella. The other on a clamp through a snoot from the back. Both were to manual power at 1/4 power.

And at 200 ISO, f/5.6, 1/125th second, that results in this student portrait:

And the great thing about this kind of “manual” shooting, where the flash is also set to manual (rather than using TTL metering) is that once you have the light right, it is right for every subsequent shot.

Regardless of subject: a pale person dressed in white, darker person dressed in black, and everything in between. You will never need to re-meter, provided you have each subject stand in the same place.

And how do you like those smiles? And a hint: they were not created by telling people to smile.

___

NB: This post shows you it’s simple. Want to learn the details of this type of studio portraiture? Come to my Tuesday evening course in Hamilton: http://www.cameratraining.ca/Studio-Ham.html and I’ll teach you all this – pocketwizards, light meters, light angles, and more.

Butbutbutbutbutbut

As a photographer who does it for a living, and a teacher who does that for a living, I get a lot of questions, and I love them – keep them coming. There is no such thing as a stupid question.

When fielding questions, and when I answer those questions, one objection that I get rather often, however, is what I call “The BUT.”

It comes in several ways, including:

  • Equipment.
  • Technique and Composition.

Equipment. As a pro, I use some pretty expensive equipment.
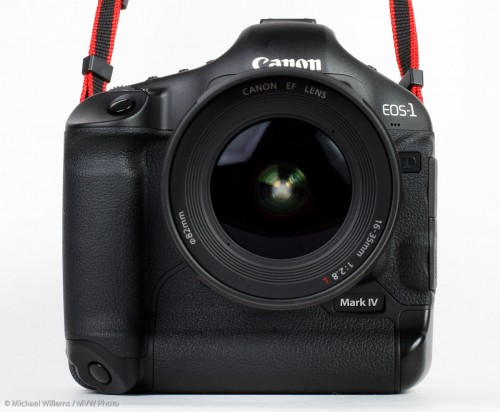
I. The Equipment But: Sometimes, that is just because the expensive gear is more waterproof, or stronger, or faster, or more reliable, or can save images to two cards at once, and so on. Those factors do not affect the image.

But often, it is because the expensive gear does things you cannot otherwise do. Like go to high ISOs or shoot at wide open aperture, or go to wider angles. And that’s where the “BUT” comes in. You can “but” the first factors, but you cannot “but” the second factor. The number of times I hear things like:

“I want to shoot a hockey game like you do – but I am not going to buy one of those expensive lenses”.

“I want to shoot an event like you do – but I am not going to buy one of those expensive high ISO cameras”.

“I want to shoot great travel pictures – but no way am I going to buy one of those wide angle lenses”.

“I want to shoot with that off camera flash light – but I am not going to buy a high end flash like an SB-910 or 600EX”.

…and my message for you in that regard is: sorry, but if it is necessary, it is necessary. If you turn up with an f/5,6 lens when I have an f/2.8 lens or an f/1.2 lens, you cannot get the same results. CAN NOT.  Wishing it doesn’t make it true: Hitler and Napoleon thought that will was enough, and look what happened to them!

So if I say it’s needed, believe me: it’s needed. No buts. That’s wishful thinking. You cannot get to Australia without getting on an airplane, much as you might like your bicycle. The reason a pro photographer costs more money than Uncle Fred is in part due to the fact that the pro has to spend more to get results.

“Has to” – I too would do it without spending if I could, but often enough, I have to! And so will you. So make sure that you know whether the expense you are debating is one of convenience or one of “must have”.

II. The Technique And Composition But: this is the most pernicious “but”. Every time I see a student image that is not great, I know that the student knows it.  My objections are always met with “But…” (and then I do not need to hear the rest).

  • But I could not move that thing out of the way. (then shoot from a different angle!)
  • But the light wasn’t good enough. (Then shoot at a different time or add flash!)
  • But that garbage can was there. (Then move it!)
  • But my lens didn’t go to a lower F-number (then buy one that does!)

…and so on. You know when your image is not good enough, and my most important pieve of advice here: you should not go easy on yourself. If you do, you are giving yourself  an excuse to come up with inferior images.

Remember: Your viewers do not care what the reasons for bad images are; they just care about the images.

So my advice is: face reality. Cut corner where you can (a Digital Rebel can make great pictures), but do not fool yourself into thinking you can invade Russia and it’ll be child’s play. Work with what you have, and do not go easy on yourself.

 

Camera Setting II

Today, part two of my “always do camera settings.

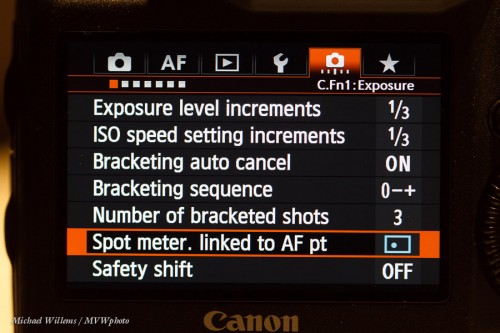
Many cameras bias their metering toward the focus point when spot metering. Some only allow centre point for metering. And mine allows me to choose. I choose “meter off my focus point”:

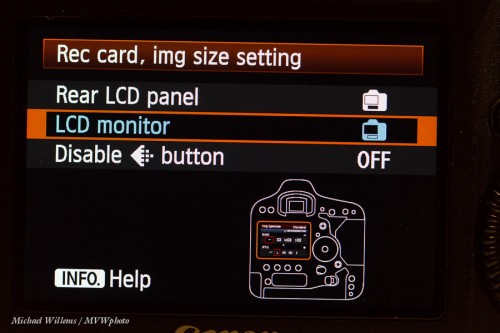
I like to see card choices on the bright, large screen:

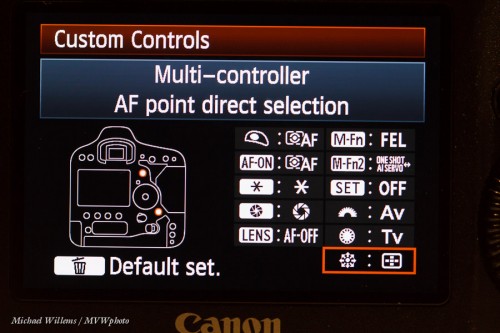
Now, on all modern Canon cameras, a very important one:

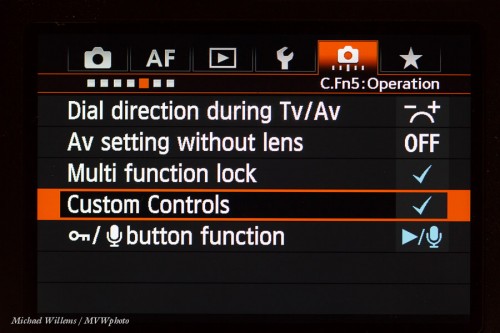
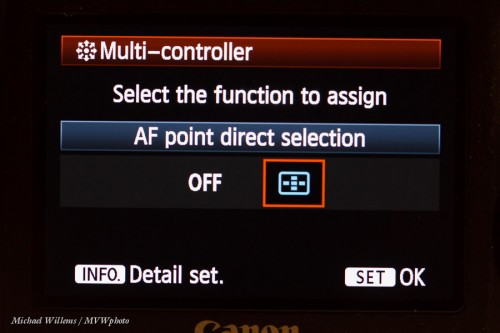
The “joystick” is normally disabled when shooting.

Instead, of course you should allow it to move the focus point! Here;s how:

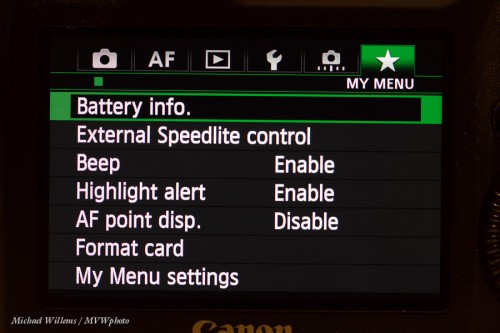
And one more: set your personalized menu! These are my options:

That’s it – your camera is now set up properly.

You may have different choices. And that is fine. As long as you go through your menus and tune your camera to your specific needs. It makes a big difference, folks!


Get your camera settings right.

Your camera has many standard and custom settings, and getting them right is important. In the next few posts, let me take you through the settings I always make sure are set on my Canon 1Dx and similar cameras. The examples here are for my Canon 1dx, but regardless of brand and model, you will probably have many similar settings.

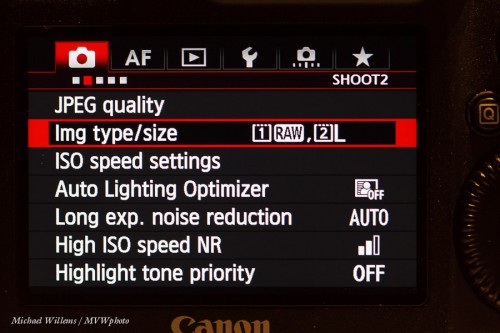
First, I use cameras that can save each image to multiple cards – and for safety, I always make a large JPG copy to card 2.

Next, I turn OFF any “auto image adjustment” settings that work only on JPG images, and this is important. ALO gets turned off:

(Otherwise, your images will look good in the preview, but in fact may be underexposed.)

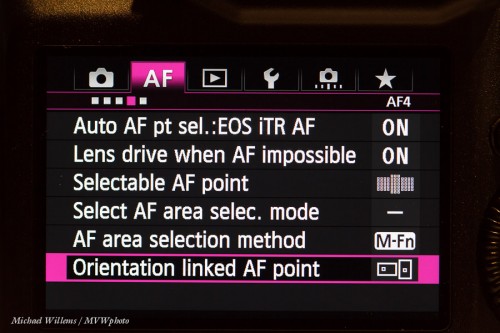
Next: I like the orientation linked AF point,so that when I turn the camera, I have a different focus point selected automatically.

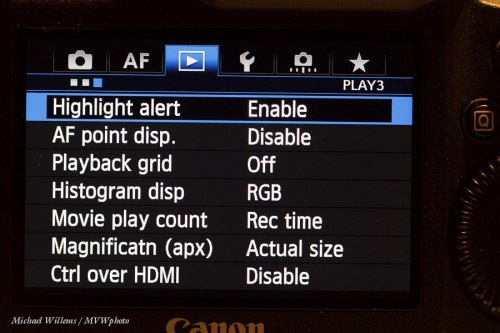
Then, I like seeing “the blinkies” warning for possible overexposure, so that goes ON:

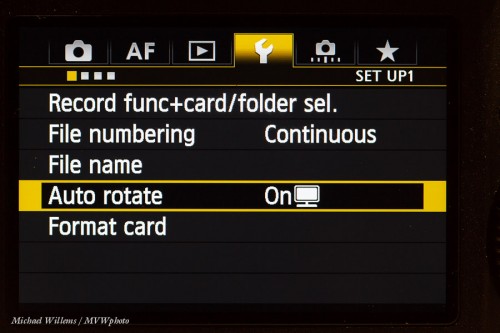
Then, anther very important one. I turn the preview rotation off, so that “portrait mode” images are rotated in the file, but they do not show as rotated on the preview. This avoid the letterboxing; instead, my images fill the entire screen when I preview them.

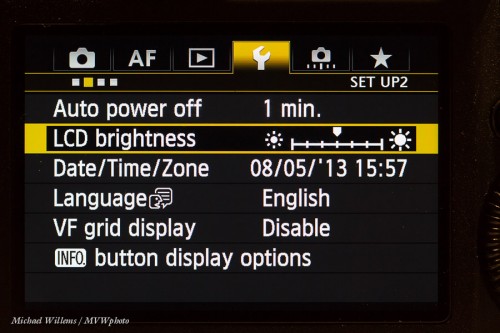
Now, I set my LCD brightness to medium and I disable, if a camera has it, auto preview brightness. Important, or you will misjudge many exposures!

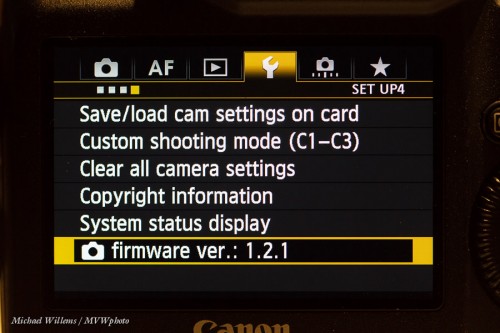
Then, I check that my camera has the latest firmware – and I recheck that a few times per year (Google it). If needed, I upgrade (Google it, again!):

This should get you started.

Tomorrow, the custom settings.


That’s correct.

The new Lightroom has an auto perspective correction function, but the current Lightroom 4 has this too – you just have to do it yourself.

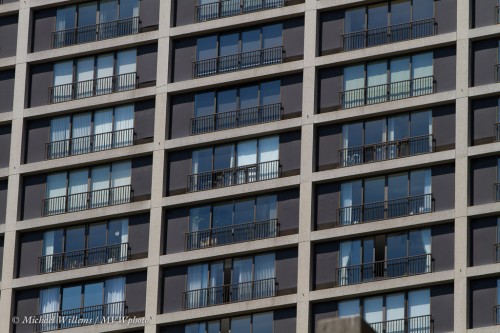
Imagine that you have to shoot a building facade like this, and you happen to not have your tilt-shift lens – or you don’t have a tilt shift lens:

We are aiming both sideways and up, so the lines are distorted, and the distortion is both apparent and annoying. A snapshot!

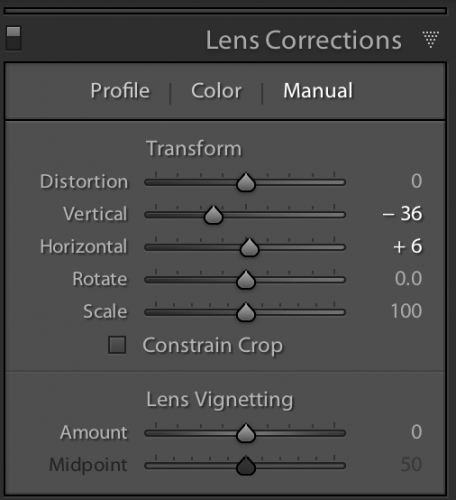
Enter Lightroom “Lens Corrections”. Go to the DEVELOP module, and in the LENS CORRECTIONS pane, select MANUAL. Now set to taste, and combine this with rotating:

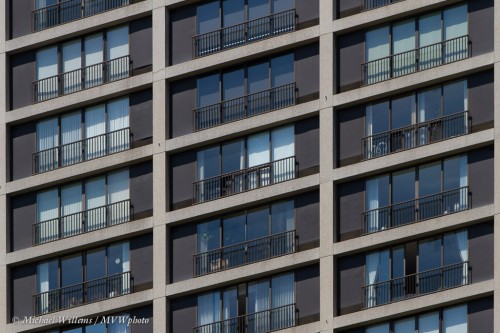
Now with a few seconds’ back and forth, and an extra crop, I see this rather pleasing image:

Building Façade (Photo: Michael Willems Photographer, www.michaelwillems.ca)

Yes, of course you shoot in camera when you can. But when you cannot, then Lightroom and similar tools are the bees’ knees – once you learn to use them.

If you hire a photographer, ensure that he or she knows too: this kind of “post” work is one of the differences between a cheap photographer and one who delivers quality work.

____

Allow me a plug here now: yes, I teach Lightroom, not just photography! And I shoot – and this month I pay the taxes for you… give me a call to hear about learning and about family portraits – perhaps for Mother’s Day or Father’s Day? Contact me today (michael@michaelwillems.ca) to hear the options.

Michael Willems Photographer, www.michaelwillems.ca


Hidden worlds

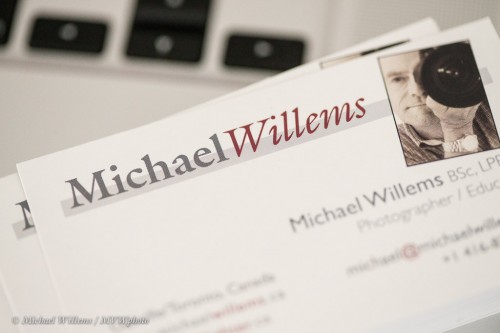
Look at my business card:

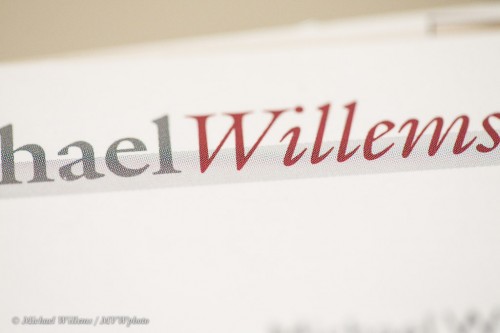
No, really look:

No, I mean really look:

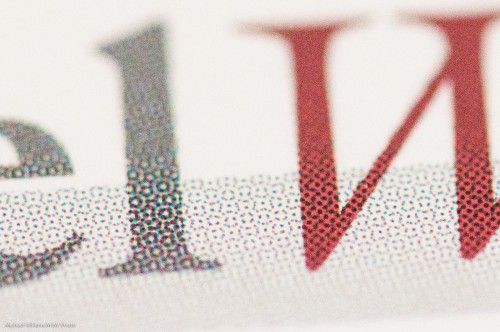
No, I mean really look:

I had no idea.

And that is why you use a macro (or as Nikon calls, it, “micro”) lens. To get close, really close – so you unlock hidden worlds.  A macro lens like a 100mm f/2.8 will set you back $800, but it is worth every penny. And here you see why.


Shadows and creativity

Of course shadows can be good. As long as they are used well  – meaning not the “drop shadow on the side” you get when you use the pop-up flash on your camera. That one is a no-no.

But that does not mean direct flash is bad. Not at all.  Here, for example, the shadows really work to give an “in the spotlight” look:

Here, they add texture and liveliness to the subject:

Here, they add both spotlight shadows and strong patterns and leading lines:

Here, the shadows add to the otherworldly quality:

Your next assignment, should you choose to accept it: use shadows creatively in a photo.


Tiger Direct III

The power of social media.  Tiger Direct just sent me a message:

“Thank you for the email. We sincerely apologize for the inconvenience. We understand that you do not have the original shipping box. We processed request so we can send you the replacement item and you may use the packaging of the replacement item to send the defective item back to us.

Thank you for visiting our website.  We  appreciate your business.  If you have further inquiries and reply to this email, please make sure to include your entire message, so we can address it appropriately.  Please feel free to contact me at the phone number below should  you require any further assistance.

Sincerely

Thanks! Not exactly the point I was making, and I will still end up paying for the shipping and insurance, but nevertheless, the effort is appreciated. My blog post, and me pointing to it, apparently helped. I’ll keep you all in the loop.


FTF

..or “Fill The Frame”. We like photos to be good, whihc often means both “draw attention to subject” and “get close” as well as “simple, without clutter”.

Take, for example, this portrait photo, taken yesterday:

Not bad. But now, look at a closer crop:

I would argue that in this image, which is not an environmental portrait, the second image is by far the more powerful one.

Oh, and a vertical view can be good, too:

Matter of taste? Yes, but most people’s tastes agree. So next time you shoot, crop closely and see what happens.