What should I buy?

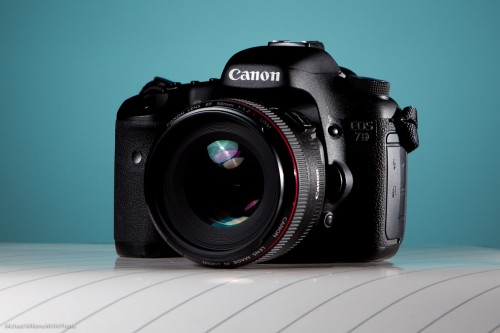
This question keeps cropping up – no surprise there. Photography equipment is expensive and making the right choices is therefore very important. Here’s just some of my gear:

The lenses are:

  1. Prime 35mm f/1.4
  2. Prime 50mm f/1.2
  3. Prime 100mm f/2.8 macro
  4. Prime 45mm f/2.8 Tilt-Shift
  5. Zoom 16-35 f/2.8
  6. Zoom 24-70 f/2.8
  7. Zoom 70-200 f/2.8

Cameras are 1.0 sensor (full size); 1.3 sensor (the 1D) and 1.6 sensor (the 7D). Which means that range of lenses can handle pretty much everything. My lenses are all I could wish for. Just about.

But do you need that kind of investment? Not if you don’t make a living from photography. I have a few tips for you when considering buying a lens:

  • Lenses are much more important than cameras. Invest in your lenses – the camera makes little difference.
  • I would simply start with a kit lens and a fast prime 50mm lens (“50mm f/1.4” or “50mm f/1.8”).
  • Always buy the fastest lenses you can afford (the lowest f-numbers). As you see here, none of my lenses are slower than f/2.8.
  • A lens that “does everything” is a compromise. The more a lens does, the more of a compromise it is. A 18-55 (crop) or 24-70 (full frame) is a better general purpose zoom; for longer and wider you add separate lenses.
  • IS/VR (Image stabilization/Vibration Reduction) is a great function, and is definitely worth the money if you can afford it.
  • If you shoot travel, if you like perspective, if you shoot street, etc – add a wide angle lens – for crop camera that means a lens in the 10-20mm zoom range. Super-wide lenses are the great under-appreciated secret in today’s SLR photography.
  • If you shoot macro, get a dedicated macro (close-up) lens.
  • A macro lens is also a great portrait lens.
  • If you shoot birds or go on a safari, get the longest lens you can buy – perhaps even adding 1.4x or 2x extenders.
  • For specialized product or architecture shooting only, get a tilt-shift lens.
  • For events, get a 24mm (crop camera) or 35mm (full frame camera) prime lens.

Now that you know those ground rules:

  • No, you cannot do it cheaper if you really want to do it well.
  • But yes, you can do it cheaper if all you want is the shot, and pro quality is not important.
  • Yes, an expensive lens is better than a cheaper lens. Sharper, faster. stronger.
  • Yes, lenses cost a lot – but then, they last a long time (decades), both technically and in terms of depreciation.
  • Yes, you really have to carry more than one lens if you want quality. I would not have those seven lenses if I did not need them. You may not need as many – but to stop as one is being over-optimistic.
  • Yes. you can buy third-party lenses (Sigma, etc) but try them out before you buy and make sure you are happy!

The above pointers should get you started. The faster the lens, the better: go have fun with lenses!

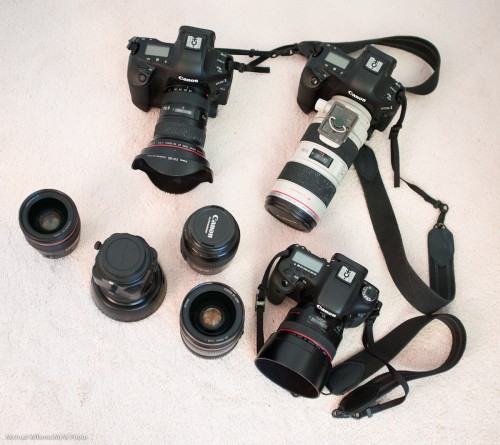
 

Exhibit on today

Word. In case you missed it: today is the start of the solo exhibit “To Find a Muse”. It is at the Kodiak Gallery at Toronto’s Historic Distillery District, and the official opening is today, 26 July, 5-8pm. See www.michaelsmuse.com for more details.

I shall be there at the opening, of course. See you there? (If so, please RSVP on the Facebook page, linked from the web site).

Michael

5D MkIII

Kristof, a friend, showed me his 5D MkIII today.  All good – a 7D with all its advantages including functional focus, plus a lot of 1-series features, like double memory cards and great high ISO performance.

The User Interface was not quite as good as in the 7D – it has been “improved” (i.e. dumbed down) to the point that in some cases, it makes little sense. The nice “small wheel for left/right, large wheel for up/down” navigation is now replaced with multiple menus within each menu, meaning the user base will now find Canon menus as confusing as they do the Nikon menus. Also, some UI features are ridiculous – like the remote flash setting, which is only recognizable by the word “OFF” – until you turn it on, the camera does not mention what exactly it is that is “off”. Who makes these poor design decisions? A committee, I dare say!

But overall the camera is great. Except mainly for things you can change – like some of the default settings, which are, just like on the 7D, wrong. Like default “fix bad photos dynamic range” settings which are ON; focus point setting by joystick which defaults to OFF, and a few others.

In a future article I will give you all the settings you should change from the default to a better setting.

For now, for a starter, find the custom interface settings via the Quick menu and set the default meaning of the joystick while shooting from nothing (OFF) to “Change focus point”. That way you can quickly move the focus point just by using the joystick alone, without first having to press other buttons.

Now I start saving for a 5D3 – it is usable as a pro camera now. It misses some 1-series features, of course, but enough is there to make it a viable contender.

More soon!


Weather

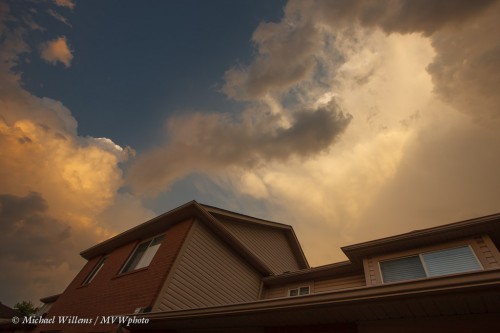
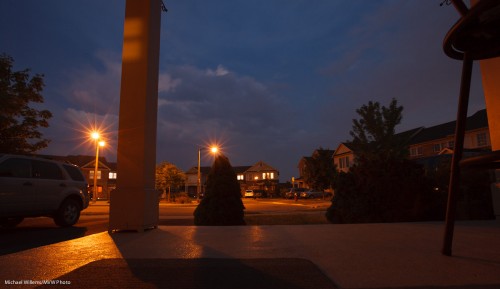
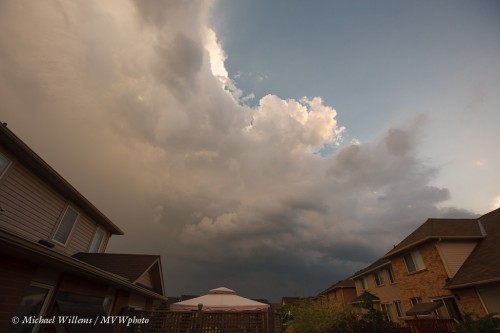
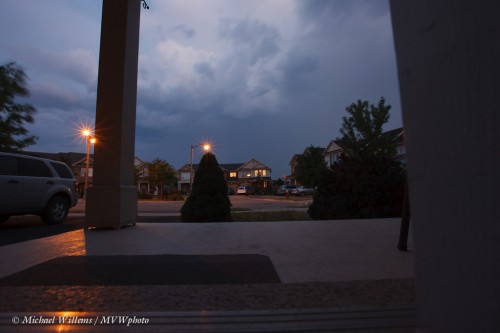
It can be quite interesting to make pictures of weather. Like the weather I had here outside my home a couple of days ago.

These were made with a wide angle lens, with the camera held steady on tables, on the floor, etc., using long exposures and low ISO. 200 ISO, 1/200th second, f/5.6 -and of course in manual mode.

So when you see nice clouds, get out the camera!


Keeping It Clean

It is very important to keep your camera’s sensor clean.

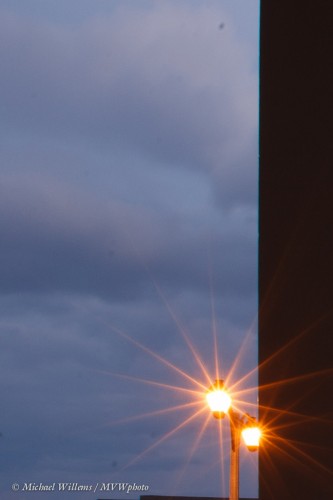
Dust shows at small apertures, like f/16:

f/16, and that looks OK until you look at the small

See those dark dots? That is sensor dust.

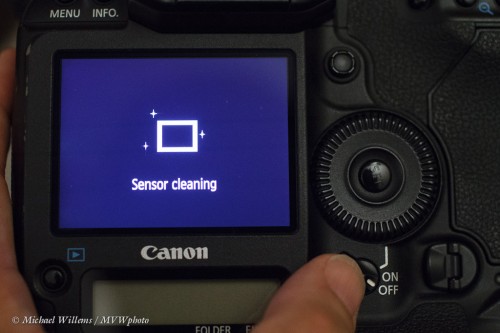
You can try to get it off with the self cleaning mechanism, see the top picture. Or with a blower (be careful – use a full battery). Or with pads and liquid, but that is potentially dangerous – one mistake and your camera is toast.

So the best way is to keep the dust off in the first place, and to minimize the effects

  • Use the self cleaning mechanism.
  • Avoid lens changes unless necessary
  • Shoot at larger apertures if it’s all the same to you 🙂
  • When changing lenses, try to do it in a safe dust-free place
  • Hold the camera upside down (-ish) when doing it, so that large dust falls out of, rather than intio, the camera

I regularly clean my sensors -looks like my 1Ds is ready for another cleaning, from that photo.

Bonus question: how do you know I was shooting at a small aperture?

Answer: because of the starburst from the street light. The smaller the aperture, the more starburst effect.


DOF in product photography

I was asked several times in the last few days about a previously made point (yes, since you ask: I repeat things quite frequently, since repeating is the way we learn – especially if, as I do, you explain in a slightly different way each time).

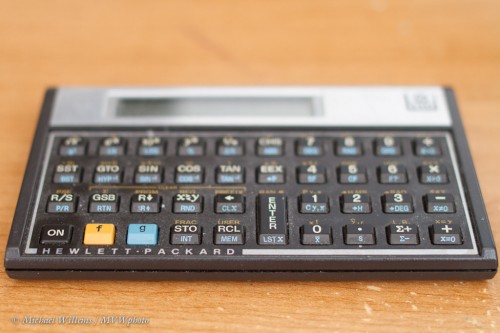
In product photography, you often want great depth of field (“DOF”) – i.e. everything is sharp from front to back. Like in this picture of one of the best calculators ever made, and shame on HP for stopping production: this is still the best calculator I have ever owned:

Oh, but we cannot see the calculator at the back. DOF is insufficient. Well, I suppose we could shoot at f/45 if our lens allowed it, but that would lead to slow shutter, fuzzy pictures, and might still not be enough even then.

So? The tilt-shift lens to the rescue. Resulting in this, at the same settings, including an aperture setting of f/3,5!

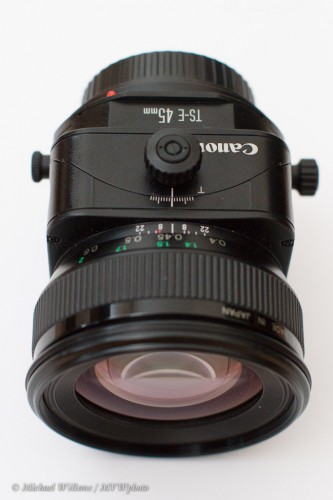
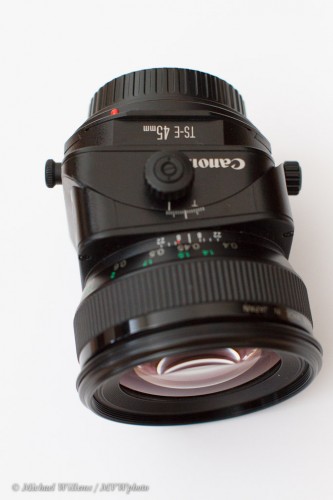
This is that lens:

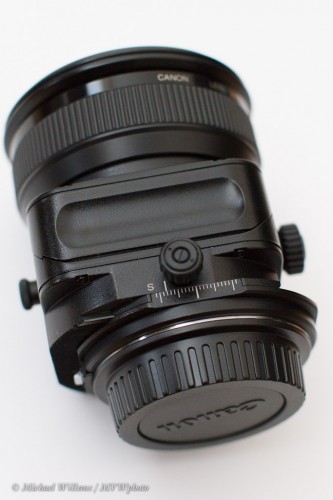
It is a manual focus only lens that allows tilting, which moves the focus plane, like for the shot above:

And it allows shifting, for occasions where you point up or down or left and right, like in architecture, and you do not want verticals to converge.

It also allows turning by 90 degrees, so your tilting and shifting can be along any axis, horizontal or vertical or diagonal.

The last adjustment is interesting: unlike the DOF, this you could usually also do in Lightroom (or PS if you feel so inclined), but why bother if you can do it while shooting?

Tilt-Shift: A specialized lens, but invaluable (meaning valuable – the English language is illogical) for product shots. Real product photographers should own one, so if you need product shot and you do not own this type of lens… call me!


Limits

When you determine exposure for a photo, the principle is simple: only three things make a photo brighter, assuming everything else remains the same (which is the case when you are in manual mode, so this is how you should learn):

  1. Higher ISO
  2. Larger aperture
  3. Slower shutter

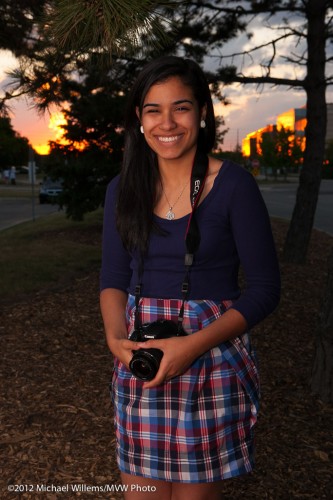
So it should be simple to get a beautiful darker background like this one here, in a recent picture – taken two weeks ago of one of my Sheridan College students:

It is simple – once you realize a few things.

Darker or Lighter? It may not be obvious to you whether you want the background lighter or darker. In fact darker brings out (saturates) the colour, but you may think brighter is better. Your great advantage is that you have a digital camera, and each click costs $0, so the best thing I can advise you: practice.

What About The Foreground? You may need different light for the foreground. Here, I used an off-camera flash into an umbrella.  My advice is: worry about the background (the ambient light) first, as above; then worry about where you may have to add light.  One thing at a time!

But where do I start? You will soon get a feeling of what settings are in the “acceptable range”. One thing you could do, as a sort of training wheels, is set your camera to P (Program mode); see what ISO/Aperture/shutter settings the camera would suggest, and then use those as starting points in your manual settings. But soon, you will get to know what you want:

  • for motion (blurring or freezing), shutter is your first thought
  • for depth of field, aperture is your first thought
  • for quality, ISO is your first thought

And you will then have only two other variables to worry about. Combine that with ISO starting points (200 outdoors, 400 indoors, 800 in difficult light) and you have only one to worry about.

Learn The Limits. Learn what aperture will give you too-shallow DOF (e.g. f/1.4 when you are 2 inches away), What aperture will give you fuzziness (eg f/45). What shutter speed will give you motion blur (slower then 1 divided by the lens length). And so on!

Put all those together, and exposure becomes much easier. The key: reduce everything to the above very simple principles.

Exercise: this week, shoot only in manual mode. Both inside and outside, so you have big changes to deal with, This is the best way to handle learning exposure, and once you know exposure, photography becomes much easier.


Learn…

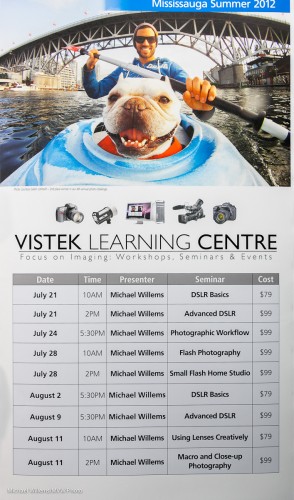
Today I teach DSLR courses at Vistek in Mississauga.

There are open spots, so if you have always wanted a refresher, head on over.. 10AM bascs, 2pm advanced. Both are good: I recommend you do both. see the list, and sign up, here – or just turn up.

Why am I excited about this? Because these courses are my own, they are good, and buying an SLR is nothing unless you learn how to use it, and I can teach you.

Starting with these simple three tips of the day:

  • While it is not strictly necessary to turn off your camera before changing lenses, memory cards, etc, I still recommend it. Because it is good practice, but also because on most DSLR cameras, when you turn off/on, the camera attempts to clean the sensor. And the more sensor cleanings, the better.
  • Charge your LiIon battery daily. Let it run down every month or so – not strictly necessary either, but not a bad idea, and the camera can tell more accurately how full the battery is.
  • Use the viewfinder, not the back of the camera – and make sure the eyepiece is set to your eyesight. The diopter adjustment is meant for this purpose (now you have something to google or look up in your manual!).

Not rocket science, but often, small tips make you a more efficient photographer, so you can concentrate on the really important stuff: moment, composition, and light.


Déja Vu All Over Again

One thing I must emphasize to my students over and over: your pics are a resource to be mined. Again and again. Your emotional involvement with the images decreases, and that gives you a new, fresh look.

After a shoot, I do the post work, meaning largely that I select what I like. But I go back to the shoot later. And later. And later again. Today I found many winners in shots I did six months ago. Years ago, even. That is why it is unwise to delete  pictures. Buy a bigger hard drive instead.

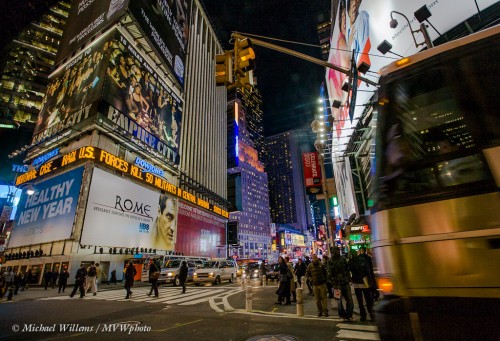
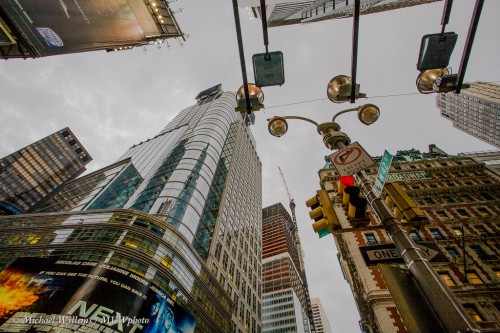
Just now, I went back to 2007 and looked at a few new York pics. And I had a little “post hoc HDR”-fun with them digitally – which I normally do not do, but this time, hey, why not. Here’s four samples:

Just a few fun images that I did not even notice the first six times I looked at this 2007 shoot. Goes to show, doesn’t it? So if you want to have some fun, open Lightroom right now, go the the first ten shoots in your catalog, and see iof youcan find images taht never struck you before. I bet you can.

___Note: Tomorrow’s two courses at Vistek in Mississauga still have open spaces. Sign up now, or just turn up tomorrow morning (Digital SLR Basics) or afternoon (Advanced Digital SLR use). You will not regret it! Space is limited: see the list, and sign up, here.