Macro Tip

For close-up photos, I have four quick tips.

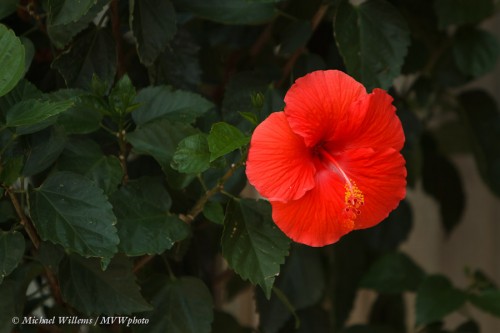
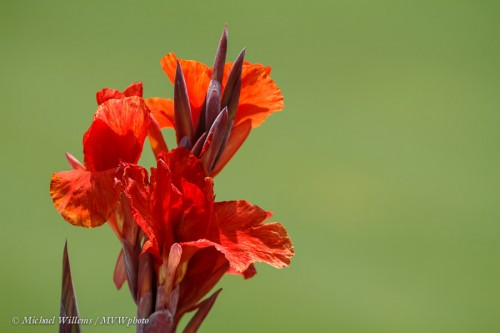
First: you may not need a macro lens. Yes, of course it’s great to have one, and for small objects like bugs you need one – but there are many types of macro shot you can do without a macro lens. Small-sensor cameras (point and shoots) can get very close without any spacial lens. So can long lenses, like my 70-200mm lens, which takes pictures like this, from the Oakville walk the other day:

Second tip: use simple backgrounds. Again. like in the pic above. I defocused the grass by shooting at f/2.8.

Third tip: use contrast to make your subject stand out. Like in the shot above, where I used colour contrast. Or in this next one, where I used brightness contrast:

This time, I simply selected a dark background. You can hold a sheet of black paper behind the flower if you like, too.

Tip four: avoid direct sunlight if possible, though translucent flowers are nice. Else, soften the light, e.g. by using a diffuser.

Go try – point-and-shoot, or SLR with large lens: go take a flower picture right now. Questions? You know where to find me.



Warming!

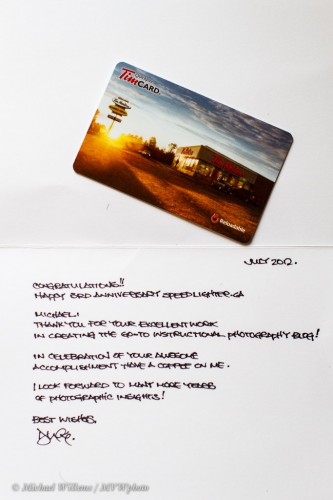
I recently announced that this daily blog celebrated its third anniversary – and a number of you have very kindly taken me up on the “buy me a coffee?” that I mentioned. This is heartwarming, and here is the latest one – in today’s mail. Thank you Duke!

And I look forward to continuing this free resource, hopefully for many more years!

Michael

PS and here’s a tip: to take a photo of a piece of writing like this, use a longish lens (50mm on a crop camera, for instance), and use an ISO that ensures you get a fast enough shutter speed (at least “1 divided by the  lens length”, preferably twice as high). If using an automatic mode, use exposure compensation +1 to +2 stops (it’s white paper, after all).


What should I buy?

A common question that I therefore hear often:

“I am going to buy a [new] camera. What should I buy?”

Followed often by:

“Oh. Isn’t there anything cheaper?”

Starting with the last question: there’s no free lunches. As for the first – that’s like asking “what car should I buy”. I have noi idea what car you should buy – it depends in needs, budget, availability, and so on.

I have two small cameras: a Canon G9 and a Fuji X100. And three SLR cameras:  A Canon 7D, a 1Ds Mark3, and a 1D Mark4. They each have pros and cons. All I can give you is some pointers.

You buy a compact camera if:

  • You have a restricted budget.
  • Size and weight are more important to you than flexibility and quality.
  • You will replace it every few years.
  • You do not need special lenses (wide angle, telephoto, macro, etc).
  • You shoot mainly static subjects.
  • You want to be inconspicuous.

You buy an SLR if:

  • Quality is paramount.
  • You are willing to learn.
  • You want to be able to shoot quickly once you aim at a subject.
  • You will shoot a lot of “difficult” subjects (sports; night scenes).
  • You are willing to invest for the future.
  • You wil by extra lenses.
  • You need to be able to use a big flash.

A few recommendations, then:

  • Think carefully about what your requirements are. What will you use the camera for? What do you need it to do? What do you expect from it?
  • If you buy a compact camera, look for one with a large sensor. These are available nowadays – small sensor cameras produce graining pictures, especially in the dark, and have trouble producing those blurry backgrounds we all love.
  • If you buy an SLR camera, I would recommend a Canon Digital Rebel – but that said, there are no “bad” cameras. Nikon and Canon are the pro brands, but Olympus, Pentax, Sony, and in the compact cameras, brands like Samsung, are just as good. Sony wants to be one of the big boys. Samsung is innovative. And so on.
  • So go hold the camera. Try the controls. Try how it feels. Fall in love – else you will not get most use out of the camera.
  • Make sure the controls are easy and convenient. I find, for example, that touch screens are gimmicky and inconvenient – you keep hitting the wrong thing all too often, and you have to take your hands off the camera to set anything.
  • If you buy an SLR, consider not getting the “kit lens” – these are not very good – but invest in a better lens or two.
  • Include a “portrait lens” – 50mm f/1.8 or f/1.4.
  • Read dpreview.com for a review of your chosen camera.
  • Have realistic expectations. A compact camera will not do for sports shooting, for example.

Does all that help? Yes, some thinking is required, and compromising – just like when you buy a car.


Wide Lens Caution

I am a big fan of wide lenses – 16-35mm on my full-frame camera, or 10-20mm on your crop camera.

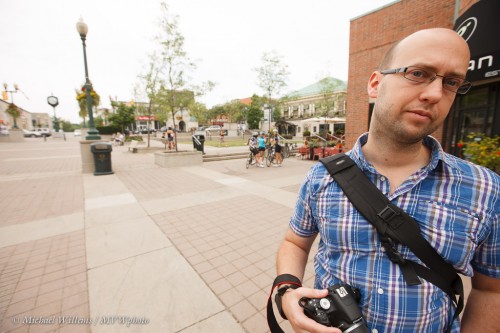
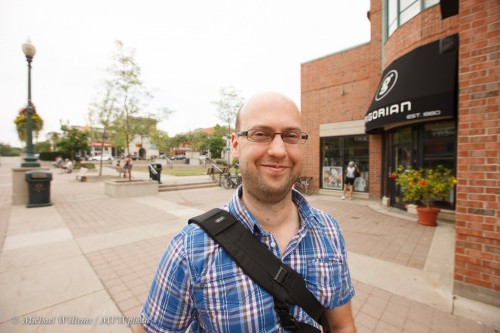
But there is one thing to watch out for: do not get too close to people. Especially, do not put them into the corner: here is volunteer student James on Sunday:

Avoid the corners!

And avoid getting too close in general. As in this one, which is much is better, but the extreme proximity to my subject still distorts his face:

Wide lenses rock, as long as you avoid this gotcha. What they do do is give you diagonals. depth, perspective, and a few technical advantages also: the ability to shoot at slow shutter speeds, and almost infinite depth of field. so if you do not yet have a 10-20, go buy one, and shoot this kind of image:

QED.


Water flow tip

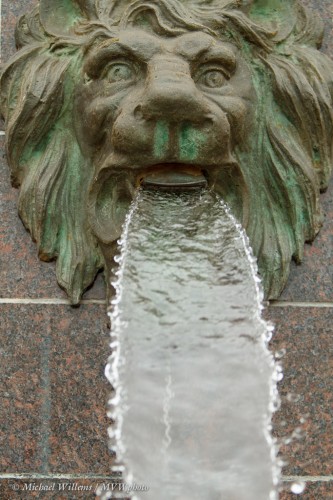
Shooting a river, waterfall, or as in this case, fountain?

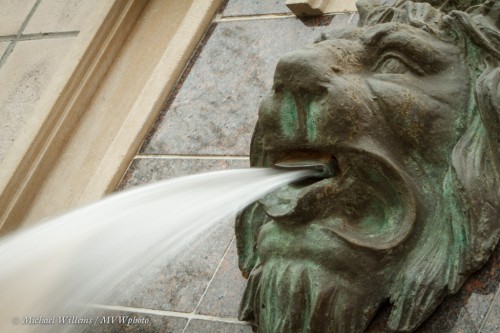
In that case consider not shooting it as above – if it is a moment in time (waves hitting rocks) you can. but when it is a flow, show it like a flow:

To do that:

  1. Use manual or Tv/S mode (shutter priority)
  2. Use a shutter speed of 1/4 to 3 seconds.
  3. Use a tripod – this is a must.
  4. If the light is too bright even with low ISO and high f-number, then use a simple dark filter (a “neutral density filter”).

Tip: if you do not have an ND filter, a polarizer will also darken the light by a couple of stops.

And now a secret: I shot that handheld, at 1/4 second, with no tripod. The secret? Experience; a steady hand; holding the long lens at the end; sitting down steady; and especially, a stabilized lens. Got the shot in one try!


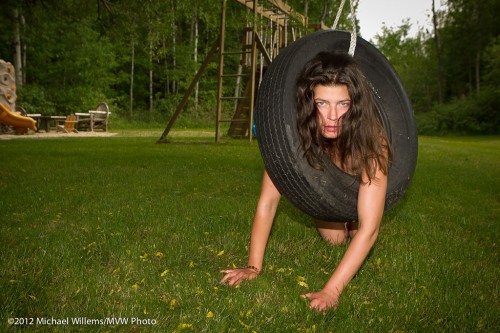
Today I shot soccer kids in Malton. Using a simple flash on camera. Pictures looked like this – although this is not a soccer player but my model recently, the technique is the same:

To do this, you

  • Underexpose the background by 1-2 stops
  • With the camera in manual mode
  • Try to get aperture around f/5.6 with the shutter between 1/100th and 1/200th second
  • And then use your flash to light up the subject.
  • If the background is too dark you will see shadows.

Note to Sheridan students: Tomorrow, I am going to walk my Sheridan students around Oakville at 11AM – yes, students, we are on, unless it is pouring with rain in which case I will post here before 10AM. Towne square and Lakeshore Rd, Oakville, under the big clock, 11AM.


What to bring on a trip?

Reader George asks:

For leisure traveling which gear would you take with you Michael? I’m off to China for 3 weeks in September and still can’t decide what to take with me having 6 lenses /3 primes;28,50,85 and 3 zooms 16-35, 24-120, 70-300/ and one body d300. Looking to buy a used second body either d700 or d7000 since I believe I need a back up just in case. As for packing I have already few Think Tank bags to chose from.

Well. Here’s what I will bring to Europe when I travel to the Netherlands late August:

  1. A camera – Canon 1Ds Mk3 or 1D Mk4 (if I had an 1Dx I would bring that).
  2. A backup camera (quite so, George): a Canon 7D in my case.
  3. Two speedlights
  4. 16-35mm lens
  5. Probably also the 24-70mm lens, but this is not strictly necessary – after all, the 16-35, when used on the 7D crop body, is like a 24-50 lens.
  6. If I have space, the 70-200mm lens: but unless I travel to Africa to shoot lions, this will be my least used lens.
  7. A prime lens: probably the 35mm f/1.4.
  8. A light meter.
  9. Batteries, chargers, plug converters
  10. Memory cards
  11. Flash modifiers
  12. Ziplock bags, dental floss, pen, business cards, and so on.
  13. Laptop.

And indeed, a Think Tank air travel bag that everything fits into. so I can bring it on board rather than checking it. Packing this bag is an art and will take me many hours: the restrictions of airline policy is the greatest factor in limiting what one can bring on a trip.


Three Years!

It was three years ago to the day, on 13 July 2009,  that I posted my first post here on www.speedlighter.ca: A-softbox-to-the-rescue/. Three years of, with a few exceptions, daily teaching posts. I surprise myself! And much more to come, I assure you. (Enjoying this blog, and feel like buying me a cup of coffee? Go here to do it!)

Tip of the day: replace your camera strap with a Domke camera strap: under $20 at B&H, and you get a better grip, less advertising of brand, and especially, a rotating swivel quick release at each end, so the eternal twisting-to-straighten-your-strap is a thing of the past.


Equipment Mania

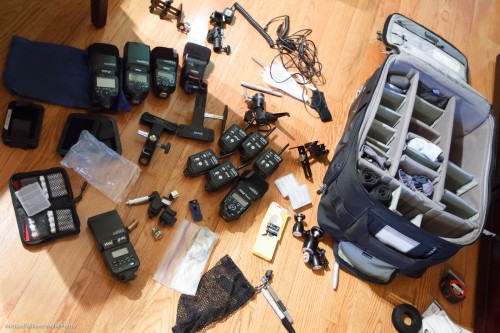
Continuing on the theme of “why a pro delivers (and shy he/she charges real money for shoots)”, let me share this snap, taken last night as I was re-arranging my photo bag:

As you can see, there’s a lot of gear there. Including:

  • Six speedlights,
  • Five Pocketwizards,
  • A light meter,
  • Many modifiers,
  • Many small items to power and connect it all,
  • Many gizmos to mount it all together.

Total value, probably around $$7,000 for that alone. Add the cameras (maybe $20,000), the lenses (maybe $16,000), and the big lighting and miscellaneous gear (maybe $5,000) and you get some idea as to why pro shooting costs money.

But do you need all that? I have two answers!

YES – if you want to shoot important events commissions and professionally. You should not shoot a wedding without gear, spares, possibilities: you do the  client a disservice.

NO – if you are shooting for yourself. A camera, one or two speedlights and a stand with umbrella is all you need for great art – look at George’s great image of me the other day (scroll down).

So, if you are a learner here: take some of my classes (scroll down too), and do NOT be discouraged by all the gear you could possibly buy. Add but by bit, but you can create art from the get-go, with basic equipment, Stay tuned here to find out how.


Wedding Season!

An exciting new initiative: Kristof Borkowski and I are now shooting weddings, engagements, etc as a team. We shoot locally in Ontario, but also do destination weddings all over the world: our all-new web site, www.tolivetolove.com, explains more.

Lucy and Matt at their recent wedding (photo by www.tolovetolive.com)

One exciting part is that since this initiative is new, unlike older businesses, we have openings even this summer.  Give us a call or drop us a line if you are interested in great photography of your special day or event.

And now what you are here for… a few Wedding Photo Tips:

  • When shooting a wedding, get a detailed list of required shots well in advance from the bride and groom.
  • Go over this list in detail until it is complete. That way, there will be no surprises!
  • Print the list!
  • Make sure you have the name and cell number etc of someone who can help you get all the people in the required shots together on the day. They know who Uncle Frank is; you don’t!
  • Use a camera with two memory cards, and write e4ach image to both. Cards fail, and precious moments never appear again – they happen once, and that is it.
  • Use fast lenses. A minimum of f/2.8 is required (even then you will shoot at 1600 ISO often!); prime f/1.4 lenses can often be even better.
  • Carry twice the number of flashes and cameras that you need. Things break!
  • Carry twice the batteries that you need – and then double this number again.
  • Change batteries for every segment of the shoot.

Use those and you’re set to go. (But… one piece of advice: do not shoot a wedding as the only shooter if you have no prior experience: shoot with a pro as an assistant, and then as a second shooter, a few times until you know the drill!)