Workflow and Lightroom

I talk about Lightroom a lot, as you will have noticed. The reason is that Adobe Lightroom is hands down the best workflow tool I know. Workflow meaning “what happens between arriving home with the camera to the finished product”.

Lightroom 6, as you will have seen, is a step forward. It has its issues—for now, the speed of the face detection module is way below par—but you can work around those, and they will be fixed.

But you do need to learn how to use it. Thank God it’s not Photoshop: it takes days to learn, not years. But it does take days.

Enter some help.

On May 30, I teach a workshop at Vistek: Lightroom and Workflow”. In it, you will learn backup strategies, computer strategies, Lightroom workflow and editing, and much more. Seating is limited, so sign up soon.

The same is true of the Flash workshop this Saturday in Oakville.If you missed the Vistek workshop, come on Saturday: 1pm, see http://learning.photography/collections/training-300-advanced/products/flash. Seating limited, so be quick if you want in.

Now, a (repeat of) a little flash tip.

If your flash looks too dark in the photo, why is it? It could have two very different reasons:

  1. Metering is wrong; the TTL circuitry decided on too low a level.
  2. With the current ISO and aperture, you simply do not have enough power (eg the ceiling you are bouncing off is too high).

To know which one: set your flash to manual mode, full power (1/1). Shoot. If the picture is overexposed, you had reason 1; if not, you had reason 2.

To solve the issue: For reason 1, go back to TTL and use flash compensation. For reason 2, go back to TTL and lower the f-number and/or increase the ISO.

That’s all – pretty simple, but often overlooked.


Setup for outdoors flash pics.

A student just asked me:

When you were at the London Camera Club, you had your usual stand/flash holder/umbrella combo on display. Unfortunately, time didn’t permit me to ask about it. Would you mind mentioning what brands the components are – I would like to have a similar set up for my Speedlight.

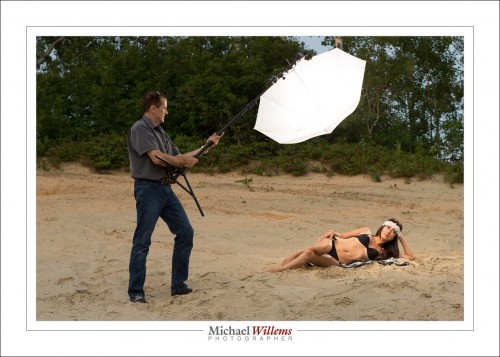
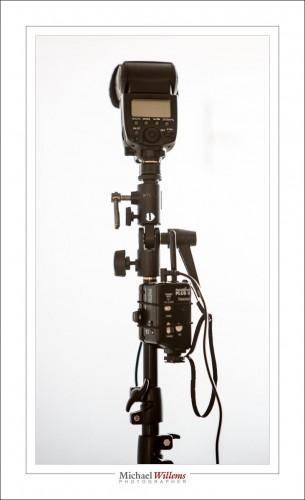
I use the following setup:

So that is:

  1. A Light stand. Any brand is OK if it is sturdy enough.
  2. A mount that sits on top of the light stand and swivels. The flash sits on top of this mount. My mount is a Manfrotto,
  3. A pocketwizard receiver. I use the simple Pocketwizard PlusX: $180 for two of them.
  4. A cable between the Pocketwizard and the flash hotshoe. This cable sits on top of the mount, and the flash on top of it.
  5. An umbrella that goes through the mount (you can see the hole in the photo). This should be an umbrella with a removable cover, so you can shoot into the umbrella as well as through the umbrella.

Because this is non-TTL, the flash can be any flash. Any make, and type, as long as it has a manual power level setting and you can disable any timeouts (otherwise it turns off every minute or two).

To a large extent, these are commodity items. There are many brands. Nikon has a kit of mount plus stand plus umbrella for just over $100, for instance, but anything that looks sturdy enough will do fine.

As for radio triggers, I use Pocketwizards because they are the industry standard and rugged, and they use AA batteries; but any other non-TTL trigger will work just as well.

The setup above serves me well: it is what I use for up to 90% of my outside pictures.

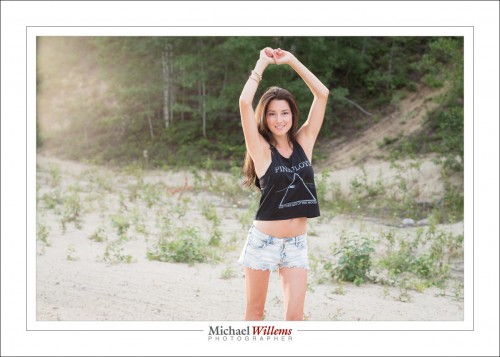
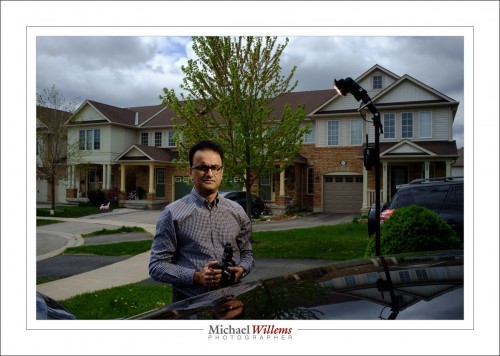
Like this scene, the way it looks to my eyes:

And here comes rescue, a.k.a. me and my umbrella:

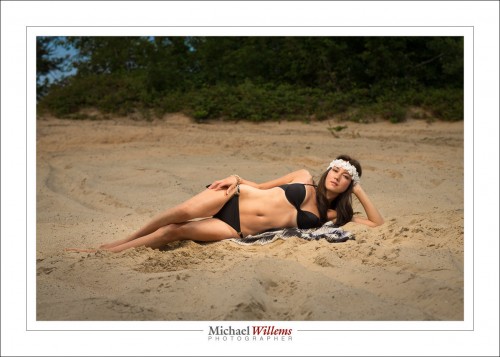
…which results in:

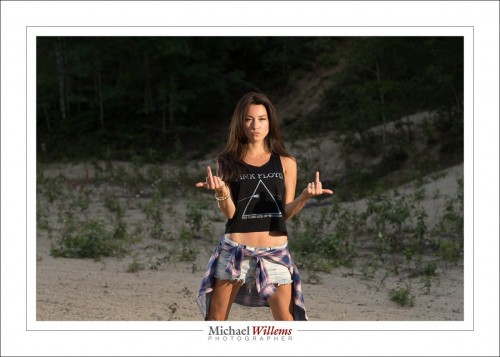
And the lovely Vanessa from Timmins has a sense of humour:

The good news: this type of dramatic lighting is simple, once you know how!

___

Want to learn how to do this? I have a couple of spots open on my “Mastering Flash” workshop in Oakville this Sat 23 May, 1pm—4:30pm. This is a very small workshop: 3-6 people maximum. If you are interested, email me: michael@mvwphoto.com. You can book on http://learning.photography.


Add a splash.

There are many distinct ways to use gels. They include:

  1. Colour correction in mixed light
  2. Background Colour shifting
  3. Adding backgrounds
  4. General creative use
  5. Adding warmth

Type 5 is easy. Like here:

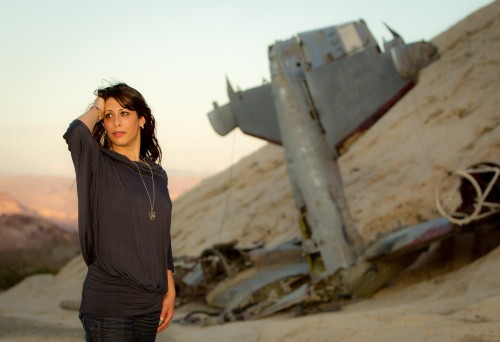
Nelson, NV, 2010

Indeed the sun was setting, so we have beautiful “Golden Hour” light.  But Yasmeen is in the shadow of a mountain, so she is not lit by this great light. She is on fact hardly lit at all.

Solution: I use a flash. On camera. Now she is lit. But I gel that flash with a CTO (Colour Temperature Orange) gel. Now it looks as though she, too, is lit by that setting sun light we like so much. And because I use the ultra convenient Honl photo gels, sdlapping on that gel takes less than a second.

The solution: a cool shot, where otherwise there would be no shot at all.


Evening work

Tomorrow, I am teaching a course at Vistek Toronto., You can turn up: there are a few spots available still. But they are limited, so turn up at 9:30AM.

So what am I doing now? Something I do regularly, and you should all do: Preventive maintenance on my equipment.

In particular, cleaning electrical contacts. Whenever something does not work, it is often an electyrical issue. I have found that this is often due to:

  • Pocketwizard contacts not clean.
  • Flash hotshoe contacts not clean.
  • Flash contacts not clean.
  • Lens contacts not clean.
  • Lens not seated properly.
  • Connectors not clean.

So cleaning all the above contacts — any electrical contact— regularly can help prevent a lot of problems.

So if you have nothing better to do.. some windex and a cloth, and rub them all clean. Do not allow any liquid to come anywhere near your camera or lenses, of course. But I do not have to explain that to you, right?


Flash and what you want.

Your background is what you want, not what it is.

Huh?

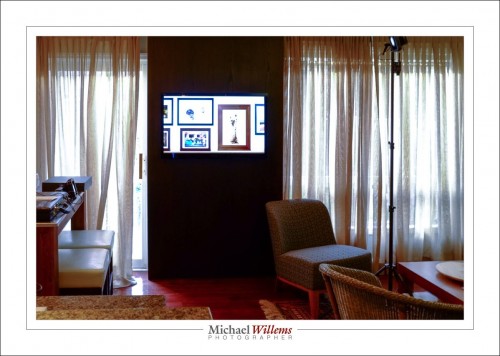
Take this example. My room looks like this, right now.

(0.5 sec, f/8, 200 ISO).

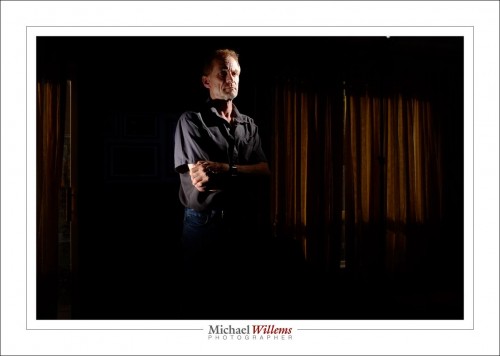
But when I set my camera to 1/250 sec, f/8, 200ISO, I get:

Dark. Even the TV is almost entirely dark.

Why? Because that is what I want. I do not care that the room is pretty well lit; I want it to be dark. So what do I do? High f-number, fast shutter, low ISO. And that gives me not what there is, but what I want.

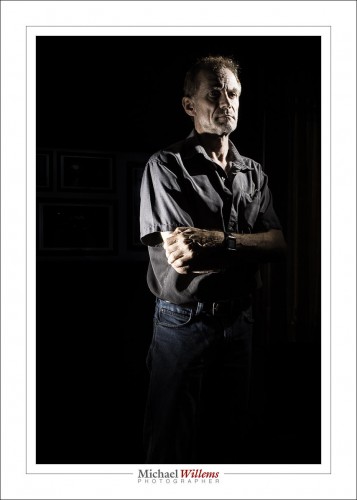
And when I crop that, decrease saturation, and increase clarity, then I have a low-key portrait.

…which is of course what I wanted all along.

Note that I use two flashes to light me. They are set to manual at 1/4 power, my standard flash setting. I also have a grid mounted on each flash (a Honlphoto grid). These stop the light from spreading through the room. If it did, the room would be visible.

You can have serious fun with one or two flashes and a few radio triggers, and this is how. Make ambient go away , then use flash to light where you want the photo to be lit.


Newsflash: Flash News—Vistek Toronto, Saturday

Flash newsflash: I am teaching a flash workshop at Vistek in Toronto on Saturday, May 16, at 10AM. This is a workshop that covers everything from first principles to creative techniques, so expect an intensive three hours.

Book here:

www.vistek.ca/events/seminars/1449/Mastering-Flash-Workshop-with-Michael-Willems.aspx

There is space but seating is strictly limited, so if you plan to attend, book soon. And bring your (SLR or similar) camera and especially, your flash.


Direct Flash: Can It Be Used?

Unmodified flash? Without umbrella, softbox, or bounce? Can I use that and still get good results?

In a word: yes. You do not always need flash to be modified.

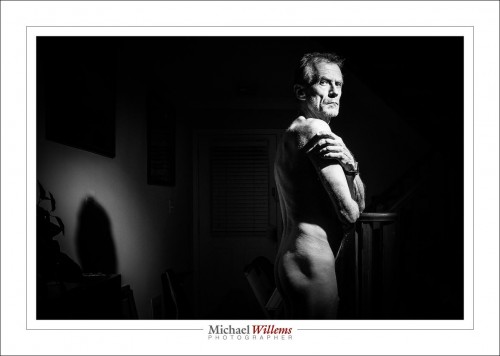
For instance, you may intend the look. One single, unmodified flash can give you a hard look, and that may be exactly what you are after, like in this high contrast B/W self portrait:

So sometimes you can use it to deliberately accentuate the hard look of a photo. So this is the intentional hard look.

At other times, you are mixing in ambient light to take away some or all of the hardness. That, in other words, is the minimized hard look. One way to do this is to use another flash; another way is to mix in ambient light, like here:

That was made with one flash; see it on the right here:

The key in all examples here is that the flash may be direct, i.e. unmodified; but it is not where the camera is. In other words, it is off-camera flash (OCF).

Whenever you want to try a new look or technique, my advice: yes, try it and see. You may be surprised by the results.

Lightroom 6

Lightroom 6 is the latest and greatest in the version history of Lightroom, the best thing since sliced bread. Asset management, editing, and production all rolled into one.

LR 6 is a worthwhile upgrade; as I mentioned in an earlier post, it has lots of new stuff. For me, the main features for me are:

  1. Face recognition. You can now recognize faces, so that all photos that feature uncle Bob can be quickly found. Remarkably accurate
  2. Panoramas. Stick together 2, 3, 4, or more overlapping photos that you have shot.
  3. HDR. Stake one normal shot, and one more more darker and one or more lighter, and pull them together to get either artistic “paint” effects, or just more dynamic range (i..e. the detail in the dark areas will be visible, as well as detail in the light areas).
  4. Brush in filters: you can now use a graduated filter and remove it (or add it) in specific, brushed areas:
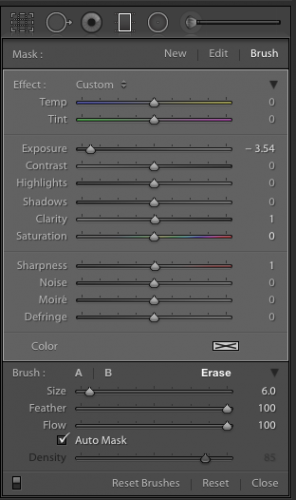
(The graduated filter here has the new BRUSH activated in ERASE mode, so I can delete part of the filter)

There’s more, especially the Mobile functions and the reputed speed increase, but I cannot comment on that since I have not observed or used them.

So, how to go about upgrading?

First, make sure that you have backups. And I mean good, verified backups. You never know. Don’t ever lose all your work… make backups and store them off site. Backups of both the photo originals and the work you have done on the (the catalog file, named <something>.LRCAT).

Then, the upgrade. Under “Help” select “check for upgrades”. Make sure that if you have the app, you keep getting the app, and not the “creative cloud”. Adobe really, really wants you to get the Cloud version, which works out much more expensive even in year one if all you use is Lightroom; and after year one the price will go up.  You will have to search the Adobe site; look for “All products”, and look for the price of around $80 for the upgrade. Not the $3-10 per month Cloud price. (Think about it: if the next upgrade is two years away, and I only use Lightroom, I pay $80 for those two years. Cloud users would pay significantly more: 24 times something is something big.)

Before you start, you will need to log in to Adobe, and under “My products”, find the serial numbers for previous versions. You will need the previous version’s serial number to qualify for the upgrade.

When, armed with the login and the serial number, you perform the upgrade, your catalog file will be converted. This takes time. On my catalog, with around 200,000 photos it took most of the overnight that I let it run.

At the end, when you can use Lightroom, you will have a new catalog. But your old catalog will also still exist. Just in case. I advise you keep that around for a little while. Just in case. You never know.

Also, make sure that when you want to use Lightroom you start the new app, not the old one. The new one is called “Adobe Lightroom” and lives in your app folder, inside a folder called Adobe Lightroom.

After the upgrade you will see that Lightroom works as it did before. But new functions have been added. Under “Photo” you can now, after selecting two or more photos, select Panorama or HDR (high dynamic range). Try!

And more importantly, in the grid view you see a new face symbol as one of the following views. Bottom right:
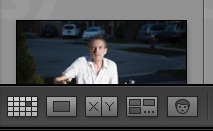
When you click that, you will see the faces Lightroom recognizes. Give them names. Over time, Lightroom gets better and better at naming faces. After you name them, you see:
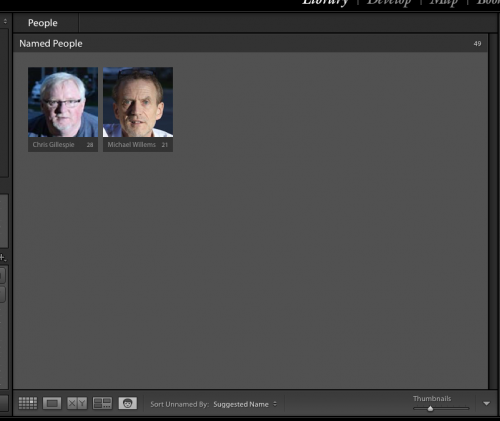
Initially, of course, all faces are unnamed.

You can turn face recognition indexing off (paused) or on by clicking on the Lightroom Logo on the very top left of your screen. You see:
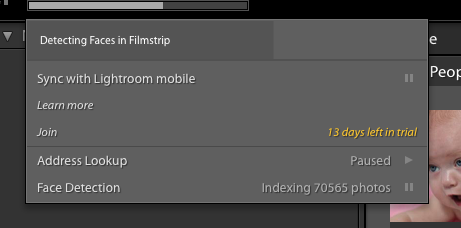
During this time, the application may be slow, not just when you are looking at the grid view, but also when exporting a picture, printing one, and so on. Allow plenty of time for the indexing to finish, and you can pause the indexing when you need speed. You can index per shoot, or per year, or all at once (though I would not recommend that when you have a large catalog, like mine).

I am still discovering new things, so there will be more blog posts about Lightroom 6. For now, though: recommended!

___

I also coach privately: bring me your laptop and I will not just teach you, but we will set up your own Lightroom installation in the optimal way. See http://learning.photography.



Colour

Again, let me point out today the effect a bit of colour can have. A splash and a dash here and there can make all the difference.

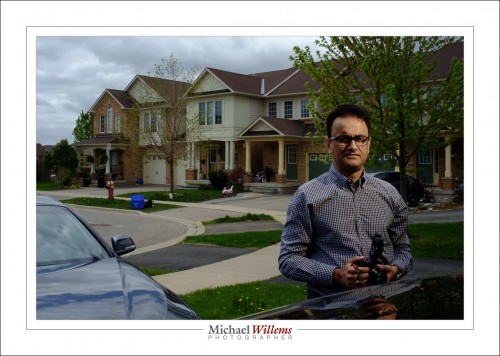
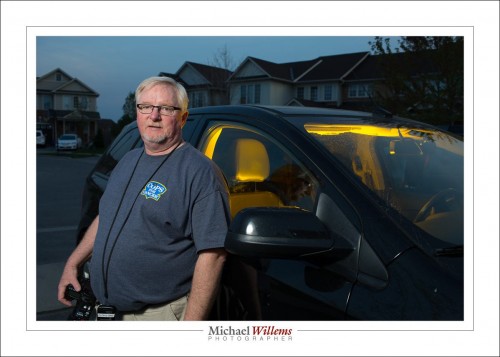
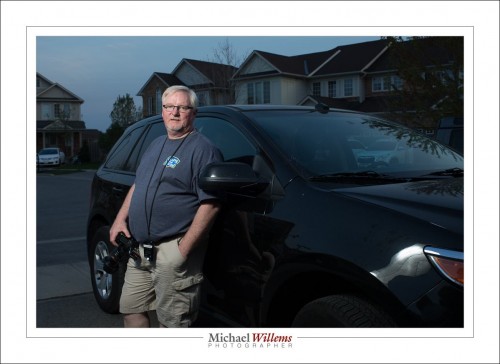
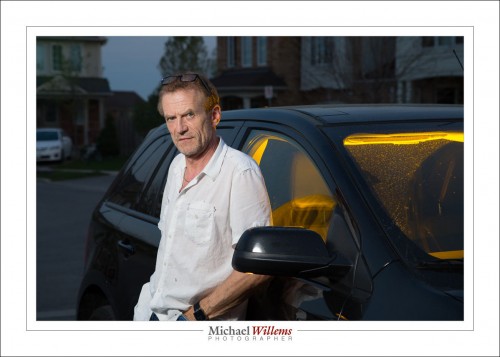
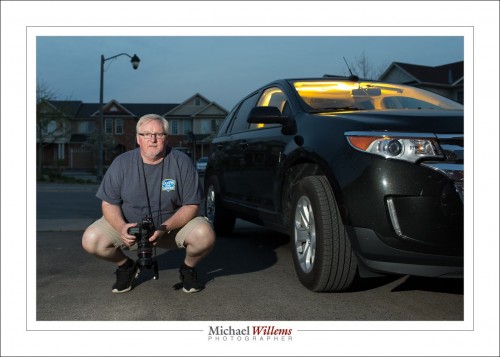
Take this picture, of yesterday’s student by his car:

Without that gelled flash inside the car, the picture would miss something. It just does not look the same:

So I always have a flash standing by just in case. To be precise:

  • Flash, like a 430EX (Canon) or SB-610 (Nikon)
  • Light stand
  • Bracket, for mounting flash onto light stand
  • Clamp, for when I want to clamp the flash to something
  • Pocketwizard radio trigger
  • Hotshoe cable between Pocketwizard and flash
  • Set of Honl photo gels (use discount code “willems” upon checkout, for 10% off)

The gels are important: over time you will get a good sense of what colour suits what occasion. The Honl gels I use are very sturdy, easy to use, and are chosen very well: I have all the colour sets and use them extensively.

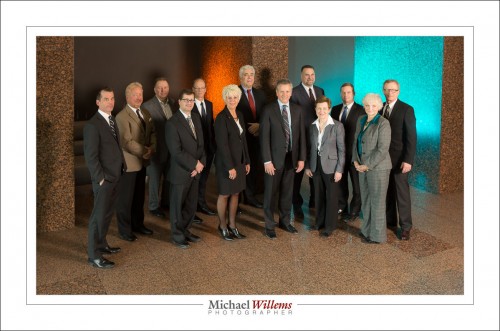
Another recent example, where I used two extra little flashes with gels to liven up a board of directors:

That, too, would have been dull without the colours. And you should never allow a board to look dull.

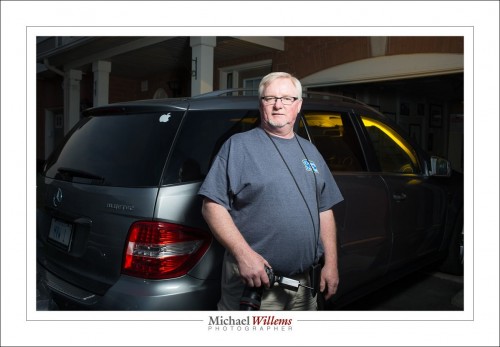
Here’s me, followed by a few more of my student:

You should know, it was not dark when we took those. As you know, your camera is a light shifter. As you know if you have taken my lessons, you start with the background. Set your A/S/ISO to whatever it takes to get that the way you want. Not the way it is. Then, and only then, add flash.

___

If all this is mystery to you, do what my student above did and take a private lesson. In person, or worldwide via Google Hangouts. And start with the books: have those ready during and after the lesson to ensure it all sticks. You too can make artistic professional pictures, and quickly, and without major investments in gear.


Basics

Before you go on to advanced topics, you need to know the basics. This is true of brain surgery, writing, painting… and it is also true of photography. Start with the basics, then build on top of them.

And yet, I sometimes meet people who think the basics can be safely skipped. Or who think the basics are simple (after all, they are called “basic”). But the basics are not simple; they are called basics not because they are simple, but because they are at the basis of everything.

These basics include:

Camera basics. You should know your camera, its menus, and its quick menus. What functions are where? Where are the buttons? Look at them all and see what they do. And I mean really learn them. How do you set a hundred and twenty-fifth second shutter speed? (No, it’s not 1/25, but it’s 1/125). What does 8″ mean? What does your camera maker call continuous focus, AF-C or AI-Servo?

A good exercise is this: pick up your camera and look at it. Ask yourself if you are fully familiar with each button: its name, purpose, and functionality.  But also: when to use it. You may be surprised that there is more that you did not know than you thought.

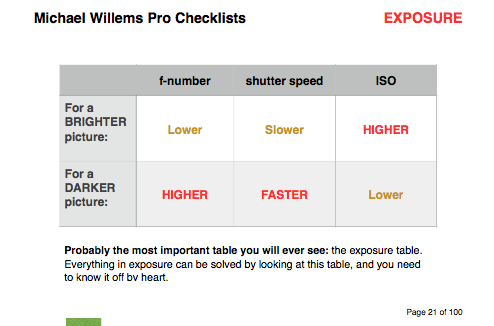
Exposure basics. This is the most fundamental of them all, and once you know them, things get easier. Hence my “table of truth”, a table that should be second nature to you. No, first nature; it’s that important:

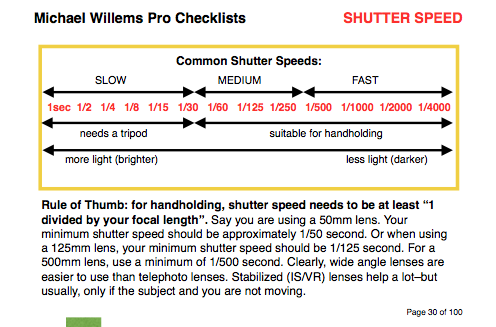
After you know this, put the two points above together, and learn what kinds of aperture and shutter speed settings are recommended.

Tables like this should also come naturally to you. As should the sumbers: the main shutter speeds as mentioned above, and the main f-numbers also: 1.4,  2.0,  2.8,  4.0,  5.6,  8.0,  11.0,  16, 22, and so on.

You should also lean how these interact, and how they work creatively.

Technique basics. These include such things as focus basics (when to use one focus point; when to let the camera choose; and when to use AI Servo/AF-C). It stands to reason you should know those before going on to advanced topics, but look around you and all you see is out-of-focus photos. And that is such a shame. So learn focus, white balance, how to hold the camera.

How do you learn? By a combination of:

  • Reading (may I recommend my e-books? You will find the Mastering Your Camera book and the Pro Checklists books, from which I copied the tables above, are excellent resources to always carry with you.
  • Taking courses. Whether it is private tuition, which is remarkably affordable for what it is, or classroom-style learning, this speeds up your book learning immensely.
  • Trying. You don’t pay per click, like in the film days, and trust me, doing it is the only way to really solidify your learning.

It’s much easier than you think, as long as you take it logically. The books and courses are available from http://learning.photography, and you will find this blog to be a useful resource as well. Go for it, and shoot like a pro soon.