High speed flash.

High Speed Flash. Also known as High Speed Sync, or HSS, or “Auto FP” flash. Your camera/speedlight combination probably has it. Let me explain what it is, why it’s good, and why it’s nevertheless seldom useful.

First, the term “High Speed” is a misnomer, since it is actually slow speed flash. Let me explain.

Normally, a flash lasts 1/1000 sec or less. At 1/32 power, it’s only about 1/30,000 second. Very, very fast.

But there’s a problem: the shutter cannot keep up. You see, the shutter needs to be fully open for that quick flash to be able to illuminate the whole sensor, but at speeds above 1/250 second, the camera makers use a trick to get faster shutter speeds: instead of opening fully, an ever narrowing slit of light travels down the sensor, so the shutter is never actually fully open.If you try to use flash, only part of your picture will be illuminated.

But there is a trick: HSS, or “Auto FP” flash. When using HSS, instead of flashing once, the flash goes FlashFlashFlashFlashFlashFlashFlashFlash very rapidly (at a rate of 30,000 times a second).  This makes it into what is effectively a continuous light. As the narrow shutter slit travels down, the FlashFlashFlash keeps going on and hence the flash illuminates the sensor gradually.

So, set your camera (Nikon: camera menu, select “Auto FP” flash sync) or flash (Canon: set flash to HSS symbol) to high speed and you are set to go. You can now use any shutter speed, up to whatever. 1/4000? Sure. Go for it.

The problem? HSS loses most of your power (you are illuminating the closed part of the shutter, after all), so your flash range is reduced. At 400 ISO and f/8, my flash has the following maximum range:

  • 1/30 sec:     9m
  • 1/60 sec:     9m
  • 1/125 sec:   9m
  • 1/250 sec:   9m
  • 1/500 sec:   3m
  • 1/1000 sec: 2m
  • 1/2000 sec: 1.5m
  • 1/4000 sec: 1m
  • 1/8000 sec: 0.7

So up to 1/250, varying the shutter speed, as you would expect, has no effect. But then HSS kicks in, and the range starts to drop dramatically. At 1/8000 sec, my flash, at full power, only reaches 70cm (about 2 ft). And if you are using a modifier, like an umbrella, forget that: you would be lucky to get a few inches.

So while HSS is a great idea, it is not very useful in most practical situations. Because you are most likely to need to need it when it is bright outside, but that’s also when you need most power and cannot afford to lose any. Catch-22, since HSS steals from Peter to pay Paul. Now you know.

Math buff note: can you see any math logic in the numbers above? Yes, every stop faster shutter speed loses you the square root of 2 (roughly 1.4)  in available range. So, two stops faster shutter means half the range.


Less is more.

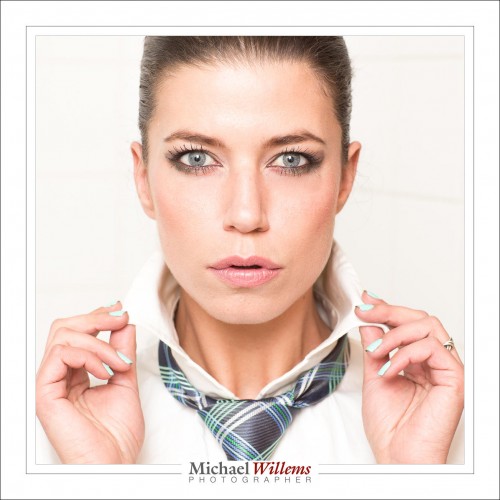
Sometimes, simple is all you need. Like in this headshot:

This shot is simple in many ways:

  • Shot with simple camera settings: f/5.6, 1/125 sec, 400 ISO.
  • I am using just one flash on camera, aimed 45 degrees up, behind me. The catch lights are the circle that my flash throws onto the ceiling.
  • The flash is using TTL (automatic flash metering, in other words). Of course since this is a high key scene, I set flash compensation to +2 stops.
  • I am filling the frame. Yes, cutting off the head is allowed.
  • The pose is a simple one, as is the composition.
  • The location is a simple white bathroom: smaller is great since it allows great bounce without the high ISO values you would otherwise need.
  • The dress is a simple white shirt, against a simple white background.

All this “simple”, combined with the right model and a razor-sharp (obscenely sharp, some might say; look at full size) 85mm f/1.2 lens, makes for a good shot. No studio complexity needed in this case; no pocketwizards, no complicated anything. Simple does it; less is more.

So if anyone tells you “you cannot do this, you need more equipment”: it ain’t necessarily so!


Things you can’t do

There are many things that conventional wisdom says you cannot do. Like shoot at slow shutter speeds when people are moving.

But I say you can, and damn the rules.

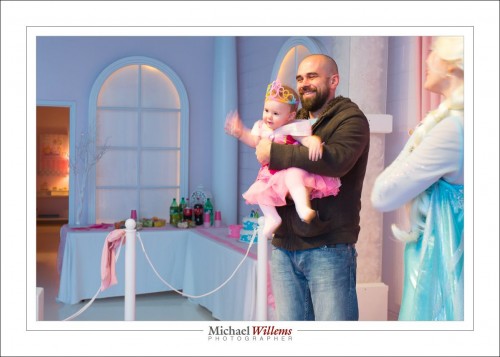
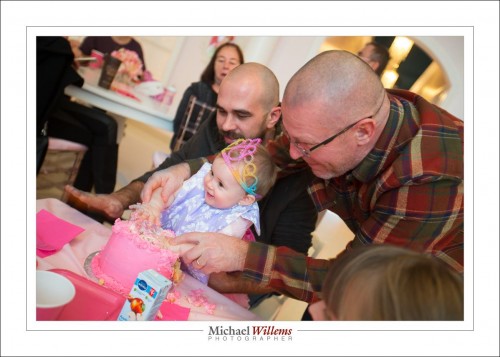
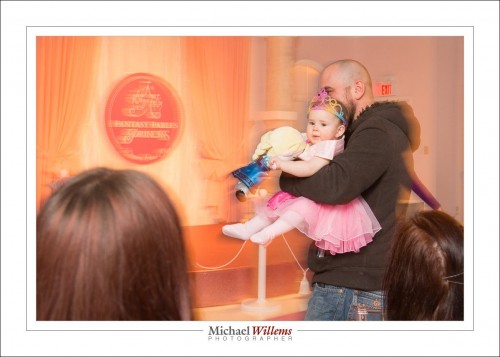
Like this, of baby Aubrey and her dad Dave at her 1st birthday party, which I photographed the other day:

(Shot at f/4, 800 ISO, 1/30 sec; focal length 35mm using the 16-35mm f/2.8 lens).

I used a flash, bounced as usual up, behind me. The challenge is white balance: I could have gelled my flash the same colour as the light, but that was difficult under the circumstances, so I ended up with blue and red light mixed. Not to worry, the compromise white balance, where I balanced mainly for the tungsten spotlight, since the baby is more important than the tables in the background, is just fine.

Back to the shutter speed. It was 1/30 second, and with the baby waving her hands and feet this of course causes unsharpness. In this case, the unsharpness is not a problem. It shows the fact that the baby is happily waving her arms and legs to show that she is delighted to be the centre of attention. Without that, the photo would have been boring. With it, it shows the joy of the occasion.

Success, even though you are not supposed to do this, 1/30 sec with rapid movement in the subject.

___

Want to learn Portrait Photography? Learn by buying the all-new Portrait Pro Collection, a set of three great e-books: “Mastering Your Camera”, “Pro Flash Manual”, and “Powerful Portrait Photography”, all together for just $44.95 instead of the regular $60. And you can now download a free sample chapter of  the Portrait Photography book by clicking here. Don’t delay—get these books now and be a Portrait Pro this coming holiday period.


Shoot

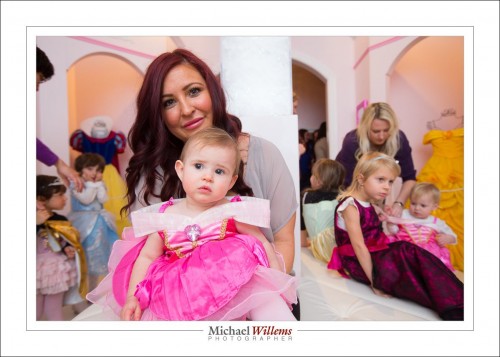
Last night I photographed a party. Let me take you through that: it is useful to see a real-life shoot as it unfolds.

This was a very quick, rushed shoot: hardly any time at all to set up.

I had two cameras:

  • 1Dx (full frame) with 16-35 lens;
  • 7D (crop camera)  with 24-70 lens.

That means effectively I had 16-35 and 35-105 mm available, i.e. 16-105 in one continuous range. So the lenses were taken care of.

Now the lights. Seeing the need for speed, I quickly set up two speedlights in umbrellas, fired by Pocketwizards. In this example only the one on the left fired:

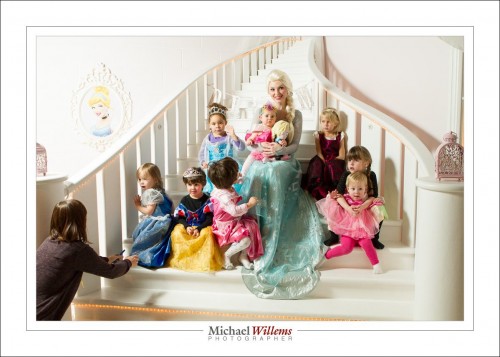
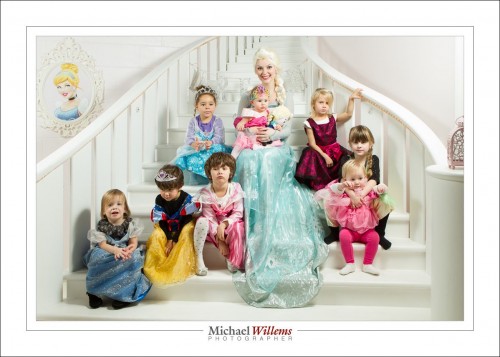
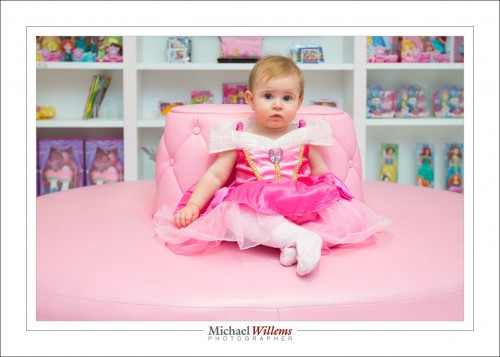
The final pics look like this:

That’s simple: One umbrella left, one umbrella right. We are looking for competent lighting here, not art. I did not use a meter; just set the lights to 1/4 power and adjusted ny camera settings (ISO, aperture) to that.

Note the mom in the first shot. My shoot was hindered big time by all the moms taking iPhone shots. A trend more than ever before.

Then the rest of the shoot: the 16-35 with one on camera flash bounced against what walls there were.

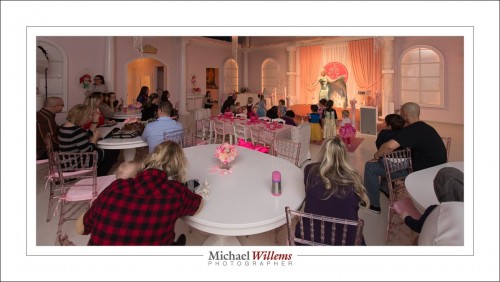
Easy in some rooms, harder in the ballroom since it had a high, black ceiling. So I started at 400-40-4 modified to 800-40-4: i.e. a camera setting of 800 ISO, 1/40 sec, f/4. That extra stop comes in handy when you are bouncing off high or dark ceilings. Like here, in the middle of the ballroom

Sometimes, I switched to mood lighting: simply increase the shutter speed to darken the ambient light, and the aperture smaller (or lower flash compensation, when on TTL) if you also want less flash:

All in all, a competent shoot.

With some fun too: A panning shot., 1/30 sec and I follow:

The ghosting lends it an interesting effect; and the subject is sharp first because I am panning; second because she is lit mainly by my flash, which is 1/1000 second or faster.

I had just enough time to produce prints for the parents, on my little Selphy printer. All good.

And then quick post work an on to the next assignment!

___

Want Michael to shoot your family event? He’ll quote a competitive price and deliver quality work quickly. See www.tolivetolove.com for details.


Aha Me A Riddle I Day

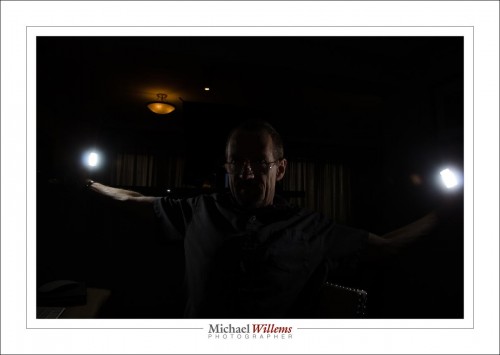
Not the Laura Love song, but a real riddle. What happened here?

My face is underexposed totally compared to the rest of the shoot, which was like this:

So there the sides of my face are well exposed. But then the photographer zoomed out, and we got the shot at the top. What gives?

If you do not know, let me give you a hint: we were using TTL.

If you still do not know, allow me to explain:

TTL is like “auto for flash”.

  • Auto flash exposure normally uses evaluative (“Matrix”) metering.
  • I.e. the screen is divided into little squares, dozens or hundreds of them, and each one is metered individually.
  • As soon as any of these little squares are overexposed, even one of them, the camera tries to fix that.
  • It does that by lowering the exposure. But you obviously cannot change just one part of the photo, so the entire exposure is lowered.
  • That’s the reason the picture at the top is underexposed: the flashes are visible, meaning a hot spot or two, and the camera “fixes” that by lowering the entire exposure (by using a lower flash power setting).

The fix: You can go to average metering. Or you can avoid hotspots like reflections or flashes.

That’s one of the little facts you learn if you take my flash course.

Are you aware that virtually all my courses are offered online as well? Live, one-on-one courses, like the one I just did today with a long-time reader from Melbourne, Australia:

If you go to this page and check the pull-down menu, you will see that you can even save money by doing it online. So wherever you are in the world, I would be delighted to do a one-on-one with you.


Post

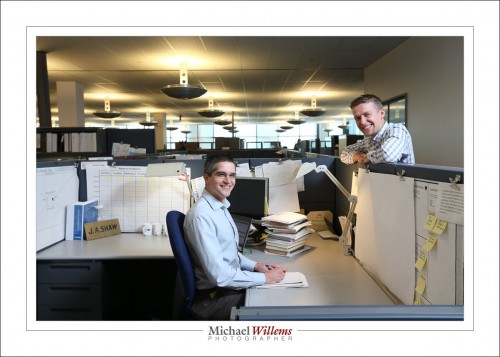
I shoot RAW always. But today I shot JPG, in a corporate annual report shoot.

One of those started off as a JPG; one as a RAW. Can you tell the difference?

No. And that is the point: if you expose well, and need no changes, JPG is fine. It is because we don’t always shoot well and get all settings right, and because we sometimes want changes, that we shoot RAW.

So why did I shoot JPG?

Because my main memory card went south in the middle of a this all day corporate shoot. I lost the RAW pictures. Yes, cards go bad randomly sometimes.

So I used the backup pics, the JPGs I wrote onto card 2 in my 1Dx. Thank God for the dual card system.

Fun shoot, and the day was saved thanks to this camera feature.

I am so tired at 2:15Am that I cannot type. But I want ed to share this, one more time: Please, please, please make backups of everything, always. Please, please, please make backups of everything, always.Please, please, please make backups of everything, always.


Big News!

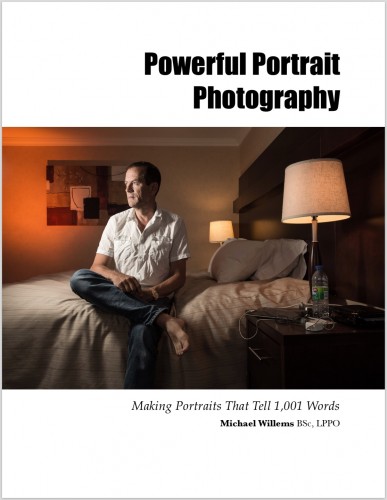
OAKVILLE, 24 November 2014—After many months of preparation, Michael Willems has tonight released his sixth and latest e-book, “Powerful Portrait Photography: Making Portraits That Tell 1001 Words”.

This book is available for immediate download now from http://learning.photography.

If you, like most of us, are attached to people, you will find enormous satisfaction in shooting their portraits. But only if you do it well. This all-new e-book takes you through the jungle of terms, shooting techniques, lighting schematics, posing techniques, and types of portrait and for each one, outlines in a logical fashion what it is you need to do to perfect your technique. From equipment to psychology, award-winning photographer and educator Michael Willems leads you through it one step at a time.

This extensive and richly illustrated e-book is $19.95 plus applicable taxes: it comes as a PDF file conveniently optimized for freely viewing on your iPad or other tablets, computer, small cell phones and similar platforms.

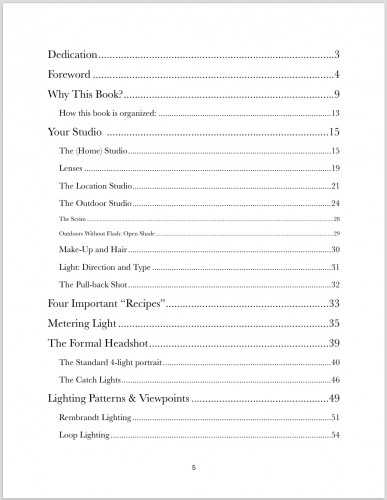
The Table of Contents shows that the subjects will teach you everything from technical needs and lighting schematics to psychology and special tools and techniques:

The book is available for immediate order and download.

But Wait! There’s More! The set of all six of Michael’s books is now also available at $79.95, a $40 discount over the regular price of $120. What better Christmas present for yourself or a loved one? Or even better: get them now so you can shoot great portraits during the upcoming festive season.  Head to http://learning.photography/ now to order your downloads or DVDs.


Lighting schemes

A short note today. About portrait lighting.

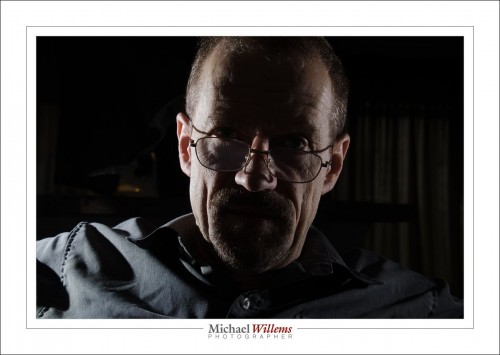
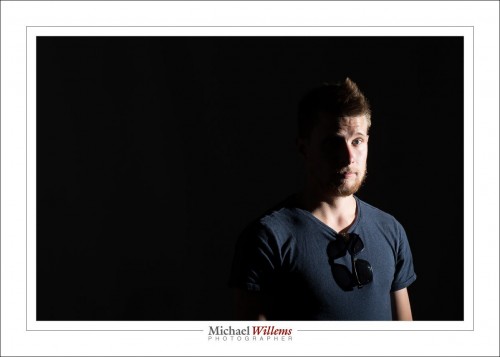
There are many lighting schemes photographers know. One of them, as you know, is split lighting:

Split lighting means that you light exactly half the face.

Let me take away a misconception: It has nothing to do with where you shoot it from: this is short lighting; if I shot the subject from his other side, it would be broad lighting.

More on all the lighting schemes in my upcoming book “Powerful Portrait Photography”… stand by for an announcement!


My must-have. My preciousssss….

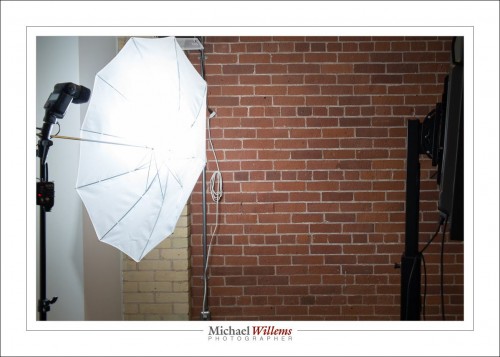
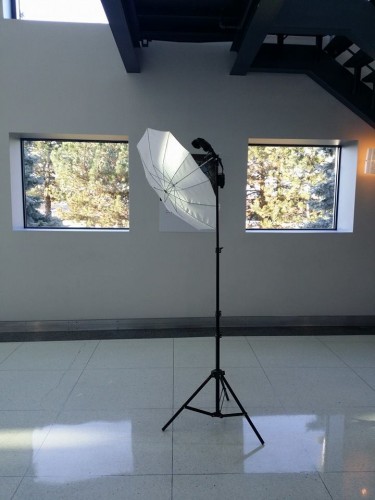
I actually have many “preciousssses”. But this one is among the most precious. My lightstand/bracket/umbrella combo. This here:

This kit, which is just about glued to me, consists of:

  • A light stand.
  • On it, a bracket for mounting flash and umbrella.
  • A pocketwizard. (Plus one on the camera).
  • Cable from pocketwizard to flash (from Pocketwizard or from flashzebra.com).
  • A small flash, e.g. a 430EX/SB710, or any other flash. Any brand will do if I use “manual”. As long as you cam disable the timeout and set the power level manually.
  • Umbrella. Shoot through as well as shoot into (i.e. removable cover).

It folds into a very small package, and often, it’s all I need. Since I know how to mix ambient and flash, that umbrella allows me to do so much. Including this:

Oh, and a student spotted me and took this photo, of the exact flash stand used for that shot:


___

Want to learn? I do remote training over the Internet, using Google Hangouts, so you can now do my courses wherever you are in the world. Better still, for a limited time, it’s cheaper than here, in person. See learning.photography to order now.