Packing

Tomorrow night, after the Flash course, I am off to Aruba for a few days. So I am packing.

Packing what, photography-wise, you may well ask?

A camera, of course. But also a spare—the spare will, I think, be the little Fuji x100, and the main camera, the 1Dx.

Lenses? Well… the 16-35, and the 70-200 probably, or the 24-70 in its place, and one prime. Of course you can shoot with whatever you have: the trick is to shoot the kinds of things you can best shoot with the lens you have.

A tip: I usually do a Flickr search for the area I am visiting, so that I can see what I like, and I can see the EXIF data to determine what lens was used for it, if I cannot see it from the photo (which I usually can).

And a flash or two. Yes, two, for off camera flash. A few flash modifiers just in case; a few Pocketwizards too.

A tripod, naturally, for panoramas and long evening beach shots. Cloths and brushes, and even filters for on the beach, if I really must. The laptop. Power supplies and chargers. A USB cable and card reader. Business cards!

That should do it. Packing light means I can carry everything onto the aircraft in a small suitcase plus a camera bag. Indispensible and expensive stuff goes into the camera bag, just in case anyone makes me check it (the route is Toronto–Caracas–Bogota–Aruba).


White Balance Tip

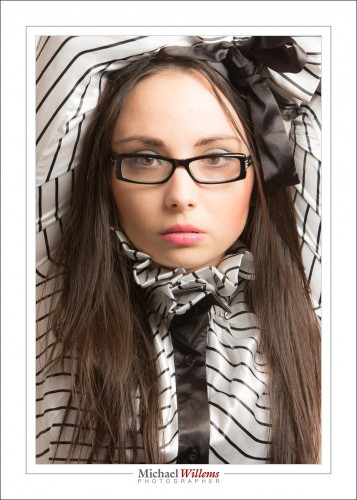
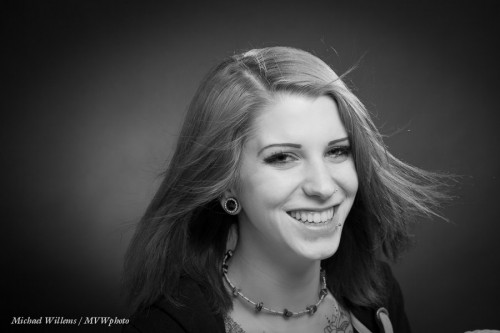
Why, I was asked yesterday, do I need to set my white balance to “Flash” when shooting studio-type pictures like the one of friend Liz below? Isn’t “Auto” enough?

Well, in a sense Auto is OK, since you can always correct later—assuming you are shooting in RAW format. (If shooting JPG, you must set the white balance accurately when shooting). But while you can shoot with the wrong balance, why not get it right? Your previews will look great, and there’s less work later.

So why is Auto wrong in this case?

The key phrase is “studio type” shooting. That is distinguished from speedlight shooting in one major way: namely, that you connect to the flash via either a cable or a radio trigger such as a Pocketwizard.

And that means the camera does not actually know you are using flash! So it does not set its white balance to Flash for you. And Auto is wrong, because you cannot measure flash white balance automatically. Why not? Because that measuring is done before the picture is taken, and before the picture is taken there is no flash! So the camera will base its white balance on the lightbulbs in the studio rather than on the flashes. And that’s wrong.

So now you know yet another little thing about flash!

ADMIN NOTES:

If you are in the Oakville, Ontario area: I have one spot open for Sunday’s Advanced Flash workshop. be quick and be part of this!

Also, of course, there’s the e-books: go check out what people are saying. The books and courses work very well together.

And finally, I have that 50mm f/1.2 lens for sale. Check that out too: and remember, $125 off for readers of this blog.


Beginner’s Tip: The Viewfinder

A beginner’s tip: the viewfinder, and why to use it.

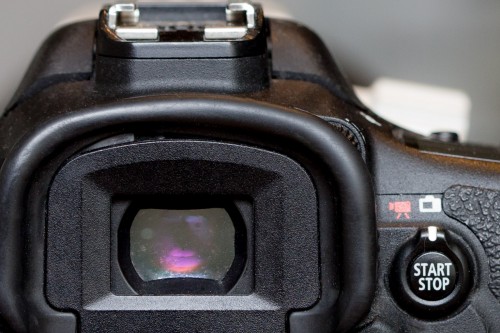
DSLR camera, and some point and shoots, have a viewfinder. And it is a good idea to use that, and not the display ion the back. Here’s why.

  • Any viewfinder can be seen even when it is very bright outside.
  • No battery power is used while you look through a traditional SLR’s (i.e., glass) viewfinder.
  • You see the scene you are shooting in all its detail and richness, not an already interpreted digital version of the scene.
  • Your eye, and the lens, still has higher resolution than the digital displays in “mirrorless” cameras (but not for much longer).
  • The viewfinder helps steady the camera (push the camera up to your face, yes, all the way, hence the rubber bumper)
  • And importantly – perhaps most important of all: the focus points on your DLSR are dedicated phase detection chips. When you flip up the mirror and use the rear screen, these are disabled, and the focus is derived from the picture itself: a slow, less accurate process.

So, for now at least, avoid the temptation to use the rear LCD unless it is necessary. Final benefit: you will look like a pro. Amateurs use the read display; pros use the viewfinder expect when necessary (i,e. when shooting over people’s heads, or when shooting some macro photos).

___

One More Chance: I am selling my pristine, boxed Canon 50mm f/1.2L lens (I have the 85 and the 50, and one is enough). Interested? To my readers here I am extending a $125 discount. It is listed for $1,500 on Kijiji (slightly cheaper than what this lens has been selling for on eBay) , but it is $1,375 for you. If interested, let me know quickly!


Minor Math Monday

Those pesky “f-numbers”…  my new f/1.2 lens prompts me to write about them.

As you know, f-numbers determine the depth of field (download the sample chapter of my DSLR book here, if you need a refresher). But what does the number mean? A little math for you today.

What is the f-number? The f-number is actually an “f divided by” number. An expression where “f” is the focal length of the lens (say, 50mm for a 50mm lens, or 70mm for a 24-70 lens that is zoomed in) that has as its result the diameter of the opening. Or in formula form:

d = f/n

..where d = diameter, f = effective focal length, and n = “the f-number”. So a 100mm lens set to f/4, for instance, would have an opening with a diameter of 100/4 = 25mm.

Why use this measure? Why not just say the diameter? Because the f-number describes the light-gathering ability of a lens. A 10mm f/2 lens and a 100mm f/2 lens can gather the same amount of light. How so? Surely the opening of the 100mm lens is much larger? Ah yes, but it is also much farther away! The amount of light is the same.

Why the funny numbers? Why f/1, f/1.4, f/2, f/2.8, f/4, f/5.6, f/8, f/11, f/16, f/22 and so on? That’s because:

  • Each number was chosen to be a stop apart. A stop just means a doubling or halving of the light; i.e. each subsequent number lets in half the light of the previous number.
  • And the light that enters the camera is proportional with the area of the diaphragm circle.
  • Hence, to go to the next main f-number, we want half the area.
  • Which means reducing the diameter not by 2 (that would give 1/4 the light gathering ability, since the area = pi x r squared). Instead. we need to divide the diameter by the square root of two (√2) to get half the light gathering ability.

So the series is: 20x0.5, 21×0.5, 22×0.5, 23×0.5, 24×0.5, 25×0.5

For half stops, the series is: 20x0.5, 20.5×0.5, 21×0.5, 21.5×0.5, 22×0.5, 22.5×0.5

For third stops, 20x0.5, 21/3×0.5, 22/3×0.5, 23/3×0.5, 24/3, 25/3×0.5

So now you know a little of the math behind aperture numbers. And here’s what they do, again,.. here’s f/1.2:

Talking of f/1.2: I am selling my pristine, boxed Canon 50mm f/1.2L lens (I have the 85 and the 50, and one is enough). Interested? To my readers here I am extending a $125 discount. It is listed for $1,500 on Kijiji (slightly cheaper than what this lens has been selling for on eBay) , but it is $1,375 for you. If interested, let me know quickly!


Black and Why?

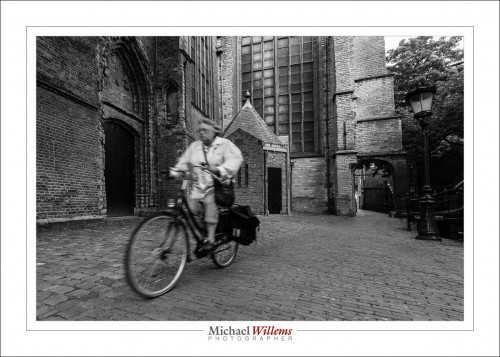
Black and white (or monochrome) is underused nowadays. Yes, colour is great–I love colour, as you see in much of my work–but “mono”, as in the picture below of a cyclist on Gouda, the Netherlands, has something going for it in several ways.

The colours do not distract from the subject. Unless the colours are the subject, avoiding this kind of distraction is a good thing.

Mood can be enhanced: mono can be a storytelling device. Mono can also evoke the past. Mono is thus used in much photojournalism.

But there are also great technical benefits to using mono, and that is what I want to briefly talk about today.

You should shoot RAW and set the camera’s “image type” to monochrome, so you see a preview that at least looks somewhat like what you will get in monochrome, but the RAW file contains all the colours.

First, white balance is unimportant. Whatever you set it to will be fine.

Second, quality of a converted file will be better; or rather, deficiencies will be less noticeable. And third, you can make changes afterward by emphasizing or de-emphasizing individual colours. This is like using coloured filters in film photography (e.g. a yellow filter to make the blue sky darker); with the difference that you can do it afterward, so you can try different “filters”.

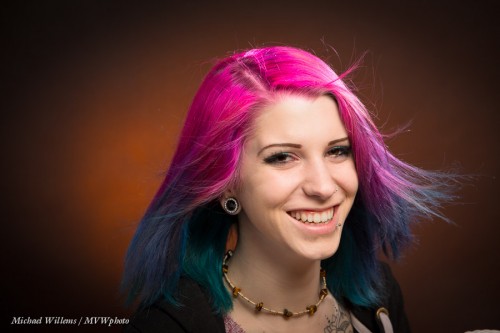
Take model Khoral:

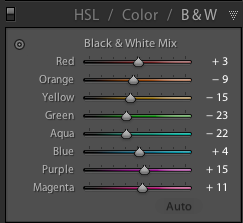
If I do a standard B/W conversion in Lightroom’s DEVELOP module, using its “HSL/Color/B&W” pane, I get this weighting of colours:

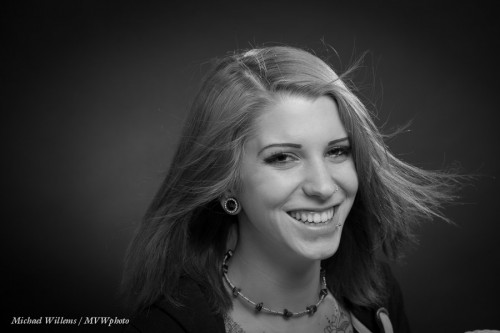
..which gives me:

Which of course looks fine.

But if I turn down Magenta and turn up orange (= skin colour) a little, I get:

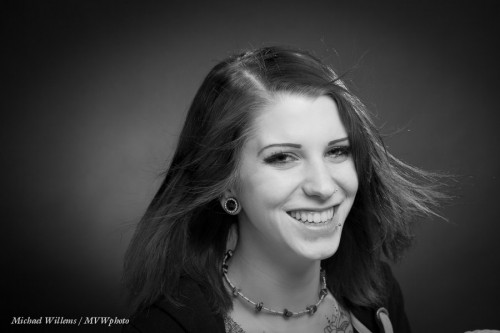
Alternately, I could turn up both magenta and orange:

…which gives me:

Can you see how powerful a tool this is? You can try any combination of colour weighting to get the results you want. A distracting colour can be made as bright as the surrounding area so it no longer distracts. Skin can be improved (making orange a little brighter makes skin brighter, which looks clearer).

I hasten to add, of course, that if you are actually doing photojournalism, you should not mess with the original other than a standard conversion, unless your photo editor allows you to use standard colour filters, say – but this would have to be a very explicit agreement, and any edits should not alter the appearance of the scene materially. Why? Because we need to trust that what our media show us is in fact “what there was”. That’s one reason I am not a great fan of “citizen journalism” taking over the news.

But if you shoot art or commercial or family portraits, go wild. OK–maybe no going wild, but you get the idea.

One more thing. Lightroom also allows you to add “film grain”, and that can be very nice in B&W too, to give that old look – and it smooths out skin imperfections. Film grain, unlike digital “noise”, can look good.

OK – lesson over: go shoot some B/W!


Fast lenses, and why again?

I regularly mention that the lens is the most important part of your equipment. Great lenses especially add to your photo-taking capabilities. Now let’s look at one aspect of that greatness again: the “speed” of a lens.

Speed is of course a misnomer. When we say “a fast lens” we simply mean “a lens with a large aperture (low “f-number”). This large aperture lets in a lot of light, which makes it possible to shoot at faster shutter speeds at the same ISO, hence the word “fast”. So a low f-number means you can obtain faster shutter speeds under the same conditions.

Like the 50mm f/1.2 lens I am selling (sadly; but I bought the 85 f/1.2 and I cannot financially justify keeping both these lenses; and for wedding portraits, the 85 will be more useful).

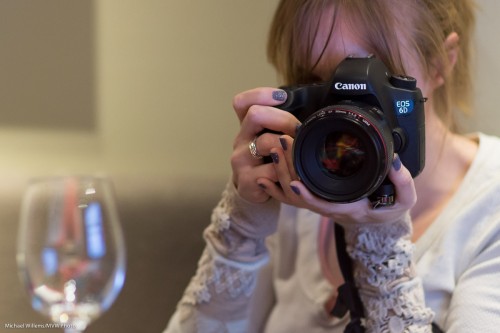
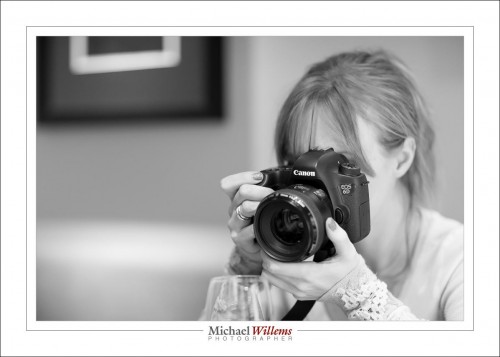
Here’s student Becky with the 50 f/1.2L mounted on her Canon 6D last night:

I was able, by using the large aperture of my own f/1.2 lens, to take that picture at a fast shutter speed, handheld. And I get a blurry foreground and background at the same time,  which helps me to emphasize the subject.

How fast? Let’s look at a real example from last night.

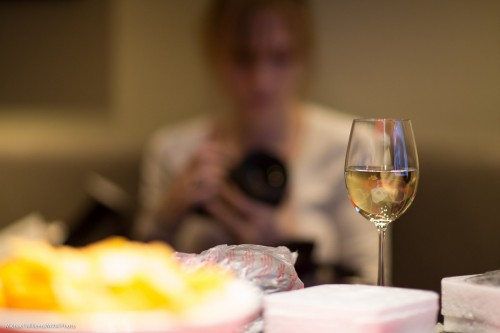
A shot of a glass of wine. That is what I focused on, so that is, of course, sharp:

I shot that at f/4.5, which is typical of the kind of lowest “f-number” that a kit lens would allow you to use. At 1600 ISO, that necessitated a shutter speed of 1/30th second. That is at the limit of what I can hope to do handheld; in fact it is beyond that “rule of thumb” limit, with an 85mm lens. So I am lucky that the shot is sharp. Also, I am lucky that nothing in the photo moved, because pretty much any motion would show, at that slow a shutter speed. And yes, the background and foreground are blurry – but they could be blurrier.

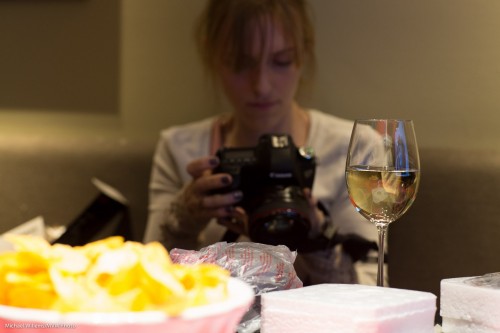
Now the f/1.2 lens, this time wide open at f/1.2:

The “f/1.2” means that:

  1. At the same ISO value, I now needed only 1/320th second shutter speed. I.e. a much faster shutter speed (i.e. less time; shorter time period; all these mean the same thing).  That means I can easily hand-hold, and also I need not be afraid of motion.
  2. The lower f-number also allows me to through both Becky and the chips in the foreground way out of focus. The glass is still sharp (I am, after all, focusing on it!), but the depth of field at this low f-number is extremely shallow; meaning that foreground and background are very blurry indeed.

Now, I do not of course always want shallow depth of field; but the point is, that with a fast lens, I can. And that expands my picture abilities; in a dark evening setting I can shoot handheld without flash, and if I want, I can get extremely blurry backgrounds. And that is one of the reasons that I use an SLR in the first place. And any SLR would do this – it’s the lens, not the camera, that determines these things.

Which is why I am happy to spend on lenses. What’s not to love?

And a good lens lasts decades, both in technical terms and in value. So if you are going to spend, and why not; then spend mainly on lenses.


Pocketwizard question

A student who took my five-day Flash course at the Niagara School of Imaging (held annually at Brock University), asks:

I still struggle with PocketWizards a little. I have the TT1 and TT5 for Nikon. This was different from the ones you used at Brock. I am not sure what is the best option and how I could add a speed light from a different make, e.g. Panasonic.

That is a good question.

So first, what is a Pocketwizard? A radio slave, i.e. an electronic “wireless cable” between your camera and your flash. One on the camera to send, and one on each flash to receive.

And just like with real cables, there are two types:

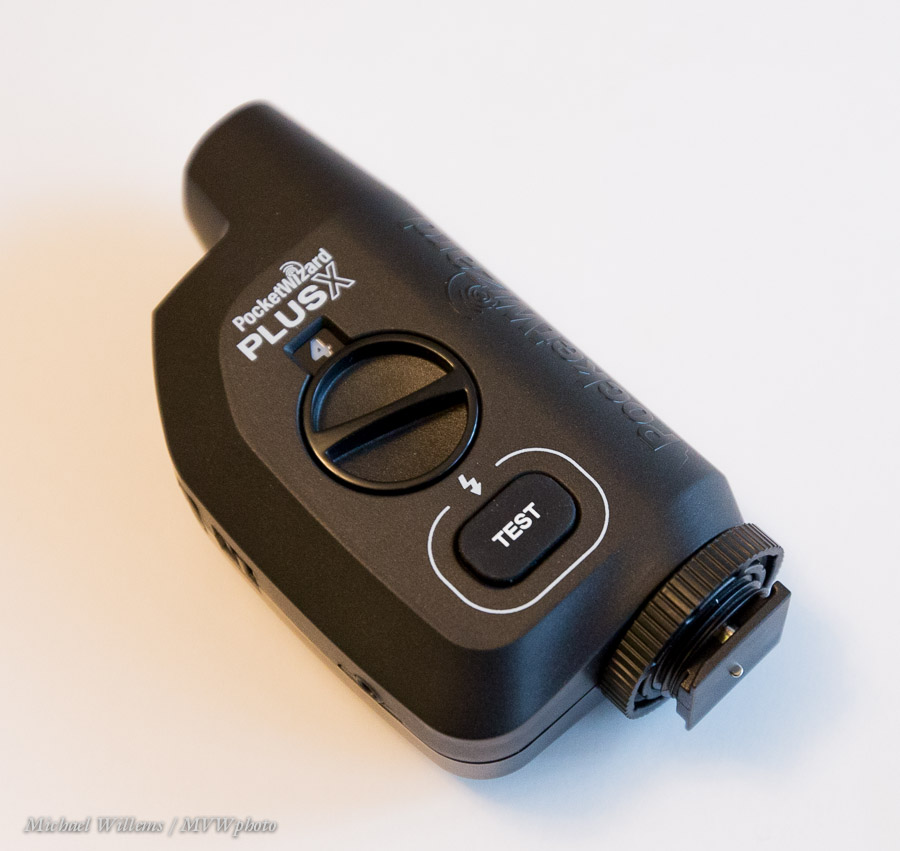
  1. “Intelligent” Pocketwizards (or cables) that “talk TTL”, i.e. that know the camera’s and the flashes’ commands. They use all of the flash contacts (like 5 of them), and they are camera specific. They provide access to all functions, especially automatic (“TTL”, Through-the-lens) metering.
  2. “Dumb” Pocketwizards (or cables) that just tell the flash “fire now”. As picured above, these provide no automatic metering; they do not know any of the camera’s or flashes’ special functions, and they are not camera specific. Can you see, there’s just one contact (plus one on the side)?

But the second type does not do any automatic metering? Why use those, then? Surely that is a drawback?

I’ll tell you why I use those. First, they use AA batteries, and a lot of the “intelligent” Pocketwizards have special little batteries. Me no like. Second, simple is good: less can go wrong. Plus, TTL is proprietary, so Pocketwizard and other vendors have to reverse-engineer the protocols, which could be difficult. Third, they are cheaper. Fourth: Pocketwizard has not yet lent me some to test, and I will not ever recommend what I have not personally tested.

And fifth, and not in that order of importance: with “dumb” Pocketwizards I can use any old flash I like, regardless of its brand. Yes, I need to set the power level on the flashes by hand, but hey, who cares. In studio-type shooting that is no big deal.

So if you want the type that is not camera specific, i,e, that allows you to use Nikon flashes with a Canon camera, say, then use the second, simple type.

Does that help?

___

Read on for course details: new courses have been announced and are running soon.

Exposing or bracketing?

A reader asks:

“When I’m shooting, sometimes I bracket exposures; I’ll do three shots, one neutral, one over and one under. When I get home, I often find that the neutral one is the correct exposure, so I delete the over- and underexposed shots. But I hear people say to expose to the right so often these days that I’m wondering if I would be better off keeping the overexposed shot instead (assuming that there are no blown highlights) and adjusting the exposure setting in post processing, because the overexposed shot should in theory, have more information than the neutral image. So, is one approach better than the other, or does it even make a difference?”

Good question.

Read my thoughts on exposing to the right here. Basically: Yes, a good technique if you do not mind the extra work, but indeed, not to excess (blowing out the right would be excess).

As for bracketing, there are two schools of thought a bout ‘routine’ bracketing. One says “you don’t have to, now that we have the histogram and instant review’. True.  The other says “why not? it used to cost a lot of money (3x the previous cost), but now the cost is essentially zero”. Also true!

I do not routinely bracket because of the extra decisions, the extra work. But I do bracket when I want to do HDR (high dynamic range) photos – like when shooting desert rocks in a bright midday sun, where one half is bright, and the other half almost completely dark. This does not happen often, but when it does, I am grateful for the convenient bracketing function on my camera.


Pro gear, and what it does.

A reader wrote to me today about pro equipment, and about how pro cameras seem to be necessary for the work I describe in some of my posts — it would be better, he suggests, if all posts were accessible to all people, amateurs and pros alike.
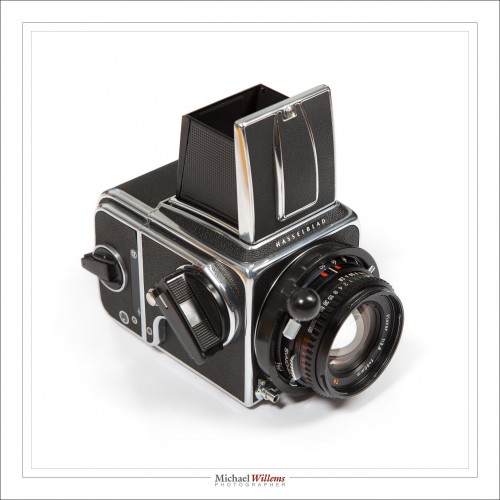
Now, if this reader had said “pro-quality lenses“, or at least “fast lenses“, he would have had a point. But while sometimes I do use the features only a professional-grade camera has, this is in fact rare. Or rather, for this to have an effect on the quality of the photos is rare. A modern camera, yes, sure; but a pro camera is rarely needed.

First, what is a pro camera? I would define it as a camera body, often large, that costs $3,000 or more, without the lens. Cameras like the Canon 5D MkIII or 1Dx.

And what do these Pro cameras do more than a “regular” camera?

Actually, very little. You see, all cameras from the same generation are similar.

Let’s have a look at a few of the typical things that a “Pro camera” does more than an entry level camera:

  • Larger, brighter viewfinder
  • Stronger, “built like a tank”
  • Longer battery life
  • Better weatherproofing
  • Faster continuous shooting
  • More personalization options
  • Better focus systems
  • Better and faster internal photo processor
  • The ability to write to two memory cards at once
  • More options
  • Sometimes, lower noise at higher ISOs

But there are also things a pro camera does not do:

  • No “scene modes”
  • Often, not even a pop-up flash

Big benefits, yes, but what of the above is important to the actual photos you take? Other than the “higher ISO’s”, not all that much, really! And that ISO point is misleading: it is more the difference in generations than the difference in “type of camera” that defines noise performance. A modern entry-level camera, for instance, can often do much better than a five-year old pro camera. Sure, my 1Dx goes to obscenely high ISO values, but take, say, a Nikon D800 and sample it down from its crazy number of megapixels to the number that I have, and you get very comparable performance. This is why we upgrade every few years: better image quality.

So if you have a modern camera, you can do what I do – all of it, or almost all of it.

So what is important to image quality? I would say (a) how new your camera is, (b) its sensor size (full frame is good) and (c) the lenses.  Lenses make a very material difference to your images. Good lenses are more sharp. They have better colour performance and less of the various distortions. They allow more light to enter the camera (faster lenses, i.e. lenses with lower minimum “f-numbers” ), hence allowing more blurred backgrounds, and the ability to use either faster shutter speed or lower ISO settings in the same light.

So while no doubt I do the occasional post that really needs a Canon 1Dx, mostly it’s just convenience and practical all-day use, but not the quality of the photos, that is affected by the camera; while lenses almost always affect the photo. So if you have money, I would recommend two things:

First, ensure you have a modern camera, preferably full frame. It does not need to be a pro camera, but they get better every year, so “modern” means good performance at high ISO values.

Then, ensure that you have the right range of fast lenses, including a few prime lenses.

And then go have fun!