Today’s photo

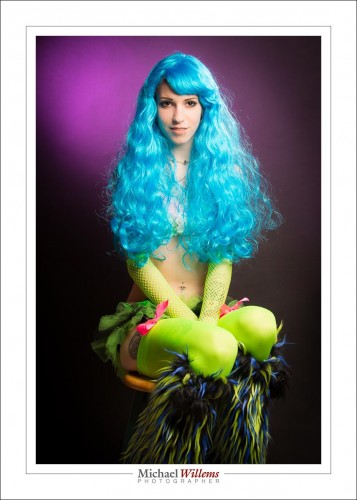
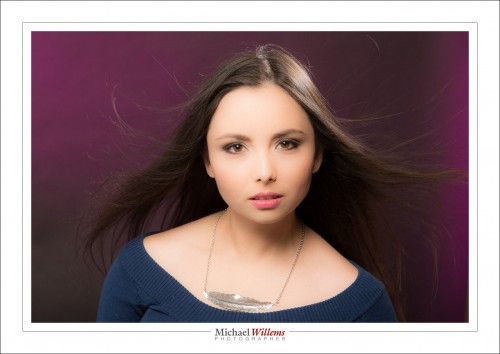
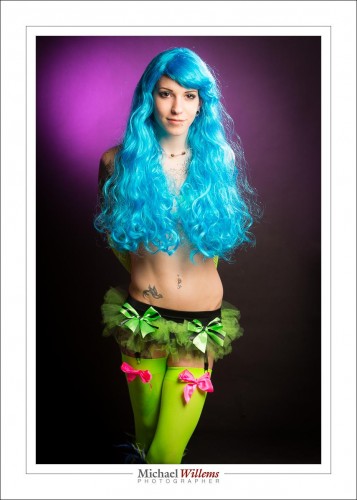
Today’s post is once again a “a day in the life of” post. The photo of the day one I took today of model Khoral, who is of course totally gorgeous, but much more importantly, who is both intelligent and a very nice person. Those are rare qualities: more rare than good abs (or whatever physical attribute you wish to name).

And as you see, she has dress sense too.

But how did I shoot her?

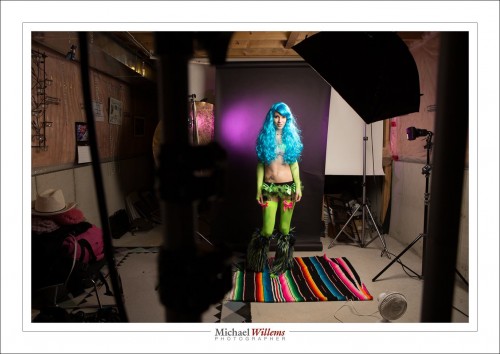
I shot her like this, in the studio:

The details:

  • The main light was a strobe with a softbox, mounted on a boom. It was fired by a Pocketwizard.
  • The hair light (needed for Shampooey Goodness™) was a strobe with a snoot. It was fired by using its cell (i.e. when the main flash fires, it senses the flash, and fires too).
  • No fill light was used, but in some pictures I used a white reflector as the fill light.
  • The background was a black paper roll. Black is good: it eats up stray light and given enough flash power, I can make it any colour I want, since it does not pick up white light from the other flashes.
  • The background light was a speedlite (a Canon 580EX), also fired by a Pocketwizard. It was fitted with a purple Honlphoto gel stuck on top of a 1/4″ Honlphoto grid (the gel colours the light; the grid restricts it to a small area to produce that nice oval with dropoff).
  • The camera was a 1Dx with a 70-200m lens. The longer the lens, the less distorted and more flattering the pictures.
  • Why the purple gel? This was a key decision. Her clothes were extremely colourful, and I had to choose a colour that matched. Purple was a good choice.
  • The camera was, of course, set to studio settings: 100 ISO, f/8, 1/125th second. You can finess this. For instance, if you have insufficient light you can either turn up the light, or turn up the ISO, or turn down the f-number. (Not the shutter speed. Why? Read the flash manual).

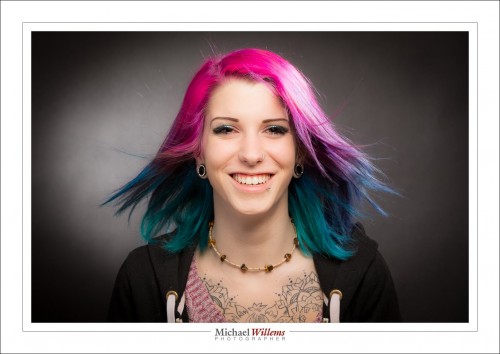
And one last one, one that shows the model’s genuine smile – an asset much greater than other assets people can have. No, models do not always need to look grumpy.

(You will see that once again, I used a fan for some of the shots, since she has longish hair).

One more word. Was this all done in camera? Yes, with a few exceptions. Slight exposure and white balance changes in post production (for which I use Adobe Lightroom) are OK: as long as they are slight, and could not have been done in camera. Skin blemish fixes are fine – but this model has almost perfect skin, so little needed to be done. Removing the odd stray hair? Fine. A little vignetting in post is fine too. Cropping and rotating, ditto. And I made the pink cushion into a red cushion (using the Lightroom masking tool and its colour setting). But these photos were mainly done in camera. You need to learn to do it in camera if you wish to call yourself a photographer. But even when you are, do realize that every ophoto needs a little TLC in post until you can call it “done”.

It Doesn’t Work!

Let me share a some camera malfunctions that I see again and again. Some of the most common ones are also very easy to fix, fortunately.

The flash does not work properly:

  • It is set to MANUAL, not TTL
  • It is set to COMMANDER/MASTER mode.
  • Your Flash Exposure Compensation is set to a value other than zero.
  • The hot shoe/flash contacts are not totally clean. This happens rather often. Always clean them – use just a drop of water and a cloth, or whatever else you can use, and clean thoroughly.

Autofocus is not working, or it is, kinda, but there is no beep:

  • Your lens switch is set to “M” (manual only).
  • Your camera switch is set to “M” (manual only).
  • Your menu is set to “M” (manual only).
  • You are set to AF-C/AI Servo instead of AF-S/One Shot.
  • You are not aiming the active focus point(s) at a subject with lines.
  • It is too dark.
  • You are too close.
  • You have disabled the beep in the camera’s menu.
  • Your lens is not fully engaged; it did not fully CLICK when you put it on the camera.

That last one happens all the time, and it is very dangerous–because of the lens is not attached, it can fall off.

The moral of this story: When your camera doesn’t behave as planned, do not panic: it’s usually something very simple.

___

Note: the “Buy Three, Get The Fourth Free” special price for my e-books is still on: I want you all to get trained up with your new cameras before you travel anywhere. Check it out on www.michaelwillems.ca/e-Books.html. If you previously bought one or more books, contact me for your price.


Computers.

Since I am teaching a lot of beginning photographers and emerging pros, I want to talk today about cameras, and how important all the technical functionality in modern cameras is. Signal processors, menus, LCD screens, a plethora of settings, multiple levels of sophisticated focus functions: all this is stuff we cannot live without.

Or is it?

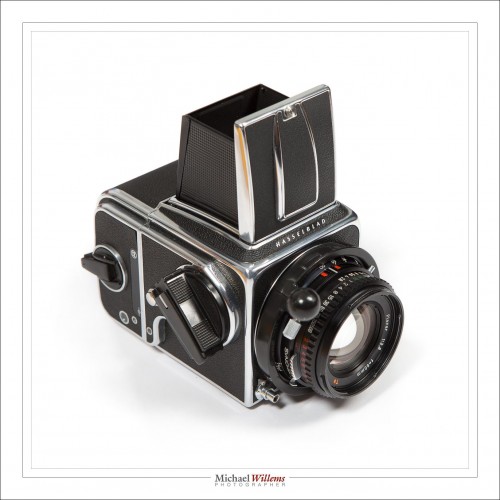
Until a few years ago we used this:

And guess what. This camera had:

  • a setting for aperture
  • a setting for shutter speed
  • a viewfinder
  • and a focus ring you had to turn.

Yes, that was it. A film (with a given ASA); a shutter speed setting; an aperture setting, and a focus ring. That is all you need for great commercial, studio, fashion, product, etc photography. I wish I had one.

So when I teach you in my courses (and in my books too), while you will learn all the buttons and menus and switches, you also majorly learn the fundamentals, Only when you know those do the menus and processors help.

For those fundamentals, by the way, you can download an entire chapter from my Learning Your Camera e-book. Click here to download it. And learn the basics before going on to sophisticated electronic functions. They’re great – but they are not necessary.

A challenge to you: shoot your next week’s pictures entirely in manual exposure mode. If you learn to do this, you will be a real photographer.

___

NOTE: This content is brought to you free of charge. The blog posts; the articles; and things like the free book chapter. Yes, in addition I sell e-books, training and photography sessions, but this blog is provided free of charge. Since this is a business, though, let me ask you to so something in return: please send this blog’s address to three friends who may be interested. That way even more people benefit from this advice and these free lessons. Fair deal?


A simple, but effective, trick

A simple trick, used by photographers the world over, is this. Can you see what we did in this shot from two days ago, a portrait of Liz Medori?

Yup, we used a fan. A simple cheap fan; I usually use an industrial fan from a home supplies store. That fan makes the hair do its wild sexiness thing, which you will see in many model photos.

And the good news: You need to know no technique for this. Even if you are a total beginner, nothing stops you from aiming a fan at your long-haired subject.

What else did I do in that photo? We had a make-up artist, Melissa T. We lit the model with one overhead softbox straight in front of her, plus one hair light aimed at us, for shampooey goodness™, plus one background light with a purplish gel aimed at the background. And I shot with a 70-200mm lens at the typical studio setting of 200 ISO, 1/125th second, f/8.

But even if you do not know what that means; go for it with the fan!

___

NOTE:  As usual, this content is brought to you free of charge. As are all the other blog posts (the entire four-year searchable archive); the articles; and things like the free book chapter from my latest book – the entire chapter on Exposure (go to http://www.michaelwillems.ca/e-Books.html and click on “download sample). Yes, in addition I sell e-books and training and photography sessions, but this content is provided free of charge.

Since this is a business, though, let me ask you to so something in return: please send this post to three friends who may be interested. That way even more people benefit from this advice and these free lessons.

Fair deal?


A Specialty Lens, Again

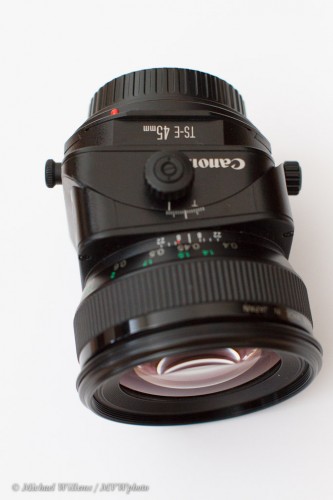
A good friend today bought a tilt-shift lens. Reason for me to talk about them again here, if briefly.

Like a traditional View Camera, a tilt-shift lens can:

  • Correct perspective distortion by shifting instead of aiming up/down.
  • Give you “dollhouse” selective focus effects.
  • Tilt the focal plane to get focus with wide apertures.

More often than not, the latter is the effect I am after, since the former two can be done in post-processing too, to a large extent. But the shifting cannot.

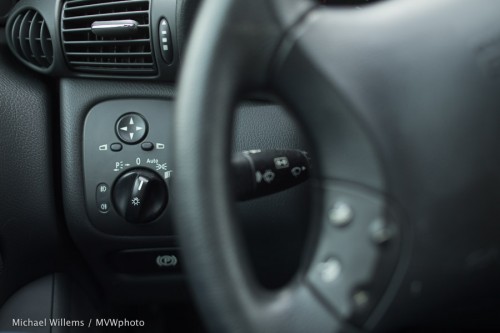
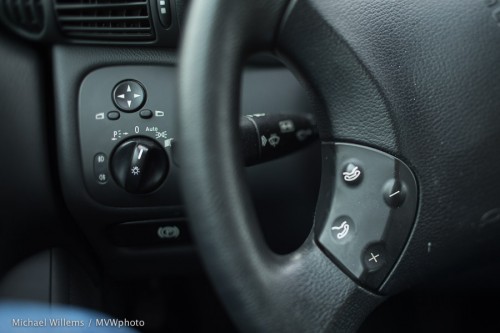
These were all taken at f/2.8. First, I focus on the nearby buttons:

Then I focus on the far buttons:

Yeah, that’s f/2.8. Selective DOPF. But only the tilt-shift allows me to focus on both buttons without going to f/11. Still at f/2.8, but I tilt the lens a few degrees and the DOF is still selective, but it rotates:

And that is why I use a tilt-shift, even if I need to expose and focus manually.

How far to tilt? I strongly recommend you read my article here. It’s full of math but even if you don’t get the math, the instructions are going to be useful: if you own a tilt-shift lens, you should be better than users who just guess ad do things by trial and error.

I’ll close by giving you three more examples, all taken at f/2.8 – the last one has both front and back objects sharp, which is impossible without a tilt-shift.

If you are a serious photographer, you might consider getting a tilt-shift – or at least renting one to see if you like it.


A thought to keep in mind

A thought for you.

Sometimes you do not have the right lens. Like, imagine you have a wide 16-35 lens:

Fine. But what if I had wanted a longer lens? I did in fact have one, but if I had not had it, I would simply crop. We sometimes forget, with all these pixels, we can crop dramatically and still be able to make a nice print. That photo above, I could crop like this:

That composition is more to my liking, and yet, it still maintains enough pixels for a print: this crop is around 2500×1800 pixels, i.e. some 4.5 megapixels: enough for an 8×10 for sure.

So next time you have a shot you wish you had had a longer lens for: Feel free to crop!


Slowly now

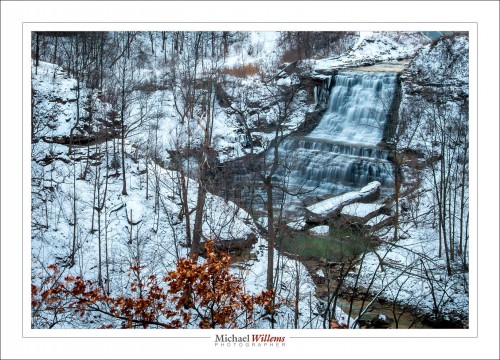
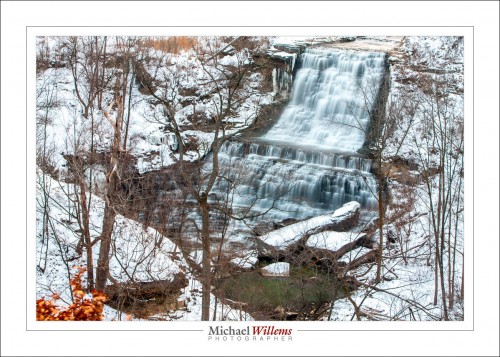
I was going to shoot some waterfall pictures yesterday. Alas: one park (Hilton Falls in Milton, Ontario) had its trails closed because of downed power lines and trees (which I discovered after paying the $14 fee, thanks, Halton Conservation), and the other waterfall, Albion Falls in Hamilton, Ontario, had its access routes closed also, but permanently, because of the danger. I had wide angle pictures in mind, but from above, which is all I could get to, they are not what I wanted, exactly. You will forgive me for that and just look at Albion Falls:

Imagine it is about minus infinity Celsius (a wicked cold wind, plus way below freezing), which is why my companion and I took only a few shots. Groan, that was freezing. I had to stop when my ears froze – literally, I felt ice inside my ear.

Now, the shot. How did I decide on settings?

I wanted a slow shutter, so I started with 100 ISO and f/16. I try to avoid apertures smaller than f/16: any larger f-number and the images tend to get a little less sharp. That would have given me a shutter speed of perhaps around a second at most: not long enough. So I used the variable ND filter, set to a dark setting, to get to 20 seconds.

And on the long lens, the 70-200, I used a polarizer, since it is all I had. That cut almost two stops from teh light, so I got to 5 seconds. Here’s one taken with that long lens:

(See the large version on my Flickr stream).

What do you need to watch out for when doing these shots: Mainly, motion.

  • Avoid moving the camera while pressing the shutter. This is worse with shutter speeds between, say, 1/15th and 2 seconds (shorter and there is no time for camera shake; longer and the little shaking will disappear compared to the rest of the exposure).
  • I had a tripod, of course, but it was too cold to go back to the car to get the sandbag I would have liked to hang from the bottom to stabilize it. So the tripod moved just a tad in the strong wind. This is worse with longer lenses, and much less noticeable with a wide angle lens.
  • The viewing platform itself moved a little, leading to a little shake too.
  • And finally: trees move in the wind over the course of a long exposure.

So of my ten pictures, three were good and sharp. Which is about what I had hoped for. Keep this in mind when shooting waterfall pictures!

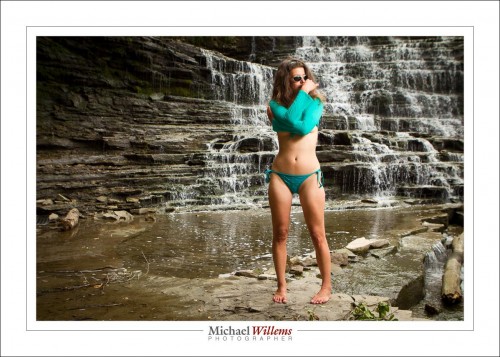
And finally, here is a model shot at the same waterfall, from 2012. Just so you seee Canada is not always cold.

I cannot wait until it is summer again.

___

Camera technique? Composition? Flash techniques? Specific situations?  I explain it all in my e-books. PDF files for viewing on computer, phone or tablet. Get them here.


I attended, for once.

For those of you who want to one day, or who already today, run photography as a business: today I have a few notes about running a photography business and about learning new tricks.

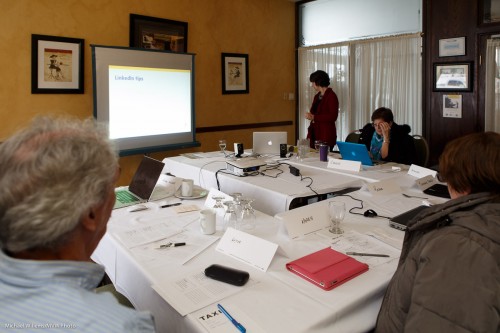
You always go on learning, of course. When you no longer learn, I advise you retire and watch geraniums grow, or something. So today I attended a very good workshop by Donna Papacosta, a communications expert, on Social Media. Such fun to be attending, not teaching, a seminar!

The photo: 24mm, 1/60th, f/4, 400 ISO). I focused one third of the way into the picture: I wanted Donna to be sharp – the foreground people server as a frame. I started at the famous “Willems 400-40-4” position (400 ISO, 1/40th sec, f/4) for indoors mixed flash, but since the room was bright, I had to go to 1/60th. The flash was bounced up behind me, but of course much of the light was ambient. As those of you who have my books know, balancing ambient and flash is the key to good flash photography. (Note: Special offer of $59 for all four books, a $20 discount, is still open).

Anyway – the course was great and I have a much better understanding of the role of social media in general, and twitter etc in particular. As you should too: it’s very important that you use Facebook, LinkedIn, your blog, Twitter, Pinterest, and more in a way that benefits your business. Photographers spend much time not shooting, but running their business. Social media are a great opportunity to get closer to your clients and to maximize the time you spend shooting.

Also on the business note, my “The Small Photography Business” course just started at Sheridan College. One of my slides from Monday’s session:

Meaning:

  • Make sure you have the needed requirements, or are willing to work to that goal (e.g. you do not yet have to be a great shooter, but you must be willing to learn).
  • Then look at the market and design an offering – one that actually makes you money.
  • Then set up the business… and execute.
  • And by having goals and regularly measuring performance against these, see how you do, and make changes when and where needed.

Of course this slide is a roadmap: the rest of the course is about making those squares and circles real; i.e. actually executing them. Slides are all very well, but as in all my courses, it’s about the detail rather then the abstractions, and above all, it is about actually doing it.

One “doing” is the web. I just did a web site review for a photographer friend. I looked in detail at her web site, and with my son the engineer also looked at the technical issues and possibilities for improvement, Result, a 25-page detailed document that she will use to materially improve her site. All done in just a few hours. Yes, that too is a service I offer. And whether you buy this service from me or from someone else: do it, and make sure your web presence actually helps your business, works well with all browsers, has no silly errors, is clear to your customers, and meets their needs.

Now off to do some tweeting.

Welcome

…welcome to all my new followers! And for those of you who are new: this is a daily photography teaching post. Every day I share a tip, a trick, a technique; I explain cameras, exposure, light; if it’s to do with photography, I’ll talk about it. Aimed at everyone from complete beginners to seasoned pros.

And often, a photo of the day. Here’s where I was last week:

Yes, Las Vegas, Nevada. But now I am back in Ontario, Canada, ready to shoot (need a photographer? Call!) and ready to teach you, both her and in person and via my e-books. Enjoy!

Michael


ND filters

A Neutral Density (ND) filter is useful when you want to cut light. Why would you want to do that? Because

  1. You may sometimes want to create longer exposure times, and cutting light may be the only way to do it.
  2. Or because on a bright day you want a larger aperture, in order to get more selective depth of field.

Imagine you have this:

At low ISO (100) and high f-number (16) that was 1/4 second (using a tripod, of course). I used my wide angle 16-35mm lens.

But what if I wanted a slower shutter speed than 1.4 second? For instance to make a river or a waterfall look all smooth? I cannot lower the ISO or increase the f-number (at least on this lens), so I need a trick. And that trick is the ND filter. It evenly cuts light, so then you need a faster shutter. Like here, the same shot with an ND filter:

But it looks just as bright?

Yes, because at the same time as cutting the light, I set the shutter speed to a much longer time, namely one of 5 seconds (set manually and metered by trial and error as much as by the meter, which is less accurate under these circumstances). Anyway, 5 seconds is 20 times less light than 1/4 second (since 5 sec/0.25 sec = 20). How many stops is that? It is 4.32 (roughly 4 and a third) stops less light, since 24.32 = 20. Um, high schoolers and above: you can calculate this number of 4.32 as follows:

  • 2x = 20 (base 2, since a stop is halving or doubling the light)
  • x = log2(20)
  • x = log(20)/log(2)
  • x = 1.301/0.301
  • x = 4.32

So my ND filter gave me  4.3 stops less light.

I used an 82mm Cokin variable density ND filter. One where you turn the filter to make it darker or brighter. Turn it one way and it cuts 1 stop; turn it the other way and it cuts 8 stops, says Cokin. I call “no” on that. Even at the darkest, it is not that dark, and in any case, when I am zoomed out and then go beyond 4-5 stops, this happens: (made one stop darker, i.e. 5.3 stops, now using a shutter speed of 10 seconds)

See how bottom left to top right it gets all weirdly dark? Not usable, so this filter is not really usable much beyond 4 stops with a wide angle lens.

An cheaper Cameron filter was even worse when turned all the way to the “max” mark for “dark”:

All variable filters do this as far as I know, since it is due to physics; but some are worse than others.  To avoid it, zoom in, not out, and then look through your viewfinder to see when this problem happens, and back off from there.

Another thing to watch out for is flare. The cheap filter did this, look at the bags on the top right:

And the better Cokin filter:

Not perfect, but better.

So you now know why to use neutral density filters; how to use them; and the possible pitfalls, including what to watch out for if you buy the variable variety. You may just want to get a non-variable 5x or 8x ND filter.

And you’re welcome.