Pic of the day

And how would you like to take pics like this, shot about an hour or two ago on my way back home from day one of the excellent Henry’s Digital Imaging Show:

Oakville.com party in Oakville

Oakville.com party in Oakville

How did I shoot this:

  • A Canon 1D Mark IV camera with a 16-35mm f/2.8 lens
  • The lens set to 16m (equals a “real” 22mm)
  • A flash on the camera set to -1 stop flash compensation
  • The camera set to -2 stops on the meter in manual (1/30th sec at f/4 if I recall correctly)
  • A Honl Photo half CTO gel on the flash
  • White balance set to “flash”

That’s how it’s done. Come to my courses and I’ll explain more!

Fun with Gels 3

I shot a night club yesterday.

Dark (black) walls, low light, stark modern furniture, not easy to shoot.

First, I used a wide angle lens (16-35 on a full frame camera). That got me the ability to get it all in, as well as freedom from focus and shake worries (the wider a lens, the easier it is to shoot at low speeds and the easier it is to focus on everything). I used a tripod, so the low speeds did not matter, but the focus all the more.

Available light was dull. Like this:

Berlin Night Club in Oakville, using simple light

Night Club using simple light

So I got out my bag of tricks:

  • A Pocketwizard on the camera
  • Four small flashes with pocketwizards: for the next shot I used one 430EX through a white umbrella and one direct, equipped with a red Honl Photo gel.
  • I set the flashes’ power levels manually, using simple trial and error and the histogram.

Now I got this:
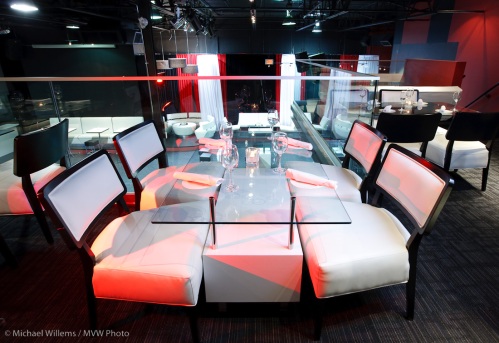
Berlon Nightclib using two flashes

Nightclub using speedlights and gels

Isn’t that much more interesting?

Same here in the following picture. First, with just the flash in the umbrella:

Not bad, but a bit like a furniture catalog. How about with a nice red gelled flash also:
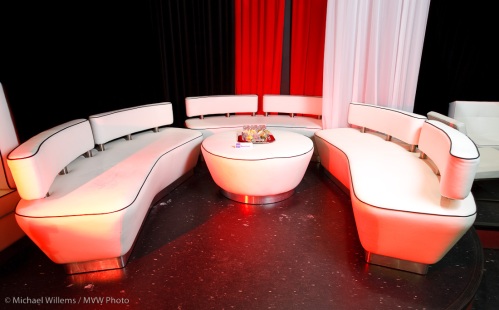
More like a club where things are happening.

The following shows part of my setup for another part of the room, with alcoves:

Light setup with multiple=

Which, when properly positioned, got me pictures like this:
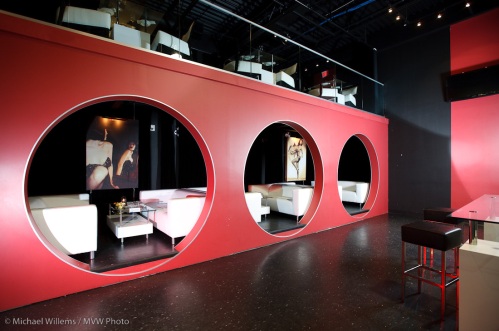
Nightclub lit with multiple=

Look at the stool’s legs: do you see how much difference that red accent makes?

Later still I used a white umbrella plus a red gelled 430, a Honl Folies Purple gelled 430EX in the dance cubicle upstairs, and a red plus an egg-yellow gelled 430 as well. All of this done with Honl gels and Honl speedstraps.

Before:

..and after:

Of course some scenery needed no gels to pretty it up, just one bounce flash:

I did have to move her to the right where the bar had a small ceiling area to bounce off.

Why would you use flash outdoors?

So why would you use flash outdoors during the day?

Sometimes it is obvious: to fill in shadows on backlit subjects. Or to soften hard shadows. But sometimes you do it for more artistic reasons.

Let me illustrate this with a shot taken during the Get Out and Shoot run we did in Toronto early this week – the workshop I wrote recently.

Imagine you are shooting someone – me, say – on a bright day, but in a spot where I am in the shade against the shady side of a grey building. Before you know it you get a dull picture: grey and low-contrast on all counts: blaah.

So that’s when you bring out the flashes. Say, two remote “slave” flashes, fired by a “master” flash on the camera. One slave to the camera’s left, shining into a Honl reflector, and aimed at the subject’s face, to add bright light to the subject. The second flash is equipped with a Honl Speedstrap and on it, a green gel, and this flash is aimed at the grey wall behind the subject to make it less grey.

Now you get this:

Outdoors Flash

Outdoors Flash Used During the Day

You will agree, I hope, that this is a lot better than it would have been without the help of flash. Even, no, especially, on this bright day.

Want to learn about all this stuff: read here of course, but also: join me for training.

(Thanks to colleague photographer Rob Corrado for the picture)

Fun with gels

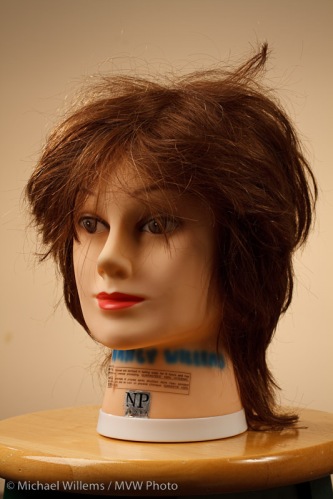
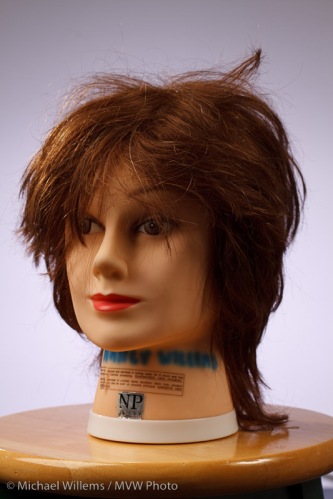
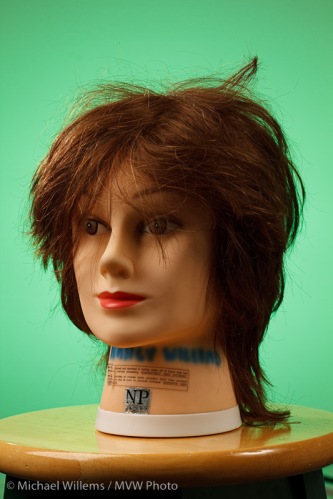
Look at these images, and see why you need gels.

A gel is a piece of sturdy plastic that you put in front of your flash. (At least if you use something like the Honl Photo system it is sturdy; the ones that come with your SB-900 flash are very fragile and will melt quickly).

So assume you have some good, easy-to-use gels. Look at what just two gels and a bit of knowledge of my camera can do. And this takes mere seconds to set up!

Case One: Warm Face, Neutral background. Flash equipped with a CTO (“Color Temperature Orange”) Gel, white balance set to “flash”:

Case Two: Neutral Face, Cold Background. Flash equipped with a CTO Gel, White Balance set to”Tungsten”:

Case Three: Neutral Face, Warm Background. Flash equipped with a CTB (“Color Temperature Blue”) Gel, white balance set to “Shade”.

I mean – is that fun, or is that fun?

Note that the effect may not be totally right in camera – gels do not exactly correspond with white balance settings, which in any case vary per camera – but that is unimportant: you can fine-adjust later in Lightroom. The essence is that you throw different light onto the subject than onto the background.

Now do you understand why photographers are always going on about gels? Secret weapon – but now you know the secret, too.

Grids and why you might like them.

Grids,  like the Honl grid attached to my flash here, are very important modifiers. A grid ensures that the light from a flash does not go “everywhere”. Instead, it goes to one cone of light, that drops off softly at the edges. This was taken by a student a few hours ago:

Oddly, that cone is a bit softer than the straight flash.

TIP: Use a gel if you want to see where a light is going, That way you can identify easily which light is shining where:

And have fun.

Gold and blue

One more “blue background, gold foreground” picture for you all. No, two.

Here is Christy, of Studio Moirae, looking radiant, mainly because she looks radiant – but also perhaps just a little because I lit her with a CTO gelled flash (with the white balance set to “Tungsten”, which turns everything blue except the bits lit by my gelled flash)?

And one more lovely participant in the course, who soon will be two:

Add a splash of colour

Look at this recent portrait:

You will see standard lighting with a softbox on camera right, a fill light on camera left, a hair light behind him, using a Honl Snoot, and a background light aimed at the background.

This background light has a subtle blue Honl Photo gel on it. Can you see how much of a difference that makes? No gel would mean a grey background, and blue adds a touch of interest as well as a hint of corporate soldity.

Backgrounds

Another recent user question:

How do you determine the background you use for portraits?

That’s a tough one, because there is no one answer. What’s better? Look at these three “Autumn” and “Hollywood” series Honl gels:

Or this?

Or this?

Of course as usual, the answer is “it depends”.

  • For business, white is good, as is a very light blue.
  • For women, more elegant colours can be used (the purple above, for instance, is not usually considered a male colour).
  • Black is possible for dramatic low-key portraits.
  • Colours depend on hair colour, skin colour and suit colour.
  • You may, for instance, want to contrast with the suit.
  • You certainly want to contrast with the hair – avoid blending your subject into the background. (Or you use a hair light).
  • And sometimes, you may want to match the background to, say, a bright red suit, again in order to make the face stand out.

In general, the most important concerns I have are:

  1. It has to match the mood (conservative is blue, etc)
  2. Ideally, it go with the person’s clothing. That means either complementary colours (yellow and blue, say) or identical colours (A suit with purple in it? Then I can use purple in the background).
  3. Above all, I try to make the face stand out and avoid blending it into the background.

The basic rule: have fun, and keep it simple if you can. Try different colours but avoid very bright colours except for special effect. Have some very subtle blues and yellows and greens available just in case you want to add a splash of tint.

Tint is a good thing. Colour is more difficult!

I hope this gives those of you who use colour gels some ideas to try.

Fun with gels

Tonight, I had some fun trying various new gels.

For those of you new to photography: a gel is a coloured material that you put in front of a flash to change the coour. You typically use these for background colours.

Usually I use a slight correction gel (1/2 CTO, 1/4 CTB, etc) to perhaps warm a background up a bit or to give a corporate shot that slight blue tint in the background. But tonight I thought I’d play with some great new colours.

My system for the test shots below was:

  • A key light to camera left, in a softbox on a Bowens 400 Ws monolight
  • A fill light to camera left, into an umbrella, using an Opus 250 Ws monolight
  • A Hair light, also into an Opus light, and snooted
  • A background light: a Canon 430 X flash with the various gels. I used the excellent Honl system: the speedstrap on the flash, plus gels conveniently Velcro’d on.

So for these gels I used some basic colours and the new Honl “Autumn” and “Hollywood” gel sets. Great colours. Here we go, and look how each gives you a very different shot:

[1] The new “Autumn” kit:

Egg Yolk Yellow:

Chocolate:

Rust:

Dark Salmon:

Medium Blue-Green:

[2] The new “Hollywood”-kit:

Follies Pink

Steel Green:

Rose Purple:

Smokey Pink:

Pale Lavender:

And for comparison, some basic primary colours: Red, Green, Blue and Yellow:

And finally, what it looked like with no background light, white background light, and “heavy frost” background light:

Note: When you play with gels, do not forget to set your white balance to “F;ash”, so your canera does not try to adjust the colour away.

Now to see these colours side by side, check them on one page: http://www.mvwphoto.com/gels/

Misc

Backgrounds and sharpness and white balance: oh my!

I thought I would chat about some of the things that go through my mind when doing a portrait, like this one last night:

Questions like:

  • What camera and lens? In this case, the Canon 7D and a 50mm f/1.4 lens.
  • What settings? Well, manual at 100 ISO, 1/125th second, f/5.6 is my standard start point, as it was here.
  • What lighting setup? In this case, a standard two main lights (softbox main light on camera left, umbrella fill light on camera right) with a snooted hair light behind left, and a gridded gelled background light. Note that while the main lights were monolights, the background light was a small speedlite fired by a pocketwizard through a Flashzebra hotshoe cable.
  • What lighting ratio? In this case pretty flat, but usually more like a 3:1 key:fill ratio.
  • What body position? Usually angled, in this case toward the softbox.
  • What head position? In this case, straight on since the subject wanted it that way.
  • What colour background? In this case I used a blue-green gel from the new Honl Photo “Autumn” colour gel set.
  • What viewpoint? I carefully choose this by moving myself left and right, up and down, until the person looks best to me for the portrait wanted. If in doubt, I take multiple views and choose later.
  • What white balance? I set it to “Flash”, even when shooting RAW, just so I get OK views on the back of the camera.

That’s all there is to a quick snap like this, which took a few minutes – if that.