Challenging Shots

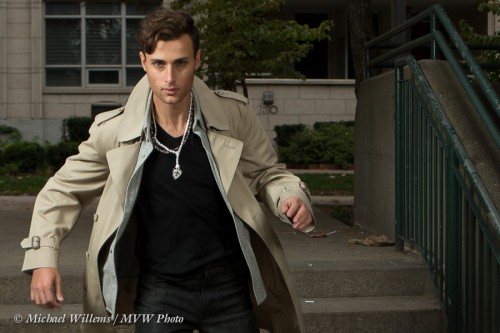
Some shots can be a little tricky. Like this one, from Sunday’s shoot:

Tricky why? Because the model is jumping, making it hard to focus.

The solution? You could try AF-C/AI-Servo, i.e. continuous focus. But often in these cases a better solution is this (and that is what I did): pre-focus, then hold that focus while he jumps. So I had the model stand where he would be when I take the shot; then focused there and held that focus while he moved back and jumped; then I shot when he was once again in the same place.

Why is he not blurry? Because he is substantially lit by the flash, which fires faster than 1/1000th second.

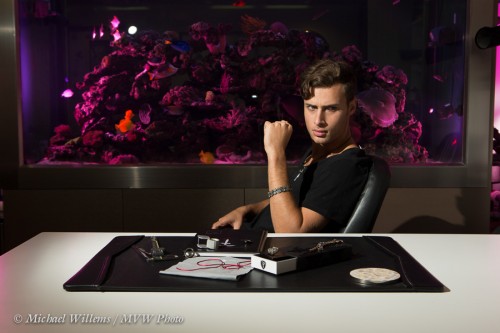
Another, different challenge was presented by this shot:

Why? Because the original plan was to light the aquarium in part from behind. But I was shooting TTL, and guess what? I found out on Sunday that the light-driven TTL does not work through an aquarium. Fancy that. You learn something new every day, even when you have been doing it forever.

The solution was to light it from the sides instead, after removing the aquarium side doors. Sometimes you just have to change your plans a little bit!

Enjoy your speedlighting, everyone. I am off to sleep – finally, at 3AM.

Another example

…of outdoor flash here.

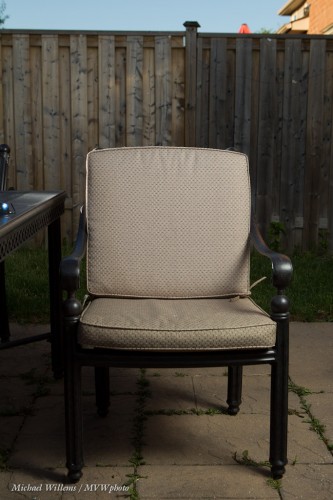
Take a typical back yard on a sunny day. Set your camera to “P”, or the green AUTO mode, or A/Av mode, and click.

Mmm. Why do we avoid just snapping? Because it can be a little boring and it gives you no control. Let’s take control, instead, and

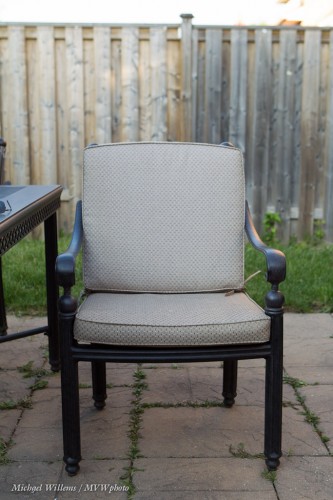
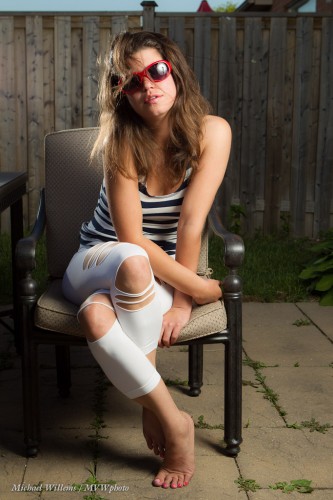
  1. Darken the background (I do it in manual mode, or you can do it by using “-” exposure compensation). Set shutter, aperture and ISO to give you a dark background (dark colour is saturated colour)
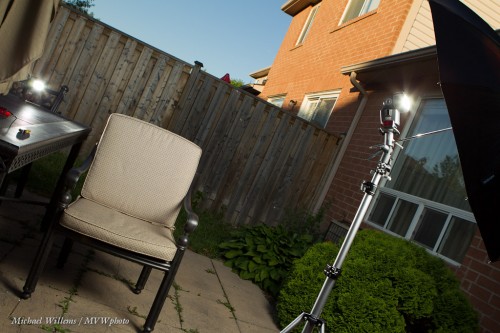
  2. Add a flash or two, using wireless TTL (wireless with manual flash power setting is better if you have the time and things don’t move position while you are shooting, but TTL is faster – I used TTL here):

…which gives us a chair like this:

And a pic like this:

See how rich and blue the sky is (in the first picture it was featureless white)?

That’s a stock quality image and the point is, you can shoot it in seconds. Learn flash (from me in a private session, or wherever I teach) and your pictures will become immeasurably better.


Inverse Square: It’s The Law

The “inverse square law” regarding light dropoff says that light drops off with the square of the distance. I.e. an object 4 times farther away gets 16 times less light, and so on.

This law needs to be part of your DNA!

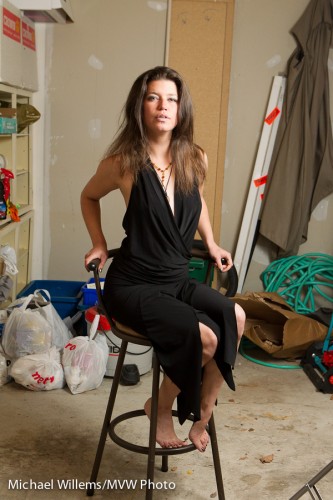
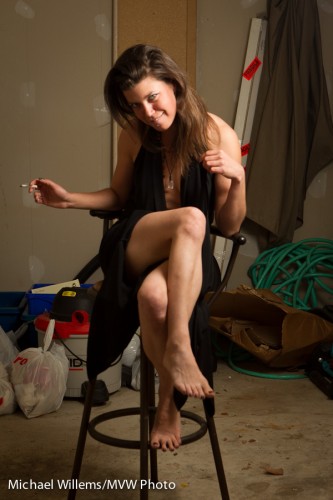
Why? Because it explains those dark flash backgrounds. And because it helps, too. Take this shot of my model Kim in a grungy garage, using an off-camera TTL speedlight through an umbrella on our right:

Fine. But what if we wanted a darker background? Remember Willems’s Dictum: “bright pixels are sharp pixels”.

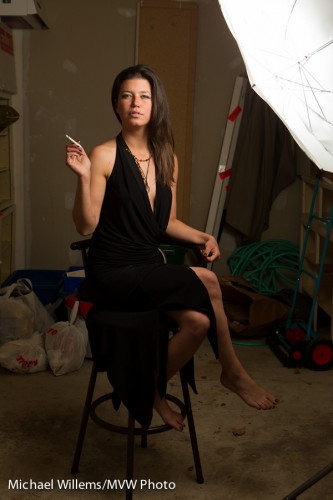
The solution is simple: move the umbrella closer to her. Then the background is farther away in relative terms, so it gets darker with the square of that ratio. So now we get:

And if we move ourselves to get the umbrella out of the picture, here is what we end up with:

Simple solution to a vexing problem if you like dark backgrounds!


Portable Studio

Your on-camera flash is a portable light studio – provided you use it right. That means:

  1. Finding the right balance between that flash and ambient light. In many cases I want the ambient light to be the fill light, so I set it to -2 stops. My flash will be the key light.
  2. Bouncing the flash.
  3. While bouncing, aiming the flash to get the effect you need.

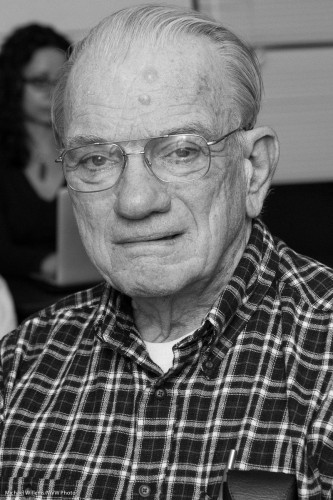
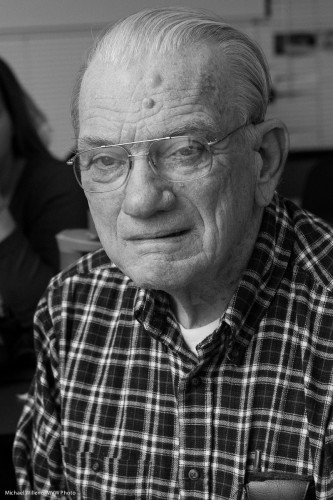
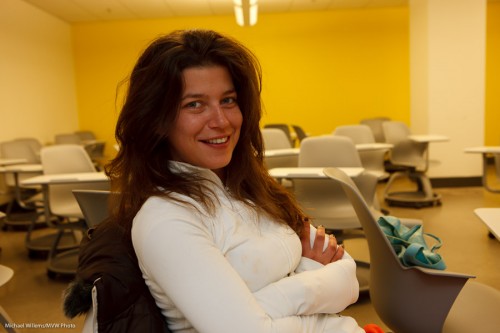
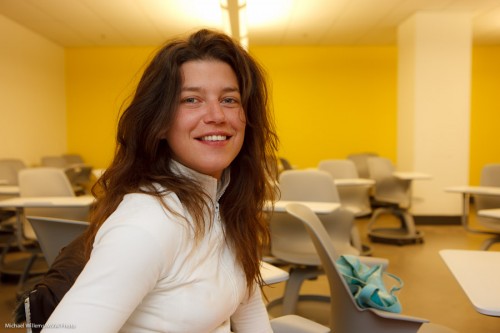
That third step is essential. To see why, look at the two examples below, of a kind volunteer in yesterday’s Sheridan College class.

Picture one – I am aiming the flash behind me. That’s just like having a large umbrella behind me: butterfly lighting:

And in picture two I swing my flash to the left, still behind me. Now that is like having an umbrella on my left, behind me. This results in broad lighting, which gives the face some modeling, some dimensions, some roundness: in other words it is now a three-dimensional face, not a flat face:

See what I mean? Beginners often fail to think about where they aim their flash, while this is one of the most important steps. Try!


Reflect on this

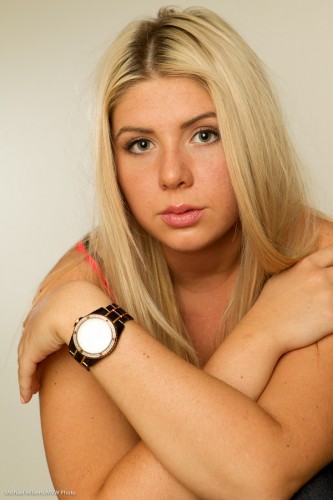
When you use TTL flash (automatically metered flash), you can get great images – I use TTL all the time. Like in this image of Anastasia:

But sometimes, oooh, it goes wrong and the image goes too dark. Like here:

What happened?

I’ll tell you what.  Your camera’s evaluative/3D Color Matrix metering tries to expose well, and to avoid over-exposed areas.

And that watch is reflecting the flash. So it would be over-exposed. So the camera tells the flash to fire at lower power- to avoid that. Hence, the rest of the image is underexposed.

Simple, once you know: in TTL flash images, avoid reflective surfaces like the watch!


The WIllems 4-4-4 Rule – redux

A readers asked, the other day:

Recently in some event shooting that I did, I followed the famous Willems 4-4-4 rule with my 430-EXII set to ETTL metering. The pictures that resulted were a bit overexposed and with the ambient light not doing as much “work” in behind the subjects. (I think could have been a variety of reasons such as brighter ambient light, distance of subjects, etc). In these instances, what is your first suggestion to correct this? Flash compensation? change shutter speed / ISO / aperture?

See the article above (under “ARTICLES”) for the 4-4-4-rule explained.

The 4-4-4 rule is a starting point. Your mileage may vary depending on many factors – ambient light intensity for one, but also distance, bounce surface, the flash power, and many others.

My suggestions:

First, the flash part:

  • First: if the flash part is too bright, use FEC (Flash Exp Comp) to decrease that (set it to, say, -1 stop).
  • If the flash part of too dark, you need to increase ISO, or open the aperture more (lower “f-number”).

Second, the background:

  • If the background is too bright, increase shutter speed.
  • If the background is too dark, increase ISO. 800, even 1600 is fine if you need it – you are aiming for -2 stops indicated on the meter, when you aim the camera at an average part of the room.

This is not the only way, but it is usually the best way.

Anyone with issues like this: send me a picture with EXIF data and I’ll tell you my suggestion/analysis.


Beginner’s mistake

I don’t make those, right?

Of course I do – but then I fix them.

At a recent talk at Seneca College I shot my “assistant-for-the-evening” Kim in a test shot, using the usual settings (ISO 400, 1/40th sec, f/4; and the flash on TTL, aimed 45 degrees behind me):

Kim Gorenko assisting (Photo: Michael Willems)

Uh oh, too dark. What?

Oh. (Hits forehead)! White or yellow bright walls, a white top: TTL metering will of course get this wrong and will underexpose (just like ambient metering would).

So let’s set FEC (flash exposure compensation) to +1 stop and let’s try that again:

Kim Gorenko assisting (Photo: Michael Willems)

That’s a lot better! (And then you can fine-tune from there). Notice how the ambient is the same (background), but the flashed part of the picture (her) is now brighter.

Often, when people say “TTL flash metering is unpredictable” they mean “I haven’t quite thought it through”, and this was such a case. Problem solved, and I should have done this even before the first test shot – but then, that is why you take test shots!


Interested in lighting? Consider some private coaching, where I explain all, you get to practice and take actual shots, and all will become clear. The December/January special is still on: 10% off during those months.

TTL magic

When you use an automatic, TTL (“Through The Lens”) metered flash, how does your flash know how much power to emit?

I.e. when I set my camera to , say, 1/200th second, f/5.6, and 400 ISO, now the camera needs a certain amount of power to come from the flash to match that. If the flash emits too little power, you would get this too-dark picture:

If on the other hand it emits too much power, you would get this instead:

And yet, when you click, time and time again, you get something more like this:

So how does the camera magically know the power should be at that level for this shot? After all, for each shot it is different. Get closer to the subject, and you would need less power. Farther away, and you would need more.

OK – here is how the camera knows.

When you click, the following happens:

  1. The camera tells the flash to emit a little pre-flash.
  2. The camera measures the light returned from that pre-flash.
  3. It uses that amount of returned light to calculate the power needed for the shot.
  4. Only now does it raise its mirror and open the shutter.
  5. Then, it tells the flash to fire at that calculated power level.
  6. The flash does as it is told.
  7. Afterward, the camera closes the shutter and drops the mirror.
  8. Done.

A whole lot of stuff here to ensure you get correct flash exposures.

So yes – every time you see a flash, you are actually seeing two flashes, This also explains why you appear to see theflash through your viewfinder – you are seeing your preflash.


Back to basics

You know that as an event shooter, I use TTL (through-the-lens flash metering, using a preflash) very widely. Much as it is sometimes hard to predict, it is the only thing you can use when things are moving quickly. Like at an event.

But sometimes, things go wrong. I had flash maslfunctions for part of Saturday’s shoots. You see, TTL is not really unpredictable -once you know how it works (metering bias to the focus point, for instance, and an assumption of 18% grey where it meters) it is predictable. So a malfunction is when it becomes actually unpredictable.

As it did Saturday with my dying 580EX II flash. Here’s three consecutive shots – I do everything the same, and yet I got, in rapid succession in the same setup, one dark shot, one light shot, and one OK shot:

Too dark. And the next one, way overexposed:

And the third one, almost OK:

I cannot live with this craziness. So then what do I do? I go back to basics. Actual basics. The basics we used in 1980. Namely, I set my flash to manual power setting (my camera, of course, is already on manual exposure settings).

One quarter flash power ought to do it, I thought, looking at where I was bouncing and what my settings were – and that worked great:

So then for the next dozen or two shots I stayed in the same place, shot people at the same distance, and kept the flash and camera set to the same. Bingo, predictable shots.

So when life hands you unpredictability, force predictability on it If you use the same settings and it’s all manual and your distance to the subject stays constant, the pictures will all be the same.

Sometimes, 1980-style basics work just great. Actually, they quite often do. My camera is very often on the “manual” exposure setting, for instance.


The making of a group shot

I shot this at a wedding the other day: a group shot featuring bride and groom Pat and Jim, relatives , maid of honour, and best man.
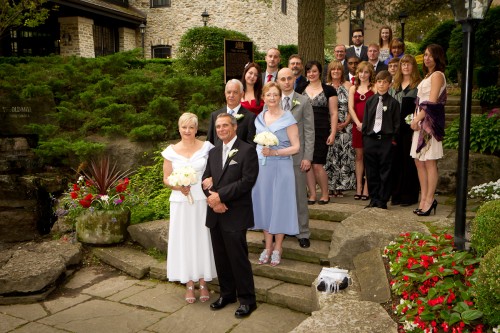
Pat and Jim Wedding (Photo: Michael Willems)

How did I shoot this? I thought it might be good to go through the process that went into creating a shot like this.

Setting

The day was ideal for photography (bright overcast). So I had lots of options at The Old Mill in Toronto. But therein lies a problem: which one to choose, out of hundreds? So I decided to look for…

  • Background: A nice, full, non-distracting and darker background.
  • Context: the background should say something about the event: it supports the image so it should provide context (notice the venue’s sign).
  • Colour: I want some colour. The flowers provided this.
  • Space: A space large enough to pose over 20 people.
  • 3-D: Preferably some various levels (e.g. steps).

Steps give you an automatically full background, so these steps were the chosen spot.  So far. so easy.

Arranging

I would often do a sit-stand-lean arrangement, but in this case, all standing is OK.  Arranging 21 people takes time and by the time you tell the last person what to do, the first person has turned around again. So speed is of the essence. I arranged bride and groom, best man and maid of honour, and from there on much of the rest fell in place and only minor adjustments were needed.

I then arranged them so I could see them all. This takes a fair amount of doing, because people move – my experience shooting sports clubs came in handy.

Now I told the group to relax – I would be doing test shots, so no worries yet – and to all breathe in deeply, and then all to breathe out at once. I demonstrated this. Silly, and silly is good, it relaxes people.I avoid saying “Smiiiiile…!” – it brings out the worst fake smiles in people, especially in men.

Then I watch body language and go, “checklist-fashion” through everyone, to see any awkwardness. If I see any, I ask them to adjust.

Technical

I used a slightly wide angle lens on my Canon 1D Mk4 body – the 24-70 f/2.8 set to 33mm effective focal length, meaning not very wide (distortion) but wide enough, giving me the following benefits:

  1. The ability to get it all in.
  2. Extended depth of field.
  3. Tolerance of slow shutter speeds.

I first of all exposed for the background. I wanted it to look nice and dark. This emphasises the people, and it also allows background colours to become saturated.

So I set my camera to:

  • f/7.1 (which gave me enough depth of field, which I needed with 8 rows of people!);
  • 1/80th second, which is fast enough for a 35mm lens hand held;
  • Getting a  dark background (between -1 and -2 on the light meter) now necessitated 800 ISO, which is great on today’s cameras. This also enabled the flash to reach far.

I then used my on-camera 580EX II flash to light the people.

On-camera, from the speedlighter? Yes, outside you can get away with it. If I had had more or more annoying shadow I would have used my Honl Photo softbox.

And there you have it. Simple shot, took a minute to make, and with little or no post work.