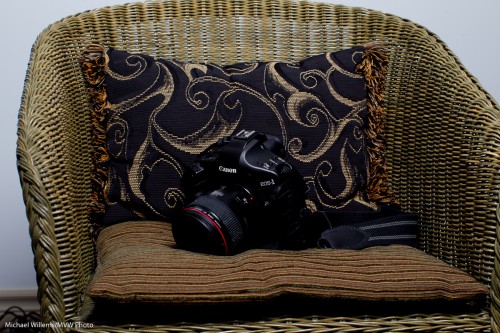
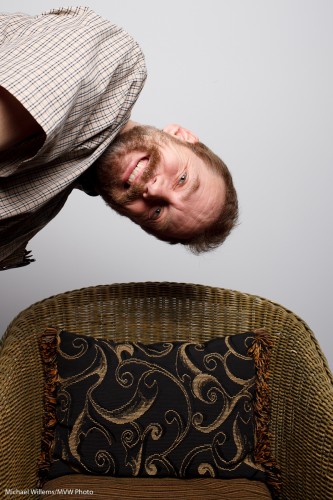
7D or 60D?

My friend and student Ed asked (and this is the abbreviated version, his question was more nuanced): “should I buy a Canon 60D or a 7D to replace my Digital Rebel”?

Because this type of question comes up often – one camera versus another one, and use the difference for lenses – like “a D90 plus a lens versus a D300 without one” – I thought I would share my answer here. It may give you some ideas as to the factors that affect a difficult choice like this.

These are both great cameras. They both have the same sensor and the same video.

The 7D does not have the cool articulating mirror, true, but it has other advantages that made me buy one:

  • The 7D has a titanium body (60D is plastic)
  • Weatherproofing.
  • A much better, entirely new focusing system.
  • Better controls (e.g. a switch for video/live view selection; more controls accessible via a switch rather than a menu).
  • More customization options
  • Better viewfinder (100%)
  • More settings in video (e.g. the option to use Av mode)
  • Faster: Two processors rather than the 60D’s one means that you get 8 frames per second when shooting sport. That’s FAST!

Clearly, there is no good or bad – both good. But

  • If you want a sturdier, weatherproofed camera with the latest focus system (more points is good: you will only use one, but you have more to choose from for that one, in a bigger area), and if you shoot sports, then the 7D for sure.
  • But since lenses are more important than cameras for the image quality, if quality is important and the other factors are less so, then go for a cheaper camera and better lenses.

As said: either is good.  But I hope this brief discussion shows there is no clear winner in these things, since the factors that go into your decision are multifaceted and complicated.

Yesterday’s workshop

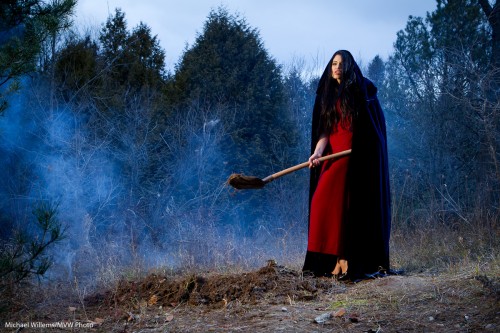
Yesterday’s Mono workshop, hosted by Joseph Marranca and myself for a full crowd of students, was a great success: four portfolio shots and great learning, and above all, great fun for all.  Here’s one image:

"Tara Buries her Lover"

Props, model, make-up, creative idea, and light all come together. Learn how to do this sort of stuff: join us for more upcoming workshops.

Now, I am off to teach a workshop at Henry’s in Thornhill.

When would I use a 24-70?

A colleague asked me recently: when would you/do you use a 24-70mm lens?

Here’s when: always.

That is to say: the 24-70 range is the most versatile range. Any type of portrait can be made in that lens range. Other lenses are great too, but none offer the versatility of a 24-70 on a full frame camera.

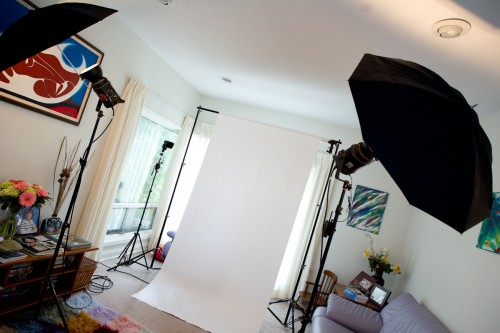
Here’s a recent simple portrait setup in a small room. This was intended for family pictures (the occasion was a Bat Mitzvah celebration):

Portrait setup

You can see:

  1. A backdrop with a narrow white background paper roll
  2. Two 400 Ws Bowens studio lights with umbrellas
  3. A speedlight with a Honl speed strap and a Honl Photo 1/4″ Grid fitted to it
  4. All lights are fired via Pocketwizards

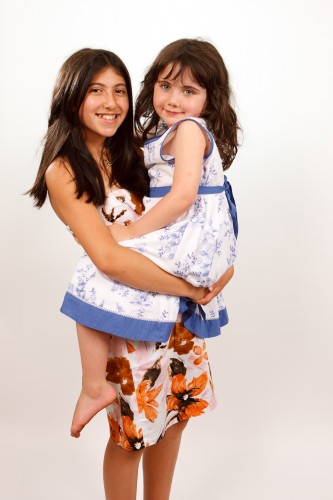
I used a Canon 1Ds Mark 3 camera with the 24-70 f/2.8 lens set to f/8.

This gives me 50mm portraits:

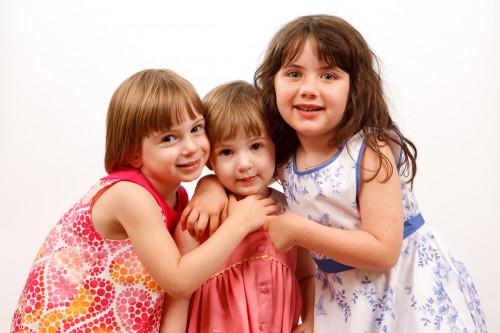
Sisters (50mm)

Sisters (50mm)

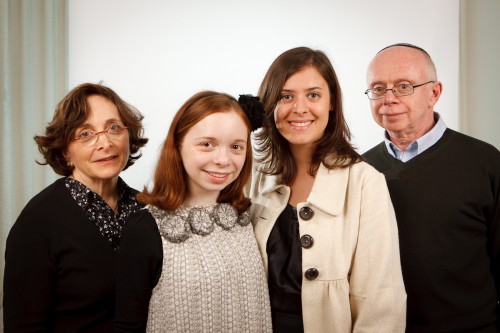
And another one – where I ran out of space:

50mm group shot

50mm group shot

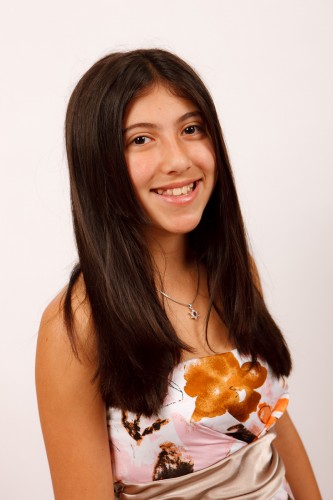
This lens also gives me the ability to take 65mm portraits like this:

Portrait at 65mm

Portrait at 65mm

65mm group shot

65mm group shot

Can you see these are closer up?

Photographers often say “you need 85mm or longer”. As a blanket statement this is nonsense. Plus, for much longer lenses I would have needed a larger room.

Now a few notes.

  1. In all my numbers, I am taking about “real” lens length. If a lens is marked “50mm” or “24-70mm” this means “this lens is a 50mm lens or a 24-70 mm lens on a full frame camera”, i.e. on a camera whose sensor is the same size as a negative.
  2. On a crop camera, a lens “behaves longer” proportional to the crop. So on a small Nikon camera (1.5 cop), a 50mm lens behaves like a 75mm lens, and a 24-70 like a 36-105. On Canon, the crop factor is 1.6. Still in the range!
  3. You can use a 50mm fixed lens (or a 35mm fixed lens on a crop camera) to get this same 50mm effect. Affordable, small, and great quality.

I hope note 3 in particular inspires you to go get a prime lens or two.

For me, I also have a Canon 1D, with a 1.3 crop, and guess what? The 50mm is like a 65mm on that camera.

So I can put the 50 on the 1Ds to get 50, or on the 1D to get 65. Who needs zooms? Yes, the 24-70 is my lens of choice for these portraits, but sometimes it is nice to not zoom, and to work with one length instead.

To delete or not to delete, that’s the question

And I say “not”. Especially when you are learning to photograph.

Never mind what other leading photographers say: I am not a fan of deleting images in your camera. And I do not think you should be, either. And here’s why not.

  1. You are using up your camera’s battery.
  2. You are using time that can be used better in other ways.
  3. You are looking elsewhere than at your subject, so it stops you from taking pictures.
  4. You will delete the wrong picture – or rather, the right one, by mistake. It is not a matter of “if”: it is a matter of “when”.
  5. The bad image may not be as bad as all that – or it may be the best image you are going to get.
  6. Most importantly: if you are learning, you need those bad images. You need to hold them by the good ones and look at the EXIF data, and determine why you went wrong. How you can do better What modes work, and which ones do not. By deleting the bad,you are depriving yourself of a great learning opportunities. Delete them when you have done the learning – on your computer.

That is why I am not a fa of deleting images “in camera”.

For those of you in the Greater Toronto Area: you have seen my cameratraining.ca schedule, and here, as promised, is my Nov/Dec teaching schedule at the Henrys School of Imaging. This is a link to a PDF file:

MICHAEL WILLEMS TEACHING SCHEDULE-NOV & DEC

This is of course subject to change, but those of you who want to take a course with me, here’s the schedule as it stands now. Go to http://www.schoolofimaging.ca to book any of these courses.

Take some training before the holiday season, not after, when you miss the opportunity to shoot those family get-togethers and those walks in the snow.

And… see you there.

Teaching News

As you probably all know, I am an educator. I teach a variety of photography subjects in various locations and in various ways.

Learning from a live person is a great way to quickly gain essential photographic skills, so I thought perhaps I should update you as to where you can see me.

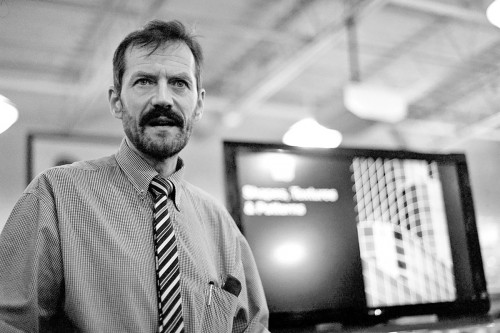
Michael Willems Looking Very Serious - Photo, Albert Wong (using film!)

S0 – here are the ten ways you can learn from me:

    1. Via this blog. Of course a blog is only an aide to real, in person teaching, but it is a very valuable resource. Search, look at specific categories, check out keywords, and so on. Read back to over a year ago, when I started posting daily.
    2. Via the Henry’s School of Imaging, Canada’s premier photo school. I teach many subjects there, including my course on Travel Photography and my Outdoor Flash workshop as well as my outdoor Creative Urban Photography workshop. I plan to post my November/December School of Imaging schedule here later today.
    3. Via my courses in Mono, Ontario – like the Creative Lighting all-day course I teach tomorrow with Joseph Marranca.
    4. By way of Personal coaching and custom one-on one or group courses. Contact me if you are interested (“contact” above).
    5. Worldwide, via special courses and tours, such as the courses I recently taught in Phoenix and Las Vegas. If you are interested in having me come to your town, shout (same “contact” button above).
    6. Via local special events – such as the upcoming half-day course with special guest David Honl (yes, the David Honl) on 19 March 2011 – book this day off in your calendar, it’ll be a great event with limited seating.
    7. Via speaking engagements to photo clubs – again, contact me if your club has not had me speak yet, or if you would like a repeat.
    8. Via custom corporate speaking engagements: if our company has people who want to learn photography, go for it!
    9. And finally, via custom 8- or 12-week courses for your organization.
    10. As a speaker at photography shows, like the Digital Imaging Show that is held twice a year beside Toronto Airport.

      I hope that clarifies, and above all, I hope to see you at one of these events soon. There is, as said, no substitute to personal training. Blogs are good, books are great, but personal interaction is much better. Think about it – otherwise we would just ship our kids and students a bunch of books and URLs at the start of each year. It just doesn’t work that way!

      Compromise lenses

      I am often asked “Can I not just bring one 18-300 lens instead of bringing all these multiple lenses?”

      Well, of course you can. There is some benefit from carrying just one lens. Convenience is important.

      So why do we often forgo that convenience and use multiple lenses instead? What is the drawback to a “one does it all” type lens?

      There are several.

      1. Aperture. Your standard kit lens says “1:3.5-5.6” on the front. Or even “1:4.0-6.3”. That means when zoomed out to a wide angle, the lens can open its aperture to f/3.5 or f/4; and when zoomed all the way in, it can only go down to f/5.6 or f/6.3.
      2. Sharpness. General purpose lenses tend to be less sharp than specialized lenses.
      3. Distortion. General purpose lenses distort more at then far ends, and show more vignetting. They are neither a great wide angle lens nor a great telephoto lens.
      4. The lens hood has to be the right shape for the widest angle, so at a zoomed-in setting, it will be less effective.
      5. Size. They are big and heavy when they do not necessarily need to be – you always carry around your longest lens.
      6. Build quality. These lenses tend to be less sturdy than “professional” lenses.

      So the convenience comes at a cost. and the secret is to see when you need the benefits above, and when you do not. When you are on a vacation outdoors, a general lens may well do. But to take product photos, sports photos, night shots, or pictures for a magazine, I would go with a better lens.

      Remember:the picture is not made by the camera, but by the lens (and by you!).

      Kiss kiss.

      Another message I iterate often is the need to keep it simple.

      A good photo is often distinguished by its simplicity. Everything in the photo is there for a reason – or it’s not there.

      Simple can be achieved by:

      1. Filling the frame (zooming in or stepping closer)
      2. Changing your viewpoint
      3. Blurring the background
      4. Moving things or people.

      An example of blurring and subsequent cropping:

      Before:

      Tree and ball

      And after:

      Tree and ball

      As you see, a simple crop makes the picture better. The crop tool in Lightroom should be your best friend! An even tighter crop would be even better, I bet.

      View the picture at full size and you can see me taking the shot.

      Softly softly.

      For last night’s picture, what did I use?

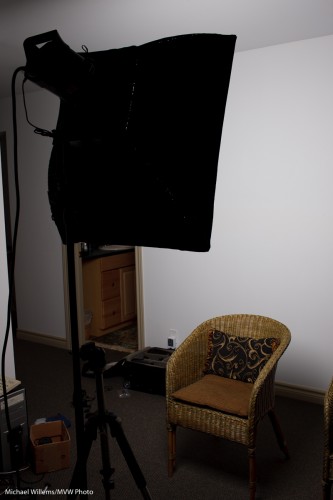
      Here’s the answer. It was a simple softbox. This one:

      Bowens Softbox

      That gives a beautiful and soft-yet-directional light – which is why softboxes are the gold standard for portraits.

      Bowens Softbox

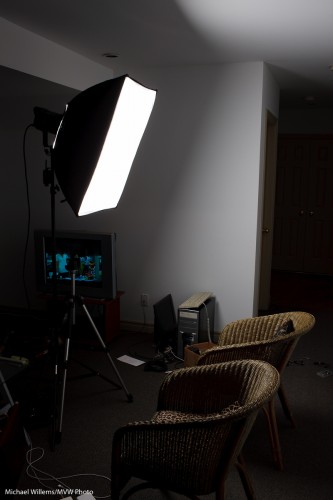
      Can you see in the shot above how the light drops off beautifully and softly?

      Camera lit with softbox

      In a small room, the softbox alone is enough. For a beauty portrait, of course, I might add any of the following:

      • A reflector, underneath the model’s chin, to bounce light back.
      • A hair light (using a snoot).
      • A a background light, perhaps with a gel to change the wall’s colour.

      But those are optional: quite often a standard beauty light softbox is all you need. So there you go.

      A softbox is better than an umbrella because

      1. It is much more controllable.
      2. It does not throw (spill) light all over the room where you do not necessarily want it.
      3. Being double diffused, a softbox produces a softer light than an umbrella.
      4. It produces a more even light, and avoids hotspots more.

      True: it is less convenient because it is bigger and heavier, does not fold into a tiny area, takes longer to set up, and costs more. But considering the advantages above, a softbox may still be the way to go.

      Try using a single light with a softbox, and see how you get on!

      Portrait tip

      As I said before, you can use just about any lens for portraiture.

      But there are certain guidelines to obey. Like: when using a wide lens, put the subject small in the centre. Then optionally crop.

      To illustrate. This is a 50mm portrait of me just now:

      Michael Willems by Michael Willems (50mm)

      Michael Willems by Michael Willems (50mm)

      That is just about OK. Any wider and it would be too wide, and for a portrait like that, ideally I would like to zoom in more, to maybe 70mm, and then to stand back.

      But perhaps you cannot do that because there is no space. Or you want the environment in the image.

      Fine, you can use a wide angle lens. But be careful. If you put your subject too close, the nose will be too large and the face distorted. And if you put your subject near the edge of the image, it will be distorted also.

      Look at this 35mm portrait:

      Michael Willems by Michael Willems (35mm)

      Michael Willems by Michael Willems (35mm)

      Not good. But what if we put the subject smallish in the centre?

      Michael Willems by Michael Willems (35mm, subject in centre)

      Michael Willems by Michael Willems 35mm, subject in centre)

      That is fine, And optionally, then we crop:

      Michael Willems by Michael Willems (35mm, cropped)

      Michael Willems by Michael Willems (35mm, cropped)

      By cropping, we have now essentially made the 35mm lens into a longer lens. But even without cropping, it is the fact that the subject is in the centre and not very big that makes the composition fine.

      I can think:

      Michael Willems by Michael Willems (35mm, cropped)

      Michael Willems by Michael Willems (35mm, cropped)

      I hope this brief example helps dispel the thought that you “must” have an 80-135mm lens for portraits!

      And to finish, a silly image.

      Michael Willems by Michael Willems (35mm, silly)

      Michael Willems by Michael Willems (35mm, silly)

      Yes, I can be silly.

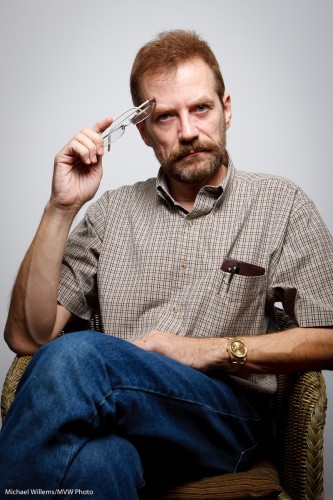
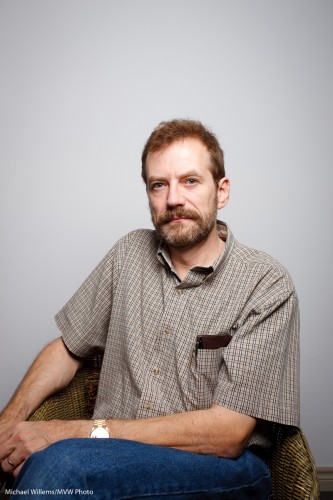
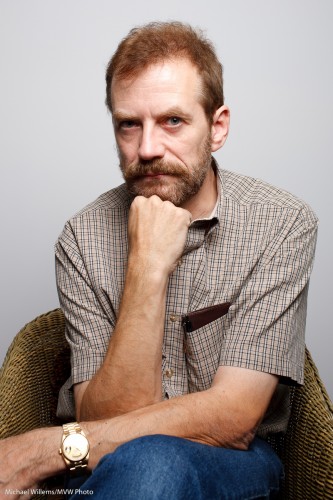
      Finally, a question for you to try your hand at, at home. Can you figure out how I lit these images?